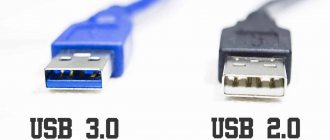
If after reinstalling Windows 7 or 8.1, as well as after upgrading them to Windows 10, your computer does not see the second hard drive or the second logical partition on the drive (disk D, conditionally), in these instructions you will find two simple solutions to the problem, as well as a video guide to eliminate it. Also, the described methods should help if you installed a second hard drive or SSD; it is visible in the BIOS (UEFI), but not visible in Windows Explorer.
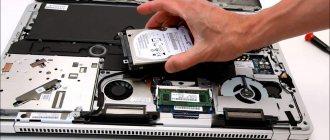
If the second hard drive is not shown in the BIOS, and this happened after some actions inside the computer or simply after installing a second hard drive, then I recommend first checking whether everything is connected correctly: How to connect a hard drive to a computer or laptop.
How to "Enable" a Second Hard Drive or SSD in Windows
All we need to fix the problem with a disk that is not visible is the built-in Disk Management utility, which is present in Windows 7, 8.1 and Windows 10.
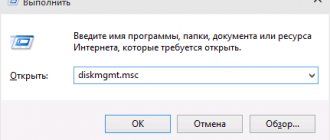
To launch it, press the Windows + R keys on your keyboard (where Windows is the key with the corresponding logo), and in the “Run” window that appears, type diskmgmt.msc and then press Enter.
After a short initialization, the Disk Management window will open. In it, you should pay attention to the following things at the bottom of the window: are there any disks there, the information about which contains the following information.
- "No data. Not initialized" (in case your physical HDD or SSD is not visible).
- Are there areas on the hard drive that say “Not allocated” (in case you cannot see a partition on one physical disk).
- If there is neither one nor the other, and instead you see a RAW partition (on a physical disk or a logical partition), as well as an NTFS or FAT32 partition, which is not displayed in Explorer and does not have a drive letter - just right-click on it on such a partition and select either “Format” (for RAW) or “Assign a drive letter” (for an already formatted partition). If there was data on the disk, then see How to recover a RAW disk.
In the first case, right-click on the disk name and select the “Initialize disk” menu item. In the window that appears next, you need to select the partition structure - GPT (GUID) or MBR (in Windows 7 this choice may not appear).
I recommend using MBR for Windows 7 and GPT for Windows 8.1 and Windows 10 (assuming they are installed on a modern computer). If you are not sure, choose MBR.
Once the disk initialization is complete, you will get an "Unallocated" area on it - i.e. the second of the two cases described above.
The next step for the first case and the only one for the second is to right-click on the unallocated area and select the “Create simple volume” menu item.
After this, all you have to do is follow the instructions of the Volume Creation Wizard: assign a letter, select a file system (if in doubt, then NTFS) and size.
As for size, by default the new disk or partition will take up all the free space. If you need to create multiple partitions on one disk, specify the size manually (less than the available free space), and then do the same with the remaining unallocated space.
Once all these steps are completed, the second disk will appear in Windows Explorer and will be usable.
#6. Run the Hardware and Devices Troubleshooter
Since controller issues are one of the causes of the above problems, follow the recommendations in this section to find and resolve errors related to incorrect registry values and certain controllers not working properly. The Windows Hardware and Devices Troubleshooter is a built-in automatic troubleshooter that can detect any irregularities in your hardware and try to fix them.
- 1) Go to Control Panel > Troubleshooter.
- 2) Click 'View all categories' in the left pane and then 'Set up device' under 'Hardware and Sound' in the right pane.
- 3) Follow the on-screen wizard instructions to have the program check for problems.
- 4) Select 'Apply this fix' or 'Skip this fix' as per your choice. You may need to restart your computer for the changes to take effect.
Making the second disk visible using the command line
Please note: The following method to fix a missing second disk using the command line is for informational purposes only. If the methods described above did not help you, and you do not understand the essence of the commands below, it is better not to use them.
I also note that these steps apply without changes to basic (not dynamic or RAID disks) without extended partitions.
Run Command Prompt as an administrator, then enter the following commands in order:
Remember the number of the disk that is not visible, or the number of the disk (hereinafter referred to as N), the partition on which is not displayed in Explorer. Type select disk N and press Enter.
In the first case, when the second physical disk is not visible, use the following commands (attention: the data will be deleted. If the disk is no longer visible, but there was data on it, do not do this, it may be enough to simply assign a drive letter or use programs to recover lost partitions ):
- clean (cleanses the disk. Data will be lost.)
- create partition primary (here you can also set the size=S parameter, specifying the partition size in megabytes if you need to make several partitions).
- format fs=ntfs quick
- assign letter=D (assign the letter D).
- exit
In the second case (there is an unallocated area on one hard drive that is not visible in Explorer), we use all the same commands, with the exception of clean (disk cleanup), as a result, the operation to create a partition will be performed on the unallocated space of the selected physical disk.
How to recover lost files?
If at any stage the user made a mistake and valuable information was deleted, we recommend using a specialized data recovery program RS Partition Recovery . This utility is able to quickly return important information that has been deleted, formatted, or destroyed by viruses. This way you can recover photos , video files , audio tracks , documents , program files and any other data.
Note that RS Partition Recovery has advanced operating algorithms that allow for in-depth analysis of the disk and recovery of long-deleted files . We recommend that you familiarize yourself with all the features and functions of the RS Partition Recovery utility for quick data recovery on the official RS Partition Recovery page.
Assigning a letter
If your PC or laptop does not see one of the hard drive partitions, then the first thing you need to do is go to the special control menu and check whether it is displayed in the corresponding list. If it is there, then it needs to be assigned a letter.
Let's look at the process in order:
- Go to the menu “Control Panel” - “Administration”.
- In the new window, find the “Computer Management” item and double-click on it.
- Another window will open, in its left area we find and open “Disk Management”.
The requested information will be instantly displayed on the screen. It is necessary to look through the local drives, and if there is one that has disappeared, then you need to set the letter.
To do this you need:
Couldn't fix the problem? Contact a specialist for help!
- Right-click on the empty area, and in the context menu select “Change letter... or path...”.
- In the window that appears, click “Add”.
- Select the appropriate letter from the list and save the changes.
- Next, you will see a notification that installed programs may stop working. Click “Yes”.
For the changes to be successfully applied, you need to restart your computer. As soon as the operating system boots, check whether the partition is visible, it should appear under the letter you specified.
Changing the operating mode
An additional solution would be to change the operating mode of the media through the BIOS settings.
- Enter the menu responsible for the operating mode. Usually this is “Sata mode / As / Type”, “Sata controller” or similar.
- If “AHCI” is installed, then set it to “IDE”, or vice versa. This can be done using the “Enter” and “Arrow” keys. Save your settings.
- Restart your PC.
Check the result.
Creating a new volume
It is likely that when you go to the management menu you will not find the missing area, instead there will be an unallocated part that cannot be assigned a letter; you can only create a new volume:
- To do this, right-click on it, select “Create a simple volume” in the drop-down menu and follow the instructions of the “wizard”.
- At the last step when creating a partition, you need to format it in NTFS, the only way it is readable and writable.
But at the same time, you will completely lose the files stored on it. Therefore, if you do not value them, then feel free to use this method; in other cases, I recommend using the method discussed below.
All processes are analyzed using Windows 7 as an example, but in other versions, Windows XP/8/10, they will be similar.
Creating a new partition
If the first method did not help and the computer still does not see the hard drive partitions, then the problem may be that the OS itself cannot see it due to the loss of the file system, as often happens, but the data on it will still be saved.
In this case, to correct the situation, we will use one very effective tool, namely the Acronis Disk Director program. With its help, we will recognize the disappeared local hard drive partition, separate a small part from it, from which we will make a new area with the NTFS file system, and then simply merge them.
Couldn't fix the problem? Contact a specialist for help!
This may seem very difficult to some, but if you follow the following instructions, which detail what to do in this situation, you will easily cope with this task:
- Download the program from the official website or any other trusted resource and install it on your computer.
- Create a bootable USB flash drive or CD in it.
- Go to BIOS settings.
- Go to “Advanced BIOS Features” and in the “First Boot Device” column indicate the previously created boot disk or flash drive. Depending on the BIOS version, the names of the items may differ slightly.
- Save the settings (usually use the F10 key) and exit the BIOS.
- After booting the computer, go to the Acronis program interface.
- In the main window of the program, all existing partitions will be displayed, both the one that has disappeared and others with an unallocated area.
- In the left menu of the main window, select the “Split Volume” tool.
- Specify the new size and click OK.
- To apply the changes, click the Apply Pending Operations button at the top of the window.
- The next step is to click “Continue” to start the process.
Removing any partitions
To remove system, reserved and hidden partitions, the user will need a bootable USB flash drive or installation disk . We boot from them and in the language selection menu press the key combination Shift+F10 to open the command line.
In the command line, similarly to the previous method, enter the commands: diskpart, list disk, select disk 0, lis part, select partition 2 (or any other partition that cannot be deleted) and delete it with the del par override .
It is worth noting that the del par override command deletes absolutely any partition, regardless of its attributes.
Important! Deleting some disk partitions may affect its operation , so we strongly do not recommend deleting protected partitions.
Partition recovery
In almost all cases when a logical partition of a hard drive disappears, it can be returned. For recovery we will use the same Acronis Disk Director. So here's how to do it:
- I will not repeat myself and describe how to create bootable media and run from it, you can read about this above in the previous paragraph.
- We go to the utility interface and select “Recovery Expert” in the menu on the left.
- Click “Next” and select manual mode, then “Next” again.
- Select the unallocated space (highlighted in green) and click “Next”.
- In the “Search Method” window, I recommend specifying “Full”, but in most cases, fast is enough.
- After the missing partition is found, by the way, do not be embarrassed if it has a different letter indicated, Acronis often confuses the names, select it and click “Next”.
- We wait until the status in the “Status” column changes to “Restored”, mark it and click further.
- In the “Recovered Volumes” window, mark our partition and move on.
- All you have to do is click on the “Continue” button to start the process.
- Upon completion of the procedure, exit the LiveCD and start the computer using the installed Windows OS.
The procedure for restoring information from a partition that the PC has stopped seeing can take a significant amount of time. The duration of the process depends on the amount and volume of data available on the disk. Therefore, you should be prepared for the fact that the computer may work for quite a long time.
We hope that the methods we have listed for solving the problem are easy to implement, and you can use them to fix the problems that have arisen.
Couldn't fix the problem? Contact a specialist for help!
Video: how to solve the problem of unallocated space in Windows 10
Professional help
If you were unable to resolve the problems yourself, then most likely the problem lies at a more technical level. This could be: a breakdown of the motherboard, power supply, hard drive, video card, RAM, etc.
It is important to diagnose and repair the breakdown in time to prevent failure of other components.
Our specialist will help you with this.
It's free and doesn't oblige you to anything. We will call you back within 30 minutes.
The hard drive is one of the most important hardware components of a PC. It houses the operating system and stores data. Over time, the amount of accumulated information grows, and users think about additional space. Everyone's approach is different. Some people prefer to use an external drive. Someone will replace the HDD with a fast SSD, and leave the old disk only for data storage. The most advanced ones use NAS for this purpose. It would seem that everything is simple - buy it, connect it and use it. Trouble can lurk just in the middle of this path. Cases when the hard drive is not visible in the system are not that uncommon. Today we will tell you how to cope with this unpleasant situation.
What to do if initialization errors occur?
Such problems usually do not happen with new hard drives. But if the system displays a message that the disk is not initialized, you can use the command line (cmd in the Run console) to fix it.
It first uses the diskpart command, to view and select a disk you need to use list disk, and to clean the partition table you need to use clean. After this, you can format it manually using a sequence of commands create partition primary, select partition 1, active and format fs=ntfs, which are entered without punctuation and press the enter key after each of them.
In other cases, you can use specialized programs like Partition Magic, but if none of the tools help, you will have to recheck the connections or look for malfunctions in the hard drive itself (perhaps physical damage). For these cases, you can try to use the HDD Regenerator program, and then perform all the above operations again.
Windows does not see HDD/SSD
Usually the user discovers that the disk is not visible when loading the OS. We open “Explorer” and instead of the desired two drives we see only one. Let's figure out why Windows doesn't see the hard drive.
Windows 10 Disk Management
First, you should make sure that the system does not recognize the drive. Its absence in Explorer doesn’t mean anything. Let's call the Power User menu. This can be done by right-clicking on the “Start” button or using the keyboard shortcut “Win” + “X”. We will need the item indicated in the screenshot.
Open the “Disk Devices” section. For clarity, the following screenshot shows the display of drives in it and in Explorer.
We were able to locate the hard drive. It is accepted by the system, but is not ready for use. To fix this, let's turn to the Power User menu again. This time we will choose a different item. Let's open a special utility that allows you to work with the drive without leaving the graphical OS environment.
When it starts, we will be asked to initialize the new SSD by selecting a partition table for it. For 64-bit systems and computers with UEFI, you can choose GPT. And 32-bit versions of Windows and BIOS require the old MBR partition to work. In this case we will use the GUID table.
Call up the context menu on the new drive and select the indicated item.
The Volume Creation Wizard starts. We follow the step-by-step instructions he offers.
We are not going to divide the disk into separate sections. At this step we make no changes and move on.
By default, the OS sets the drive to the next letter of the Latin alphabet not occupied by devices. If desired, you can select any other in the menu indicated by the arrow. In order not to cause a conflict, you should not indicate a letter that comes earlier in the alphabet than the option proposed by the system.
Set the text label of the volume being created in the designated field. We do not change the file system type and cluster size.
At the final stage, the wizard displays the selected parameters. We agree and confirm the choice.
Installing the missing VMware driver
If the disk mapping issue is a result of a NAT failure while using a virtual machine, the OS kernel may be broken. In such situations, this failure causes damage to Windows components that cause startup problems.
But when I try to start System Restore, the process is interrupted by the same error, which indicates that DiskPart did not detect the disks.
This occurs when using the Paravirtual SCSI virtual disk type. In this case, the problem can be resolved using a series of commands executed in a Command Prompt with Administrator rights.
On the Vmware workstation, right-click on the virtual machine and select "Install Vmware Tools". In the next menu, select Mount and wait for the procedure to complete.
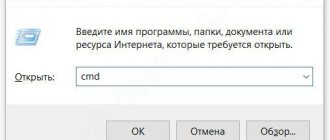
After connecting the virtual machine, you need to return to the Windows recovery menu. To do this, open the Run window (Win + R), type “cmd” and press Ctrl + Shift + Enter together to launch a command prompt with administrator rights. When prompted for confirmation from User Account Control, click on the “Yes” button.
In the console, run the command:
drvload "X:Program FilesVMwareVMware ToolsDriverspvscsiWin8amd64pvscsi.inf"
Note: Replace the "X" in the command with the letter where VMware is installed.
After successful processing, run the following commands to check if the Diskpart utility sees the installed hard drive.
- X:windowssystem32>diskpart
- list disk
After successful execution, connect the virtual machine.
The disk is not detected by the OS
If the disk does not appear in the device manager, you need to check whether it is visible in the BIOS. A user may encounter this problem if he decides to install an SSD. To improve hardware compatibility, manufacturers enable IDE mode on motherboards by default. Any HDD can work with it. Even connected via a SATA connector, it will not create problems for the user. The SSD requires unconditional use of the more modern AHCI mode.
We go into the BIOS and on the main tab look at the presence of disks in the system.
Go to the next section to check the connection mode. Select the marked item.
We are looking for the parameter responsible for the operation of the controllers.
As you can see, the mode switch is in the IDE position. For this reason, the computer does not see the hard drive in the BIOS. Use the arrows to move to the desired item and open the internal menu by pressing Enter. Change the mode to AHCI.
We return to the Main tab and make sure that the BIOS sees our drive. It appeared in the list of connected SATA devices. We record the changes made by pressing the corresponding function key and exit the BIOS.
We have solved the problem where the hard drive is not detected in Windows and is not visible in Device Manager. You can boot into the graphical mode of the OS and perform the actions described in the first section.
We carry out diagnostics
First, you need to make sure that no mistakes were made during the process of connecting the hard drive. To do this, follow a series of simple steps.
- Check both SATA cables (data and power). Make sure they are firmly connected to the appropriate connectors and are not damaged.
- The noise of the hard drive is heard. At the same time, it should not make any extraneous sounds (squeaks, clicks, crackles) that indicate a possible malfunction.
- Check if the BIOS sees the hard drive. To do this, enter the BIOS, move to the section where the connected drives are displayed. This is usually the main screen or "Boot". If the HDD is not visible, then most likely it is poorly connected or faulty.
If no problems were identified during the diagnostic process, then proceed to the next part.
Disk with caching SSD
Laptop owners may encounter another type of the described problem when reinstalling the operating system. Windows does not see a drive that uses a caching SSD running on Intel Rapid Storage Technology and requires a driver. In this case, you will have to postpone the installation and prepare first by visiting the Intel website from another computer.
In the “Support - Drivers and Software” section you will find the RST driver for your OS.
Before the next installation attempt, place it on a USB flash drive with the distribution kit or on a separate disk. When Windows once again cannot see the hard drive on its own, point it to the folder with the unpacked driver. After this procedure, OS installation will continue as usual.
Wrong format
There are dozens of types of file systems for data storage devices.
For Windows, these are NTFS and FAT32. Any other file systems will not be detected in the Microsoft operating system.
To view data on some disks, you can use third-party software. But to install programs, record and edit files, you need to format your hard drive to NTFS. Read the instructions in the previous section. All data will be erased during formatting.
OS doesn't see external drive
USB-connected external hard drives are popular due to their versatility. The file archive is not tied to a specific computer, and the volume available for storing data is an order of magnitude greater than a flash drive. As a result, such devices are often used to transfer large amounts of information between different PCs, the configuration of which can vary significantly. The situation in which Windows does not see the external hard drive on the computer can be caused by several reasons.
So, we connect the device and see the following picture. It did not appear in Explorer and only system drives are available to us.
Armed with the knowledge gained, we check the availability in the device manager.
As you can see, the system has identified three drives. The next step is to move to the disk manager.
As you can see in the screenshot, the SSD is fully functional, but the letter is missing in the place indicated by the arrow. A device that does not have a letter designation is ignored by Windows and therefore does not appear in Explorer. Call up the context menu of the found “invisible device” and select the marked item in it.
In the empty window that opens, click “Add”.
At this stage, we agree with the proposal and confirm our choice.
Immediately after clicking “OK”, the “Explorer” window will open.
After assigning a letter, the disk is identified and ready for use.
Other file system
This may come as a revelation to some, but Windows is not the only operating system in the world. There is also Linux or MacOS for Apple computers. Each of these OS uses its own file system. Therefore, when, having connected a disk borrowed from a friend, you receive the following window, do not rush to follow Windows recommendations.
By clicking the cancel button, you will get the real reason for this behavior.
Microsoft, while dominating the market, does not include support for other file systems in Windows. Therefore, if you receive a disk formatted in ext2/3/4 or HFS+, you will not be able to read it without installing an additional driver.
In order not to resort to the help of third-party utilities, find out the type of file system used from the owner. If this is not possible, install drivers from Paragon.
They are available for free use for a month. This period is enough to gain access to information on removable media.