Antivirus is a fairly important component for any system. This is primarily due to a large set of protective functions, as well as working modules that are simply integrated into system processes and become one. This is why many users have difficulty uninstalling an antivirus - the program is not completely removed or an error notification appears on the screen. Dr.Web antivirus does not avoid similar problems. Therefore, if for some reason you want to remove Dr.Web or reinstall it, then do it correctly.
Methods for uninstalling Dr.Web
Antivirus Doctor Web is a powerful security program that affects a large number of system processes, therefore, to eliminate problems and errors in the operation of the computer, you need to approach the removal of such a utility responsibly. If you no longer want to use Dr.Web on your computer, then remove it using one of the following methods.
Using standard system tools
The most common and familiar way to remove utilities from a Windows-based computer is to use the built-in tools. This is the well-known “Add or Remove Programs” module, where you can completely clear your computer of unnecessary programs or restore it. So, you can remove Doctor Web antivirus as follows:
- Go to the Start menu (from the Desktop, button in the lower left corner).
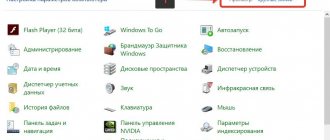
- On the right, select “Control Panel” (Windows 7) or “Settings” (Windows 10).
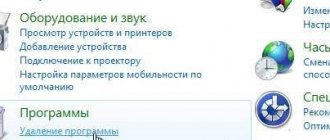
- Next, in the “System” section, you need to go to “Programs” or “Add or Remove Programs”.
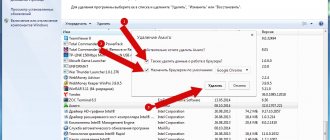
- The screen will display a list of all installed utilities on the computer; find “Web” in the list and select it with the mouse.
- Afterwards, click on the “Delete” button at the top.
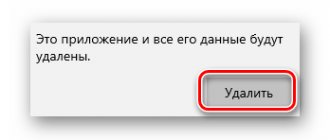
- An antivirus window will open on the screen, where you will need to mark all components for cleaning, and then confirm “Delete” again.
To make sure that there are no longer any traces of the antivirus left on the computer, all components and folders have been deleted, you need to check the system registry for residual files that may become a problem in the future when installing another antivirus or reinstalling Dr.Web. To do this, go to each of these folders “Program files/Dr.Web”, “User/Application Data/Dr.Web” and delete all files in them that are related to the antivirus, and then reboot the device.
The “Application Data” folder is hidden, so you will not be able to find it on Local Drive C. To do this, you need to open access by changing the folder settings “Show hidden files and folders” (Start - Control Panel - Folder Options).
Using third party programs
In order not to burden yourself with removing the antivirus and cleaning the system registry, it is easier to use special utilities. Today there are a large number of them, but the most convenient and popular are CCleaner and Master Clean. They are completely free and have a number of other useful features. How to use them to remove Doctor Web antivirus:
- Download and install the program.
- You launch it.
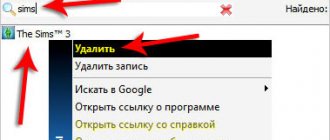
- Go to the “Tools” section on the left, then “Programs”, “Uninstall programs”.
- The window will load a list of all utilities installed on your computer.
- Find Dr.Web, select and on the right click on the desired function “Delete” or “Uninstall”.
- All that remains is to restart the computer.
The convenience of using special cleaning utilities is that they will correctly remove the necessary program from the computer and automatically clean the registry, garbage and other residual files. After cleaning the antivirus, you can continue to use cleaning programs, especially since they contain a huge range of useful functions and increase system performance.
Remove Dr.Web using Dr.Web Remover
Using Dr.Web Remover
Due to the peculiarities of the antivirus program, the developers of Dr.Web took care of their users and released a special utility - Web Remover, designed to remove the antivirus. Since anti-virus programs often block their own removal, supposedly preventing the action of viruses or malware, the principle of the Doctor Web Remover utility is based on entering a captcha, thereby confirming the user’s activity. Therefore, if you want to remove your antivirus the first time and without problems, then use the company’s special product - Web Remover:
- Download the removal program Web Remover.
- Run the installation file.
- A program window with a picture will appear on the screen, where the captcha will be indicated.
- Enter the numbers from the picture below and confirm with the “Delete” button.
- If everything went well, the program will prompt you to restart the computer.
- Now you can remove the Dr.Web Remover installation file.
The removal utility - Web Remover is designed only for Windows-based computers and is provided for free use.
Using Dr.Web Remover is suitable for safe and correct removal of Doctor Web antivirus. This is a reliable and proven method, which it is advisable to use not only when completely uninstalling the antivirus, but also, if necessary, to rearrange it. The cleaning utility also allows you to avoid system error 902, which often occurs when uninstalling antiviruses.
Using the registry
Everything I talked about above are standard uninstallation methods and in most cases they are sufficient. But as you already understand, there are rare exceptions when they do not give the desired result. The only thing left in this case is to uninstall it yourself.
To do this, we need a registry and detailed instructions.
- Let's launch safe mode.
- Using the “Win + R” combination, open the command execution window, enter “regedit” and click “OK”.
- Open the search window with the combination “CTRL + F”.
- We search for and delete all entries with the following connections: drweb, dr.web, Idvlab, spider, SpiderNT.
- Open the partition with Windows installed, go to the “Drivers” folder and get rid of the “dwprot.sys and DrWebLwf.sys” files.
- Open the system partition, usually the “C” drive. We find and get rid of all antivirus folders.
- Restart the laptop.
The procedure is not the easiest, it requires time and care. Therefore, before starting, it is best to make a backup of the registry. This will help avoid possible difficulties.
Uninstall in Safe Mode
If none of the listed methods allows you to completely remove Doctor Web antivirus from your computer, then the last option remains - uninstalling the program in Windows safe mode. Launching safe mode allows you to unload the system and start it in a debugging state. Removing such serious programs as antivirus in safe mode allows you to avoid errors and failures. So, if you encounter problems using the previously described methods, then remove the antivirus by launching Windows Safe Mode. To do this, you need to restart the computer and, during system startup, constantly press the F8 key until the selection of the operating mode is displayed on the screen. Afterwards, all you have to do is uninstall the program in the standard way through the Control Panel.
Why do you need to remove your antivirus?
Before you completely remove Doctor Web from your computer or mobile device, you need to clarify why you need to do this. In some cases, it is better not to use such drastic measures.
Most often, uninstallation is required if the program was damaged or installed incorrectly. After removing all components, the antivirus is simply reinstalled, but from a good boot file that contains an undamaged version.
Sometimes uninstalling Dr web is required if you need to install another antivirus program. Usually, 2 or more antiviruses are not installed on one device, since they may conflict with each other, which will disrupt their stable operation.
Possible difficulties
We have already said that antiviruses require special attention not only during installation, but also during removal. These are programs that adapt their security components to system modules, so various failures may occur during or after uninstallation. Among the common problems users identify are the following:
- inability to remove Doctor Web either using Windows tools or using the Web Remover utility;
- A system error constantly appears on the screen;
- the computer freezes and does not respond to user requests;
- You cannot install another antivirus.
Well, firstly, if a system error constantly appears on the screen or you cannot install another antivirus, then you need to run a scan of the system and Local Disk, and secondly, clean the registry. If the problems are more serious - the computer freezes, does not start or does not respond to commands, then it is better to contact Doctor Web technical support or call a specialist.
System Restore
An alternative option for removing Doctor Web is to use the Windows recovery tool. I want to warn you in advance that this method is very doubtful, since by rolling back to an earlier state you risk losing some of your personal data and installed applications. In addition, you must have the function for creating backup points enabled.
Use this method only if the others have not brought any results.
Detailed instructions:
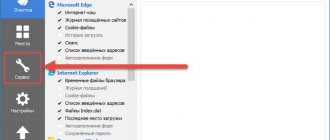
- Open “Start”, enter “Recovery” in the search and go to the appropriate section.
- Click Next.
- Check the box to show other points and click Next.
- Select the checkpoint to which you want to rollback and click “Next” again.
- In the confirmation window, click “Done.”
The recovery process will begin, wait for it to complete.
How to download the program
The user should enter the following address in the browser: “www.drweb.ru”. When the page loads, you need to hover over the “Download” tab. In the menu that opens, select the “Sysadmin First Aid Kit” item.
In a few seconds, a web page will open with a description of the utility and the opportunity to download it. In this case, the user will have access to a version for mobile devices. Simply select the product you are interested in and then click on the link.
In the next step, you need to find “drw_remover.exe” among the downloaded files. After its launch, the process of removing antivirus software will begin.
There are several points to consider when working with the program:
- The utility is not installed on the computer;
- You only need to run the application as an administrator;
- After the uninstallation process, you need to restart your computer.