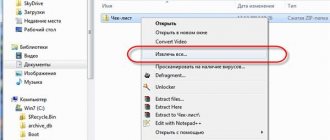
Most users who work with hard drives and logical partitions in Windows systems, using Explorer or the corresponding disk management section, have probably noticed the presence in the context menu of a somewhat incomprehensible item “Shrink this disk to save space.” This innovation was placed in a separate category starting with Windows 7, although it was also present in systems of a lower rank. Let's see what it is, what it can be used for, whether it is worth doing such things and what should be taken into account if such an operation is still intended to be performed.
Settings item “Compress this disk to save space”: what is it?
As you know, earlier, when hard drives did not have sufficient capacity to store information, and some files, most often related to multimedia formats (mainly video and music), were very large, saving space on the hard drive was a real problem for all users without exception. . That is why at one time Microsoft Corporation specialists decided to somehow eliminate it. To save free space when selecting a partition, it was (and is) proposed to compress this disk to save space. This, in theory, should mean reducing the file size, thereby freeing up the necessary additional space. As is already clear, if such a function exists in the system, it would be a sin not to use it. And, according to most users, there is nothing critical about this. However, despite the appearance of such a function in Windows, some people do not understand the essence of the issue well enough and, without understanding what’s what, they immediately try to apply compression to disks and partitions. But this should not be done without understanding the essence of what is happening.
How it works?
Yes, indeed, it is possible to compress a volume. The technology for carrying out such actions is in some ways very reminiscent of working with the Zip archiver built into the latest versions of Windows, when you can simply go into the packaged archive and view its contents or open the desired file.
Exactly the same here. When choosing compression, all files are simply compressed, but only in the percentage that is provided for each specific format. However, in Explorer, all compressed objects are visible in their normal form, and the compression itself in no way affects the ability to open files, edit them, save them, or perform copying or moving operations. On the one hand, it is very convenient. But not always, since in some cases you may not only encounter unforeseen difficulties, but also end up with an inoperable operating system.
What drives or partitions can be compressed?
What does it mean to “compress a disk to save space”? Let’s figure it out a little. Now let's see which sections can be applied to such operations. If we are talking about logical partitions, compression can be performed.
But the main condition is that they must initially be formatted exclusively in NTFS. Otherwise, nothing will work. Another nuance is that when copying a compressed file from one partition to another, the compression is preserved, but when such an object is moved within a partition, it takes on its original form, in which there was no compression. Thus, if you often perform operations related to copying or moving large files in one partition, the meaning of compression, in general, is completely lost (especially since it will not be possible to re-compress the moved file using means to perform compression of the entire partition).
Now a few words about whether to compress the disk to save space if it serves as a system partition (the one on which the operating system is installed). Most experts are inclined to believe that in this case it is not worth using compression, despite the presence of such an item in the disk properties, under any circumstances, if only for the reason that after doing it, Windows may stop loading altogether.
Compression. What not to do.
As you may have already realized, Windows compression is not a feature you should mess around with. However, understanding the compression function (at least within the paragraphs at the top of the article) can help you determine the root of the errors that appear. the compression function may be to blame for this :
Do not compress the disk with the operating system installed on it! System drive C: cannot be subjected to this procedure. Most often, device drivers suffer from this, refusing to start a whole set of devices that just seemed to be working. After the compression procedure is completed, the operating system will most likely not boot in the new session. But if - I don’t know what made you - you decide to do this, at least do not touch the root directories .
Source
How to decompress the system partition?
But what to do if the user decided to use such a tool and, unknowingly or by mistake, compressed the system partition, after which Windows stopped loading normally?
Please note right away that a system rollback, which can sometimes start automatically, will not give any result.
In this situation, you will have to boot from some removable media, after which, at the very beginning of the installation, select the recovery option, and at the stage of selecting the driver location (after determining the installed OS), in the window that appears, again select the properties of the system partition through the context menu and uncheck unfortunate point.
Is it worth compressing the drive to save space?
In general terms, as can be seen from all of the above, there is nothing wrong with performing compression. There remains one last question about using the “Shrink this disk to save space” option. This decision, of course, remains up to the user, but as the most practical solution, we can recommend compressing only logical partitions, and only those in which frequent internal movement of files and folders is not provided. It is better not to experiment with the system partition.
In the disk properties, you can compress it to save space. What kind of function this is is still worth figuring out. The processor must be powerful enough to allow compression and decompression to be performed seamlessly. Compression can have a positive impact on performance.
This article will tell you what it means and how to shrink a disk to save space. Let's figure it out in practice. For all drives, compression is disabled by default. And most don't even know about its existence. Perhaps they saw this opportunity by chance and don’t know if it’s worth it?
A couple of paragraphs of theory...
The NTFS file system uses the compression unit to determine the degree of partitioning, granularity of byte range streams, and whether they are aligned or grouped into blocks. The size of this very unit depends only on the size of the cluster in the NTFS system. Until the last moment, the following table was used to calculate the cluster size:
As you can see, from a certain point exceptions begin: “native” NTFS compression stops working on volumes and partitions whose cluster size is selected to be more than 4 KB.
, sparse file compression begins to be used . Such files are another strong point of the NTFS file system, which allows applications to create very large files, which, strange as it may sound, can exceed the size of the parent directory. This happens because the lion's share of the contents of such files (and sometimes completely) is filled with zeros or zero chains. However, the file system does not provide logical clusters for such chains. And NTFS creates only a “pointer to where the virtual number of clusters is filled.” What does compression have to do with it? NTFS, when working to compress a file or folder, divides the data stream using the same principle. Moreover, the compression process is individual for each file; the degree of compression and subsequent operations with the file are very dependent on its actual size. How to check which files and folders are compressed?
Compress the disk to save space. What is this?
If you enable disk compression, you can save space, but it won't come without costs. As previously mentioned, compression uses the processing power of the CPU. Each time you access a file, it is first unpacked.
What do you need to know?
- Compression may take several hours. The process is accompanied by disk and CPU load.
- When accessing such a file, it is unpacked, after which you can work with it.
- If you move a file to an already compressed folder, then it will automatically be compressed as well.
- This is not the best way to increase disk space (cleaning gives more).
Important! Do not compress the drive (C:) under any circumstances. Shrinking the system partition can lead to various problems. Both in driver failure and even in the operation of Windows 10. You cannot do without reinstalling the system. This will be easier than trying to fix bugs manually.
Disk expansion
There are three ways to expand and edit the space allocated for a particular hard drive partition: through built-in utilities, third-party programs, or during a system reinstallation.
Through built-in utilities
In Windows 7, a program is installed by default that allows you to make all the necessary settings:
Video: how to expand a volume through Computer Management in Windows 7
During Windows installation
If you are in the process of installing Windows 7 and want to change the disk size, follow these steps:
Video: how to repartition hard drive partitions when installing Windows 7
Using third party programs
There are several free programs that replace the Windows utility for working with disks and their partitions. For example, Aomei Partition Assistant. This is a convenient program in Russian, characterized by a simple and understandable design.
Video: How to use Aomei Partition Assistant
How to shrink a disk to save space
In the panel, open Explorer or directly This PC and select properties . the Local Disk (F:) as an example , check the box Compact this disk to save space .
Choose how to compress: Do you want to apply this change only to the F:\ drive or also to all subfolders and files. We are interested specifically in the disk and all subfolders...
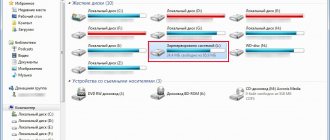
For testing, we selected a little-used hard drive partition, namely F:\. Of course, its file system is NTFS. It is used as a small "cloud". To store backups, old works and some data. After 3 hours it turned out:
Additional considerations
- When you shrink a partition, certain files (for example, the paging file or the shadow copy storage area) cannot be automatically relocated, and you cannot decrease the allocated space beyond the point where the unmovable files are located. If the compression operation fails, check the application log for event 259, which will indicate the file is unmovable. If the shrink operation fails, check the Application Log for Event 259, which will identify the unmovable file. If you know which clusters associated with a file are interfering with the shrink operation, you can use the fsutil at the command prompt (type fsutil volume querycluster /? If you know the cluster(s) associated with the file that is preventing the shrink operation, you can also use the fsutil command at a command prompt (type fsutil volume querycluster /? When you provide the querycluster parameter , the command output will identify the unmovable file that is preventing the shrink operation from succeeding.In some cases, you can relocate the file temporarily.For example, if you want to shrink the partition even further, you can use Control Panel to move the page file or saved shadow copies to another drive. For example, if you need to shrink the partition further, you can use Control Panel to move the paging file or stored shadow copies to another disk, delete the stored shadow copies, shrink the volume, and then move the paging file back to the disk.If the number of bad clusters detected by dynamic bad-cluster remapping is too high, you cannot shrink the partition.If this occurs, you should consider moving the data and replacing the disk.
- Do not use a block-level copy to transfer the data. This will also copy the table of bad sectors and the new disk will consider these sectors to be bad when in fact they are good. copy the bad sector table and the new disk will treat the same sectors as bad even though they are normal.
- You can shrink primary partitions and logical drives on raw partitions (those without a file system) or partitions using the NTFS file system.
Shrink disk to save space: what is it?
Disk compression is a process that is performed to free up free space on a hard drive by compressing the data on the media. The method is similar to archiving in a regular archiver, but completely different technologies are used.
Compression parameter
Beginners may think that shrinking a disk implies that it is physically smaller, but in reality this is not the case. In information technology, this process refers to reduction in size and applies only to information or data stored on media.
Important! The file compression process only needs to be performed if there is not enough free space on the media. It will not damage the hard drive if it is half empty, but working with system archivers heavily loads the processor and the procedure can take a long time.
There are a couple of nuances. Some people think that shrinking a Windows 10 volume can destroy some files, but this is not true. Loads on the processor are also possible, since the system will have to “get used” to the new operating conditions of the hard drive. Difficulties can only arise when performing the procedure on personal computers from the 90s and early 00s. Modern PCs calmly continue their work as usual.
Also, as mentioned above, it is better to try to delete something unnecessary than to compress the disk in Windows 10. If space is really low, you will have to resort to compression, but you should not compress a drive that has more than half of the space free.
You can also reduce the amount of space taken up through Explorer
Disk space management
So-called disks are correctly called partitions or volumes (you only have 1 disk, most likely), but given that even Windows calls them disks, this is not important.
To make one volume larger, you must first make another volume smaller. You can't just grab a spot out of nowhere and you have to find a donor first. It is worth saying that in Windows 10 there is no function for merging volumes. If you want to merge, you will have to use the standard methods described below and copying information from disk to disk.
There is one very important non-obvious rule that imposes a strong limitation on disk management, and before you start wasting space, you need to consider the most popular mistake.
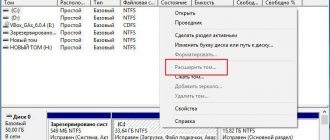
Why is "Extend Volume" inactive?
Pay special attention to the order of the volumes in the lower half of the window.
Note the order of the volumes in the lower half of the window
In our case, the order is: C, J, D. After we pinch off a piece of space from one of the disks, it will appear behind the donor volume. For example, if we take a piece from drive J, the order will be: C, J, Free space, D. Free space can only be filled into adjacent partitions. That is: return to the donor volume (J) or expand the next disk (D). We cannot expand drive C, since there is an obstacle in the way in the form of drive J.
Free space can only be filled into adjacent partitions
To expand the C drive, you need to completely remove J and make it a remote space. But if this doesn’t seem enough and you want to expand to include drive D, you’ll have to delete it too.
Expansion of the first volume is possible only with the help of an individual multi-pass or specialized programs.
For example, in this case, to expand drive C at the expense of D, you can do the following multi-step:
It all depends on the order of the disks, their volume and the availability of free space, so the multi-pass is individual.
If the disk with the system is not the first, then expanding the ones in front of it is impossible, since the disk with the system cannot be removed.
Compression
Right-click on the partition you are interested in and select “Shrink Volume...”
Set the size of the donor space and click "Shrink"
Free space will appear behind the donor volume
If you cannot compress the volume, you must either moderate your appetite or delete part of the contents of the volume.
Removal
Right-click on the volume and select "Delete Volume..."
All its contents will then be deleted.
The freed space will appear in the place of the deleted volume
Extension
The system disk expands just like all the others. But due to the error described above about the impossibility of expanding the volume, this is not easy to do. Before expanding your disk, be sure to read the first part of this chapter, which covers the most common disk management error.
Right-click on the volume and select "Extend Volume"
Select the size of the allocated space and confirm the expansion
Creation
Windows 10 does not recognize the difference between a local disk and a simple volume. In principle, there is no difference between them. The distinction between volumes and local disks was used on older operating systems and was purely a conditional limitation. By creating a simple volume, you create a full-fledged local disk.
Right-click on the unallocated space and select "Create Simple Volume"
Select the size of the allocated space. You will not be able to use non-adjacent free space
Select a letter for the new volume
It is better to leave all settings as default
A new volume will appear in place of the used space
Video: Disk Management in Windows 10
How to shrink drive C on Windows 10 using Explorer
If the situation is such that you cannot do without compression and there is nowhere to transfer the data, then you can get to work. It is best to carry out the procedure through the NTFS file system. You can do everything in literally a couple of clicks using the standard File Explorer file manager.
The general instructions are as follows:
- Go to the Explorer application in any convenient way. You can use the Start menu or the Taskbar. The fastest way is to press the Win + E hotkey combination.
- Find the drive you want to compress and right-click on it.
- Select “Properties” from the context menu.
- Go to the section of the window called "General" if it doesn't open right away.
- View the amount of used and free space and check the box next to “Shrink this drive to save space.”
- Click on the “Apply” and “Ok” buttons.
Shrinking a volume, freeing up space to create a new partition in Windows 10
To create a new volume in the Disk Management utility, you first need to get free space somewhere for this; it can be obtained by compressing space on an existing volume. In the Windows operating system, no more than 4 partitions can exist on one physical HDD, including system ones (for example, the Recovery Partition). Typically there are two local drives C and D.
To create a third volume, you need to right-click on the partition that has more free space, in our case it is drive D. An explorer window will appear, click on the “Shrink volume” item to free up free space, change it to unallocated.
Using the Command Line
It's time to talk about how to shrink a volume in Windows 10 via the command line. It provides more features than a GUI. Step-by-step instructions on how to shrink system space to save space look like this:
- Go to the command line via the Start menu or the Run window.
- Enter the command “diskpart” and press the enter key.
- After execution, enter the following command “list volume” to display a list of all disks.
- Execute the command “select volume X”, where X is the volume number of the selected disk.
- The last command will look like this: “shrink querymax”. It will allow the operating system to determine the maximum amount of space that will be compressed.
After the procedure, the system will notify the user that the diskpart utility has performed compression of a certain number of megabytes.
Compression helps remove the “Area size is less than minimum” error in Windows 10
Deleting the update cache
This method is the least dangerous for user data, since it clears the system from downloaded but not installed update packages, or from previous versions of software upgrades. If the necessary elements are deleted, the system can always be restored by simply downloading the previous update using standard tools.
The sequence of actions looks like this:
- The first steps are to turn off the System Update Center. Using the “Search” tool in the main panel, enter “services.msc” and launch the found configuration document. In the “Search” panel, enter “services.msc” and launch the found configuration document
- In the window that will immediately open by the system, find the “System Update Center” management option and open it by double-clicking. Open the “System Update” management option
- An additional window will be launched to configure the properties of a specific parameter. In the central tab, under the characteristics of the state of the current process, click on the “Stop” option, then confirm your action at the bottom of the window. In the central tab, click on the “Stop” option
- Through the main folder of Explorer (“This PC”), open the following folders one by one: “Windows”, the main folder with the system and all files associated with it. “SoftwareDistribution”, a folder with settings and software for managing the capabilities of new system components. “Download” – a special download folder for downloaded software. We follow the indicated path
- In the download folder that opens, open the “File” item in the top panel, and in the submenu, among other debugging elements, select the option to configure folder settings. Open “File” and select the option to configure folder options
- After launching the parameters window, go to the “View” sub-item, and in the additional parameters field, set the status for hidden elements to “Show hidden files”. Also, to clear a larger amount of information, uncheck the box next to the option to hide special protected files. In the “View” sub-item and in the additional parameters field, set “Show hidden files” and uncheck the box next to “Hide special protected files”
- Then, select absolutely all downloaded update files in the folder and delete them, thus clearing all outdated, faulty and space-consuming update files. Select all downloaded update files in the folder and delete them
- When the uninstallation process is completed, you must run the OS updater again for the system to function normally. To do this, reopen the properties window for this component (see previous paragraphs), and in the main “General” tab, under the status indicator, click “Run”. In the main “General” tab, under the status indicator, click “Run”
Note! If the user wishes to no longer receive constant system updates to prevent system overload in the future, this option can be left disabled.
Video - How to reduce the size of Windows 10 on your hard drive
July, 11th 2018 Category:Tips | Windows 17251Subscribe to comments via RSS
Quite often I have to partition hard drives, mainly to separate user data from system and program data. For Windows, this is very important, especially if you often have to reinstall the system for various reasons and don’t want to bother every time with saving everything you’ve acquired through back-breaking labor to an external hard drive.
The opposite problem also occurs when insufficient space is allocated on the system disk while there is a large amount of unused space on an adjacent volume.
I don’t see much point in using any specialized programs to partition disks, especially since in Windows 10 this is done quite simply, either in graphical mode or from the command line - whichever you prefer. Let's tell you how to compress volumes in Windows 10 to finally solve all the difficulties that arise.
Shrink a volume using Windows 10 Disk Management
First, let’s consider the option with the familiar “Disk Management” graphical interface, as the most popular (the command line scares many). You can call the Disk Management utility in several ways:
- by right-clicking the “Start” menu and selecting the appropriate item in the list that opens;
- right-click on the “This PC” icon, then select “Manage” and go to “Disk Management”;
- In the search bar, enter the command diskmgmt.msc and press Enter.
Now we need to decide on a disk (volume), the size of which we will change, freeing up space for an additional partition. Right-click on it and select “Shrink Volume”.
A simple dialog opens with more detailed information about the disk partition (volume), but there are some confusion here, so let me explain a little. In the Space available for compression field, it is indicated how much free space there is on the disk, and in the Size of compressed space we are required to enter the desired size of the new partition in MB, which, naturally, should be less than the remaining free space on the disk.
We usually allocate space in gigabytes, so when allocating the exact volume for a new partition, please note that 1GB contains 1024MB, that is, when creating a 100GB partition, you should write the number 102400 in the “Size of compressed space” field.
After we have thus allocated unallocated space on the disk, to create a partition, all we have to do is right-click on it and select “Create simple volume”.
Shrinking a volume from the Windows command line
Launch the command line (necessarily as an administrator) and give the command DiskPart
.
Next, we will display a list of partitions by entering the list volume
:
DISKPART > list volume
Again we find in the list the desired section that we will compress, but now we need its number (in my example it will be “Volume 3”).
display a list of all available commands of the DISKPART with their brief description using the help
.
You can learn more about each command by specifying its name after the help command (for example, help shrink
)
Select volume 3 command
select this section:
DISKPART > select volume 3
shrink querymax command
will help you find out the free space on the disk (in bytes).
The selected partition is directly compressed using the command , where is the amount of disk space in MB by which the partition will be reduced. By analogy with the first option, to create an undetected area of 100 GB in size, the command will take the following form:
DISKPART > shrink desired=102400
Shrink a volume using PowerShell
Working with PowerShell implies a higher level of users, so we omit detailed discussions about launching the shell and actions as an administrator. It remains to explain the essence of the commands that you see in the screenshot:
- Get-Partition
command displays a list of volumes (we need the volume letter, in the example drive C); - Get-PartitionSupportedSize -DriveLetter C
command shows (in bytes) how much the selected volume can be minimally and maximally compressed; - Using the Resize-Partition -DriveLetter C -Size 15GB
, we compress the partition,
indicating its size after compression . The fundamental difference from the first two methods is to specify the new size of the source volume, and not the one for which space is being freed. In addition, you can set the size in any convenient form, even in gigabytes (GB), even in megabytes (MB).
How to enter Windows safe mode from the command line How to get rid of the background in columns What to do if a folder on Win7 is not deleted FATAL: xcalloc: Unable to allocate 1 blocks of 4120 bytes! Adding Web access to remote desktops. Problem with the HP ML310e gen8 server SSD disk in the RAM slot... was it even possible?
–>
Applies To: Windows 10, Windows 8.1, Windows Server (Semi-Annual Channel), Windows Server 2022, Windows Server 2016, Windows Server 2012 R2, Windows Server 2012 Applies To: Windows 10, Windows 8.1, Windows Server (Semi-Annual Channel ), Windows Server 2022, Windows Server 2016, Windows Server 2012 R2, Windows Server 2012
You can decrease the space used by primary partitions and logical drives by shrinking them into adjacent, contiguous space on the same disk. For example, if you discover that you need an additional partition but do not have additional disks, you can shrink the existing partition from the end of the volume to create new unallocated space that can then be used for a new partition. The shrink operation can be blocked by the presence of certain file types. the presence of certain file types. For more information, see Additional considerations
When you shrink a partition, any ordinary files are automatically relocated on the disk to create the new unallocated space. There is no need to reformat the disk to shrink a volume. There is no need to reformat the disk to shrink the partition.
Attention!
If the partition is a raw partition (that is, one without a file system) that contains data (such as a database file), shrinking the partition might destroy the data.
Undo disk compression from Explorer
To undo compression, you will need to do the opposite. The procedure is almost identical to that described above:
- Go to the Explorer application in any convenient way. You can use the Start menu or the Taskbar. The fastest way is to press the Win + E hotkey combination.
- Find the compressed drive and right-click on it.
- Select “Properties” from the context menu.
- Go to the section of the window called "General" if it doesn't open right away.
- Uncheck the box next to “Compress this drive to save space.”
- Click on the “Apply” and “Ok” buttons.
Next, you just have to wait for the operation to complete.
Uncompress a folder or file from the command line
In order to uncompress data on a volume or disk via the command line, you must also perform an almost identical set of actions as in the compression instructions, but using different commands. It looks like this:
- Go to the command line via the Start menu. You can also simply enter the command “cmd” in the “Run” window and click “OK”.
- Wait for the window to load and enter the command “compact /u /s:”full path to the folder” /i /Q” to cancel folder compression and “compact /u “full path to the file” /i /Q” to cancel file compression.
- Press the enter key and wait for the command to complete.
Shrinking a basic volume
Note
You must be a member of the Backup Operators or Administrators group , at minimum, to complete these steps.
To shrink a basic volume using the Windows interface
- In Disk Manager, right-click the basic volume you want to shrink.
- Click Shrink Volume . _
- Follow the on-screen instructions.
Note
You can only shrink basic volumes that have no file system or that use the NTFS file system.
To shrink a basic volume using a command line
- Open a command prompt and type diskpart.
- DISKPART prompt list volume Note the number of the simple volume you want to shrink.
- the DISKPART prompt , type select volume . Selects the simple volume volumenumber you want to shrink.
- DISKPART command prompt , type shrink [desired=] [minimum=.g>DISKPART prompt, type shrink [desired=] [minimum=. Shrinks the volume to the desired size in megabytes (MB) if possible, or to minimumsize if size desiredsize is too large. Shrinks the selected volume to desiredsize in megabytes (MB) if possible, or to minimumsize if desiredsize is too large.
| ApplicationValue | Description |
| list volume list volume | Displays a list of basic and dynamic volumes on all disks. |
| select volume select volume | Selects the specified volume, where volumenumber is the volume number, and gives it focus. If no volume is specified, the select command lists the current volume with focus.You can specify the volume by number, drive letter, or mount point path.When you select a volume on the underlying disk, focus On a basic disk, selecting a volume also gives the corresponding partition focus. |
| shrink shrink | Shrinks the volume with focus to create unallocated space. All data remains intact. No data loss occurs. If the partition contains unmovable files (such as a page file or shadow copy storage area), the volume will shrink to If the partition includes unmovable files (such as the page file or the shadow copy storage area), the volume will shrink to the point where the unmovable files are located. |
| desired= desiredsize desired= desiredsize | The amount of space, in megabytes, to recover to the current partition. |
| minimum= minimumsize minimum= minimumsize | The minimum amount of space, in megabytes, to recover to the current partition. If you do not specify a desired size, the command will free up the maximum possible space. or minimum size, the command will reclaim the maximum amount of space possible. |
How to set a ban on disk compression through the Local Group Policy Editor
If a person uses Windows 7 or 10 editions Professional or Enterprise, then he can prohibit the operating system and other users from compressing data. For this:
- Go to the “Run” window by pressing the key combination “Win + R”.
- Enter the command gpedit.msc and press the “OK” button.
- Waiting for the Editor window to open.
- Click on the “PC Configurations” section and the “Administrative Templates” subsection.
- Select the “System” item and the “File system” sub-item.
- Click on the NTFS type and on the right side of the settings window click on the inscription “Prohibit compression on all NTFS volumes.”
- Activate the parameter by selecting “Enabled” and click “OK”.
A setting in the “Group Policy Editor” may interfere with the procedure.
This material discussed how to compress a disk to save space in Windows 7, what it is and what the consequences may be. In fact, the procedure is not dangerous, but it can affect the speed of data access, so reducing the amount of occupied space by compression is necessary only in extreme cases.
Defragmentation
The entire contents of the hard drive are divided into many small fragments, and when new information is entered, these fragments are located taking into account their best position for sequential reading, one might say side by side. However, when they change, new information is recorded and existing information is moved, a well-ordered structure gradually tends to become more chaotic. Moreover, bad sectors appear, where the reading process is greatly hindered. The process of optimizing this entire structure is called defragmentation and is recommended for periodic execution at least once every six months.
Checking the disk for errors is also included in the optimization process.
Defragmentation is intended exclusively for HDDs. For SSDs, it is not only dangerous, but also harmful. If you don't know what you have:
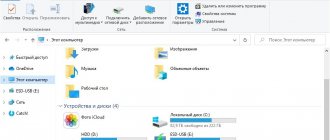
Right-click one of the drives in Explorer and select Properties
Select one of the drives and click "Optimize"