In the previous article, I discussed the issue of installing Windows 7. Several points were raised about where to get the Windows 7 distribution. One of the options involved downloading an operating system image from the Internet. In this article, I will tell you in more detail how to burn a downloaded image to a DVD disc, using various applications. Along the way, we’ll touch on some of the nuances of recording for Windows 10.
To create a boot disk with the Windows 7 or 8 or 10 operating system, we need a DVD-R or DVD-RW disk, a windows image and a computer or laptop with a burner drive. Previously, we looked at burning an image using the BurnAware Free . You can find it here.
To begin with, we will describe the general recording rules, which will not differ for almost any recording program. These rules are typical for writing not only windows images, but also for writing any data to DVD, CD or BR disks:
- To burn a Windows image, try not to skimp on the DVD. Let it not be a top-priced blank, but also not a disk at the lowest cost. A high-quality disk will allow you to install the operating system many times, of course, with proper storage of the disk.
- The disc writing speed should be the minimum for your drive and for the specific DVD disc. The lower the write speed, the higher the probability of recording without failures.
- During recording, it is advisable to equip the computer with an uninterruptible power supply - a UPS, in order to minimize the risk of damaging the disc during power surges or power outages.
The most common user mistake is writing an image file to disk as a regular data file. Such a disk is not bootable and you will not be able to install the Windows 7 operating system from it. The principle of burning an image to a disk implies “unpacking the system installation files onto an empty DVD media.”
ISO and UltraISO image
This application is very popular not only for burning discs, but also for burning boot images onto flash drives. In addition, UltraISO has the ability to create a virtual drive into which you can mount a disk image. We'll talk about all the features of this program another time. Stay tuned.
Download the UltraISO program from the official website, install and run it. The first launch familiarizes you with the cost of the program and offers you to buy it or enter a registration code if the program has already been purchased. I will choose the Trial period since for my purposes there is no need to purchase the program now.
First launch of UltraISO
the Burn CD image button in the menu to open the image burning dialog:
Menu - Burn CD image
In the Burn image window, use the select button to open the image file with the operating system we need:
Selecting an image file
Next, select the minimum recording speed, the Disc-at-Once(DAO) , and then click the Record .
Burning an image
Once the recording is complete, a message will appear indicating that the recording was completed successfully. At this point, the recording of the disc can be considered complete and you can proceed to installing the system.
If the dialog box about successful recording does not appear, then you will see an error, which most likely means that your disk is damaged. The entire procedure of burning the image to disk will have to be repeated from the beginning.
What you need to know for proper installation
First you need to have an idea of what a disk image is. It is a file containing absolutely all the contents of the disk . Experts often compare it to zip archives.
Burned Windows image on bootable media
In this situation we are talking about an ISO image. Almost all programs accept it, there are no conflicts in work, since “.iso” is a generally accepted format.
Reference! An important point when recording Windows is the correct choice of the bit size of the distribution.
Often users do not know this information, so you need to know the main differences:
- If you purchased the 32-bit version, it cannot support 4 GB of memory.
- For the 64-bit version this function is possible.
CloneCD as an alternative to UltraISO
CloneCD is also not free, like UltraISO, although it is cheaper. You can download the utility, for example, here.
The first launch after installing the program is accompanied by an information window disclaiming warranties. Agree by clicking the button Everything is fine .
CloneCD first launch
Next, CloneCD notifies you that it is not free and you have 21 days to get acquainted with it. Well, we don't need any more. We close the message and the main program window appears in front of us, in which we select the second button from the left Burn CD .
Selecting an image entry
Next, click the Browse and in the dialog box select the file type - Image , and then the file with the system image to record and click Open .
Selecting an image file
Then click Next .
Information about the image file
In the next step, select the recording speed and click OK .
Selecting the recording speed
After finishing recording, you can proceed to installing the operating system.
Option for burning discs on Windows 7 - with a CD/DVD player
Select to use the disc with the CD/DVD player and click Next
Then send the files using the above method or simply copy everything you need to write to disk. In this case, nothing will be recorded immediately. A session will be created that you can record. You will see a warning in the notification area
Copy all the necessary information to disk. Then open your optical drive and click Burn to CD
A window will appear in which you can set the name of the disc and theoretically select the recording speed. In my case, the speed was not selected and, moreover, it was set higher than the maximum - 48x. Click Next
You need to wait a little while the files are prepared for recording and the recording itself takes place.
Files take a long time to record even at maximum speed. I have 3 drawings up to 5 MB, a total of 3 minutes were recorded. After successful completion, you will see the window below where you will be prompted to write the same files to another disk. Click Finish
The disc was successfully burned in Windows 7. All that remains is to check the recording quality on another computer by copying the contents of the optical disc to the hard drive.
Image MDF/MDS and Alcohol 120%
Another equally popular program for recording images is Alcohol 120% . As in the case of UltraISO, it can do a lot, but its main advantage is working with images like MDF/MDS .
To install, go to the official website of the application, download and install the program. You can also download it here.
Launch the application and wait for the countdown to end, click OK .
Alcohol 120% - first launch
Next, click on Burn images to disks (highlighted with a red frame).
Burning a disk image
Then select the image file in the dialog box by clicking the Browse .
Selecting an image file
In the next window, set the recording speed, leave the recording method as DAO and click Start .
Selecting recording speed and method
After finishing recording, we go to install the operating system on the computer.
Introduction
In order to burn a disc you need to insert it into the drive. Insert a blank disc into the drive.
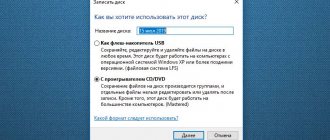
The window below appears almost immediately. If it is not there, you need to go into the optical disk. In the Burn disc window, you need to select how to use this disc.
Like a USB flash drive
— allows you to work with this disk as a flash drive. That is, write and erase files at any time by simply dragging and deleting files. If you don't have a flash drive at hand, this is a great alternative.
With CD/DVD player
— this disc format is readable on computers and most home players, unlike the previous one, but is less convenient to use. Files can only be burned in groups, and there is no way to change or delete individual files after burning a disc.
Let's consider each option separately.
NRG image and Nero Burning ROM
Perhaps the most famous among the programs presented is the Nero Burning ROM program. Download it from the official website of the developers and install it.
The first launch, as in the case of any trial program, is accompanied by familiarization with information about purchasing the program or launching a trial version. Select Continue .
Nero Burning ROM - first launch
Next, click the Cancel .
Cancel – new project
The next step is to go to the menu and select Recorder - Record image...
Burn image
Next, in the standard Windows dialog box, select our file with the operating system image and click Open . Then in the next window set the Recording Speed, Recording Method and click the Burn .
Recording a project
After clicking the Burn , the process of burning the Windows image to disk will begin.
Option for burning discs in Windows 7 - as a USB flash drive
Select this option and click Next
The optical disc will format
In the case of a CD, this is a quick procedure.
Then you need to send the file you are writing to the optical drive. Right-click on the file or folder and select Send > DVD/CD-RW drive.
The file will be copied to the disk and written to immediately
You can also simply drag and drop any file or folder onto the disk.
You can view what happened on the disk by opening it in the Computer window.
You can just as easily delete information. Select an unnecessary file and press Delete
. The file will be deleted immediately, but it will continue to take up disk space. That is, if you recorded 500 MB of information on a CD, and then deleted 400 MB, 500 MB will still be occupied.
If you are using a rewritable CD-RW or DVD-RW disc, you can erase it so that all the disk space is available.
Right-click on the disk and select Erase disk
In the next window, click Next
When you remove a disk used as a flash drive, the recording session will be closed, which you will be warned about in a message in the notification area. You can read how to conveniently manage programs in the notification area in the article Startup Windows 7
The session closes quickly and automatically when you press the open drive button and the disk is ready for use on other computers.
MediaCreationTool for Windows 10
There is a simple option to burn a Windows 10 image to disk. To do this, you need to download the utility from microsoft.com and use it. Follow the link, download and run. In the first window, accept the licensing terms and proceed to the first step of the wizard, selecting the second option Create installation media for another computer and click Next .
Create installation media for another computer
Next, you are offered a choice of language, architecture and edition, which can be changed by clicking the checkbox Use recommended settings for this computer . This means that the image will be recorded in accordance with the capabilities of the computer on which the utility was launched. If you need to change these parameters, then uncheck the box and change it at your discretion.
Selecting System Parameters
In the next step, in the standard Windows dialog box, specify the path where the utility will download the image file of the Windows 10 operating system from the Internet and click Next . The download process begins, which, depending on the speed of your Internet connection, can take from 5 minutes to 2 or 3 hours. Immediately after this, the creation of Windows 10 media will begin, which also takes a long time. Be patient.
Download and create Windows 10 media
Once you've finished burning the Windows 10 image, all you have to do is insert the blank into the DVD burner and click Open DVD burner .
Completing the Windows 10 image preparation
Burn a Windows 10 image to disk using other applications
There are almost a dozen programs that allow you to burn a USB flash drive with Windows 10 - these are UltraISO, Daemon Tools, Alcohol and Nero applications, CDBurnerXP (works not only with Windows XP), Astroburn, etc.
Burning a Windows 10 installation flash drive using the Media Creation Tool
Unlike downloading a Windows 10 build from torrent trackers and using third-party programs, Media Creation Tool stores the downloaded image in the user's temporary files on drive C. Once it is written, MCT will delete these files before restarting the computer.
The image will be saved only on a flash drive. You can get it from there in several ways:
- extract using ImgBurn or similar programs (together with an IMA loader);
- copy it from a flash drive and reuse it when burning other installation flash drives and disks with Windows 10 (if it was copied as an ISO, and not in the form of folders with files).
From the above it follows that downloading an ISO file and burning a Windows 10 installation flash drive in the Media Creation Tool are inseparable. To burn the image to media, use the instructions described above.
Video: How to create a bootable USB flash drive with Windows 10 in Media Creation Tool
Using the built-in wizard for burning a Windows 10 image to DVD
ISO files opened in Windows without the help of any third-party utilities have a “Burn disc image” command in the context menu of Windows Vista/7/8/8.1/10/10.1.
Select "Burn disc image" in the context menu of the image file
Select your DVD drive, insert the DVD, and click the Burn button. If you are not sure about the image, it was taken from an unknown source, for example, use a rewritable DVD-RW and the “Check disc after burning” function.
Use the Check Disk feature if the ISO image is questionable
The burning wizard will create a boot record that allows your PC to jump straight into Windows 10 setup when starting from the CD.
To write a Windows 10 image to a flash drive or external SSD/HDD drive, you need a virtual (mounted using the program) DVD drive. This is a section of a hard drive or flash drive (or the flash drive itself) that has the functions of a DVD. This technology was previously used in games that did not want to work without a disk: clone loaders were transferred to partition D or E, working like a real DVD drive.
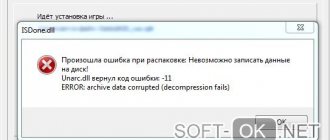
When burning an ISO image, carelessly or in a hurry, you can make serious mistakes that will disrupt the installation in the middle of the process. Problems can also arise in an already installed OS. For example, errors like 0x1234567, “Windows needs file 12345.dll, click search button,” “Application X crashed,” etc., jeopardizing the user experience. If such an image was recorded on a disposable disc (DVD-R), then the media becomes useless, because it will no longer be possible to erase the faulty copy of Windows and write a new one.
The Wizard for burning ISO images to disk allows you not only to create a Windows installation disk, but also to make any program packaged in ISO format self-launch.
Burning an installation flash drive using Ultra ISO
UltraISO is a popular tool for burning installation flash drives. Compared to the Windows Image Burner, it does not require virtual DVDs, like any third-party program. Before burning a Windows 10 image, transfer the most valuable files from the flash drive.
- Download, install (if the version is not portable) and run UltraISO. Give the command “File” - “Open” and select the previously downloaded Windows 10 ISO image.
Select an ISO image that you already have - The contents of the ISO will be unpacked as a list of Windows 10 build files and folders. Give the command “Boot” - “Burn hard disk image”. Select "Burn hard disk image"
- Specify your flash drive as the disk and click the start recording button, confirm the action.
UltraISO asks for confirmation, because all data from the media will be erased
The UltraISO application, like its analogues, records data for up to several tens of minutes. The Windows 10 image is quite large (from 3 GB, not counting the auxiliary files of the bootloader itself, which are also written there), and the writing speed depends on the speed characteristics of the flash drive, the wear of its memory and the version of the USB hardware interface.
The use of a USB 3.1 interface in the PC, the flash drive’s support for its bandwidth and the excellent condition of the media will speed up recording as much as possible.
Video: how to create a bootable USB flash drive with Windows 10 using UltraISO
Burning Windows 10 to a USB flash drive using Daemon Tools
Download and install this application, insert the flash drive into the USB port. Daemon Tools will display the free space and total memory on the flash drive.
- Select the Windows 10 ISO image (browse button).
Daemon Tools has reduced all necessary settings to a minimum - Check the option to rewrite MBR boot header. This will allow the PC to immediately launch the Windows 10 Setupper without using the ancient method of launching from the MS-DOS command line and additional add-ons for third-party DOS loaders.
- Select formatting to NTFS - the most progressive format for any disk. Assign a name to the flash drive and click the “Start” button.
Preparing a flash drive and recording a Windows 10 image will generally take the same amount of time as copying takes in the vast majority of Daemon Tools analogues.
Burn Windows 10 to DVD using Alcohol 120%
The Alcohol 120% program, unfortunately, cannot work directly with flash drives. The recording will be indirect: Windows 10 files will be sent from the image to a partition marked as a virtual CD, and then copied to a flash drive, like the user’s personal files to any media.
- Download, install (you will need to restart your PC to install drivers that support virtual DVD drives) and run Alcohol 120%. Open the Disk Burner. Select the disk image burner in Alcohol 120%
- Select the Windows 10 image and pre-mounted virtual DVD drive. The drive must be either real or imaginary (device image on PC disk)
- Confirm that you want to start burning the image to disk. If this is a partition on a PC disk, its contents can simply be copied to a flash drive.
Confirm that the image has been mounted and written to disk - Make sure the desired real (or virtual) drive is checked and click the start recording button. Press the start recording button for Alcohol 120% to start recording
The Windows 10 image will be burned. Burning images of other versions of Windows based on an ISO image, for example 7, is no different from burning a Windows 10 image.
Alcohol 120% will report the completion of burning the Windows 10 image to disk
After finishing recording, insert the USB flash drive and copy to it all the files that are in the PC disk partition with the virtual drive. If your drive is real and the disc has been inserted, the Windows 10 image will be written to it immediately. Restart your PC and begin installing Windows 10.
Video: how to work with Windows images in Alcohol 120% (using Windows 7 as an example)
Using Alcohol 52% to burn Windows 10 to disk
The difference between Alcohol 52% and Alcohol 120% is the lack of functionality for recording real DVDs. Using this program, you can burn the image to a virtual DVD, from where you can still copy Windows 10 files to a flash drive or external HDD/SSD drive.
- Download, install (you may need to restart Windows) and run Alcohol 52%.
Click on the “Create Images” button - Click on the "Create Images" link and select the virtual DVD drive, enter the drive name and specify the location of the Windows 10 ISO image.
Select the disk, image and name of the distribution to be created - Click the "Start" button. The image will be written to a virtual disk.
After this, you can copy the resulting files to a flash drive. Alcohol 52% also created a boot record: without it, the external drive would not have allowed the PC to start from it.
Working with Windows 10 disks and flash drives in Astroburn
Working with the Astroburn Lite application is similar to working with its analogues:
- Download and launch Astroburn Lite, give the command “Image” - “Browse Disk” and add the Windows 10 ISO image.
Paste the location of the Windows 10 ISO file into the search bar - Press the disk/flash drive cleanup button.
All data from the flash drive or disk will be deleted, so copy it in advance - Close the notification that the disk/flash drive was successfully erased. It will appear 10 seconds after formatting the flash drive or 30–40 seconds after cleaning the DVD. Close the notification about erasing files from the media
- Click the button to start burning the Windows 10 image to media. This may take from 15 minutes to an hour. The time depends on the speed of burning the disc (or writing files to a flash drive) and the parameters of the DVD drive and the disk itself (or the USB interface and the flash drive itself).
After clicking the start recording button, the Windows 10 image will begin copying to the media. - Once the image has been recorded, Astroburn will notify you that it was successful.
The Windows 10 image was successfully copied to a disk or flash drive
You can now reinstall Windows 10 from burned media.
Burning a Windows 10 USB flash drive in the Nero application
Nero Burning ROM is an old product, popular even before the advent of Windows Vista, like Alcohol brand applications. Despite the fact that many people prefer to use flash drives, some prefer DVD CDs (including double-sided ones). Do the following:
- Download, install the Nero software package and launch the Nero Burning ROM application. Give the command “Recorder” - “Record image”.
Proceed to select the Windows 10 image to burn to Nero - Select the Windows 10 image and speed 8x, o and “Finalize disc” (end burning the disc), click the “Burn” button. Select the Windows 10 image and speed 8x, about and “Finalize disc” (finish burning the disc), click the “Burn” button
- Wait for the Windows 10 disc to finish burning.
Wait until the Windows 10 image is copied to the disk - Close the Windows 10 recording report window.
View the Windows 10 DVD burning report
The Windows 10 disk is ready to install Windows 10 on your PC.
Video: how to create an image in Nero Burning ROM
Burn Windows 10 to a USB flash drive with CDBurnerXP
Despite its outdated name, CDBurnerXP also works with Windows 10 images:
- Download, install and launch CDBurnerXP. Select a tool to burn ISO images to disk.
Choose to burn the ISO image to disk - Select the drive, image file, writing speed and option to check data after burning.
Select the drive, image file, writing speed, option to check data after burning and click “Burn disc” - Click the "Burn Disc" button. Recording time is determined by the drive settings and disk speed and can take up to 40 minutes.
After finishing recording, proceed to setting the “tens”.
Recording in UltralSO
First of all, you need to download this application on the Internet. It is important to contact only trusted sources, otherwise the file may contain malware.
Manufacturers have made sure that the installation itself is as simple as possible for the user. All specified settings can be configured by default. This application is paid, but a trial version is available.
- When you open it, a window will appear where you need to select the “Trial period” button.
Select the “Trial period” button - As soon as the program starts, at the very top you need to find the “Tools” tab. In the drop-down list you must select “Burn CD image”.
Find the “Tools” tab, then click on the line “Burn CD image”Reference! It is important to know that transferring Windows to the list of files and applications is the wrong action. By performing this action, the user will write the file, but the content will not be saved.
- In the window that appears, next to the “Image File” tab, there is a button with three dots. You need to click it, and then select the ISO image.
In the “Image file” section, click on the three dots to open the file with the Windows image
Open the folder with the Windows image, select it, click “Open” - It is worth paying close attention to the disc writing speed. Often you can leave the default maximum value. If DVD-RW was not selected for these actions, then you need to reduce the speed to x4 or x8. For older versions, it is recommended to set the speed even lower. This is necessary to ensure that the disc is preserved as much as possible during recording. An important point is the information provided on the disc itself. There you can find out the recommended speed and reduce it by 2 or 4 times.
In the “Writing speed” section we set the appropriate one depending on the disc to be recorded - At the bottom of the window, next to the “Erase” button, there is a “Write” option. You need to press it. If the disk has already been overwritten, the process will take longer as the data begins to be formatted.
We check all the settings, click “Record” - As soon as the recording comes to an end, all the necessary information will appear in a separate window called “Record image”.
Completing the process of burning a Windows image to disk
Method No. 1: How to burn Windows to disk using Nero
Everything is quite simple. Once you have installed and launched the program, launch Nero Express in the left pane of the start window.
- Select the “Image, project, copy” section, go to the “Create a copy of the entire disk” item.
- Specify a virtual device (an image mounted in Daemon Tolls) as the source drive.
- Assign the recorder to the physical device for burning.
- With a disc inserted, specify the write speed (average).
- The question of how to burn Windows to disk essentially requires a high-quality solution. Therefore, it would be useful to activate the “Check data after...” checkbox.
- And finally, make sure that all settings are made correctly, and only then can you safely press the “Copy” or “Write” button (in older versions of the program).
Let's sum it up
Today, friends and I, we learned, reviewed and analyzed 5 ways of how or how to burn an image to disk. To do this, we used the following programs: Windows Image Burner, CDBurnerXP, Daemon Tools Lite and Astroburn Lite, UltraISO and my favorite, Nero 7 StartSmart. It’s up to you to decide which method to use, they are all working and proven.
This is the last article in this outgoing year, I wish everyone a happy new year and the rest of the Christmas holidays.
You may have questions related to burning an image to disk. You can ask them below in the comments to this article, and also use the feedback form with me.
Thank you for following me on Twitter.
Stay connected - my You Tube channel.
If the above information was useful to you, then I recommend subscribing to my blog updates to always be aware of fresh and relevant information on setting up your computer.
Don't forget to share this information with your acquaintances and friends. Click on the social buttons and thank the author.
Sincerely, Dmitry Sergeev December 26, 2013
Blog navigation