The Windows operating system has a feature that allows you to compress a disk to save hard disk space. In some situations, you need to compress disk space due to the lack of free space necessary to accommodate other files.
On computers with the NTFS file system, there is a function for compressing files and directories (directories, folders, disks, volumes) built into the Windows operating system. Thanks to this, there will be more free space on your hard drive.
Let's figure out what it means to shrink a disk; what happens if you shrink drive “C”? In this situation, not everything is as obvious as it seems at first glance.
Shrink disk to save space: what is it?
What does it mean to shrink a disk to save space? When compressed, the size of the occupied space on the disk decreases and there is more free space. The operation of the operating system tool resembles the work of an archiver.
Windows overwrites the data, so it takes up less space on the local disk. Everything seems to be fine, but there are some nuances to this:
- compressed files will get into RAM faster, therefore performance will increase;
- Opening compressed files will require more CPU resources, which will slow down your computer.
It should be noted that if you compress the system partition, then frequent compression will increase the fragmentation of compressed files, therefore reading and writing files will slow down, and this affects system performance.
The disk compression process takes some time, depending on the amount of space that files occupy on a given volume. Compressing a disk is a reversible operation. The user can uncompress a volume if it is no longer needed.
Considering all of the above, we come to the following conclusions:
- Compression works on the NTFS file system.
- Compression will free up some free disk space.
- Previously compressed files are not recompressed.
- There is a high probability that after compressing the disk, the PC will become slower.
- On some computers, after compressing the system disk, problems may arise when updating the system or when using drivers.
The user must decide whether to compress the disk to save space independently, taking into account various circumstances. The user can not only compress a disk partition, but also compress an individual folder or file without compressing the entire disk. In this case, system performance will not be affected.
Is it possible to shrink the C drive? Yes, but this should only be done in certain situations. For example, if there is not enough space to install the required update, or to get some important files from the Internet to your computer.
Once you have the data you need, perform Disk Cleanup and then disable volume compression in Windows.
The Windows 10 operating system independently compresses some system files during its operation if necessary, in addition, the Compact OS function has been added to the system for compressing system files.
In this guide, you will find several instructions on how to shrink your hard drive in several ways, or how to uncompress a disk, folder, or file.
How it works?
Yes, indeed, it is possible to compress a volume. The technology for carrying out such actions is in some ways very reminiscent of working with the Zip archiver built into the latest versions of Windows, when you can simply go into the packaged archive and view its contents or open the desired file.
Exactly the same here. When choosing compression, all files are simply compressed, but only in the percentage that is provided for each specific format. However, in Explorer, all compressed objects are visible in their normal form, and the compression itself in no way affects the ability to open files, edit them, save them, or perform copying or moving operations. On the one hand, it is very convenient. But not always, since in some cases you may not only encounter unforeseen difficulties, but also end up with an inoperable operating system.
How to compress a file or folder on the command line
Using the system tool: command line, the user can compress a folder or file on the computer disk.
You may also be interested in:
- How to increase or decrease the size of the “C” drive in Windows
- How to partition a disk in Windows 7
Run Command Prompt as Administrator.
To compress a folder with all its contents, in a command line interpreter window, run the command:
compact /c /s:”full path to the folder” /i /Q
To perform file compression, run the command:
compact /c “full path to file” /i /Q
Owners of computers with Windows Vista/7/8.
The location of data in user profile folders on computers with Windows Vista/7/8 operating systems installed differs from those in Windows XP. Here we will briefly look at the main differences: - The Documents and Settings is now called the Users ; - The Local Settings is now located in the AppData and is called Local Temp folder and empty it. I also recommend using a program called CCleaner. The program is good, the only thing it can’t do is clean the profiles of other users on the computer. Those. It will delete all temporary files accumulated in the folders of the active profile, and all the rest either manually or under each one, go in and run CCleaner.
How to compress a folder or file in Windows
In the Windows operating system, the process of compressing a folder or file occurs in a similar way to compressing a disk.
Do the following:
- Right-click on the folder or file.
- In the “Properties: X” window, click on the “Other...” button.
- In the “Additional Attributes” window, in the “Compression and Encryption Attributes” parameter, check the “Compress contents to save disk space” checkbox.
- Click on the "OK" button.
- After this, the individual file will be compressed. When you compress the folder, an additional window will open.
- In the “Attribute Change Confirmation” window, click the “OK” button.
Here you need to select the appropriate option:
- Applies changes only to this folder.
- To this folder and to all subfolders and files (this is the default setting).
After this, the folder compression process will begin.
In the Explorer window, symbols will appear on compressed folders and files warning you that the items have been compressed.
How to free up space on the C: drive without deleting the programs there?
First, let's do a little preparation, which we will need to more successfully and efficiently get rid of temporary files. For the purity of the experiment, we will measure how much space was on the hard drive of the author of this article and will monitor these values after each stage of disk cleaning.
1. Go to the My Computer and select the menu Tools>Folder Options .
2. Go to the View and in the Advanced Options , select Show hidden files and folders . We will need this to clear temporary files from our profile. By default, these things are hidden from users, but we are not happy with this state of affairs. Click OK to save the settings. For Windows Vista/7 users - to get to this window, you need to go to Start>Control Panel , select Small icons View and double-click the Folder Options .
3. Now click Start , find the Run command there (in Windows Vista/7 they are not displayed by default - see How to enable the Run command) and type (or copy from here) the command %USERPROFILE% and press the OK . Local Settings > Temp folder (Windows Vista/7/8 owners - you need to go to AppData > Local > Temp ).
4. Press Ctrl+A and then the key combination Shift+Delete (deleting files bypassing the trash) and press Yes .
All these files can be safely deleted, because... Since they ended up in this folder, they cannot represent any value. However, during the removal process the following situation will definitely arise:
Here we answer Yes for everyone
And then this:
Here we press OK, after which we press the Ctrl and left-click on the file with the name indicated on the message to deselect it. After that, Shift+Delete and move on until everything that can be deleted has been deleted.
Why did this situation arise? The fact is that we are deleting files from the current profile, so there are files there that are currently used by the operating system and programs. Naturally, Windows will not allow you to delete them, so as not to cause a system crash. Everything else must be removed.
This is what the Temp after global cleaning:
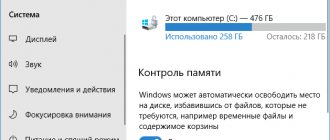
Here's how much space was freed up on drive C:
This computer undergoes such cleaning regularly, so in your case the results may be much more noticeable. The author once freed up 20(!) Gigabytes of disk space in this way, and this was only by deleting the contents of the Temp folder. True, it was someone else's computer.
Let's move on to the next stage. Go to the My Computer , drive C:, Windows folder Temp folder in it . If during this long journey the message appears:
Feel free to select Show the contents of this folder and move on.
In fact, this Temp is left in the operating system only for compatibility with older programs, so it will most likely be practically empty. But the chicken pecks every grain, so we will clean everything we can, and the result will be good. We do exactly the same thing with this folder as with the previous one of the same name. Namely Ctrl+A and Shift+Delete .
In this case, about three megabytes were freed up, so there is no point in looking at how the disk space of the tested disk has changed.
Cleaning temporary Internet files. This method works if you are using Internet Explorer. Although, in other browsers everything is deleted in much the same way. Go to Start>(Settings>)Control Panel and double-click on the Internet Options .
Click the Delete .
Check the boxes like this and click Delete . And then OK after the removal is complete. Let's see how the free disk space indicators have changed:
On this computer, Internet Explorer is almost not used, so in your case the effect may be much more noticeable.
Now right-click on the Trash and select Empty Trash . This is done just in case something might fly into the trash can. You don't store the most necessary files the Recycle Bin Just like don't store food in the trash can.
Next we will use the DupKiller - this program will help us get rid of duplicates. The program is absolutely free. You can download it either from our website (), or the latest version from the website of the manufacturer DupKiller. There is a suspicion that in the near future it will become a full-fledged paid commercial product, but so far this has not happened (the program is in beta
) - we use it!
Undo disk compression from Explorer
To cancel the compression, you will need to perform the reverse operation. All actions are almost identical to those performed during the compression process.
- Launch Windows Explorer.
- Right-click on the computer drive.
- In the menu that opens, click on “Properties”.
- In the disk properties window, in the “General” tab, uncheck the box next to “Compress this disk to save space”, and then click on the “OK” button.
- In the “Attribute Change Confirmation” window, click the “OK” button.
- In the “Access Denied” window, click on the “Continue” button.
- Wait until the operation completes.
Installing the DupKiller program
Select the installation language.
Click Next
.
We accept the terms of the License Agreement
.
There’s nothing much you can change here, so click Next
.
Click Next
.
Installation progress window.
Click Finish
.
Now we need to go to Start>(All) Programs>DupKiller>DupKiller . At startup the advice appears. If necessary, uncheck Show tips on startup
.
Click Close
.
This is what the main program window looks like. You just need to select drive C:
— I don’t have any duplicates on it, so for greater clarity I selected all the disks. I definitely have duplicates there, because... I duplicate especially important information on different disks (I physically have 3 of them).
Menu files and folders - select All files .
Exceptions menu . You can leave it as is so that you understand the principle by which the program makes the selection. After analyzing the selection results, it is possible to add exceptions and scan the disk again.
Search Settings menu - leave everything as it is.
Menu Other settings - leave everything as it is.
Delete menu - you can leave everything as is, you can select Delete files immediately if you are not afraid of accidentally deleting something important. For the first time it is better to leave the option with the Cart
.
Click the Scan and wait...
This is how much space is taken up by duplicates on all drives.
And now the routine begins - we put checkboxes on the files that we definitely do not need as duplicates. Keep in mind that the checkbox needs to be checked only for one copy of the duplicate, otherwise there is a high probability that both the original file and its duplicate will be deleted. There is no doubt that in this case even more space will be freed up (smile), but we agreed to do without sacrifices.
I would like to draw your attention to another point that will make your life much easier - if you see duplicate folders in the dupekiller’s list, then this routine can be simplified - go through Explorer to the desired folder and delete it manually. It will be much faster than checking thousands of boxes.
Warning for Windows Vista/7/8 users:
While the DupKiller program is running, you can see the following picture:
Remember - files located on such paths are not duplicates. These are so-called symbolic links , i.e. the file is physically located alone on the disk, and a link to it can lead from different places. Remember this! For simplicity, you can focus on this - if the ProgramData , this indicates that everything else is links.
Well, the last stage in our epic is disk defragmentation . The defragmentation program optimizes the location of files on the disk (after our actions there is something to work on, take my word for it) and compresses files that have not been used for a long time, which also frees up additional disk space.
To launch it, you need to right-click on drive C:
, go to the
Tools and click the Run defragmentation .
In the window that opens, click - Defragmentation
and we go to smoke, eat, buy bread, etc., since this process is quite long. It is recommended to do this once every 3-6 months, depending on how actively the computer is used.
In principle, during defragmentation, you can even try to do something, however, the computer will work very, very slowly.
Disabling disk compression from the Local Group Policy Editor
In Windows Pro (Professional) and Windows Enterprise operating systems, users can use a system tool: the Local Group Policy Editor to disable compression of all disks.
- Press the “Win” + “R” keys on your keyboard.
- In the “Run” window, enter the command: “gpedit.msc”, click on the “OK” button.
- In the Local Group Policy Editor window, follow the path:
Computer Configuration => Administrative Templates => System => File System => NTFS
- In the "NTFS" policy setting, click on the "Prohibit compression on all NTFS volumes" option.
- In the “Prohibit compression on all NTFS volumes” window, activate the “Enabled” option, and then click on the “OK” button.
- Restart your computer.
For the reverse operation: canceling the prohibition of compression, go to Group Policy settings, in the “Prohibit compression on all NTFS volumes” window, select the “Not configured” option.
Why is this method not recommended for widespread use?
On the other side of the coin in this case, you will notice that the speed of the computer has decreased. This happens because on a compressed disk, when opening a file, the operating system must unpack it, and then perform certain actions. This very “unpacking” takes up processor performance and machine time. Therefore, even if you had to shrink the system disk, try to find an opportunity to expand it back as quickly as possible in order to return the computer to its previous performance.
How to uncompress a file or folder
The user has the ability to cancel compression of a folder or file at any time. To do this you need to follow these steps:
- Right-click on the file or folder.
- Click on “Properties” in the context menu.
- In the properties window, in the “General...” tab, click on the “Other...” button.
- In the “Advanced Attributes” window, uncheck the “Compress contents to save disk space” checkbox, and then click the “OK” button.
- Next, click on the “OK” button in the folder or file properties window.
- For folder options, select the appropriate attribute for unpacking.
How to decompress the system partition?
But what to do if the user decided to use such a tool and, unknowingly or by mistake, compressed the system partition, after which Windows stopped loading normally?
Please note right away that a system rollback, which can sometimes start automatically, will not give any result.
In this situation, you will have to boot from some removable media, after which, at the very beginning of the installation, select the recovery option, and at the stage of selecting the driver location (after determining the installed OS), in the window that appears, again select the properties of the system partition through the context menu and uncheck unfortunate point.
Discussion
The shrinking size and cost of PCs poses interesting challenges for Windows creators, and they not only come up with solutions, but continue to improve them. I will return to another side of Compact OS technology a little later, and in the next article I will tell you what else developers have invented to reduce the system footprint on the disk.
However, in the context of disk space, not all Microsoft software is at the same level of technological development. Thus, Microsoft Office looks disappointing in this regard - with the traditional package, monthly updates weighing 500-600MB have become the norm, ending up in the Installer folder, and Office 2016 Click-to-Run updates can eat up gigabytes in the ProgramData folder.
Write in the comments
:
- Windows 10 original compression status
- device model, disk capacity, CPU brand and RAM size
- current installation method for Windows 10 (upgrade/clean)
- amount of freed disk space after compression
- Windows 10 original compression status
device model, disk capacity, CPU brand and RAM size
- current installation method for Windows 10 (upgrade/clean)
- amount of freed disk space after compression
- 37953 files within 17349 directories were compressed
