- 0shared
- 0Facebook
- 0Twitter
- 0VKontakte
- 0Odnoklassniki
When installing the Windows 10 operating system, a special “System Reserved” volume is created where the bootloader and data for BitLocker hard drive encryption, if used, are placed. Typically, this partition, which ranges in size from 100 to 600 MB, is not displayed by default in Explorer, but in certain cases it may appear there.
Since it is undesirable to perform any actions with this volume without special knowledge, it is better to hide it. This is done quite easily, below we will give a couple of ways.
What is the System Reserved section?
This section contains the boot configuration database, boot manager code, the Windows Recovery Environment, and reserves space for startup files that may be required by BitLocker if BitLocker Drive Encryption is used.
When your computer boots, Windows Boot Manager starts and reads boot data from the Boot Configuration Data (BCD) store. Next, the computer loads the boot loader from the “System Reserved” section and loads Windows from your system drive.
If you want to view the contents of this partition, you need to set a letter for it in disk management. Then in Explorer, go to “Folder Options” and allow the display of hidden files, folders and drives, as well as protected operating system files. Now in Explorer you can open the “System Reserved” section, there you will see the files bootmgr, BOOTNXT, BOOTSECT.bak and the folders: Boot, Recovery, System Volume Information, $RECYCLE BIN, etc.
Background
Some time ago, one of the users came up with such a problem. They spent the nth amount on a newly purchased SSD of impressive volumes. The decision was immediately made to reinstall the operating system (Windows 7 was installed on board). However, after manipulating the rearrangement of disks and its own boot recovery, the system ended up on a disk without a System Reserved partition. The mistake was noticed late - the necessary software package was already installed, all other system settings were also completed. Everything would be fine, but with the upgrade to Windows 10, as the user himself soon realized, he began to have problems, to put it mildly. Unlike previous versions, where the System Reserved section was something like a “wedding general” rather than carrying a serious and responsible load, Windows 7 managed just fine without it in most cases. The question arose about reinstallation, which in this case would take at least 4 days. But after this question a second one arose: is it possible to create the System Reserved section manually?
I repeat, the question was rarely occupied by owners of previous versions. However, today I would like to clarify a couple of points. So let's go.
Let's start with the fact that an already installed Windows OS can be deceived. By and large, the System Reserved for MBR section is the same for almost all machines, with the exception of “a couple of lines in a couple of files.” No, copying a similar partition from a virtual machine to a partition that was just created specifically for this purpose (later) on a disk with an existing Windows is not enough. And let's start with the fact that the system should see your partition where it is prescribed to be - “in the first lines” of the HDD or SSD. Not all programs for working with partitions are capable of this. So we stock up on patience and some utilities that will simplify the task as much as possible. By the way, this option is also suitable for those who are going to move the boot partition to another disk .
How to hide Windows 10 hard drive partitions
Disk Management
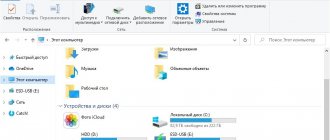
Previously, we used disk management when the computer did not see the second hard drive after connecting it. If we previously set a drive letter, we will now delete it. If the hard drive partition letter is not set, it will not be displayed in Explorer.
- Launch the disk management utility by running the command diskmgmt.msc in the Win+R .
- Now in the disk context menu, select Change drive letter or drive path...
- Then in the window that opens, click the button Delete.
After clicking the delete button, the user will have to confirm the deletion twice. Some programs using this drive letter may stop working. If this is a system-reserved disk, then there should be no problems with this.
Method 3: Using the Local Group Policy Editor utility
You can use the Local Group Policy Editor as follows:
- We press the key combination “Win + R” on the keyboard, where Win is the button with the Windows logo, located in the lower left part of the keyboard. In the window that opens, enter gpedit.msc and click “OK”.
Open the Local Group Policy Editor
Double click on the specified line
Disconnect the required disk
At the end of the process, restart the computer and check whether the disk is hidden or not.
How to remove a system-reserved disk
Having an additional disk among drives can be annoying or confusing for users. In such a situation, they have a desire to remove the disk reserved by the system. Naturally, Microsoft made sure that a computer user could not delete data from it and format it even with administrator rights.
If you want to remove a system-reserved disk from the list of drives, you must do this as follows:
- Right-click on the “Start” menu and select “Disk Management”;
- The corresponding utility will launch, which displays all the information about the computer’s hard drives, as well as connected external drives. The base disk of the operating system is most often displayed with the name “Disk 0” and is at the very top of the list (it does not matter what letter the drive is designated by);
- A configuration window will open in which you need to select the letter of the disk reserved by the system, and then click “Delete”. A pop-up window will appear asking you to confirm the deletion.
After this, the system-reserved disk will no longer be displayed in Explorer. At the same time, its operation will not be disrupted, and if it is necessary to restore the system, Windows will be able to use the information from this section.
Important: If you have multiple drives installed on your computer, you may notice that there are two (or more) system-reserved partitions. This suggests that previously the connected disks also had Windows installed, which created this partition. For proper operation of the current system, the “old reserve” is not required, and you can safely delete it, and then format the disk, creating a partition that occupies the entire volume of the drive.
Why is it necessary?
Windows reserves space on the hard drive where it stores important data, without which the operating system would stop working.
Before this, users could accidentally delete system files, after which the computer would stop functioning normally. And in order to avoid such problems, Microsoft developers decided to play it safe and limit access to system files by hiding them on a separate hidden drive.
When reinstalling the current OS, the installer independently reserves memory space and automatically creates a new partition. Even if you install Windows on a completely empty disk, “Reserved by the system” will still appear. By default it will be hidden, but after the next OS change you will be able to see it again.
But in some cases it will still appear in “My Computer”. This mainly happens when installing a pirated version and not very direct hands of the programmer who assembled it.
The user has several options:
- nothing bad will happen if the disk remains among the connected drives, if you don’t go into it and make changes, then there’s nothing to fear;
- if you are still afraid that you will accidentally erase something on the disk, just hide it;
- Well, the last thing you can do is remove it completely.
How to remove the “System Reserved” drive from File Explorer
If you have a separate disk with the specified label in Explorer, you can simply hide it from there without performing any operations on the hard disk. To do this, follow these steps:
- Launch Windows Disk Management, to do this you can press the Win + R keys and enter the command diskmgmt.msc
- In the Disk Management utility, right-click on the system-reserved partition and select “Change drive letter or drive path.”
- In the window that opens, select the letter under which this drive appears and click “Delete”. You will have to confirm the deletion of this letter twice (you will receive a message indicating that the partition is in use).
After these steps and possibly restarting the computer, the drive will no longer appear in Explorer.
Please note: if you see such a partition, but it is located not on the system physical hard drive, but on the second hard drive (that is, you actually have two of them), this means that Windows was previously installed on it and, if there are no important files there, then using the same disk management you can delete all partitions from this HDD, and then create a new one that takes up the entire size, format it and assign a letter to it - i.e. Completely delete a system-reserved volume.
Why does the reserve increase when installing components and languages?
How to remove Windows 10 screen lock or increase time
When new language packs or system components are installed in Windows, their download and installation files are stored in a backup partition so that Windows can restore them in the event of an update rollback to previous versions.
For your information! The service folder with information about old versions of Windows Windows.old can also be stored in a reserved area. If information from it is no longer needed, deleting it will help add free space.
How to hide a disk Reserved by the system
You can hide the System Reserved section only if it is visible in Windows Explorer and has a separate letter assigned to it. Without an assigned letter, you will not be able to hide the System Reserved drive. There will simply be nothing to hide, since without the letter it will not be displayed. This is the way to hide a drive - you simply need to delete the letter associated with it. It simply shouldn't be there.
- Press Win + X and select Disk Management . Disk Utility will open.
- Find System Reserved drive. Right-click on it and select Change drive letter or drive path .
- A small window will appear in which you will see the drive letter of the backup files. Click on it and then click Remove . The system will delete only the letter and leave the partition untouched. But after that it will no longer be displayed in Explorer.
Is it possible to delete?
Despite the fact that this hidden system partition does not contain the operating system loader, and if you remove it, Windows will still start normally, we strongly do not recommend doing this. This is due to the fact that in the future, when you need to do something with your local disks, for example, expand or, on the contrary, shrink one of them, due to the missing MSR (reserved), this may not be possible.
And what’s the point of deleting it if in the “Computer” window it is not displayed among the local drives (that is, it does not interfere in any way), and its size is no more than 500 megabytes, by freeing which you will gain practically nothing.