Starting from Windows Vista, the task scheduler plays a very important role in maintaining and optimizing the operating system. Today I will talk about the innovations in automatic maintenance of Windows 8 and explain what they are related to.
At one time, I examined in detail the tasks built into the Windows Vista scheduler, focusing on whether it makes any sense to disable them. In fact, it turned out that there are very few of them. I have been asked more than once by email to do the same review of the Windows 7 scheduler, but I saw no reason in this. After all, the only change was the increased number of system maintenance tasks.
However, with the release of Windows 8, there was a reason to return to this topic, especially since elements of automatic system maintenance even appeared in the control panel.
[+] Today on the program
- Control Panel
- Startup time, inactivity and PC resource usage
- Wake up PC
- Creating an XML File
- Importing a task into the scheduler and checking its operation
Control Panel
A new feature has been added to the Maintenance section of Windows Action Center: Automated Maintenance.
Do not rush to start the service manually, we will come to this later. Let's first look at its simple settings (they can also be found in the control panel on request service
).
Startup time, inactivity and PC resource usage
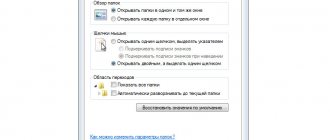
From the detailed description it is clear that the service start time does not need to be changed. It will still happen at the appropriate moment when the system goes into idle mode. However, what the control panel description doesn't tell you is that if you start interacting with the system while it's being serviced, it will stop immediately. And this is logical, since background tasks can be accompanied by intensive load on the disk and processor, thereby interfering with your work.
Windows Automatic Maintenance runs at maximum performance, using all system resources to complete it as quickly as possible.
While working in Windows, you may have noticed from the sound and indicators of the PC case that when left unattended, the system sometimes demonstrates increased processor and disk activity. But as soon as you return to work in the system, this activity immediately declines and then stops. This is background service!
Wake up PC
I'll take a closer look at the system wake-up option to clarify a few points.
- Waking up involves waking up from sleep, but not waking up from hibernation or turning on a previously turned off PC. After waking up the system and performing maintenance, Windows sends the PC back to sleep.
- Automatic maintenance takes into account differences in power policies between mobile and desktop PCs that have different initial settings. For example, one of them is to wake up on a timer to perform scheduled tasks (screenshot taken on a laptop).
It is for this reason that the wake-up for maintenance checkbox is initially unchecked on mobile systems, while on stationary systems it is checked. - If you have a powerful computer that likes to make noise from the fans and make the case shine, it is better to change the standard task startup time. Otherwise, your PC may wake you up at three in the morning.
Carrying out automatic Windows maintenance is still done using the Scheduler, but now there is a new group of tasks for this purpose.
Changing Scheduler Behavior
Now we are armed with knowledge of how thread changes occur at the code level in Windows. But how can you make the scheduler work in accordance with the task? That is, firstly, make the quantum “infinite” for the duration of the given thread’s operation, and secondly, prevent the balance manager from raising the priority of long-waiting threads above the priority of the given thread.
This requires a fix to the kernel itself. It is not so difficult. Of course, you will need to take care of recalculating the checksum using the CheckSumMappedFile and similar little things, but this is not a serious obstacle. The most important thing is to organize a convenient interface between the user task and the kernel. We remind you that this is done for a single computer.
A scheme was chosen in which the running thread itself periodically informs the kernel about its “chosenness”. Upon receiving this message, the kernel extends the execution quantum and limits the balance manager from raising priorities to no higher than the specified one. As soon as (after 20-30 minutes) the thread terminates, it stops sending messages to the kernel. Therefore, the OS again starts executing the code fragment when the quantum is exhausted (for other threads). At this point, the balance manager will return to normal operation. Thus, after the desired thread terminates, the kernel automatically returns to normal operation.
First you need to find a place to place additional commands. There are many such places, for example, commands can be written instead of this long diagnostic text, which is unlikely to be needed:
555390 E8 CE DC EA FF C9 C2 04-00 90 2A 2A 2A 2A 2A 2A ..Р****** 5553A0 2A 2A 2A 2A 2A 2A 2A 2A-2A 2A 2A 2A 2A 2A 2A 2A ***** *********** 5553B0 2A 2A 2A 2A 2A 2A 2A 2A-2A 2A 2A 2A 2A 2A 2A 2A **************** 5553C0 2A 2A 2A 2A 2A 2A 2A 2A-2A 2A 2A 2A 2A 2A 2A 2A **************** 5553D0 2A 2A 2A 2A 2A 2A 2A 2A-2A 2A 2A 2A 2A 2A 2A 2A *** ************* 5553E0 2A 2A 2A 2A 2A 2A 2A 2A-2A 0A 2A 0A 2A 20 54 68 ************.*.* Th 5553F0 69 73 20 69 73 20 74 68-65 20 73 74 72 69 6E 67 is the string 555400 20 79 6F 75 20 61 64 64-20 74 6F 20 79 6F 75 72 you add to your 555410 20 63 68 65 63 6B 69 6E-20 64 65 73 63 72 69 70 checkin descrip 555420 74 69 6F 6E 0A 2A 20 44-72 69 76 65 72 20 56 65 tion.* Driver Ve 555430 72 69 66 69 65 72 3A 20-45 6 E 61 62 6C 65 64 20 rifier: Enabled 555440 66 6F 72 20 25 5A 20 6F-6E 20 42 75 69 6C 64 20 for %Z on Build 555450 25 6C 64 20 25 77 5A 0A-2A 0A 2A 2A 2A 2A 2A 2A %ld %wZ.* .****** 555460 2A 2A 2A 2A 2A 2A 2A 2A-2A 2A 2A 2A 2A 2A 2A 2A **************** 555470 2A 2A 2A 2A 2A 2A 2A 2A -2A 2A 2A 2A 2A 2A 2A 2A **************** 555480 2A 2A 2A 2A 2A 2A 2A 2A-2A 2A 2A 2A 2A 2A 2A 2A ******* ********* 555490 2A 2A 2A 2A 2A 2A 2A 2A-2A 2A 2A 2A 2A 2A 2A 2A **************** 5554A0 2A 2A 2A 2A 2A 2A 2A 2A-2A 0A 00 CC CC CC CC CC *********..
The message is transmitted to the kernel by executing a privileged command, which will trigger an INT 0D “general protection violation” exception. In this case, a special value is first written in one of the registers, which will allow the kernel to distinguish this case from all others. By the way, the kernel itself also uses a similar technique, for example, in the INT 2A time request interface, you can write special values F0F0F0F0 or F0F0F0F1 , which will make the kernel react to INT 2A differently.
To start the exception handler command INT 0D in the kernel at address 409150 , you can “compact” it a little and add a call to a new subroutine (located at address 5553A0 in place of the text), without moving the rest of the handler code:
;—- ORIGINAL EXCEPTION HANDLER “GENERAL PROTECTION VIOLATION” —- 409150 F744240C00000200 TEST D PTR [ESP]+0C,00020000 409158 0F843A010000 JJE 409298 40915E 83EC64 SUB ESP, 0064 409161 66C74424660000 MOV W PTR [ESP]+66.0000 409168 895C245C MOV [ESP]+005C,EBX 40916C 89442444 MOV [ESP]+0044,EAX … ;—- ADVANCED “GENERAL PROTECTION VIOLATION” EXCEPTION HANDLELER —- 409150 E84BC21400 CALL 5553A0 ; INSERTED PROCESSING CALL 409155 F644240E02 TEST B PTR [ESP]+000E,02 40915A 0F8438010000 JJE 409298 409160 83EC64 SUB ESP,0064 409163 895C245C MOV [ESP]+00 5C,EBX 409167 89442444 MOV [ESP]+0044,EAX 40916B 33C0 XOR EAX, EAX 40916D 6689442466 MOV [ESP]+0066,AX …
As you can see, if necessary, even optimized code can be “compressed” and additional commands inserted.
And in place of the diagnostic text are the main commands for fixing the kernel:
;—- SIGNATURE CHECK —- 5553A0 81FE44445555 CMP ESI,55554444 5553A6 7401 JZ 5553A9 5553A8 C3 RET ;—- MESSAGE PROCESSING — 5553A9 1E PUSH DS 5553AA 0FA0 PUSH FS 5553AC 66BB3000 MOV BX,0030 5553B0 66B82300 MOV AX,0023 5553B4 8EE3 MOV FS ,BX 5553B6 8ED8 MOV DS,AX ;—- EXTEND THE QUANTUM OF WORK OF THE CURRENT FLOW —— 5553B8 64A124010000 FS: MOV EAX,[00000124] 5553BE C6406F7F MOV B PTR [EAX]+006F,7F ;—— SET MA MAXIMUM PRIORITY FOR BALANCE MANAGER - - 5553C2 8A4833 MOV CL,[EAX]+0033 5553C5 E800000000 CALL 5553CA 5553CA 5B POP EBX 5553CB 884B3A MOV [EBX]+003A,CL 5553CE 0FA1 POP FS 5553D0 1F POP DS ;— - RETURNING FROM THE EXCEPTION TO THE PROBLEM —- 5553D1 FF442408 INC D PTR [ESP]+0008 5553D5 FF442408 INC D PTR [ESP]+0008 5553D9 83C408 ADD ESP,0008 5553DC CF IRET
An additional exception handler checks the signature ESI=55554444 and performs the following actions:
— sets the maximum counter value 127 for the current thread;
— takes the priority of the current thread and inserts it as a constant directly inside the command through which control passes in the balance manager. To find the relative address of the instruction being corrected, a dummy procedure call is made;
- skips the command that caused the exception, pops the return address and error code from the stack, and returns directly to the user's task.
In fact, Windows does not "feel" such an exception at all, since control is immediately returned to the task, bypassing the normal exception handling paths. In the program, it is enough to throw an exception with such a value in ESI at least once every 2-3 seconds, and then the internal flow counter at address 6F will never reach zero. This means that the 9AC variable remains zero and Windows does not look for a replacement for the current thread.
All that remains is to fix the balance manager. It adds commands that check the priority of the waiting thread. If the priority is lower, the dispatcher acts as if the thread is not yet “old”:
… 410348 8D4EA0 LEA ECX,[ESI]+FFA0 41034B 3B4168 CMP EAX,[ECX]+0068 41034E E998501400 JMP 5553FB 410353 90 NOP … ;—- ACCOUNTING FOR THE REQUIRED PRIORITY IN THE BALANCE MANAGER —- 5 553FB 0F8653AFEBFF JJB 410354 555401 80793310 CMP B PTR [ ECX]+0033.10 555405 0F8549AFEBFF JJBE 410354 55540B E92904EFFF JMP 445839
Initially, the priority is compared to the constant 16, which the threads being checked cannot have, and therefore the check does not affect the normal operation of the dispatcher. But when messages from the “selected” thread begin to arrive, the constant 16 directly in the check command is replaced by the priority value of the specified thread. Now the dispatcher no longer tries to set priority 15 to all lower-priority threads.
All that is required is to return the constant 16 to its place after the given thread has ended. In this case, the OS again begins to search for threads based on the exhaustion of the quantum, and recovery commands can be added to this place:
… 40592A E890C10000 CALL 411ABF 40592F E9986D0400 JMP 5553DE … ;—- RESTORING THE NORMAL BALANCE MANAGER MODE —- 5553DE 50 PUSH EAX 5553DF E800000000 CALL 5553E4 5 553E4 58 POP EAX 5553E5 C6402010 MOV B PTR [EAX]+0020.10 5553E9 58 POP EAX 5553EA 0BC0 OR EAX,EAX 5553EC 0F85EF04EBFF JJNE 4058D1 5553F2 C3 RET
All of the listed code insertions are written continuously in place of the diagnostic text and are divided here only for a more clear explanation of their operation.
Scheduled Jobs
In Windows 8/8.1, the scheduler in programs
and go to Task Scheduler Library - Microsoft - Windows -
TaskScheduler .
In Windows 10 , these tasks are hidden from the scheduler to prevent people from interfering with OS maintenance by disabling tasks. However, they are all in the registry, so particularly talented users will be able to prevent service if they wish.
HKEY_LOCAL_MACHINE\SOFTWARE\Microsoft\Windows NT\CurrentVersion\Schedule\TaskCache\Tree\Microsoft\Windows\TaskScheduler
At the bottom of the list you see the same Regular Maintenance
,
the daily
start time of which can be configured in the control panel. Please note that in the scheduler you can change the launch schedule, for example, to weekly. However, it is not at all necessary to do this, because in the end everything comes down to the inaction of the PC.
If you run the Manual Maintenance
, the system will perform the same set of maintenance tasks as when the job was scheduled to run. The difference is that your interaction with the system will not interrupt the optimization process, since you started it yourself.
Disabled Idle Maintenance
What’s interesting is that the system itself turns it on when performing manual or automatic maintenance. However, I was unable to find out any other details about him.
Maintenance Configurator Job
, judging by several triggers, determines the list of tasks serving the system.
Create a simple task
Now let's see how to create a simple task in Task Scheduler. This is the easiest way for beginners and does not require any special skills. So, select the “Create a simple task” item.
On the first screen, you will need to enter a task name and, optionally, a description.
The next item is to select when the task will be executed: you can run it by time, when you log into Windows or turn on the computer, or when an event occurs in the system. When you select one of the items, you will also be asked to set the execution time and other details.
And the last step is to choose what action will be performed - launching the program (you can add arguments to it), displaying a message or sending an email.
What tasks are performed to maintain the system?
You can perform maintenance manually from the Control Panel or with the MSchedExe.exe Start and see what happens. For complete happiness, first open the task manager, and at the same time the resource monitor on the “Disk” tab.
So, the first thing I did was see the processor activity of the MsMpEng.exe process. Opening Windows Defender, I made sure that the built-in antivirus was performing a quick scan. At the same time, the external drive light began to blink, and the resource monitor indicated activity in the images folder. My suspicion that this was the work of file history was quickly confirmed by the Process Monitor filter.
In any case, you will see the CPU consumption of the system
, since the service is performed on behalf of the system. In particular, maintenance also includes the following tasks:
- Automatically create a registry backup
- Transfer of system usage data under the CEIP program
- Submitting problem reports
- Disk optimization and defragmentation
- Search index update
- System Boot Optimization
- Creating a System Restore Point
I deliberately did not list all the tasks, since you can figure out the list yourself! To do this, go through the scheduler folders in the Windows
, paying attention to the time the job was last run.
If the job was run shortly after running Manual Maintenance
, it is included in the general list of maintenance tasks. The figure above shows several scheduler jobs that the system executed immediately after running a single maintenance job.
However, all these tasks are not necessarily completed in full. If you are not participating in CEIP or there are no new problem reports, then there is nothing to submit. In the same way, if there is no need to create a restore point, it will not be created.
Removing a task from the Task Scheduler
If necessary, the user can delete a task that has become unnecessary.
- In the main window of the Task Scheduler, in the “Active tasks” parameter, find the required task.
- Select the task, double-click on the task with the left mouse button.
- Information about the task being performed will open in the Scheduler window.
- In the “Actions” section, click on the “Delete” button.
In the warning window, agree to delete the task.
What is the essence of the change in automatic maintenance?
The key difference in automatic maintenance between Windows 7 and Windows 8+ is the optimization of energy consumption by the operating system!
Previously, many maintenance tasks were solely scheduled and could run while running on battery power, but now they are tied to a single task that runs during periods of inactivity only when running on AC power and runs as quickly as possible.
This does not mean that all scheduler jobs are now only executed as part of automatic maintenance, since they can have multiple triggers defined. For example, a system restore point must be created when installing updates and drivers. However, the absence of a trigger in a job indicates that it is being executed solely as part of automated maintenance.
The picture above illustrates the same task of backing up the registry, Dr. Watson’s story about which helped out many people who had lost hope of restoring the system.
In PowerShell
PowerShell , which provides a number of cmdlets designed specifically for interacting with tasks scheduled in taskschd.msc, can serve similar purposes
The command to delete a task looks like this:
Unregister-ScheduledTask -TaskName “task-name” -Confirm:$false
If the task is not located in the root, the line -TaskPath “path-to-folder” , the path is relative, the backslashes on the right and left do not need to be removed, see the screenshot below.
Why does Microsoft need this?
Sales of desktop computers are steadily declining, giving way to mobile systems, and all analytical agencies unanimously predict the continuation of this trend. Thus, Forester Research believes that in the next three years the already low share of desktop PC sales will further decrease due to the growing popularity of tablets, ultimately amounting to only 18%.
Obviously, in this situation, the battery life of the device comes to the fore, and the efficiency of the operating system in this aspect is very important. Microsoft has talked a lot about the improved power consumption of Windows 8 compared to Windows 7, and consolidating background OS maintenance tasks is one important step in this direction.
At the same time, Microsoft is not limited to optimizing background Windows tasks, giving developers, IT specialists and end users the opportunity to add their task to automatic system maintenance. Next, I'll show you how you can do this without much effort.
How to manage jobs on local and remote systems?
Jobs are managed on Windows OS thanks to a special Microsoft Management Console snap-in - mmc.exe. In order to launch it, go to the control panel, find the “Administration” item, then “Computer Management” and select “Task Scheduler”. Or we call the “Run” utility using the key combination “win+r” and enter the command “taskschd.msc”.
When a new window opens, on the left side you will see a list of tasks that will be ordered according to their purpose. A kind of console tree of folders.
In the middle of the window you see information regarding the status of these jobs and their properties.
The right side will display a menu of actions that can be performed with the specified tasks. The tasks that appear by default are specific to the local computer.
In order to start working with tasks on a remote computer, right-click on the item at the top of the “Task Scheduler (local)” window and select “connect to another computer” from the menu. In the window that opens next, you will need to select the “other computer” switch and enter the name or IP address of the PC or laptop you need.
In order for you to be able to manage jobs on another computer, you must have administrator rights. If the current user does not have such rights, then you need to connect to another computer using a different account, and enable the “Connect as another user” mode.
Also, do not forget that any remote connection requires firewall permission.
One of the main factors for remote work with scheduled tasks is the compliance of operating system versions. For example, with Windows 7 you will not be able to connect to a computer on which Ten will be installed.
In order to start working with a task, you need to right-click on it in the main panel and select one of the commands in the context menu:
- Delete—completely delete the task;
- Disable—temporarily disable the task;
- Properties—allows you to view or edit a job property;
- Export—Export the job to a file, the data from which can be imported on another computer. The Windows 8 and Windows Server 2012 operating systems have the same job architecture as Windows 7 and Windows Server 2008 R2, but the job architecture of earlier versions of Windows operating systems has a different structure. When exporting jobs, you can specify the operating system with which the job can be used using the Configure for option on the General tab of the job's properties window.
- Run—runs the task;
- End - If the job is running, it can be completed.
All tasks that are created by the user or any other programs can be easily modified or even deleted without any problems for the operating system itself. But it is better not to touch those tasks that the operating system itself creates, since such tasks can affect the further operation of the OS. In order to highlight system tasks from the rest, you need to check the “View” menu next to the “Show hidden tasks” item.
Creating your own task to be performed as part of automatic maintenance
Do you have any Windows maintenance tasks that rely on the scheduler or logon scripts? If they are not interactive, it may make sense to put them into automatic maintenance mode in the background. Examples of such tasks include:
- disk cleanup using system tools
- deleting temporary files using a scheduled script
- creating a backup system image using the recimg utility
All automated maintenance tasks are performed in stealth mode. For example, the batch file window will not appear.
Creating an XML File
The Windows Scheduler GUI does not provide the ability to include your job in automatic maintenance. However, you can create an XML file that describes the task and import it into the scheduler. In the example file below, you only need to change a few settings.
Example Automatic Maintenance XML File
2011-09-01T19:35:38 Vadim LeastPrivilege NT AUTHORITY\SYSTEM IgnoreNew true true true false false P1D P7D true true false false false true false P3D 7 cmd /c echo %date% %time% >> "%windir%\temp \test.txt"
The file contains my brief comments, but I will describe the key points below.
MaintenanceSettings node
Starting in Windows 8, the job syntax supports a MaintenanceSettings
, responsible for automatic maintenance.
P1D P7D
There are two key parameters here.
Period
This is the frequency at which your job is performed as part of regular automated maintenance. For example, P1D
means the job will run daily and
P30D
will run once a month.
Deadline
This is the deadline for completing the task. For example, P7D
means that the task must be performed at least once a week.
If the job has never been run during regular maintenance, the system will run it the first time the system is idle. If the PC is used in a mode that does not allow the system to remain idle, emergency maintenance comes into play. In this case, the user receives a message that it is running to explain the load on the disk and processor.
Emergency maintenance performs all tasks included in the automatic maintenance list. However, the missed task is always completed first.
Additional settings
If you need to configure additional parameters for a scheduled task, right-click on the created task in the “Task Scheduler Library” section located in the Task Scheduler and select Properties. If additional settings will change immediately after creating a task, then in the last window when creating a task (Figure 11 in the previous chapter), you need to check the box “Open the Properties window for this task after clicking the Finish button” and click Finish. Any of these sequences of actions will lead to a window opening, an example of which is shown in Figure 12.
Figure 12.
This window contains several tabs with parameters for fine-tuning the task launch schedule. All settings located on them will be discussed in detail below. The first tab, Task, the appearance of which is shown in Figure 12, contains basic information about the scheduled task. This:
- Name - The name of the task under which it is displayed in the Task Scheduler.
- Placement - The location of the task in the task scheduler tree structure. In this case, “\” means that the task is located at the root of the tree.
- Author - The name of the user who created the task.
- Description — Text description of the task.
- When performing a task, use the following user account - User name under which the task will be executed.
- Execute only for logged-in users - If you check this checkbox, this task will be performed only if there is a logged-in user.
- Execute for all users - This task will be executed regardless of the presence of a logged-in user.
- Execute with highest rights - Administrator rights will be granted to complete the task.
The appearance of the next tab “Triggers” is shown in Figure 13.
Figure 13.
This tab provides all the options for managing the launch schedule of a scheduled task, which are much broader than those that could be configured in the task creation wizard and discussed in the previous chapter. It allows you to create a new trigger to launch or edit an existing trigger. By selecting an existing trigger and clicking the “Edit” button, advanced trigger settings will open, which can be seen in Figure 14.
Figure 14.
Here you can see the following settings:
- Start task - The condition under which the task will start. This setting has already been discussed in the previous chapter.
- Parameters — Launch schedule type. All types were discussed in the previous chapter, so we will not dwell on them.
- Postpone task for (arbitrary delay) - Allows you to enable a delay in the execution of a task, without changing its launch schedule.
- Repeat the task every... for... - Using these settings, you can configure the task to repeat within a specified time interval. For example, you can run a task every 30 minutes for 8 hours or until a certain time. A very convenient option for solving certain event monitoring problems. For example, sometimes you need to check for the presence of a file in a certain folder every five minutes during the working day, and if it appears there, then run a script that will perform certain actions on the file.
- Stop task after —Forcibly terminates a process started by the Task Scheduler. For example, in the Execute until field the time is 18:00. If the job is very large and takes half an hour to complete, then starting it at 17:55 will cause the job to actually run until 18:25. If this state of affairs is undesirable, then you need to check the Stop task checkbox. In this case, the task will be terminated at 18:00 no matter what.
- Validity period - The date interval during which the task will be active.
- Enabled - Allows you to enable or disable this trigger.
The “Actions” tab shows a list of tasks that will be performed when the previously discussed triggers are activated. Its appearance is shown in Figure 15 below.
Figure 15.
On this tab, you can set additional actions that will be performed when the task is activated - in contrast to the task creation window, where you could only set one single action. When you select to create or change an action, a window will appear with the previously discussed actions for selecting the program to be launched, so let’s move on to the next tab “Conditions”, which is shown in Figure 16.
Figure 16.
This contains additional task conditions, such as:
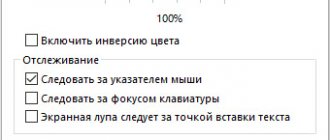
- Run the task when the computer is idle - The task will be executed only when the computer is idle; it is useful for planning the launch of resource-intensive tasks that take up all the processor time during their execution, loading it at 100%.
- Run only when powered by the mains - If the device on which this task is configured switches to battery power (for example, a laptop or a server with a connected UPS), then with this option enabled, the task will not be executed.
- Wake up the computer to perform a task - When you enable this option, Task Scheduler will wake the computer from sleep mode to perform a given task.
- Run only when connected to the next network - When you activate this parameter and select the desired network connection, the task will be executed only if this connection is active.
The Options tab is shown in Figure 17.
Figure 17.
- Run a task immediately if a scheduled launch is missed - If the task was not completed on time, it will be executed as soon as possible (for example, if the computer was turned off at that time, the task will begin to execute immediately when it is turned on).
- If execution fails, restart after - If the task fails, you can specify the time interval after which it will be restarted. You can also set the number of retries to run the task.
- Stop a task that is running longer than that - You can forcefully stop a task if the task is running for longer than a specified time.
- Force a task to stop if it is not terminated upon request - If the task does not stop, it will be terminated forcefully.
- If the task is not scheduled to be repeated, delete after — Allows you to configure automatic deletion of a “one-time” task after some time.