Fonts are not added directly to Word: if you try to drag additional content (OTF or TTF format files) into a text editor window, then instead of at least some instructions or information, only a thematic icon of the downloaded file with the name and information about the extension will appear.
New fonts are also not added through Word’s “Settings”: similar menu items are simply not provided in the text editor options. We have to act differently - thematic content is integrated into Microsoft Office directly through the operating system. How exactly - details below.
Where to find and download new fonts
By default, Microsoft's text editor supports just over 200 designer fonts already integrated into Word and found in the Windows operating system. And, although the basic collection offered by the developers is quite extensive, problems associated with the design of headings and text still arise - sometimes there is a lack of experimental and even provocative modifications that can add individuality to each word.
Safe Resources
Before adding new fonts to the system, it is recommended to select a suitable source in advance - a trusted site with a built-in antivirus with direct links to downloaded files. Trusting randomly found resources is risky - there is a high probability of encountering malicious software.
Therefore, it doesn’t hurt to check TTF or OTF format files downloaded from the network in advance on the VirusTotal service page.
If you need to save time, it is much easier to immediately seek help from the following safe resources:
DaFont . A library of freely distributed fonts adapted for computer operating systems Windows and MacOS and divided into thematic categories (“Gothic”, “Techno”, “Calligraphy”).
The choice is quite large, but the Cyrillic alphabet is only partially supported. In 99% of cases, the site presents only kits intended for preparing text in English.
Font Squirrel . A well-known source of fonts for designers, marketers and those who often prepare text for brochures, leaflets and advertising creatives.
The developers divided the proposed content into dozens of categories, and at the same time sorted it depending on the supported languages.
The collection of fonts adapted for the Cyrillic alphabet (or specifically the Russian language) exceeds more than 150 positions with an exclusive style and an interesting combination of graphic elements. As in the case of DaFont, files are uploaded in free mode and without restrictions.
Free Fonts . An interactive platform with fonts selected depending on the required style, preferred style, thematic collection and even a random generation system.
Like its competitors, the content is distributed free of charge - even registration is not required. Difficulties will arise again only with the Cyrillic alphabet - only a small part of the Free Fonts collection is intended for visitors from the CIS countries.
1001 Free Fonts . An almost legendary library of fonts, divided into categories, supporting Cyrillic and Latin, and updated by developers with enviable regularity (new sets appear, including from third-party artists and enthusiasts).
The content is available for download with restrictions: those who intend to make money from designed texts (advertising or printing) will have to pay up to $20 for access to the license agreement. Personal use is not limited.
Junior 3D . Not too diverse, but a Cyrillic collection of fonts, divided into categories and supplied in several formats and without restrictions.
The service doesn’t have too many interesting features - sorting by style and a special “Lessons” section, which includes a whole collection of additional instructions.
Regardless of the site chosen, fonts in 99% of cases are downloaded in archives and support a whole collection of actions that are available even without prior unpacking.
Firstly, the fonts are available for full preview (Windows will display the famous phrase “Eat these soft French rolls and drink tea,” containing all the letters of the Russian alphabet) and comparison with those already available in the system.
And secondly, OTF and TFT files are instantly integrated into the system using the right mouse button and the “Install for all users” button (in a similar scenario, fonts are added on computers with MacOS).
After adding new content, you won’t need to restart your computer—everything will be immediately available for full interaction.
What else is important to know
In addition to the functions already discussed, there are several more worthy of attention.
- Bulleted and numbered lists. They help visually structure transfers, descriptions of stages, contract clauses, etc. It is possible to build multi-level lists, that is, using sub-items. The style of markers, as well as the design and type of numbering, can be changed.
- Text alignment. Aligns text within a paragraph, respectively, to the left or right, center, or to the width of the page. Most often, width alignment is used, then the text looks neat and there is no “torn” edge. Right alignment may be needed for statement headers or signatures.
- Collection of ready-made styles. Word has ready-made templates for formatting headings, highlights, and quotes. You can create your own styles.
- Tool for writing formulas. Word allows you to write any formulas using the built-in powerful editor. In a special field you can insert fractions, indices, integrals and other functions, as well as mathematical symbols.
- Inserting symbols. Allows you to insert special characters and symbols that are not on the keyboard. These are phonetic signs, currency symbols, arrows, technical signs, as well as letters of the alphabets.
- Headers and footers. This is the same content at the top and/or bottom of the document pages. You can also automatically number pages by choosing the format and numbering location you want.
How to install a new font if you have Windows
In addition to the standard method of adding fonts, there is also an alternative one. A little more confusing, but offering additional benefits: there will be a chance to adjust the collection of already available fonts and hide unnecessary ones. And you have to act in accordance with the following algorithm:
Find, download and unpack the archive with fonts, preparing OTF and TTF format files for further interaction;
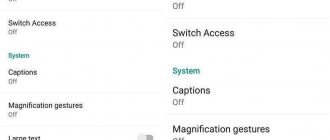
Launch “Control Panel” via search in the “Start” menu and in the upper right part of the interface activate “Small icons”.
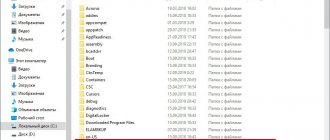
The Control Panel will immediately begin displaying additional categories for you to interact with, including Fonts.
The selected menu item unlocks access to the library of fonts loaded into the operating system, adapted for Cyrillic and Latin, as well as Arabic and some European languages.
The last step is to transfer the fonts downloaded from the network using the hotkeys Ctrl + C or Ctrl + V.
As in standard mode (installation via the context menu), there is no need to restart the computer - new content is activated automatically.
Which font integration method to choose depends on the desired result. The option with the “Control Panel” is more profitable from the point of view of content management: unnecessary templates are hidden, transferred to the trash can, or sorted depending on their significance or the presence of Cyrillic support.
How to find the installed font in Word
Fonts added to the operating system immediately become available in Word, Excel, PowerPoint and third-party compatible software, including Figma and even Photoshop.
Specifically, office programs from Microsoft do not even offer additional insight into the details - you just need to find the new font on the “Main” quick access panel in the drop-down list.
If you have problems with a manual search, then an alternative option is provided: calling the “Font” context menu and going to the search line.
The selected settings are automatically applied to the selected text. But, if the words have not changed their style, then the problem is related to the same language support: the downloaded content must support the Cyrillic alphabet.
Embedding a font into a Word document
The key feature of Word, associated with “tightening up” the operating system settings (including fonts), upon closer examination also has disadvantages. We are talking about automatically resetting the design in documents if the corresponding content sets are not loaded on another computer. Instead of an exclusive typeface, the already boring Times New Roman will appear.
And, although the restriction has been in effect since older versions of Word, starting from 2003-2007, an additional option appeared in the “Settings” of the text editor that allows you to literally embed the missing content into the document. It is enough to repeat the following steps:
Call the “File” menu from the quick access panel and go down to the “Options” section, located in the list on the left;
Go to the “Saving” tab and in the menu that appears, check the box next to “Embed fonts into file”;
Additionally, Word will offer to configure the integration method - whether it is necessary to completely embed OTF or TTF files, or to replace certain fragments to save space.
After these steps, the saved documents will take up a little more than 40-50 kilobytes, but they will not lose their design after transferring the files to the hard drives of third-party computers and even mobile platforms.
What operations are used
Creating a readable text requires elaboration not only of its essence and literacy, but also of its appearance. Along with typos and errors, loose words or lines can be off-putting. When designing a document, several types of formatting operations are performed. They can be used both for the entire document and for a specific paragraph or passage; for this, the required part of the text must be highlighted. What operations are used to format text?
How to add a new font in Word Online
The online version of Microsoft's text editor does not support third-party content: it does not allow you to download scripts, document templates, or integrate additional fonts.
The restriction appeared a long time ago and it is unlikely that the developers will at least somehow try to influence the situation. Therefore, for a new design for texts, you will have to turn to third-party resources for help - the Canva graphic editor, the Google Docs service, or office programs with expanded support for unofficial content.
Application
Downloading the fonts was not difficult, using them was even easier. To apply a new writing style, open the list of formats on the main tab and select the required one. To make searching easier, you can use handwriting.
How to make text size larger than 72 in Word
To change the font size and set its maximum parameters, you need to write text, select it and set it to 72 units. As you can see, the font does not change further.
To increase the size of the written letters, click on the “Increase size” button on the top panel. The maximum size is practically unlimited. There is no need to launch additional applications.
How to make a default style in Word
To avoid changing the established writing style, you should set the necessary parameters, right-click on the “Normal” style and select the line “Update according to the specified parameters.”
How to make text large in Word
You can increase the size of the written text on the top panel. By default, it is set the same for all documents. Open the main tab and select the desired indicators in the “Size” section.
How to make text size less than 8 in Word
In Word 2008 and other versions, you can reduce the text size in the same way as increase it, only by selecting the “Reduce” button on the main panel.
How to make bold font in Word
To make a drawing font or any other bold, you should select the required fragment, go to the main tab and select the icon with the image of the letter “F”.
How to make a small font in Word
The size of the text does not depend on the writing style. Using any type of text, you can set it to an individual size. To do this, you need to select the desired format, and then set its size in the adjacent window.
How to change the font in Word
You can change the type of text writing with one click, regardless of the version of the text editor. To do this, call the pop-up list on the top panel and select the required option.
The presented instructions and videos can be used on Windows 10 and other versions of the operating system. The version of the text editor also does not matter. The presented illustrations will help you quickly understand the program interface and spend a minimum of time mastering a new function.
How to Add Fonts to Android Devices
The Android mobile operating system recently allowed semi-automatic recognition of TTF and OTF format files and integrated additional content into third-party software. But after several updates the rules have changed and we have to act differently:
- Activate Root rights ( KingRoot FX File Explorer file manager to interact with fonts;
- OTF or TTF format files found on internal or external memory must be viewed and copied through a special context menu;
- Afterwards, you need to use the MS Word icon and, using Root rights, run the “data research” check (the editor will display an additional menu with settings) with access to the “Fonts” section;
- The last step is to move the copied file to the directory that appears and restart MS Word.
Results
Microsoft experts are diligently updating the collection of functions and tools provided by Word. Fonts are no exception: even after the transition from version 2016 to 2022, new sets appeared in the menu. Despite the efforts of the developers, the choice of those who work with text is not limited; they are allowed to install new fonts in Word from third-party sources. They are not added specifically to the editor, but are built in, and therefore are available in Excel, as well as third-party software. You just have to figure out a couple of steps, and sometimes you have to restart the computer for the changes to take effect. Problems are rare - as practice suggests, specialists from Microsoft have long ago perfected the entire procedure.
How to Add New Fonts on Mac
As in the case of Windows, fonts on MacOS are integrated into the system through the context menu: just call up the context menu by double-clicking on the file and select “Install” from the list that appears. The files are instantly integrated into the system and will become available for use in Microsoft office programs.
There is also an alternative option:
- Launch the Windows Office Compatible service through Finder, which allows you to view information about an already available collection of content and hide unnecessary items;
- The list that appears, in addition to editing, also supports loading third-party OTF and TTF files - you just need to drag and drop the missing information into the interface. The settings take effect immediately.
If in the future the files prepared in Word are to be transferred to someone, then, as on computers with Windows, you will have to look into the editor settings and check the box associated with “embedding fonts” directly into the document.