In order for the system to plan and automatically perform all these many operations, there is a standard tool called the task scheduler.
The task scheduler prepares a number of tasks in advance and starts their execution at a certain period of time. Also, the task scheduler can adjust to an event that has already been launched. Defined tasks and techniques that enable execution of command line scripts, WSH scripts, PowerShell cmdlers, or applications. Unlike previous versions of Windows, Windows Vista, 7, 8 contain an extensive library of pre-configured jobs.
The combination of all these tasks performs a wide range of operations that are necessary for the operating system to maintain its operating state. In addition, the task scheduler in Windows 10 is necessary for the proper operation of components that are not disabled by standard OS tools.
All tasks in the operating system are executed according to a specific schedule. The task scheduler service is responsible for this. This service performs its work under the guidance of the local system account, but it is also possible to configure tasks to run in the context of specific user accounts. You just need to specify a username and password when creating a task.
The task scheduler is so universal that you can create a task not only for a local computer, but also for a remote one. The main thing is that you have special rights to manage it.
Using the appropriate wizard, the process of creating scheduler tasks is greatly simplified.
What are the planned tasks?
Despite the fact that scheduled tasks do a huge amount of work, there are only two main types of them: standard tasks and hidden ones.
Standard jobs automate routine tasks required to maintain a computer system. The user can always view these tasks and, if necessary, make changes.
Hidden tasks are necessary to automate the execution of special system tasks. In standard viewing mode, you will not be able to see these tasks. It is also not recommended to make changes to such tasks. This can be done, but only if you know for sure that you will not harm the operating system.
Job properties
Each scheduler task has its own properties. The first of them is Trigger. This property specifies the start and end of execution for a scheduled job. A task can start its work according to a schedule or based on certain events. For example, when a user logs into the system, when starting a computer or laptop, when connecting or disconnecting a terminal session. Also, the start of a task can be registered with a specific code in the system log.
The next property is action. It defines the operation that the job set to run should perform. The executor can be an application or a written script.
Condition is also considered one of the properties. This parameter is responsible for the conditions that affect the start or stop of a running job.
For example, you can set a condition under which the task will be executed only if there is a network connection. Conditions allow the user to start, stop, and restart a job.
And, the last condition is a parameter. This condition is necessary in order to enter additional parameters that will affect the execution of the scheduled task. For example, restarting after a failure or incorrect operation, executing a task that did not happen earlier, the behavior of a task when another task is already running.
The settings and settings for scheduled jobs are located in the registry key. They can be found at this path: HKEY_LOCAL_MACHINE\SOFTWARE\Microsoft\Windows NT\CurrentVersion\Schedule.
The results after the completion of scheduled tasks are recorded in the log. Logging can be disabled. To do this, you need to select the “action” item in the task scheduler management console and here disable or enable logging of all tasks.
In the Computer Management utility
The task scheduler is also present in the system as an element of the built-in Computer Management utility.
- Autoload software. Cleaning Windows startup
- Launch computer management; for this, for example, you can press the Win+R keys, enter compmgmt.msc and press Enter.
- In the left pane, under Utilities, select Task Scheduler.
The Task Scheduler will open directly in the Computer Management window.
How to manage jobs on local and remote systems?
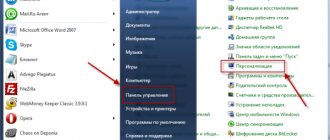
Jobs are managed on Windows OS thanks to a special Microsoft Management Console snap-in - mmc.exe. In order to launch it, go to the control panel, find the “Administration” item, then “Computer Management” and select “Task Scheduler”. Or we call the “Run” utility using the key combination “win+r” and enter the command “taskschd.msc”.
When a new window opens, on the left side you will see a list of tasks that will be ordered according to their purpose. A kind of console tree of folders.
In the middle of the window you see information regarding the status of these jobs and their properties.
The right side will display a menu of actions that can be performed with the specified tasks. The tasks that appear by default are specific to the local computer.
In order to start working with tasks on a remote computer, right-click on the item at the top of the “Task Scheduler (local)” window and select “connect to another computer” from the menu. In the window that opens next, you will need to select the “other computer” switch and enter the name or IP address of the PC or laptop you need.
In order for you to be able to manage jobs on another computer, you must have administrator rights. If the current user does not have such rights, then you need to connect to another computer using a different account, and enable the “Connect as another user” mode.
Also, do not forget that any remote connection requires firewall permission.
One of the main factors for remote work with scheduled tasks is the compliance of operating system versions. For example, with Windows 7 you will not be able to connect to a computer on which Ten will be installed.
In order to start working with a task, you need to right-click on it in the main panel and select one of the commands in the context menu:
- Delete—completely delete the task;
- Disable—temporarily disable the task;
- Properties—allows you to view or edit a job property;
- Export—Export the job to a file, the data from which can be imported on another computer. The Windows 8 and Windows Server 2012 operating systems have the same job architecture as Windows 7 and Windows Server 2008 R2, but the job architecture of earlier versions of Windows operating systems has a different structure. When exporting jobs, you can specify the operating system with which the job can be used using the Configure for option on the General tab of the job's properties window.
- Run—runs the task;
- End - If the job is running, it can be completed.
All tasks that are created by the user or any other programs can be easily modified or even deleted without any problems for the operating system itself. But it is better not to touch those tasks that the operating system itself creates, since such tasks can affect the further operation of the OS. In order to highlight system tasks from the rest, you need to check the “View” menu next to the “Show hidden tasks” item.
Using Search
All recent versions of Windows have a search: on the taskbar in Windows 10, in the Start menu in Windows 7, and in a separate panel in Windows 8 or 8.1 (the panel can be opened with the Win+S keys).
If you start typing “Task Scheduler” in the search field, then after entering the first characters you will see the desired result, which launches the task scheduler.
In general, using Windows Search to open those items for which the question "how to launch?" arises. - probably the most effective method. I recommend keeping it in mind and using it when necessary. At the same time, almost all system tools can be launched using more than one method, which is discussed below.
Creating tasks for the scheduler
You can see the task scheduler library if you look at the left side of the scheduler snap-in window mentioned above. It has a complex hierarchical structure. Therefore, in order to master the working aspects of this library, you need to practice a little. To do this, you will need to create a separate folder. This can be done in the context menu, which is called up with the right mouse button. There you will see the “create folder” option. Name the folder whatever you like and create your test or work assignments in it.
As a scheduler task, we will use a task that will launch a batch file, which, in turn, will determine with what properties and access level it is executed. We will also display a message about the current use of the file. Once you create such a task, you can make some settings for the task properties yourself.
In order to check the privilege level, you need to use the standard “whoami” command in conjunction with the “find” command. In order to customize the message output, use the “msg” command.
After the batch file is executed, the message “The task is running with administrator rights” or “The task is running with user (name) rights” will appear on the screen. Our batch file will be named “who-admin.bat”. If you want, you can change the commands used and the way privileges are determined. You can easily find the list of the above on the Internet.
For example, the contents of the file, which we named “who-admin.bat”, could be like this:
@echo OFF WHOAMI /PRIV | find /i "SeRemoteShutdownPrivilege" if %ERRORLEVEL% == 0 goto admin msg * The task is executed with user rights - %USERNAME% exit :admin msg * The task is executed with administrator rights.
To create such a file, a regular text editor is suitable. Just copy the above code and name the text file “who-admin.bat”. In order to enter everything correctly and with the same characters, you must use DOS encoding (CP866, code page 866) or change the text of the messages to enter in English. If the text editor does not support the Cyrillic DOS encoding, you can use third-party programs such as “iconv”. You can also use an online service, such as a universal Cyrillic decoder-converter.
In order to create a scheduler task, you can use two wizards, which can be called through the “create a simple task” and “create a task” mode. When you create a simple task, you will have access to a minimal set of parameters that will not have a large number of execution conditions and a variety of actions.
In order to create a new task, you need to do the following:
We use the “action” menu item and find “create task” in it.
In the window that opens, you will immediately have the “General” tab open. Here you need to enter the job name and description. Let the name be Test and the description “Test Test”. You can write whatever you want in the description. The main thing is that the written text reflects the meaning of the task being performed. You can leave all other settings as they are. We will change all of them immediately, before executing the created task. This way you can fully understand their meaning and purpose.
By default, tasks will only run if the user is logged in. In order for the task to be executed regardless of whether the user is logged in or not, you must use the “Run whether user is logged on or not” switch. You can also specify the most advanced permissions for a task or configure it for a specific operating system.
Go to the “Twiggers” tab. Here you need to click the “create” button. Open the “Create a twigger” window and set the conditions that, when met, will execute the task being created.
Since we are still learning, the twigger needs to be defined in such a way that the task is not performed automatically, but only launched manually. To do this, you need to select the one-time launch mode on a date that has already happened or will happen. In this case, you will be able to change the task settings and complete it whenever you want.
Go to the “actions” tab. First of all, in the “actions” we select “run the program”. We will use a newly created file called “who-admin.bat” as the program. To insert it, you need to click on the “Browse” button and select our file.
We are slowly approaching completion. Now we need the “Conditions” tab. Leave all the settings you see here as they are. Well, in general, here you can configure the influence on the behavior of the task you created.
We also leave all the settings in the “Options” tab unchanged. We will use them in the future, when creating the necessary tasks.
After you complete all the settings I specified, click “Ok” to create the task. You can change the settings for this task at any time. The main thing is that the user has the appropriate rights.
Obtaining code for analysis
Unfortunately, obtaining the text of the kernel code for analysis is not so easy. Those. ntoskrnl.exe kernel cannot simply be loaded into memory using some ntsd or windbg. Of course, there are special tools, debug versions, and virtual machines, but in this case I would like to get just assembly code as text, which can even be at least partially printed and calmly analyzed “at the table.” For this purpose, it is easier to create a small program (I called it sd.exe) yourself. Since the tools I use have a built-in debugger, it's easy to write a small program that simply loads the ntoskrnl into memory and then shifts each section listed in the exe file's header table by the desired amount. Having completed these steps, the program stops at a breakpoint (that is, at the INT 3 command). As a result, a correctly “unfolded” kernel image from ntoskrnl , which can now be displayed on the screen or to a file using the “U” and “D” commands of the built-in interactive debugger. The difficulty with such disassembly is that the commands and data are interspersed, and if the entire file is output as commands, the data will be output as a set of meaningless commands, often spoiling the beginning of sections of real commands. You have to first view everything on the screen as data and determine by eye the next boundaries of commands and data. The viewing results are formatted in text form as a sequence of commands “U” and “D” for the future receipt of a “printout”:
… U EAX+17EC2B EAX+17FA09 D EAX+17FA00 EAX+17FA3F U EAX+17FA4A EAX+180DF7 D EAX+180DF0 EAX+180EFF …
Here, all addresses are indicated relative to the EAX register, into which the sd.exe program writes the loading address of the ntoskrnl file in memory. Sometimes it is more convenient, instead of the “D” command, to use the “DD” command also available in this debugger, which outputs data in double words, i.e. addresses. For example, here are the mailing addresses for interrupts INT 00, INT 01, INT 02,...:
DD EAX+1EE0FC 5EE0FC 00407522 00088E00-004076A1 00088E00 5EE10C 00407794 00088E00-00407AB5 0008EE00 5EE11C 00407C38 0008EE00-00407D9D 0 0088E00 5EE12C 00407F1E 00088E00-00408597 00088E00 5EE13C 004088A5 00088E00-0040899C 00088E00 5EE14C 00408ABA 00088E00-00408BF7 0 0088E00 5EE15C 00408E54 00088E00-00409150 00088E00 5EE16C 00409899 00088E00- 00409B16 00088E00 5EE17C 00409C34 00088E00-00409D6E 00088E00 5EE18C 00409B16 00088E00-00409B16 00088E00 …
By the way, the found address 409150 exception INT 0D “violation of general protection” will be useful later.
Now, if the debugger executes a sequence of commands “U” and “D”, the resulting text will look like this, this time in a more correct form:
… 57F9F7 90 NOP 57F9F8 8B65E8 MOV ESP,[EBP]+FFFFFFFE8 57F9FB 8B7DCC MOV EDI,[EBP]+FFFFFFCC 57F9FE 834DFCFF OR D PTR [EBP]+FFFFFFFC,FFFFFFFF 57FA02 8BC7 MOV EAX,EDI 57FA04 E 825C4E8FF CALL 40BE2E 57FA09 C20800 RET 0008 57FA00 FC FF 8B C7 E8 25 C4 E8-FF C2 08 00 0A 20 53 75 .. Su 57FA10 62 6B 65 79 73 20 6F 70-65 6E 20 69 6E 73 69 64 bkeys open inside 57FA20 65 20 74 68 65 20 68 69-76 65 20 28 25 70 29 20 e the hive (%p) 57FA30 28 25 2E 2A 53 29 20 3A-0A 0A 00 CC CC CC CC CC (%.*S) :… 57FA4A 6A34 PUSH 00000034 57FA4C 6890844 500 PUSH 00458490 57FA51 E89DC3E8FF CALL 40BDF3 57FA56 33DB XOR EBX,EBX 57FA58 66895DCC MOV [EBP]+FFFFFFCC,BX 57FA5C 33C0 XOR EAX,EAX …
In this way, commands are separated from data. I wrote the entire sequence of commands for the debugger in the file ud.txt and with one command:
sd.exe ntoskrnl.exe ntos.txt
I received the first version of the kernel code in the text file ntos.txt . This option is still quite “blind”. However, now it is easy to create another small program that will process the result, adding the names of imported procedures to the text, using the import table of the source exe file, and also place labels in the text using the addresses of the table of exported functions. In addition, the program inserts all sorts of convenient little things like an empty line after each RET command to make it easier to read the analyzed sections, etc.
Based on the “source” assembler text, a processed text is obtained that is more suitable for analysis. You can manually make edits to the “source” text, for example, comments, empty lines, etc., and then process it again with the program and get a more and more understandable text of the kernel code with each iteration, as comments accumulate in it. In addition, checks for a specific context can be added to the processing program and some comments can be automatically placed. As a result, the analyzed text becomes less and less “blind”, for example:
... KeReleaseMutant: 402B4C 8BFF MOV EDI,EDI 402B4E 55 PUSH EBP 402B4F 8BEC MOV EBP,ESP 402B51 53 PUSH EBX 402B52 56 PUSH ESI 402B53 57 PUSH EDI 402B54 33C9 XOR ECX, ECX 402B56 FF1588104000 CALL D PTR [00401088]; KeAcquireQueuedSpinLockRaiseToSynch 402B5C 8B7508 MOV ESI,[EBP]+00000008 402B5F 8AD8 MOV BL,AL 402B61 8B4604 MOV EAX,[ESI]+00000004 402B64 894508 MOV [EBP]+000000 08,EAX 402B67 64A124010000 FS: MOV EAX,[00000124] ;CURRENT STREAM 402B6D 807D1000 CMP B PTR [EBP]+00000010.00 402B71 8BF8 MOV EDI,EAX 402B73 0F85AFB30100 JNE 41DF28 …
The most important thing is that now in this large (26 MB) text file it is easy to search for the desired context, for example, going to a given address. This means that you can begin to actually analyze the kernel code.
Job diagnostics
Setting up a task does not always go smoothly. Sometimes problems arise. They can be of the following types: the created task does not start or does not complete; completion of tasks is accompanied by an error.
In order to determine the status of any of the tasks, you will need to select this task in the task scheduler and view information about it, namely: status, last run time, result of the last run, etc.
Conditions are of the following types:
Disabled. This state indicates that the task exists, but is not executed, since it is prohibited in the twigger settings.
Queued. This status of the job indicates that it is in the queue for execution.
Ready. This state indicates that the task is ready for the next execution.
Also in the states you will find a description of the time when the task will be launched next time, when it was already launched and what was the result of its execution. There will also be information about the date the task was created.
In order not to look at the task status every time, you can set up long-term monitoring. Any OS has a logging function available, which displays and saves the entire history of the task.
Job. If you observe such a state for a task, then most likely it is frozen. You may need to enter user data or, for example, there may be a programming error and therefore the task went into an endless loop.
In order to be sure whether the task is stuck or not, you need to check the “Last run time” column, in which you will find when the task was launched. If the task has already lasted longer than a day, then most likely it is stuck. Since there are very few such long tasks on the computer and they happen quite rarely. This means that such a task must be stopped.
To do this, right-click on it and select “Finish” from the context menu. For those tasks whose completion time you know exactly, you can set a time limit. This must be done with a small margin so that the task completes its work correctly. In case it freezes, it will automatically turn off. In order to set limits on execution time, you need to go to “Properties”, find “Parameters”, go to “Stop a task that takes longer to complete...” and set your parameter.
When you create a test task, I advise you to try to use the hidden task execution mode, which is called “Hidden task”, perform the task with administrator rights “execute with the highest parameters”, transfer the task to another PC, for this use the export and import mode.
It will also be useful for you to try changing the conditions and parameters of the task. For example, add the command “pause” to the conditions of the batch file when the command is executed in hidden mode. This way you can simulate a stuck task. It will be a good experience for you to try to complete an overdue task. In this case, the following conditions must exist: for the duration of the task, the computer must be turned off, but at the same time set the parameter to the task “run the task immediately if the scheduled launch is missed.”
How to view scheduled tasks in Windows 10
Let's figure out a little how to work with this utility. After we managed to open it, you can see a list of active tasks.
As you can see from the screenshot, updates are launched according to a schedule. Each line corresponds to the name of the action, the time it was launched, the trigger (event to be launched) and the placement of the component to be launched.
Using the Actions menu, you can enable a custom event.
Standard tasks in Windows 7 and 8
There are a number of tasks that will be performed in seven and eight in any case, since they are necessary for the correct functioning of the system.
Application Experience\AitAgent task. This task collects and transmits data during remote monitoring of applications. The task is completed if you agree to participate in the Customer Experience Improvement Program. Even if this task is automatically scheduled for execution at 2-3 am, it also has the condition of executing an overdue data transfer task.
Application Experience\ProgramDataUpdater task. Collects program telemetry data while participating in the software quality improvement program.
Autochk\Proxy task - collects and downloads SQM data (with participation in the software quality improvement program).
Task Customer Experience Improvement Program\BthSQM. This task is necessary to improve the performance of Bluetooth. It collects statistics regarding Bluetooth operation and information about your PC. After collecting all the data, it is sent to Microsoft servers. All information is processed and certain improvements are made in order to increase the reliability, stability and overall functionality of Bluetooth in the operating system. If you do not agree to participate in the Windows Software Improvement Program, the task will be disabled and no action will be taken. This task is present by default only in Windows 8.
Customer Experience Improvement Program\Consolidator task. This task is aimed at improving the quality of software, which is executed in the Kernel Ceip kernel mode. This is possible through the collection of additional system data, which is transmitted to Microsoft. Also, as in the previous option, you may not agree to complete this task. In this case, no actions will be performed.
Task Customer Experience Improvement Program\UsbCeip. This task is also aimed at improving the quality of USB bus software. Also, as in previous options, data is collected after analyzing the operation of the USB universal serial bus and information about the computer. After receiving all the data, a package with files is also sent to the developer company to analyze and improve the operation of the device. You may also not agree with this task, in which case it will also not run.
RAC\RacTask task. This task is intended to monitor system stability. It also collects data on the reliability and performance of the computer as a whole.
Few people, even experienced users, know about such a task as “Registry\RegIdleBackup”. This job archives the registry. It runs once every 10 days and saves all registry file reporting in the “C:\Windows\System32\config\RegBack\” folder.
If your computer does not have restore points set or they are not suitable for use, you have the opportunity to restore the system functionality if you boot from a different operating system and copy the registry files to a directory called “\Windows\System32\config\”.
Eight has a special folder that you can find in “\Microsoft\Windows\WS”. It contains several tasks that exchange data with the Windows Store.
These are just some of the required tasks that exist in the scheduler libraries of the Windows 7 and 8 operating systems. Of course, some are very little useful; moreover, there are tasks that slow down and interfere with the operation of the operating system. Basically, these are those tasks that require high consumption of the laptop battery, expensive mobile traffic, and additional electricity costs, while they reduce the real performance of the computer.
In conclusion of the information provided about system tasks, I would like to remind you that disabling them is sometimes fraught with dire consequences. Therefore, it is worth understanding exactly what task you are disabling and why. Otherwise, the operating system may fail altogether or not work correctly.
Antivirus programs also create their tasks in the task scheduler library. Most often they are associated with updating antivirus databases. Such tasks are necessary for the system. Tasks are also created by other programs that are not always necessary for you. These tasks are designed to check for an update. Most often, such programs are updated without the user’s knowledge. Such programs include products from Adobe, Google, free software and others.