It is not uncommon that administrator rights are required to perform certain tasks on a computer. They provide expanded functionality and freedom of action in matters of installing, launching and uninstalling applications, more thoroughly configuring the system, enabling and disabling its services, etc. But how do you become an administrator on your Windows 10 PC? In fact, performing this task does not pose any particular difficulties and the user has several options for solving it. We will talk about how to get administrator rights in Windows 10 in several simple ways in this article.
Run as administrator using context menu
The context menu is called up with the right mouse button. Click on any program with the mouse and from the context menu click on the “Run as administrator” option. This opens the command line and other programs where elevated privileges are required.
Using the combination Ctrl+Shift+Enter when searching
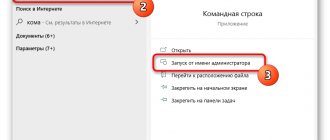
When there is no tool on the desktop or in the Start menu, we turn to search. Any version of Windows is equipped with it, and in the tenth it is most convenient. Write some command, for example, cmd - command line. Having selected the result, simultaneously press the combination Ctrl+Shift+Enter . Simple way isn't it?
Additional Shortcut Properties
Let's say you are interested in the question of how to run the command line as an administrator. The icon is already located on the desktop as a shortcut, but you don't want to launch the context menu all the time. This problem can be solved.
Go to the shortcut properties (right mouse button and Properties ) and go to the “ Advanced ” section.
Additional options will open. There, check the “Run as administrator” option. Now, when you run the program normally, it will always open with elevated rights.
In the properties on the "Compatibility" tab there is an option "Run this program as an administrator." Also a useful thing.
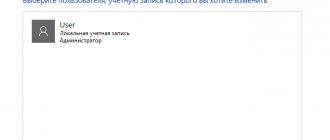
This is interesting: Hidden Windows 10 Administrator Account
Open as administrator from taskbar
On Windows 10 this method is very easy to implement. You need to place the programs and applications that you use most often on the taskbar. Clicking on the program shortcut on the taskbar will launch the process as usual, but we need elevated privileges.
To open a program from the taskbar as an administrator, right-click on the program shortcut. Two items will appear: a shortcut to the program itself and the “Unpin from taskbar” option. Naturally, we need the shortcut itself, which we right-click again.
Several sub-items will be displayed, where there is also an option “Run as administrator”.
Yes, there is such a method, but it will be easier to use the properties of the shortcut from the previous method. We check the appropriate box in the properties, after which you will not have to perform additional actions.
Run as administrator in task manager
The task manager is needed not only for analyzing current processes in the Windows operating system; it is also possible to launch programs through it.
To launch the task manager, press the simple key combination Ctrl + Shift + Esc. Or press the Win+X combination and find the corresponding item in the menu.
In the window that opens, click on the “File” menu item and select the “Run a new task” option. At this moment, a task creation window will open, similar to the “Run” window.
We enter the name of the task, for example, command line process – cmd. Click OK.
Changing elevated privilege settings in the registry
The Registry Editor in Windows is a huge database of settings that is responsible for the operation of almost everything in the system. We will change the Registry Editor settings so that applications will always run as an administrator.
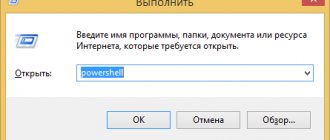
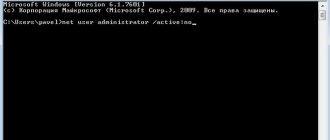
- Open the RUN window using the Win+R hotkeys.
- Enter the regedit commands to launch the registry.
- The path HKEY_LOCAL_MACHINE\SOFTWARE\Microsoft\Windows NT\CurrentVersion\AppCompatFlags\Layers allows you to configure the launch of applications for all users of the computer.
- Select the last Layers path with the left mouse button.
- Right-click on the right side of the window.
- Select the option: Create – String parameter – “Specify the path to the program’s executable file.” The extension of the executable file must be ".exe". For example, C:\Program Files (x86)\AIMP/aimp.exe.
- Having created the parameter, open it by double-clicking with the mouse.
- In the “Value” field you must enter the command “~ RUNASADMIN”.
If the Layers section, then you can create it yourself. To do this, right-click on the AppCompatFlags section and select “Create” – “Section”. Let's call it Layers. Next, follow the instructions above.
Why do you need administrator mode?
Windows 11 comes with many default apps like Notepad, Paint, etc. However, these apps are not very useful if you want to create a professional work like creating a Word document or connecting to a VPN. Regular users can install programs that are available only to them and not change system files. For example, all Microsoft Store apps do not require administrator access. However, most desktop applications from third-party websites require administrator access to install them for all users on your computer.
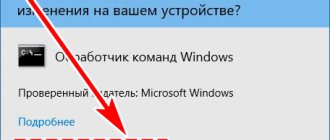
Whenever a desktop application needs to be run in administrator mode, Windows will show a User Account Control pop-up and ask you to confirm access. If you are already logged in as an administrator, you can simply click the Yes button to continue. Otherwise, you need to provide administrator credentials to run the program.
Programs to run as administrator in Windows 7 and 10
There are the following programs: RunAs, AdmiLink, ExecAS.
RunAs Tool
It is part of Windows, so you can use it. To run it, just open the command line and enter the following command:
runas /user:PCName\UserName msconfig.exe
You will most likely be asked to enter a password. Be sure to enter it.
Next, the system configuration window should appear. Instead of the specified utility, use cmd.exe or other utilities.
Let's create a shortcut on the desktop. Right-click on an empty area and select “Shortcut”. We write the same command as the location:
runas /user:PCName\UserName msconfig.exe
Give the shortcut a name and save it.
After launching the shortcut, a command line will open where you must enter the account password. When you enter the correct data, msconfig or the utility you selected will immediately launch.
In this situation, you or people with access to the PC will have to enter a password every time. This point can be solved by adding the /savecred parameter to the command, then the command will be like this:
runas /savecred /user:PCName\UserName msconfig.exe
If you are thinking about security, then it is better not to use such shortcuts with this option. It’s better to enter your password every time and not worry that some impudent person will use Windows tools without a password to please himself and to your detriment.
Using the ExecAS tool
Running as administrator is possible using the ExecAS program. After launch, a window appears asking you to enter account information (login and password), as well as the program name and path. After entering the data, click “ Write ”.
Our guinea pig appeared in the ExecAS window. Close the program and open it again. The program we specified in ExecAS will immediately open. To add an additional application, you need to enter ExecAS.exe /S on the command line. (In this case, you need to be in the directory with the utility, for example, C:\ExecAS).
Having launched ExecAS, we add some other program. Close the tool and launch it again. The same window appears. But this is not convenient for us, so let’s move on to creating shortcuts:
We make two shortcuts with the following commands:
- C:\ExecAS\ExecAS.exe 1
- C:\ExecAS\ExecAS.exe 2
Numbers 1 and 2 correspond to the program number in ExecAS.
Having launched the shortcuts, we see that they were opened as administrator.
Using the AdmiLink utility
The utility specified in the title is a console utility, and after installation it will be located in the Windows directory.
We launch the tool and see a very convenient window with a Russian interface, so it will be easy to figure it out.
- In the first field, enter the path to the file that we want to run;
- The command line parameters in the second field are optional;
- The third line will be filled in independently, if this is not the case, enter C:\windows\system32
- Window display mode. In line 4 there are 2 parameters: SHOW – standard launch of software with a visible window;
- HIDE – software runs in the background;
Configure the settings on the Account :
- For the domain name, write the name of your PC, or NetBios and test.lan;
- Username – can be selected by clicking on the button with three dots;
- Account password and confirm.
- After entering all the data, click the “ Test ” button.
The utility will check the functionality of the information we specified. Press any key in CMD.
After a successful test, click the “ Generate AdmiRun launch key ” button. If you don't do this, then nothing will work.
- Go to the “Link” tab and do the following:
- Label name – call it by any name;
- Directory – indicate where the shortcut will be located;
- Picture – select an image for the label;
- Click the “Generate command line” button.
- Now click the big “Create Shortcut Now!” button.
The icon will immediately appear on the desktop or directory you specified.
Let's try to launch the shortcut. If everything went well and the program was launched as administrator, then congratulations. Otherwise, actions at some step were performed incorrectly.
If you go to the properties of the shortcut and change the program in the “Object” field to another, it simply will not start. This is a little protection against malware.
Task Scheduler
To run the program as an administrator, just use the “ Task Scheduler ” tool. There is one nuance here - if you are not an administrator, you will not be able to use it.
Enter just two words in the search: “Task Scheduler” and open the result. In the window on the right, select the “ Create task ” item.
Call it an appropriate name, let's say you are launching the command line, then you can call it CMD. We also check the “Run with highest rights” checkbox.
On the “Actions” tab, click the “Create” button.
Select an action (in our case, launch the program). Click Browse and select the utility to launch. If you run the command line, the path will be like this: C:\Windows\System32\cmd.exe. Now click OK.
A new line has appeared on the “Actions” tab. Great, you can click OK.
Shortcut creation stage
Create a shortcut on the desktop and enter the following command:
schtasks /run /tn task_name in scheduler
scheduler_task_name is the name you gave at the very beginning of the task creation process.
Hurray, we made the shortcut, but that's not all. Go to its properties.
On the Shortcut tab, change the icon. Of course, you don't have to do this.
Addition to the task scheduler method
To quickly launch many programs, you can use the Elevated Shortcut utility. You take a shortcut or executable file and drag it onto the Elevated Shortcut icon.
Disable User Account Control popup
The problem with all the above methods is that Windows will still display the User Account Control (UAC) pop-up window when you open the application in Administrator mode. You must confirm by clicking the "Yes" button to open the application. This can be annoying if you are already logged in as an administrator. The solution to the problem is to disable UAC notifications.
- Click the search icon and type "UAC" to open User Account Control settings in Windows 11.
- By default, you will receive a notification when an application tries to change files on your computer.
- Drag the slider to the Never Notify option and click OK.
Never notify about UAC changes
This is not recommended as applications can harm your computer by changing files without any notification. However, if you are sure of what you are doing, enable this option to get rid of the UAC popup that you need to confirm every time. You will now see a warning message when opening apps such as the Edge browser. It will show you how to open an application in non-administrator mode for better performance. You can ignore the message or close and disable the settings in properties to open it normally.
Administrative Mode Warning
Running programs from the command line
If you open the command prompt as an administrator using the above methods, then launching all programs from CMD will also allow you to open them with elevated rights.
Elevate tool
Download this utility from here and unpack it. Next, open the command line and enter the following command:
<path_to_Elevate> <path_to_the_launch_application>
It's simple, isn't it? And you can launch the command line in the usual way, the program will do everything itself.
Useful materials:
- Hack the administrator password on Windows 10
- How to transfer an account to another computer
How to change the appearance of the Control Panel
Unfortunately or fortunately, the PU doesn’t have many appearance settings. In fact, there is only one, it consists of the “View” filter, which is in the upper right corner of the “Control Panel” window:
- category;
- small icons;
- large icons.
Photo gallery: possible options for the appearance of the “Control Panel”
The first appearance variation is more extensive and is designed to associatively direct the user to a section if he does not know exactly where the settings he needs are located. For example, the “Programs” category provides access to uninstalling and installing programs, assigning programs to run files with a specific extension, and much more. In the icon categories, only the item with the main functionality of removing programs from the list of installed ones is responsible for the entire category of programs.
Run as administrator is gone - there is no button | point
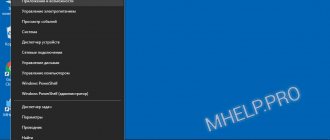
There are often times when Windows crashes. This is very difficult to predict, but it is possible to fix it. For example, you want to run a program as an administrator. According to the standard, you right-click on the shortcut, but there is no item responsible for launching with elevated privileges. In this case, the option may be located in the Win+X menu.
It happens that opening programs as an administrator is only possible if you go to the system drive and run the program from there. For example, you need to launch the shortcut located at the path C:\Program Files (x86)\AIMP/aimp.exe, and not from the desktop.
The simplest solution is to clear the system cache. There are many ways to clean up temporary junk files. This is done as follows:
- Open Start.
- Go to the “Shutdown” menu.
- Hold down the Shift key and click on the “Shut down” button.
- Ready.
The following experience has shown that checking the system for the integrity of system files and restoring damaged ones is possible by running the following commands on the command line or PowerShell utility:
- DISM.exe /Online /Cleanup-image /Restorehealth
- sfc /scannow
Opening the "Administrative Panel" of Windows 11 through "Explorer"
Through the File Explorer file manager, you can go to almost any section/subsection of the Control Panel. To go to Windows Tools, simply copy the following address into the address bar of Explorer and press Enter (it doesn’t matter what folder is currently open in Explorer):
Control Panel\System and Security\Windows Tools
“Windows Tools” will open in a new window (in the “Control Panel”). But you can also use the actual location address of the tools included in the administration panel:
C:\ProgramData\Microsoft\Windows\Start Menu\Programs\Administrative Tools
When you go to this address, the desired panel will be opened in Explorer itself, and all the tools available in it will be available to launch from shortcuts: