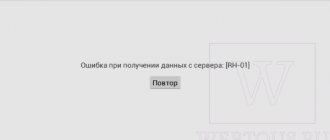
The Android operating system is still not perfect; from time to time, users encounter various glitches and errors in its operation. “The application could not be downloaded... (Error code: 403)” is one such annoying problem. In this article we will look at the reasons why it occurs and how to eliminate it.
Reasons for the 403 error
There are a number of reasons why an unwanted 403 error appears in the Play Store:
- Internet problems. If you are using a Wi-Fi network, certain difficulties may arise. To perform the necessary actions, the mobile Internet speed may not be enough. (Read There is no Internet via WiFi on Android)
- There is not enough space in the device memory. Often, users download different files without thinking that the amount of memory on the device is not unlimited. Because of this, there may simply not be enough space to install programs from the Play Market. (Read Which folders cannot be deleted on Android, and which ones can)
- The reason may be related to Google account synchronization. This account is linked directly to the Play Store, so the 403 Forbidden error may appear due to problems with the account. (Read Google account synchronization does not turn on on Android)
- Geographical reason. There are restrictions on downloading or installing some applications in certain territories. For example, in Crimea, Google blocked the possibility of updates and installations in the Play Market.
Solution for residents of Crimea
Owners of Android devices living in Crimea may encounter a 403 error in the Play Market due to some regional restrictions. Their reason is obvious, so we will not go into details. The root of the problem lies in the forced blocking of access to Google proprietary services and/or directly to the company’s servers. This unpleasant restriction can come from both the Good Corporation and the provider and/or cellular operator.
There are two solutions here - using an alternative application store for Android or a private virtual network (VPN). The latter, by the way, can be implemented either using third-party software or independently by performing the setup manually.
Method 1: Using a Third Party VPN Client
It doesn’t matter on which side access to certain Play Store functionality is blocked, you can bypass these restrictions using a VPN client. Quite a lot of such applications have been developed for devices based on Android OS, but the problem is that due to the regional (in this case) error 403, none of them can be installed from the official Store. You will have to resort to thematic web resources such as XDA, w3bsit3-dns.com, APKMirror and the like.
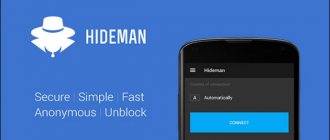
In our example, we will use the free Turbo VPN client. In addition to this, we can recommend solutions such as Hotspot Shield or Avast VPN.
- Having found the installer for a suitable application, place it on your smartphone’s storage device and install it. To do this you will need to do the following:
- Allow installation of applications from third-party sources. In “Settings”, open the “Security” section and there activate the “Install from unknown sources” item.
- Install the software itself. Using a built-in or third-party file manager, go to the folder with the downloaded APK file, launch it and confirm installation.
- Launch the VPN client and select the appropriate server, or let the application do it itself. Additionally, you will need to provide permission to launch and use a private virtual network. Just click "OK" on the pop-up window.
- After connecting to the selected server, you can minimize the VPN client (its operating status will be displayed in the curtain).
Now launch the Play Store and install the application that received a 403 error when trying to download it. It will be installed.
Important: We strongly recommend using a VPN only when absolutely necessary. Having installed the required application and updated all the others, disconnect from the server using the appropriate item in the main window of the program you are using.
Using a VPN client is an excellent solution in all cases where you need to bypass any access restrictions, but you definitely shouldn’t abuse it.
Method 2: Manually setting up a VPN connection
If you do not want or for some reason cannot download a third-party application, you can configure and launch a VPN on your smartphone manually. This is done quite simply.
- After opening the “Settings” of your mobile device, go to the “Wireless networks” (or “Network and Internet”) section.
- Click “More” to open an additional menu, which will contain the item we are interested in – VPN. In Android 8, it is located directly in the “Network and Internet” settings. Select it.
- On older versions of Android, when you go to the VPN settings section, you may need to specify a PIN code. Enter any four numbers and be sure to remember them, or better yet, write them down.
- Next, in the upper right corner, tap on the “+” sign to create a new VPN connection.
- Give the network to be created any name convenient for you. Make sure that PPTP is selected as the protocol type. In the “Server Address” field you must specify the VPN address (issued by some providers).
- After filling out all the fields, click on the “Save” button to create your own virtual private network.
- Tap on the connection to launch it, enter the username and password (on Android 8 the same data was entered in the previous step). To simplify the procedure for subsequent connections, check the box next to “Save account information.” Click the "Connect" button.
- The status of the activated VPN connection will be displayed in the notification panel. By clicking on it, you will see information about the amount of data received and received, the duration of the connection, and you can also disable it.
- Now go to the Play Store and install the application - error 403 will not bother you.
Note: On devices with Android 8, in the same window, enter the username and password required to connect to the created VPN.
As with third-party VPN clients, we recommend using your own connection only when necessary and remembering to disable it.
Fixing error 403
If error 403 occurs due to a full application cache, then execute the instruction:
- Go to the gadget settings and select the “Applications” section.
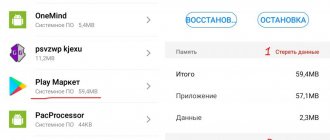
- Then in the list of programs we find and open the “Google Play Market” section.
- A screen will open showing the Clear Cache and Erase Data buttons. We click on them.
- We carry out similar actions with the “Download Manager”. If possible, you should also remove updates.
Help is needed?
Don’t know how to solve a problem with your gadget and need expert advice? Alexey, a smartphone and tablet repairman at the service center, answers your questions. Write to me »
Double check the address
The most common cause of a 403 error is an invalid URL. Make sure that the address you are trying to access is for a web page or file, not a directory. A regular URL ends in .com, .php, .org, .html, or simply has an extension, while a directory URL usually ends with a "/" character.
Most servers are configured to prevent directory browsing for security reasons. When they are configured correctly, you are redirected to another page. When this is not the case, you may see a 403 error.
Error 403 access denied
If this error appears, you need to check your network connection. The Internet connection may be interrupted for some time, for example, due to a lack of funds in the account, blocking by the provider, or unfavorable weather conditions.
If the Internet connection is functioning, but the problem remains, then you need to check the free space in the device’s memory. To do this, open the settings and select the “Memory Status” section. Not all gadgets support installing programs from the Play Store to micro SD. (Read How to transfer an application to a memory card (flash drive) on Android)
If there is enough space on the card, you can transfer some of the files from the main memory of the device, and then try to download the program again. Some applications require more memory than is available on the device, and there is nothing you can do in this situation.
We provoke 403 ourselves
You can cause the 403 error to appear for a selected group of users or for one specific evil hacker or spammer. .htaccess service file . It is included in the Joomla CMS distribution under the name htaccess.txt. Rename the file, remembering to put a dot before the name. It’s easy to create it yourself. Use Notepad++ for this.
If you write in the file:
, then you will block access to the site to everyone except the specified IP. Considering that the attacker's IP changes, the unwanted IP address is indicated in the Deny directive. Fill in the next two with the same number 0. You yourself can arrange a ban for all visitors from a specific country if you know the national code. In this case, after deny from write, for example: 83.4.0.0/14. The number 14 after the slash indicates that all IPs starting with 83.4 should be blocked.
The IP of the offender (spammer, hacker) is calculated in two ways:
- CMS components (forum) write this address, informing the administrator about a new post.
- in the log files folder on the host.
It will take a long time to dig through the logs, but it will be worth it. Select the IP of the person who visited the site at the moment when the file or folder was unauthorized changed or a spam post arrived. And then block the pest.
You can also further protect particularly important directories or files. In Joomla this is the Libraries folder.
Create a .htaccess file and write in it:
Order allow deny
, then put it in a protected folder. Anyone who types the site address and puts /libraries after it will receive a 403 error notification on the browser screen.
Account synchronization
Google Play accounts are linked directly to the G+ system. Failures in account synchronization lead to an error in the operation of application download services.
Solution to the problem:
- Let's go to settings.
- From the list, select the “Accounts and synchronization” or “Accounts” section.
- Turn off the option to automatically synchronize accounts.
- Reboot the device.
When the device reboots, you must again enter the “Accounts” section. There we turn on automatic synchronization again.