Home » Computers
Reading time: 7 minutes
Frequent system freezes and other errors are the result of incorrect software operation. Problematic programs can be easily removed. But what to do with installed software that is not removed from the system? In such cases, the device must be flashed to a more stable version or you need to make changes to the OS yourself. In this post, you will learn how to open Android firmware so that you can change it later.
Structure of a ZIP file with firmware
After downloading, unpack the archive using any archiver. Inside there will be the following set of files and folders:
- META-INF - a folder with meta-information about the firmware (author's certificate, manifest with a list of files, their checksums), an update script (updater-script) and an installer (update-binary), which executes script commands for mounting partitions, copying files and others actions with NAND memory;
- boot.img - an image with a kernel and a RAM disk (it is flashed into the boot partition);
- system.new.dat - this, roughly speaking, is the firmware itself, or rather an image of the system partition containing the Android operating system minus the kernel;
- system.transfer.list - contains a list of commands that must be executed to copy the contents of system.new.dat block by block to the system section when installing the firmware;
- system.patch.dat - used for OTA updates, that is, selective changes to the firmware; if the firmware is “full”, it has a size of zero.
Contents of the LineageOS firmware ZIP file for Nexus 5
We recommend reading:
Xakep #274. Tweaking Windows 11
- Contents of the issue
- Subscription to "Hacker" -70%
Core
We also need a boot partition, which is essentially a Linux kernel (for the selected firmware it is 2.6.29 armv6l) with a ramdisk and has the following format:
** +——————+ ** | boot header | 1 page ** +——————+ ** | kernel | n pages ** +——————+ ** | ramdisk | m pages ** +——————+ ** | second stage | o pages ** +——————+ ** ** n = (kernel_size + page_size - 1) / page_size ** m = (ramdisk_size + page_size - 1) / page_size ** o = (second_size + page_size - 1 ) / page_size If we want to replace the kernel or modify the initialization scripts, we need to extract them from the boot image. To do this, we need the wonderful perl script split_bootimg.pl by William Enck.
- $split_bootimg.pl ../
rom
/
boot.img - $ ls
- boot.img-kernel boot.img-ramdisk.gz data system
We can't do anything with the kernel itself except replace it with another one, and the ramdisk can be unpacked for later modification and configuration:
- $ mkdir
ramdisk
&& cd
ramdisk
&& gzip
-dc ..
/
boot.img-ramdisk.gz
| cpio
-i - $ ls
- data default.prop dev init init.goldfish.rc init.hero.rc init.rc logo.rle proc sbin sys system
In this article, we don’t want to do anything with either the kernel or the ramdisk, so we’ll pack everything back (or go back a step and not touch boot at all)
- find
.
| cpio
--quiet -o -H newc
| gzip >
../new-ramdisk.gz
_
_ - $ cd
..
&&
mkbootimg —kernel boot.img-kernel —ramdisk new-ramdisk.gz —cmdline “no_console_suspend=1 console=NULL” -o newboot —base 0x19200000
Base offset settings may vary for other phones. We get the commandline from split_bootimg when unpacking.
Unpack system.new.dat
The files system.new.dat and system.transfer.list are of greatest interest to us. More precisely, not they, but the system contained in them. But getting to it is not so easy.
Script
The laziest can disassemble the firmware using the System_Extractor-Linux script.
- Unpack the archive with the firmware into any folder.
- Download the script from the link and unzip it into any folder.
- We launch the ext file (if it complains about the lack of Java, just skip by pressing y; Java is only needed for packaging).
- Now select unpacking by pressing button 1 and then Enter.
- A new folder named extract_* will appear next to the ext file and the tools folder. Copy the files system.new.dat and system.transfer.list into it.
- After copying the files, press Enter and wait. After a while, you will need to press Enter again, enter the administrator password and press Enter again.
- Ready. The contents of system in the extract_*/output folder.
Script for unpacking system.new.dat in Linux
Manual method
Unpack the archive with the firmware into any folder (for example, rom):
$ mkdir ~/rom $ unzip path_to_archive -d ~/rom/
Download the tools we need into this folder:
$ cd ~/rom $ wget https://github.com/xpirt/sdat2img/raw/master/sdat2img.py
Let's run the script:
$ chmod +x sdat2img.py $ ./sdat2img.py system.transfer.list system.new.dat system.img
It converts the system.new.dat file into a raw image called system.img. Mount the image to the mnt subfolder:
$ mkdir mnt $ sudo mount -t ext4 -o loop system.img ~/rom/mnt
System image contents
Android Directory Structure
After unpacking system, the following directory structure will appear:
- app - pre-installed applications with standard privileges;
- priv-app - pre-installed applications with elevated privileges, including some system components;
- bin - ELF binary files, analogous to the /bin and /usr/bin directories in Linux. Contains various system components used by higher-level system components;
- etc - settings files. A complete analogue of /etc in Linux, used, however, only by those same system components. Android applications store individual settings in the /data/data/ directories;
- fonts - fonts. By default, it contains only Roboto branded fonts;
- framework - libraries of Java classes used by the system and applications. There is also a file framework-res.apk containing a complete description of the operating system interface, including all graphic files;
- lib and lib64 are Linux libraries used by low-level system components. An analogue of the /lib and /usr/lib directories in Linux, including standard libraries such as libc, libz, libssl. On devices with ARMv7 architecture and lower, the lib64 directory will be missing;
- media - media files: ringtones, notification sounds, interface sounds and OS boot animation;
- tts - files needed by the speech synthesizer;
- usr is a directory that typically contains files needed to run applications from the bin directory. Essentially an analogue of /usr/share;
- vendor - files supplied by the device manufacturer. Usually contains binary firmware for various hardware components, for example a Wi-Fi module;
- xbin - optional directory; custom firmwares use it to store things like the bash interpreter, SSH, PowerTOP, BusyBox, and other useful tools;
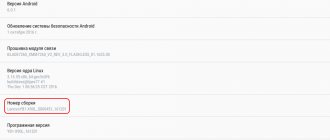
- build.prop - a file containing information about the assembly, as well as various low-level settings;
- addon.d - contains scripts that are launched after installing the firmware. GApps also write their script here, thanks to which they are revived after reinstalling the firmware.
Now that we're familiar with the basic structure of Android, let's start making changes.
What is "Recovery"?
To understand how you can flash Android via recovery from an SD card, you need to know exactly what is meant by this concept. itself comes from the English verb “recover” or “to restore.”
Will be useful
Recovery is a special software that is present in the Android system. If we draw analogies with a computer, then Revovery for a smartphone replicates the BIOS on a computer in its functions.
The function is a means of accessing the hardware before the operating system files are loaded, which allows you to manipulate the device at a low level and bypass system failures.
note
Entering the engineering menu or recovery is done by simultaneously pressing the home button and the volume key while rebooting the device. This is a general scheme; in reality, each manufacturer comes up with their own combinations.
Removing and adding applications
All pre-installed programs can be found in two folders:
- /system/app/;
- /system/priv-app/.
They differ from each other in access privileges. If programs from the app have the same permissions as third-party programs (for example, installed from the Play Store), then applications from the priv-app can use privileged APIs (privileged rights). You can learn more about this from our article.
To preinstall an application into the firmware, simply drop its APK file into /system/app/. You can, of course, create a separate folder, but in our case this makes no sense, because the folder is used to store libraries and odex files, which we simply do not have. To remove it, simply delete the folder with it.
You can go further and replace stock applications with analogues. For example, to replace the calendar, delete the Calendar folder and copy our favorite com.rpagyc.simplecalendar.apk to /system/app. And you don’t have to copy it. Then the firmware will be without a calendar.
The main thing to remember is that stock programs can be related to each other. Therefore, deleting one program may well lead to the complete inoperability of another (for example, CalendarProvider and Calendar: by deleting the first, you will make not only the stock calendar inoperable, but also any other calendar). Fortunately, in pure AOSP firmware there are not many interconnections.
Preparatory work
To know how to properly flash Android through recovery, you need to clearly understand all the stages of preparatory work that must be carried out before the procedure.
They include:
- Create a backup copy of data from your phone. They can be transferred to a memory card or synchronized via cloud services.
- Download the selected firmware version. This can be a custom or stock build. It all depends on the subjective choice of the user.
- Obtaining root rights.
After completing the preparatory work, which includes additional study of the topic on specialized forums, you can proceed to the actual flashing process.
Changing the loading animation
The animation is stored as PNG images, packed into the archive /system/media/bootanimation.zip without compression. Inside the archive there are:
- desc.txt - file describing the animation;
- part0 - folder with animation files that are played first;
- part1 - folder with animation files that are played second;
- …
- part? — the outermost folder, the images from which are played back at the end.
The desc.txt file might contain something like
1920 1080 60 p 1 0 part0 p 0 0 part1
The purpose of these lines is intuitive: 1920 × 1080 is the image resolution, 60 is the number of frames per second. Part0 and part1 indicate the folders from which the animation will be played and the playback sequence. In general, there can be either one part or several (three or more).
The images located in the part folders are numbered with five numbers in playback order: 00000.png, 00001.png, 00002.png... These images can be replaced with your own, thereby creating an original animation. Or you can simply delete the bootanimation.zip file. Then the device will show animation from standard Android. Or use a ready-made collection of animations on w3bsit3-dns.com.
Four parts in bootanimation.zip for LineageOS
Update script
To update, we will use the update script, which is written in a special scripting language edify , the syntax of which can be read in the android source code. The script /META-INF/com/google/android/update-script could be like this:
- show_progress 0.1 0
- format CACHE:
- format SYSTEM:
- copy_dir PACKAGE:system SYSTEM:
- set_perm_recursive 0 0 0755 0644 SYSTEM:
- set_perm_recursive 0 2000 0755 0755 SYSTEM:bin
- set_perm 0 3003 02755 SYSTEM:bin/netcfg
- set_perm 0 3004 02755 SYSTEM:bin/ping
- set_perm_recursive 1002 1002 0755 0440 SYSTEM:etc/bluez
- set_perm 0 0 0755 SYSTEM:etc/bluez
- set_perm 1002 1002 0440 SYSTEM:etc/dbus.conf
- set_perm 1014 2000 0550 SYSTEM:etc/dhcpcd/dhcpcd-run-hooks
- set_perm 0 2000 0550 SYSTEM:etc/init.goldfish.sh
- set_perm_recursive 0 0 0755 0555 SYSTEM:etc/ppp
- set_perm 0 0 04755 SYSTEM:etc/ppp/ip-up-vpn
- show_progress 0.1 10
- show_progress 0.2 0
- copy_dir PACKAGE:data DATA:
- show_progress 0.2 10
- show_progress 0.3 0
- format BOOT:
- write_raw_image PACKAGE:boot.img BOOT:
- show_progress 0.3 10
For now, this script is very primitive and the only thing it does is prepare the appropriate sections.
Changing the sound design
In fact, all the sounds that the system plays are stored in the /system/media/audio folder. Inside it you will find the following folders:
- alarms — alarm ringtones;
- notifications - notification sounds;
- ringtones - ringtones;
- ui - system sounds, for example, low battery, camera focusing, selection of interface elements.
In alarms, notifications, ringtones you can add as many melodies as you like. You can take them, for example, here:
- standard ringtones from different Nokia phones and smartphones;
- famous standard ringtones;
- just a lot of ringtones;
- ringtones from different phones.
And a little life hack: deleting files from the ui folder will not lead to crashes and errors, but to the disappearance of system sounds. Therefore, you can easily turn off the sound of taking a picture from the camera, taking a screenshot, simply by erasing the files containing these sounds (their names are intuitive).
Changing system settings (build.prop)
The system image contains an interesting file called build.prop, which contains a lot of useful information about the device’s hardware and default settings for various stock applications. To be fair, I note that this is not always the case. For example, in Gigaset ME and ME Pro build.prop is divided into two parts. One part contains settings for Gigaset ME, and for ME Pro some lines are duplicated, but the keys (smartphone name, etc.) are different. This was done to ensure more or less correct operation of the same firmware on different devices.
Additional file for Gigaset ME and ME Pro
Build.prop contains (or can contain) a huge number of settings. Some of them do not change anything, some improve one thing at the expense of another, but there are those that are really useful:
- ro.product.model and ro.product.manufacturer - smartphone model and manufacturer name. By replacing these lines, you can make the Play Store think that you have a different smartphone, which will open access to more software. For any little-known Chinese smartphones, these lines can be life-saving;
- hw.qemu.mainkeys - accepts only two values: 0 - show on-screen navigation keys, 1 - do not show buttons. The absence of a line corresponds to 0;
- debug.sf.nobootanimation - value 1 disables the boot animation, which slightly increases its speed. Setting it to 0 or deleting the line returns the animation to its place;
- ro.telephony.default_network - tells the system what mode the mobile network should be switched to upon boot;
- ro.sf.lcd_density - display DPI, the most accurate value for the display can be calculated through a convenient website. But no one forbids you to set a higher or lower value to your liking: higher values make the interface elements larger, lower values make the interface elements smaller;
- ro.config.vc_call_vol_steps — number of volume steps during a call (default 8);
- ro.config.media_vol_steps - number of media volume steps (default 15).
Important!
- Before flashing your device, create a backup copy of your data. This can be done in the Android settings, the “restore and reset” item. If the firmware fails, a backup copy will help you get back to where you started.
- To install firmware from an SD card on Android, you first need to download it and save it to this card in “.zip” format, and in the root
catalogue, i.e. not in some folder, but so that when you open the contents of the card, you will immediately see the firmware.
- Download the Rom Manager app from the Play Store. Open it and click "Recovery Setup". Then click “ClockworkMod Recovery” and select your phone/tablet model from the list provided. The installation will begin, during which the program will require superuser rights. If you don’t have them, the Internet is full of loopholes in this regard, use one of them. Once completed, the application will notify you that the installation was successful.
- Check the battery charge level. It should be enough for the entire installation process, which may take 45 minutes.
We implement Google Apps in the firmware
Almost always, custom firmware is delivered without Google services and the application store. The developers suggest that we install them separately using the GApps package. However, it can be integrated directly into the firmware.
First you need to download the GApps package. I recommend taking the Open GApps archives. You choose the Android version, processor architecture and configuration option (Pico, Nano, Stock...), which determines how many different Google applications the archive contains. I recommend downloading the Pico version. It contains only the Play Store and a set of libraries necessary for its operation.
Integrating GApps into the firmware is done like this:
- Unpack the GApps ZIP archive using any archiver.
- Go to the Core folder.
- We see many archives with the .tar.lz extension. Extract using lzip.
- After unpacking, copy the files from the folders to the corresponding folders in the system. It’s easy to guess what to throw where from the directory structure in the archive. For example, configupdater (from the screenshot) needs to be placed in the priv-app folder.
- Go to the GApps folder (located next to Core) and follow steps 3 and 4 for the files in it.
- That's it, we have integrated GApps into our firmware!
Directory structure configupdater-all.tar.lz
How to open Android firmware to change it later
Frequent system freezes and other errors are the result of incorrect software operation. Problematic programs can be easily removed. But what to do with installed software that is not removed from the system? In such cases, the device must be flashed to a more stable version or you need to make changes to the OS yourself. In this post, you will learn how to open Android firmware so that you can change it later.
What is firmware
Firmware is an operating system that connects the entire technical potential of a gadget into a single chain and provides the user with optimal operational capabilities. This software is the basis of all modern multifunctional devices.
On the vastness of the global network you can find an impressive number of official and custom firmware that open up additional opportunities.
Is it worth unpacking the firmware?
Unpacking the firmware is a complex process that requires time and appropriate skills, but is very relevant and useful.
By unpacking, the user can make adjustments to the operation of various elements of the installed software, thereby eliminating the possibility of errors, freezes and many other unpleasant moments without flashing or replacing the software.
When you think about the question of whether you need to unpack the Android firmware, you will probably find a couple of additional advantages. You can extract apk files from the unpacked firmware or integrate installers for other programs.
Unpacking QSB and INB firmware
Firmware with the extension .qsb and .inb are the prerogative of Lenovo devices. Unpacking them does not take much time and is carried out using just one LenovoWinTools utility.
This program has intuitive controls and provides a lot of additional features. In addition to unpacking the firmware, it allows you to quickly reassemble the firmware with already modified files, promote comfortable work with the context menu, and assemble several parts of files into one.
To work with firmware through the LenovoWinTools editor, just install the Russified program, go to the “File” item and use the available tools to select your firmware. Next, you will need to wait, and then you will be able to operate the firmware files directly from the program.
Free place
It is necessary to understand that the space for installing firmware is limited. You cannot install firmware whose size exceeds the size of the system partition of the device. You can view its value using ADB:
$ adb shell df /system
Information about the system partition
Second option: put a terminal on the device and type the command
$df/system
You can find out the partition size in bytes by installing BusyBox on your smartphone and running the command in the terminal
$ busybox df -B 1 /system
Or the same with ADB:
$ adb shell busybox df -B 1 /system
The space occupied by the firmware will be approximately equal to the size of the system when unpacked. In general, when creating firmware, it is necessary to take into account that the user can also flash various modifications on top of it (SuperSU, Xposed) or transfer applications to the system section. For example, Google's minimum application package (Pico) requires a minimum of 150 MB of additional installation space.
If necessary, the size of the firmware file can be reduced by removing not only unnecessary programs from /system/app (/system/priv-app) and call sounds from system/media/audio and bootanimation.zip, but also:
- /system/tts/lang_pico - languages of the primitive voice engine Pico TTS, Google voice engine will not be affected;
- /system/usr/srec/config/ - offline languages. You can download it online later if needed.
Assembly
After making changes, you need to put everything back together. First, let's pack the system section into system.new.dat. Download the tools we need:
$ wget https://github.com/xpirt/img2sdat/raw/master/img2sdat.py $ wget https://github.com/xpirt/img2sdat/raw/master/blockimgdiff.py $ wget https://github. com/xpirt/img2sdat/raw/master/common.py $ wget https://github.com/xpirt/img2sdat/raw/master/rangelib.py $ wget https://github.com/xpirt/img2sdat/raw/ master/sparse_img.py $ sudo apt-get install android-tools-fsutils
Let's convert our folder back to a RAW image. Let's call it system_new.img:
$ sudo make_ext4fs -T 0 -S file_contexts -l 1073741824 -a system system_new.img output/
1073741824 is changed to the size of the system partition in bytes. It would be advisable to even make it a little smaller. We make a sparse image from the RAW image:
$ img2simg system_new.img system_snew.img
Let's convert our image into system.transfer.list and system.new.dat, which we need to throw into the archive with the firmware, but first we'll delete the old files:
$ rm -rf system.transfer.list $ rm -rf system.new.dat $ rm -rf system.patch.dat $ chmod +x img2sdat.py $ ./img2sdat.py system_snew.img
Let's separate the firmware files from the excess husk (files that we downloaded for work. For this it is convenient to use the archive with the firmware). Deleted? Now you need to pack the firmware into a ZIP archive (with any archiver).
All that remains is to sign the archive. This can be done both on Android itself using ZipSigner, and on a PC (you will need Java installed):
$ wget https://github.com/appium/sign/raw/master/dist/sign.jar $ java -jar file.zip
Underwater rocks
While building system.new.dat, you may encounter several problems caused by constant changes in the mechanisms for generating Android firmware. The method described above should work well in the case of firmware based on Android 5.1; newer ones may have difficulties, so you will need to use other versions of the build tools. Unfortunately, we cannot describe all the nuances of the assembly, so you may have to Google it.
Some installation tips
- It is strongly recommended to make a backup copy of your data before starting the flashing. This will protect you from losing all data if the OS installation is unsuccessful.
- The phone's charge level should not be less than 30%. Better yet, do not disconnect it from the PC during the entire process.
- In some cases (especially when installing custom firmware), root rights are required. You can quickly get them using the programs GingerBreak, SuperOneClick, Unlock Root Pro and others.
- Sometimes even the officially released firmware for a device can be too “heavy” for it. Therefore, before you start installing it, you need to read the recommendations, system requirements and reviews.
- If the device is flashed using special programs, you must carefully check its connection to the computer. If the USB cord suddenly comes off during the reinstallation process, the phone risks remaining inoperable.
Manual firmware, as you can see, is quite simple and does not take much time. To update your smartphone, it is not at all necessary to take it to a specialist - attentiveness and strict adherence to the sequence of actions will be enough.
Sources used:
- https://smartfon-24.ru/kak-ustanovit-proshivku-na-android-s-sd-karty/
- https://androidguid.ru/proshivka/proshit-android-cherez-sd-kartu.html
- https://mobila.guru/faqsingle/kak-proshit-android-cherez-kartu-pamyati/
- https://mrandroid.ru/kak-proshit-android-cherez-kartu-pamyati/
- https://androidonliner.ru/problem/os-android-usb.html
SHARE Facebook
- tweet
Previous articleHow to check a used Android phone when purchasing
Next articleHow to unblock WhatsApp if you are blocked
conclusions
This article describes only the tip of a huge iceberg called “firmware modification”. “Serious” firmware not only complements the kernel and the firmware itself with stock applications with many functions (which are often taken from other kernels and firmware), organizing or even changing the principles of their interaction, but can also radically change the operating principles of the OS. True, such a hack is no longer Android, but a separate OS, even if Play services can be installed there (by the way, such actions, to put it mildly, are not encouraged by Google). Well, don’t forget: all shells from manufacturers - TouchWiz, ZenUI, HTC Sense and so on - are just ordinary custom ones, maximally tied to the hardware of the device and to each other.
The basis
There are several different approaches to firmware development.
- Build from Android Open Source Project sources
- Build from the sources of the CyanogenMod project
- Modification of firmware provided by the phone manufacturer
Despite the fact that the Android platform seems to be open, real phones use closed components. These are drivers distributed in binary form (wifi/gps/fm), and key components of the system, such as Market and other Google services. Also here we need to add the developments of companies in the field of interface, such as HTC Sense, Motoblur, TouchWiz from Samsung. This creates in some places insurmountable difficulties in developing firmware from source codes. I propose to focus on modifying ready-made firmware provided by phone vendors. Firmware for HTC phones exists in two types:
- RUU.
Rom Update Utility . Utility for Windows OS that updates your phone - OTA.
Over the Air (Update over the air). A package downloaded by the phone itself via wifi/gprs networks, which is installed on the phone without any computer involvement
Recently, OTA updates consist of binary diffs
, which makes it somewhat difficult to use them as a
basis
. Since this requires having a specific phone with a specific firmware version, which may simply not be feasible if we want to adapt the firmware from one phone to another. Or it involves a long and painful falsification of the phone ID with subsequent downloading of the update without installing it. Moreover, this procedure may have to be repeated several times. We will use the RUU update.