An Apple ID is an account that is needed to install applications from the App Store, sync photos and various data with iCloud, purchase content from the iTunes Store, and much more. If you have an iPhone, iPad, Mac or other Apple devices, you won’t be able to fully use them without such an account. You can register an Apple ID in a browser, mobile device, or computer.
If you have already registered an account before and want to create a new one, you will first have to log out of the current one. Otherwise, the “Create an Apple ID” option will not appear.
How to create an Apple ID in the browser
Open your account management page in any browser and click on the “Create an Apple ID” link.
Indicate your first and last name, date of birth, and country. Specify an email that will be used as a login. Create and repeat a password.
Add your phone number and choose the confirmation option - message or call. Enter the captcha characters and click Continue.
To confirm your email, enter the digital code that will be sent to the specified mailbox. Click the “Continue” button.
Next, confirm your phone number by entering the code from SMS or answering the call. Click Continue again.
In a few seconds your account will be created.
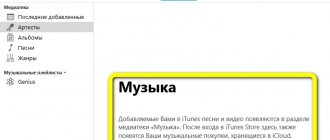
iTunes and App Store
Movies, books, music - everything is there. But what else is needed for complete happiness? Of course, access to a store with millions of applications for every taste, which can be obtained both from a gadget and from a computer using iTunes.
Click the “iTunes Store” , which is located in the upper right corner. A store opens before us where you can purchase movies, music and applications. We already have movies with music, so click “App Store” .
The large banners at the top are new and popular applications. On the right you can select a category or, going down a little lower, another section. If you want to have a free application, then click the “Download” or “Buy” button , if it is paid. To install it, you will have to enter the password you created earlier when creating your Apple ID.
The downloaded or purchased program will live in your Apple ID account, and you can always install it on your gadget . To do this, connect it to your computer and go to the Applications tab in iTunes. Find there visually or using the search bar the application you just downloaded and click the “Install” button opposite it.
If you need to install any other applications or games from iTunes on your iPhone or iPad, then also click on the “Install” button opposite them. The text will change to “Will be installed.” Next, go down and click on the “Apply” button located there.
The synchronization process will begin, during which your new application will be successfully installed on your gadget.
In general, no one is stopping you from connecting to the Internet via Wi-Fi and browsing the App Store directly from your Apple gadget in search of the necessary software or games. However, the variety of options only adds to the convenience.
Improving the usability of iTunes and the App Store
- iTunes has the ability to open a left side window, which makes working in the program much easier. To open this panel, press Ctrl + S on Windows and alt + cmd + S on Mac.
- In order not to lose the player with your music in a sea of windows, you can put the mini player on top of everything and it will always be displayed in the right place. To do this, select “Settings” from the drop-down menu (upper left corner).
Go to the “Add-ons” tab and check the box next to “Keep mini player on top of all windows.” There you can also enable a similar skill for the video player. - You can create multiple libraries in iTunes. You can do this by holding down the Shift key on Windows or alt on Mac when launching it. Next, on the sign that appears, select “Create a media library.”
- The program also provides a number of hotkeys for quick access to certain menus.
Well, now you can use, at first glance, a very complex and sophisticated program, but in the end, convenient and functional. Perhaps this is all I wanted to tell you about the right hand of the owner of Apple products.
By the way, if you need to download pictures and videos taken on it from your iPhone or iPad to your computer, and you also have an account in Dropbox or Yandex Drive, then it will be enough to install the appropriate mobile application on the gadget and it will allow you to do this automatically . Read more about how to use Dropbox and how to log in and create Yandex Disk.
Good luck to you! See you soon on the blog pages KtoNaNovenkogo.ru
How to create an Apple ID on iPhone or iPad
Launch the App Store, tap on the profile icon, and then click on the “Create Apple ID” link.
Enter your email (it will serve as your login) and country. Create a password, turn on the “Accept terms and conditions” toggle switch and tap “Next”. Enter your first name, last name and date of birth. Click "Next" to continue.
Set your payment method and enter your payment information. If you don’t plan to buy content yet, select “No.” Indicate your first name, last name and address with zip code. Tap "Next".
Enter your phone number and choose how to verify it. Click Next again. Enter the code from the SMS that will arrive after this, or answer the call. Tap "Confirm".
Now verify your mail in the same way by entering the code from the received letter and click “Confirm”. In a second, your account will be created.
How to use iTunes?
First, you will need to log in to iTunes, if this action did not happen automatically after registration. The “Login” button located at the top left serves this purpose. After clicking on it, you will see the familiar authorization window, where you will enter your Apple ID and the password you created.
The highest quality software and games are usually paid. Therefore, you need to register your card, and if you don’t have one, you can easily get one without a commission in Qiwi - QIWI Visa Plastic and Card.
To add card details, in the upper left corner of the iTunes window, click on your Apple ID and select “Account”.
In the window that opens, find the “Payment method” and click a little to the right on the “edit” link.
It's simple: enter the card number, security code and other data. When you register for the first time, one ruble will be withdrawn from your account in order to verify its authenticity.
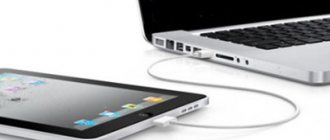
Next, you can connect your device to your computer. As soon as iTunes sees this device, its name will appear in the upper right corner of the program. For example, iPhone .
If you then connect your iPad via USB with iTunes turned off, this will cause it to launch and it will automatically detect the gadget connected to it, and will also display it in the form of a button like this:
On the button on the right there will be an upward-pointing triangle (you might have seen something like this on CD players, where it was used to eject media). I accidentally clicked on it at first, expecting the context menu to appear, but instead the button disappeared and my iPad disconnected from the computer.
I had to close and reopen iTunes to reconnect with my tablet. You need to click a little to the left and then all the diversity of the inner world of your gadget will open to you. The first tab “Overview” opens a page with its name and model, as well as all other data. Battery charge, capacity, serial number.
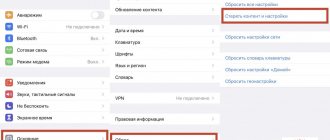
You can immediately update the software of your gadget (check for availability and download a new version of iOS) or restore its state to factory settings (the “Restore iPad” button), that is, erase all personal data and bring the device to the state in which you purchased (alas, this does not apply to scratches).
It turns out that from here you can manage your “apple”, as well as create backup copies or restore from them. You can even encrypt them for greater reliability if the data stored on the iPhone or iPad is confidential. By default, iTunes will create an image of your tablet or phone on your computer, but you can also save important data in the cloud, which Apple calls iCloud.
Creating backup copies ( syncing your iPhone, iPod or iPad with iTunes ) is very important, because if you lose data, or buy a new version of the gadget, you can download all the programs again - in this case, we won’t have to search and buy everything again.
Moreover, as shown in the screenshot just below (second), you can set up automatic synchronization immediately when you connect the device (via USB), and you can also set up wi-fi synchronization between your computer with iTunes and your iPhone.
All this data can be saved not only on your computer, but also in cloud storage, the so-called iCloud .
With its help, you can download some data, for example, saves for games directly to the gadget without connecting to a computer via the Internet.
How to sync iPhone, iPod or iPad with iTunes?
Also at the bottom there is a very convenient and interesting panel, here we can clearly understand what exactly takes up space on the internal memory and how much. You can also click the “Synchronize” button.
But what exactly will be synchronized between the computer and the iPhone, iPod or iPad? Well, this is up to you - just go through all the other tabs of the top menu and check the boxes in the right places.
It turns out that here you can download music, video or photos from your computer to your device and back, but not only that. Moreover, it is possible to create your own music library (not from tracks purchased in the Apple store, but from your own that live on your computer).
To do this, open the folder with your music in Explorer (or Total Commander), and in iTunes go to the “Music” tab.
After that, select all the necessary tracks in the explorer and drag them to the empty space in the program, as shown in the screenshot.
iTunes will offer to convert some types of music files into a format convenient for this program:
You can edit this music and even listen to it directly in iTunes. Right-click on any music file icon and select “Play” from the context menu. A player will appear on the top panel, where the bitten apple used to be.
If you click on the arrow in this very player, a window will open where you can choose which music will be played for which. If you are not satisfied with these “gray notes” instead of the cover of your favorite band, then you can change it as well as the name.
To do this, right-click on the icon again and select “Details”. A window will open, where you can write the title, album, etc. To change the cover, first copy the image you want, then go to the cover tab and click paste. Beauty.
To transfer this music to your device, click on the device button (Iphone or iPad) in the top right, and in the window that opens, go to the “Music” tab, where you can specify what exactly to copy. Well, to start synchronization, click on the “Finish” located at the top of the window on the right.
If everything worked out, then instead of the player a bar will appear showing the music loading.
Great, you have music on your iPhone or iPad. movies via iTunes ? The process of uploading video to the gadget is approximately the same as uploading music; in the upper left corner we find a button and select “Movies” there. In the same way as in the case of music, drag the video files into the program and click on the “Finish” button. You can download books in the same way.
How to Create an Apple ID in the App Store on Mac
Go to the App Store, click Sign In in the sidebar, and then Create an Apple ID.
Enter your email (it will act as a login), create a password. Select your country and indicate that you agree to the terms and conditions. Click Continue.
Please provide your first and last name and date of birth. If you wish, subscribe to the newsletter. Click Continue.
Add a payment method or select "None" if you don't intend to purchase anything. Also fill in the address.
Enter your phone number and select a verification method. Then answer the call or enter the code from the SMS you receive. Click "Confirm".
After this, another code will be sent to you by email, enter it and click “Confirm”.
In a few seconds your account will be created.
What is an Apple ID for?
An Apple ID will allow you to access all Apple online services, including: iCloud , iMessage , FaceTime , Apple Music , and of course, the iTunes Store and App Store .
To describe it in simple words, using Apple ID you can:
- download paid and free content (games, applications, music, videos, etc.) directly to iPhone , iPad , iPod Touch, Apple TV and Mac . iMessage multimedia messages (text, images, etc.); — make free audio and video calls FaceTime ; — synchronize and store personal data (contacts, notes, reminders, accounts, documents, etc.) using the iCloud .
We strongly recommend that you understand and try each of the points.
ON THIS TOPIC:
- The best games for iPhone and iPad.
- Tips and secrets about iPhone, iPad and Mac.
- Our application for iPhone and iPad (instructions, reviews, information about discounts on games and applications).
If you don't plan to make purchases at Apple online stores in the near future, then create an Apple ID without a credit card. In any case, you can top up this account or link a card to it later.
Initial setup of a new iPhone
Initial setup is a mandatory procedure after purchasing a new iPhone or iPad. Selecting a language, setting up security, connecting to branded services such as iCloud and iMessage, as well as activating a new device - all this can be configured immediately after turning on your iPhone or iPad for the first time.
After reading this article, you will be able to configure your new iPhone for comfortable use. And if you have already successfully done this, read the following guide, “How to buy programs and games in the App Store.”
1.Turn on iPhone
The power (lock) button is located on the right edge of iPhone 6 and newer or on the top edge of earlier models. Press and hold it until the Apple logo appears on the screen.
After a few seconds, you will see a greeting in several languages. Swipe anywhere on the screen from left to right.
2.Select language and home region
This choice determines what language information will be displayed on your iPhone. If you purchased it in Russia, the default country will be Russia and the language will be Russian.
3.Internet connection
At this point, you need to connect to a Wi-Fi network to activate your new Apple device.
A list of wireless networks available for connection will appear on the screen. From this list, you should select a Wi-Fi network known to you and log in to it using a password.
If wireless networks are not available, you should use the mobile Internet to activate your Apple smartphone or tablet. To do this, click on the phrase “Use cellular communication.” Activation is required for a new device, so this step cannot be skipped. Make sure you have a wireless network in advance or install a SIM card in your Apple mobile device.
4.Enable location services
Location services let you navigate, share your location with friends, and find your Apple device on a map if it's lost or stolen.
5.Setting up Touch ID and setting a password
At this stage, you will be asked to remember your fingerprint in order to later use it to confirm purchases in the App Store and iTunes Store, unlock your Apple device, and ensure the confidentiality of personal data stored on the device.
Follow the on-screen prompts to successfully set up Touch ID.
The next step is setting a password. The system will prompt you to set a 4 or 6-digit password as an alternative to Touch ID. Please remember that a 6-digit password is more secure. Be sure to remember or write down the password you create in a safe place.
We do not recommend skipping this step, since Touch ID and password are a guarantee of the security of storing information on your Apple device.
6.Data recovery
At this point, you can restore all information and settings from your old iPhone or iPad through iCloud backup service using a backup on your local computer using iTunes.
Also, if necessary, it is possible to transfer information (contacts, message history, photos and videos from the camera, Internet bookmarks, mail accounts and calendars) from your old Android smartphone.
If there is no need to restore data, you should select the “Set up as new iPhone” option.
7.Connecting an Apple ID account
An Apple ID is a personal account that allows you to access various Apple services, such as instant messaging or video calls between Apple technology users.
With an Apple ID, you can use the App Store and iTunes Store to buy apps, games, and music, and back up your data, including your notes and phone book, to iCloud.
If you don't have your own Apple ID, you can create one during the activation process for your iPhone. To do this, click on “Don’t have an Apple ID or forgot it?” and follow the system prompts.
You will be asked to choose a new name for your account, create a password, and enter information about your physical address and bank card information to make purchases in the App Store and iTunes Store digital stores.
Read more about creating an Apple ID here.
Don't forget the password for your Apple ID, but don't make it too simple: this account is your main key to the world of Apple services.
8.Setting up Siri
Siri is your personal voice assistant that lets you create reminders, set alarms, mark calendar events, send messages, and more.
More information about the voice assistant can be found here.
During this setup step, follow the on-screen prompts to teach Siri how to detect your voice and respond only to it.
You can call her at any time by simply saying “Hey Siri!” On iPhone 6s this function is always available, but on previous generations of iPhone it is only available when the smartphone is charging.
9.Choosing the optimal interface size
If you have an iPhone 6 and newer (except iPhone SE), the system will prompt you to select the interface scale “Standard” or “Enlarged”. If you select the second option, all icons and fonts on the screen will be larger.
To complete the setup, tap the Get Started button. The Home screen will appear and you can use your new iPhone.
Read more New Apple Arcade: interesting games worth playing in February