The technology for automatically receiving updates was first used by Microsoft in the Millennium Edition. In all modern versions of operating systems it is enabled by default. Moreover, in Windows 10, in accordance with the license agreement, the user does not have the right to refuse to install them. This ensures that the OS is kept up to date and vulnerabilities are addressed in a timely manner. Let's take a look under the hood and figure out how Windows update technology works.
Update storage
We will leave the subtleties of the process to programmers and system administrators. For an ordinary user, to control the correct operation of the OS, it is enough to know where updates are installed. Since all current versions of Windows run on the same core, the internal directory structure is practically the same.
Having moved along the path indicated in the frame, we see the folder into which the downloaded updates are placed. If desired, the user can examine its contents and measure the size.
It’s worth warning right away that you won’t find update files with the names KB0000001 and the extension “msu” in it. This folder is used to cache downloaded components, which are subsequently automatically deleted after installation. Those interested can watch the process “live” at the moment when updates are downloaded. By opening the Download subfolder in this directory, you can observe the operation of the operating system. The necessary folders are created and deleted before your eyes as the resulting “patches” are installed.
Cache rebuild
An attempt to directly delete this system directory will result in receiving the warning shown in the screenshot.
- What to do if updates are not downloaded in Windows 10
Its appearance is a consequence of the Windows Update service, which blocks its cache folder from unwanted interference. To perform the delete operation, you will have to disable it.
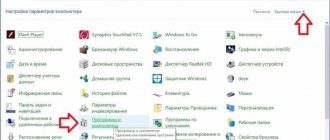
We use the context menu to select the option shown in the screenshot and go to the computer control panel.
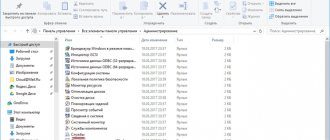
Select “Services” on the left side of the window and scroll down the list that opens to the end to find the Update Center. In the drop-down menu, select the startup type – “Disabled” and click the “Stop” button.
Clearing log history
To clear the history log, use Disk Cleanup. To do this, follow these steps:
- Run Disk Cleanup in the This PC window.
- Click on the OS drive and click Properties.
- After examining the window that opens, check the box next to “Windows Update Log Files.”
- After clicking OK, the program will completely clear the Windows 10 update history, thereby freeing up some free disk space.
Setting up Windows Explorer
You received a Get Windows 10 notification. You declined the offer and received it again. The operating system very annoyingly offers to install updates and upgrade to the new product. If you want to get rid of this, you need to remove the Tens installation files and some updates.
But first of all, users will need to change the file display configurations in the system Explorer (a program for working with disks, folders and files). This is necessary because the Windows 10 distribution is saved in a hidden folder that you cannot see. Without appropriate settings.
Follow the instructions provided:
- Open File Explorer. You can do this from the My Computer shortcut in the Start menu, Quick Access Toolbar, or desktop. There is an alternative way - press the + keys at the same time.
- Click on the “Arrange” tab, which is located in the main menu of the window (upper left corner).
- In the drop-down list that opens, you need to select the “Folder and Search Options” section.
- In the new window that opens, go to the “View” section.
- Find the option “Show hidden drives, files, folders” and check the box next to it.
- Click the and buttons.
Where are Windows 10 distribution files downloaded?
Many users are also interested in where the Windows 10 distribution files are downloaded. Microsoft offers users a special Windows Update Assistant utility, which can be found on the official website. Using this application, files are saved by default in the “$Windows.~BT” folder on drive C. However, a similar Assistant creates a couple more folders on the disk – Windows10Upgrade and $GetCurrent\Media. The first stores installation documents, the second contains ready-made files.
This Assistant is very easy to use. It is enough to launch it and select the “Update now” command, the program will find and check everything, and then begin downloading, creating new folders. After the process is completed, you can perform any actions with the distribution.
If necessary, you can disable Update Center.
A similar folder with files can also be deleted if it takes up extra space. For this purpose, it is recommended to use the Unlocker program - it is the most convenient, although if you wish, you can use any other software to remove software.
Updates for Windows 10 or any other version are downloaded to a specific location on the computer. These folders are not public. To find them, you will need to follow some simple steps. If you wish, you can delete the installation files and configure the program so that they are no longer downloaded. You can do these steps yourself, but you must strictly follow all instructions. However, if you are not confident in your abilities, then it is better to trust a specialist.
Windows ~BT folder
After you change Windows Explorer configurations, you will be able to see folders and files that have the “Hide” attribute. Now you can search for the folder where the Windows 10 distribution is downloaded and delete it.
The first place where it can be saved is directly in the root directory of your system drive. That is, the one on which you installed the OS (the “Windows” directory is located in it). In most cases it has the letter "C:". The folder is called "$Windows.~BT". You can safely delete all its contents.
If you are looking for this directory to force an upgrade to Windows 10, this is a bad idea. If you try to run “Setup.exe” manually, all installation files will be deleted.
In some cases (depending on the Update Center settings) this folder may be located in a different location:
- Open the "Windows" directory on your system hard drive.
- Find the "Software Distribution" section.
- It contains the “Download” directory. Open it.
The “$Windows.~BT” folder you need may also be located here.
Practical benefits of the ReportingEvents log file and the folder with downloaded updates
So, we figured out where Windows 10 updates are stored. Now let's look at the practical side of applying such knowledge. First of all, attention should be paid to the text log file itself, which is opened in the most common Notepad.
It contains all the information regarding the processes of downloading and installing update packages, with a description of the errors and failures that have arisen for each of them. Thus, if the report indicates that errors occurred during the installation of a certain package, knowing its number, you can install the update again yourself. To do this, go to the Internet resource of the Microsoft update catalog, search by the number of the faulty package (it is not necessary to enter the abbreviation “KB” before it, which marks all packages), and then download the required package in MSU format and install it by running the downloaded file .
Note: it is impossible to perform a manual installation from the directory with saved data, since it contains not installation files, but cached data.
But if there is a need to reinstall the entire system, you can first copy the files from the SoftwareDistribution folder to removable media (and only those packages that you consider necessary), so as not to wait for all updates to be checked and installed after the installation of the system itself is completed. Pay special attention to the fact that if the package name contains the prefix “EXPRESS”, such files and directories can not be copied, but can be safely skipped (forced manual installation is not provided for them anyway).
Explorer address bar
If you don't want to go into the system Explorer configuration and change anything there, there is an alternative way to open a hidden directory. To do this, you can use the address line. It is located between the Explorer work area (which displays files and folders directly) and the toolbar with various tabs.
- Click on the address bar with the left mouse button.
- All its contents will immediately be highlighted. If for some reason this does not happen, use the + key combination.
- You need to copy the following into the empty address bar: “C:// $Windows.~BT/” without quotes and press .
- If nothing is found at the specified address, enter an alternative: “C://Windows/Software Distribution/Download/$Windows.~BT/” and also click .
This way, you can open any hidden folders without affecting the Windows Explorer system configuration. By going to a directory, you can simply select all the files that are stored in it and delete them.
Cleaning up from a previous build
Windows.old is nothing more than a compilation of an operating system from the past. This folder weighs about 5-10 GB, so it is recommended to delete it.
Before uninstalling, make sure that all personal files have been correctly copied from the old operating system to the new one. If necessary, you can copy them manually by going to the Windows.old folder. Restoring these files after uninstallation will not be possible.
To remove the old version:
- Click on the drive where the Windows.old folder is located and click Clean Up Disk.
- After a short wait, files that can be deleted will appear on the screen. However, you are interested in the “Erase system files” feature.
- Select Previous Versions of Windows from the list and click OK.
After this, the folder will be deleted. This action will save almost 8 GB of space.
Search your hard drive
If there is no folder with the Windows 10 installation distribution in the root directory of the system drive, and you don’t want to search for it in various sections, you can resort to the services of a search utility. To do this, open File Explorer and press the + key combination to bring up the search menu.
Copy the name of the folder you want to find into it and click . The program will automatically find the necessary data and show you where it is stored. This is the least successful method, since this section is often not indexed by the system. Due to this, the search may take quite a long time. Or not bring any results at all.
If the display of hidden directories is disabled in Explorer, the search may not find anything. In this case, you must first activate the display of files with the “Hide” attribute, and only then search for them.
Disabling "Get Windows 10" updates
If you simply delete the “$Windows.~BT” directory, after a while it will start downloading to your personal computer again. To prevent this from happening, you need to remove the updates that enable the Get Windows 10 application to work. They are removed, like installed programs, using a special operating system tool.
Follow the instructions:
- Bring up the Start menu. This can be done using the key or the corresponding icon at the bottom of the screen.
- Open Control Panel.
- Go to the section called “Programs”.
- Click on the “Uninstall a program” hyperlink.
- Using the navigation menu on the left side of the window, go to the “View installed updates” category.
Here, users will need to find and remove several programs. Their list depends on the version of your operating system.
For Windows 7 you need to remove:
- KV 3035583
- KV 2952664
- KV 3021917
For Windows 8 you will need to remove:
- KV 3035583
- KV 2976978
You can use the search bar in the upper right corner to quickly find all the necessary files. Select an object, after which a “Delete” button will appear above the list, which you need to click.
Block automatic installation
If your Update Center is running, it will immediately download these updates again and install them on your computer. To prevent this, you need to disable the downloading of these patches. To do this you need to do the following:
- Open Control Panel from the Start menu.
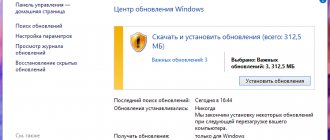
- Find Update Center and launch it.
- Click on the “Important Updates” hyperlink.
- Find the recently deleted updates in the list and mark them with checkboxes.
- Right-click on one of them and select the “Hide update” action.
- Click and close Update Center.
Now the Get Windows 10 notification will not bother you.
On a similar topic, there is another article on the site that describes additional methods for getting rid of unnecessary directories: what kind of Windows BT WS folders are they and whether they can be deleted.
Actions with the update saving directory
But when deleting the folder itself, described above, knowing where Windows 10 updates are downloaded will come in handy. It goes without saying that when you try to simply delete it from Explorer, you will receive a message stating that you first need to stop the directory associated with it. process. This applies to the Update Center service.
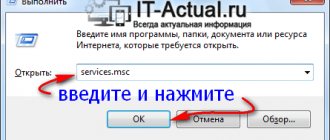
It can only be deactivated in the services section (services.msc) by first clicking the stop button and then setting the startup to disabled. If this is not done, even actions directly in the update management section will be ineffective. Terminating the process in the Task Manager will also lead to nothing, since after some period of time (very short) the process will start again on its own.

