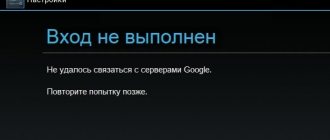
The error “could not contact google servers” occurs when adding an account, as well as when logging into the Play Market, Google Play and even Youtube. A window appears on the smartphone screen with the message “Failed to contact Google servers - try again later.” This is not the most pleasant, but quite common notification, which is most often received by owners of Meizu M5, Huawei, Samsung, etc. phones.
We have collected the most effective methods that will help you fix the problem and get your applications working properly:
- Clear cache Android
- Correcting date and time
- Incorrect DNS servers
- Removing bad applications
- Create an account
- Checking hosts for errors
- Reset via Recovery
- Other fixes
Why do I get the message "We couldn't contact Google's servers, please try again later"
The error in question has a rather long history, and has been recorded from approximately 2011 to the present day.
Its reasons may be the following:
- There are problems with the network Internet connection (in particular, due to the router, incorrect operation of DNS servers, etc.);
- The date and time are set incorrectly on the mobile device;
- The Google Play Store, Google Services Framework, and Google Play Services applications do not work correctly. In particular, the error may be caused by outdated versions of the specified applications;
- The system hosts file on the phone has been modified;
- Two-factor identification is enabled when connecting to a Google account;
- A number of mobile applications, at the level of the well-known “Freedom”, were removed (installed) incorrectly.
In rare cases, the error may also be caused by a rooted version of the Android operating system.
Changing Hosts
If you used Freedom, but the method of installing and uninstalling the program did not help you, then you need to change the Hosts file in the system. To do this, you need root access and the Root Explorer file manager:
- Open Root Explorer and select R/W (read / write; change files) rights.
- Go to the /system/etc/
. - Hosts
file there and open it in a text editor. - We delete all the text and add the line 127.0.0.1 localhost
.
The same can be done in simpler ways:
- Restore the original Hosts file using the AdAway application.
- Just delete the Hosts file - it will be restored on its own and in its original form.
If you are not going to use AdAway, then it is better to remove all applications that block ads - they can also cause the error.
Play Market server crash
Quite often, such errors can occur due to incorrect updating of the OS and Google Play itself. A very common mistake. Google Play often doesn't work because the cache is full.
It happens that there are no problems with this platform. But there is no Internet. In this case, you need to check your Internet connection. In addition, there may be no Internet if you set the date and time incorrectly. This usually happens after removing the battery (or you just completely drained the device).
It affects the functioning of Google Play and proper synchronization with the Google profile. This happens after you have installed or downloaded an application from the store. Also, a crash may occur if you downloaded a cracked game or program.
Also, not every version of Android may support this store. This is due to the incompatibility of some phones with Google Play. You can find out the list of brands in Google Play in the “Help” menu.
Troubleshoot problems with your bank card
You may see one of these messages:
- “The payment cannot be processed: there are insufficient funds on the card.”
- “The transaction could not be completed. Please use another payment method."
- “Transaction failed.”
- “Unable to complete transaction: card has expired.”
- “Update this bank card details or use another one.”
To resolve these issues, follow the steps below.
Check that your card details and address are correct
Your Google Payments account may have an outdated billing address or an expired card. In this case, simply update the data.
Remove or update outdated maps
If you choose to use an expired card, the payment will be declined. Here's how to update your card details:
- Sign in to your Google account at https://pay.google.com.
- Find the card you used to pay.
- Check when it expires.
- If it has expired, remove the card or update the data.
Make sure your card address matches your Google Payments address
Payment may be declined if the card address on your account is incorrect. Here's how to check it:
- Sign in to your Google account at https://pay.google.com.
- Find the card you used to pay.
- Click Edit.
- Make sure the billing address and the address on your card match.
- Update the address if necessary.
Clear cache and application data
If the error “Could not contact Google servers, please try again later” does not go away, you can try this method:
- How to recover your Play Store account if your password is lost?
- Go to the settings of your gadget, select “Applications” (Application Manager) there and find “Google Play Store”, “Google Services Framework”, and “Google Play Services” in the list of applications.
- Tap on each of these applications, and after entering their settings, click on “Erase data” and “Clear cache”.
- After performing this operation with each of the mentioned applications, restart your device.
Follow this procedure for all listed applications.
If this does not help, try updating the listed applications from the Play Market if updates are available. This has helped some users resolve an issue with Google servers on their devices.
Error "No Internet connection" when purchasing
This message appears rarely, but will become a serious problem if the user decides to purchase the software.
Let's try the following options:
- Reconnect to another wireless access point. If you are using mobile Internet, turn it off for five minutes and then turn it on again.
- Choose another payment method. For example, the user selected the “By bank card” option. We exchange it for a Yandex.Money wallet.
- We check the smartphone for viruses. We use only official antivirus tools, which were previously installed through Google Play.
If none of the methods helped, try again after a few hours. Perhaps the error is on Google's side.
Method 5. Activating “Download Manager”
Problems with the Play Market may occur due to the disabling of this service application. In order to activate the “Download Manager”, you must first go to the settings menu of your device, then use a swipe to go to the “All” section, where you select the required item. When stopping the application, click the “Enable” button.
After the operations have been completed, you need to reboot the device and then check the correct operation of the Play Market.
Disable synchronization
Due to a synchronization error, the app store also cannot connect correctly to the server. To disable it, go to the device settings again, move to the “Accounts” item, select Google.
Disable all synchronization and reboot the device. Log into your account again and turn synchronization back on. An error may appear, but we don’t pay attention to it and try to go to the Play Market.
To disable, uncheck all the boxes.
It is important to turn synchronization back on. Due to its absence, problems with the Market may also occur.
If there is still no connection to the server, proceed to the next step.
Why does the Play Store show a server error?
The Google App Store is a tool that contains information about the software available on the device, installing and updating it. Play Market is extremely easy to use, has the function of automatically installing new versions of programs, and provides a wide selection of software of various categories.
note
To access the service, you need a Google account, which is also linked to your mobile device. Problems that arise in your account can have a negative impact on all related products and vice versa.
Among the main reasons that Google Play writes a server error are:
- operating system failure;
problems on the Google side; excessive cache size; accidental or intentional shutdown of the Download Manager application; error when accessing user account data;
the date and time settings
on the device are Regardless of the cause of the problem, the procedure for solving it is to try the methods presented below one by one. They are arranged in order of complexity, starting with the simplest and ending with resetting the settings to factory values.
- Email for google play. Free Google Play registration
Causes of error and elimination
Now let's move on to common cases that cause failure. The solutions are arranged in order of increasing difficulty.
Connection to the global network
The first and most obvious reason for the error “could not connect to the Google Play Service servers” is the lack of Internet . It can be disabled on the device or on the router. Therefore, you should do a quick check using one of the following methods:
- Launch your browser and check the availability of any site.
- Lower the curtain and see if Wi -Fi on the device. If you are using mobile Internet, then check “Mobile data”.
- Check the availability of any site on other devices connected to the current network.
Bad sound on Windows 10 - how to fix it
If Internet access is not available on other devices , then this is a problem with the router or provider. If the Internet is not available only on the desired smartphone, then just turn it back on and try again. In a situation where there are no problems with access to the global network, you need to check other solutions.
System failures
The following problem can be roughly divided into 2 stages. Sometimes, errors in an application accumulate over time. Especially if the device works without being turned off. And these errors can be easily eliminated or become permanent (for example, a network failure during an update will affect).
Fixable Issues
The simplest way to resolve system errors is to reboot the device. To do this you will need:
- Press the “ Lock ” button.
- Select the item “ Reboot ” by clicking on it.
- Check for errors .
Often this action will correct minor system glitches. More critical situations will require extreme measures.
Irreversible system errors
The last resort is to reset the phone to factory settings. To do this you will need:
- Open “ Settings ” (location depends on the smartphone model and OS version).
- Go to the “ Backup ” section.
- Select the item "Factory reset».
It is important to remember that in this case absolutely all information is deleted : accounts, photographs, audio materials. That is why this method is considered extreme.
Cache overflow
The solution can also be called simple. If the saved data contains incorrect information (for example, an outdated Google server address), clearing the cache will solve the problem. The only caveat is that 2 stages of cleaning may be required.
Shared cache
Clears saved data from all applications. May not erase information from damaged system programs. That’s why you need to check each stage sequentially:
- Open " Settings ".
- Go to the “ Memory ” section.
- Click on “ Cache Data ”.
- Confirm deletion .
Windows has detected a hard drive problem
Application cache
The action is more complex. Associated with the deletion of information about Google accounts. Therefore, it would be a good idea to first check if you remember your account password . The steps are simple:
- Open " Settings ".
- Go to the " Applications " section.
- Find " Google Services " and open it.
- Find the " Clear cache " button.
- Confirm deletion.
- Re-login to your account.
If at the login stage, after cleaning, the error manifests itself again, then you will need to resort to more complex solutions.
Application rollback
Repeats the actions described earlier and serves the same purpose. Only now, you need to find the PlayMarket application, which will be completely erased and reinstalled . After which it will be updated. Such aggressive actions can correct the error that has occurred. The steps to delete the application cache are repeated, except for step 4. By entering the program properties you need to:
- Click " Disable ". Or, if the button is available, click “ uninstall updates ”.
- Confirm action.
- Click "OK».
Sync failed
It could also be due to some kind of glitch in the synchronized data. For example, a smartphone contains information that is not in its “cloud copy”. In this case, you will need to resynchronize the data. The failure in this case is due to the fact that mismatched data is transmitted and the server resets the connection in order to protect the user’s information:
- Open settings .
- Find “ account ” and select “ Google ”.
- Open the desired account.
- Click “ sync ” in the drop-down menu.
Updating the current information will allow the server to recognize the device as correct and allow it to continue working with services.
Incorrect date settings
It is worth noting that this action is the simplest on the list. But, due to the rarity of failures for this reason, it is in one of the last positions on the list. If the time on your phone is set incorrectly, then when you try to connect to any site or service, the corresponding information will be provided. The solution is:
- Open " Settings ".
- Go to " Date and Time ".
- Disable/enable synchronization and/or set the correct configuration.
All ways to change your account in the Play Store on Android
Thus, information from the device will be provided at the current moment and connection certificates will be submitted in the correct form (corresponding to the validity period).
Rare causes
The rarest case is that the settings are damaged due to a virus. To be precise, the browser settings are damaged, which affects the operation of the device. In an attempt to rewrite inaccessible hosts, the virus edits what it can. The problem can be detected due to the constant opening of additional tabs in the browser. Fixed as follows:
- Open browser .
- Go to settings .
- Find the line " Content ".
- Check for the “ forwarding ” tab.
- If there is a tab, remove everything unnecessary .
Features of the BlueStacks player
Before moving on to a detailed discussion of the problem, it is worth briefly talking about the main features of the BlueStacks application. This emulator is designed to run Android applications on computers running Windows. Separately, I would like to note that the user does not have to understand all the intricacies of the program; all that is necessary is to install it on the computer, log into your Google account and make the initial settings. After this, the usage is identical to regular Android.
By deleting the Google account on the device
As a last resort, we will delete the user account and then reactivate it.
Important! Before performing subsequent actions, we synchronize the necessary information with Google cloud storage. Open the settings menu, go to the “Accounts” section
Find the Google line and go into it
Open the settings menu and go to the “Accounts” section. Find the Google line and go into it.
The next step is to click “Delete”. We confirm the action, and then reboot the communicator.
After startup, the operating system will ask you to enter your Google account information. Enter your email and password. Let's try connecting Google Play to the Internet again.
What to do if you receive the error “Could not contact Google servers. Please try again later"
Before moving on to specific methods for fixing the error when you cannot contact Google servers, check and adjust the settings in your own gadget.
Do the following:
| 1 | Determine which mailbox you want to add (maybe you enter mail.ru, yandex.ru, or other addresses by mistake). |
| 2 | Check if the time and date are set correctly. |
| 3 | See if there is a network connection - open the device settings or try to access the Internet through a browser. |
If your mobile gadget is functioning correctly and you are entering the correct data, then the problem may be caused by the Freedom software.
Extraordinary solutions
Users report that changing the theme on their phone helped them resolve the issue. The second solution is to change the DNS.
- Open the settings for the current connection.
- Tap on the “DHCP” item.
- Enter 8.8.8.8 for DNS1 and 8.8.4.4 for DNS2.
- Reboot your gadget.
If an error appears while trying to download purchased content, make sure that your device has enough free memory plus at least 200-300 megabytes of storage.
There are many reasons why the Play Market does not see an online Internet connection. They should be looked for individually, although most often, based on user reviews, setting the correct time zone and date on the gadget and wireless router helps.
Factory reset
If none of the above helps, then you can use a radical reset of the gadget settings to factory settings. For example, on some devices this is done by going to “Settings”, then “Backup”, and selecting “Reset data”.
- What should I do if there is an error in the Google Play Services application?
Please remember that all user files in the phone memory will be deleted when performing this reset.
Recommended reading: Your browser does not currently recognize any video formats.
How to fix errors
Now we will talk in more detail about the problem: if an error occurs in the Google Play Services application - what and how to do. It is advisable to follow the instructions according to the sequence of their location in the article.
Fixing update errors
First, you need to find out if the error is due to an outdated version of Google Play Services. For this:
- Open your phone settings and go to “Applications”.
- Click on “Google Play Services”.
- At the very bottom there is a line “About the application in the store”. Click on it.
- The system will redirect us to the program card in the Play Store. And if you see an active “Update” button, it means the version installed on your smartphone is outdated, but for some reason the update was not performed automatically. Click on this button and wait until the latest software is downloaded and installed.
If there is no “Update” button, proceed to the next instructions.
Clearing cache and deleting service data
How to fix Google Play Services error by clearing unnecessary data:
- Go to the program location from the “Applications” section, in the same way as described above.
- Click on the “Memory” button and then on “Clear cache”.
- Now go back and “Memory management” and at the very bottom of the window - “Delete all data”.
- Confirm the action.
After deleting the data, you will need to log in to the application again. You can do this by following the system prompts.
Fixing authorization error
How to resolve the Google Play Services error if its probable cause is an authorization failure:
Removing your Google account from your smartphone. “Settings” → “Cloud and accounts” → “Accounts” → select the Google account by name → Click on the three dots in the upper right corner and click on “Delete account”.
Add the account to your smartphone again. We do the same thing, only instead of “Accounts” click on “Add account”, then confirm your identity (if such a setting is enabled) and enter your account information.
If you have multiple accounts connected to your device, you should work with the main one. You can see which one is the main one here: Settings → Google → Account.
Date and time settings, search for an application with which there may be a conflict
If a Google Play services error occurs, you need to check whether the date and time on your smartphone are set correctly - a failure can also occur because of this. We do:
- Open the settings and go to “General Settings”.
- Click on “Date and Time”.
- Move the slider next to “Automatic time detection” to the “On” position.
After this, the smartphone will take accurate data from the Internet.
Also, sometimes the tablet displays a Google Play Services error after installing a new application. A so-called conflict occurs. You can only find out which program is causing the crash using a brute force method - one by one disabling what was recently installed.
Transfer Google Play Services from SD card back to device memory
When a Google Play Services error occurs due to insufficient free space on the device, an ordinary user who does not have special knowledge quite logically decides to transfer the bulk of programs to an SD card. But you can’t do this with Google utilities: the SD card is read by the OS much slower than the internal memory, and this speed is lower than that required for the normal operation of the Services.
To free up space, it’s better to do the following:
- Go to the “Applications” section in your smartphone’s settings, view a list of everything that is installed and delete what you don’t use.
- Using the file manager, move already downloaded programs* to the SD card, thereby keeping the device’s built-in memory free. And in the future, new applications can be sent there.
*Those that can be carried.
Errors with codes
It happens that when you try to perform some action where Google Play Services is involved, a specific error on Android is indicated - usually this is a short code. For example:
Errors 910 and 495 The connection to remote servers is lost due to problems with updates or the Play Store program is clogged with cached data.* Error 403 The connection to remote servers is blocked by IP (Google services are blocked in your country)
Error DF - DFERH - 01 (impossibility of packet data transmission)
Complex error. Can happen for any of the reasons described in the article
Particular attention should be paid to the relevance of the date and time, as well as the possibility of conflict between programs.
*Fixed using the same principle as described above in the sections on updates and clearing the cache.
Fast and easy
To begin with, we will present a method that will not require you to perform any complex or dangerous operations with the gadget. The simplest solution to the “Unable to establish a reliable connection” error is based on system settings. You just need to check the system date and time in your Android device. They must coincide with the real ones within one minute. This is due to restrictions on the validity of program certificates. If the date is incorrect, the phone will consider that the validity period of the certificate has not yet arrived or has already passed.
Method 2: Checking the date and time on your phone
One of the simplest causes of an error is an incorrectly set date and time. They don't always match Google certificate expiration dates, which can result in an error. To fix it, just find out the appropriate time zone and set it on your phone.
Instructions : How to correct the time on your phone
- Go to “Settings > General settings > Date and time”.
- Set the time and date manually by clicking “Set date” and “Select time zone”.
- The “Auto time detection” option is responsible for automatic time detection. Move the slider to the right to activate it.
Reinstalling Play Store
If the problem persists, you can reinstall the Play Market. For this:
- open the tinctures;
- applications;
- select Play Market;
- stop;
- Click remove updates;
- erase data;
- remove from default startup;
- download the application with the .apk extension;
- go to the device file manager;
- run the file;
- After installation, open the Play Market and enter your username and password.
How to remove Play Store
The application should work.
Important. Since the Market is built into the system and is not supposed to be removed, it is not available on the official Google Play website, so you will have to download it from third-party sources. Use only reliable and safe sites to protect your device. The latest version of the Play Market can be found on the resource w3bsit3-dns.com and others like it.
General recommendations
- Reboot your device. Perhaps this simple action will solve the problem.
- If the problem persists, switch from Wi-Fi to mobile Internet or vice versa.
- Open Settings Wireless & Networks or Connections. These options may be named differently depending on the device.
- Turn off Wi-Fi, turn on mobile data and check if that solves the problem.
- If not, turn off mobile data and turn on Wi-Fi. Check to see if the problem has been resolved.
- Follow the steps below.
How to fix problems with mobile Internet
Make sure your device is connected to a mobile network
Open Settings “Wireless networks” or “Connections” Mobile Internet or Mobile data. On some devices, you must first select “Data transfer”. Turn on mobile data
If this is already done, disable it and enable it again. Make sure the technology indicator (for example, 2G, 3G, 4G, or H) is shown next to the icon at the top of the screen. Please note that this indicator is sometimes not visible when the device is connected to a Wi-Fi network. Turn off Wi-Fi and check the indicator again.
If there is no indicator, you may be out of mobile Internet coverage. Go to another location (for example, go outside) and check the signal strength again.
Note. If this problem occurs frequently, contact your mobile operator.
Turn Airplane Mode On or Off
- Open Settings Wireless & Networks or Connections Airplane Mode. These options may be named differently depending on the device.
- Turn on airplane mode.
- Wait 10 seconds.
- Turn off airplane mode.
- Check if the problem is resolved.
If you have followed all the steps above and the problem is not resolved, contact your mobile operator.
How to fix Wi-Fi problems
Make sure your device is connected to a Wi-Fi network
- Open Settings Wireless & networks or Wi-Fi connections. These options may be named differently depending on the device.
- Turn on Wi-Fi.
- Find the Wi-Fi connection indicator at the top of the screen.
- If it doesn't show or there are no bars, you may be out of range of a Wi-Fi network.
- Move closer to the router, check the signal strength, and check if the problem is resolved.
Reboot your router
If your device is connected to your home Wi-Fi network, check your router manual for information on how to reset it. Most often this is done like this:
- Disconnect the router from the power supply and make sure that the indicator lights on it go off.
- Wait 30 seconds.
- Plug your router back into power and wait 30 seconds until all the lights come on.
Advice for advanced users. Make sure your firewall is not blocking access to the ports required by Google Play (TCP and UDP port 5228).
If you have followed all the steps above and the problem is not resolved, contact your ISP or Wi-Fi network owner.
Delete Google profile
This method sometimes helps in some situations, and if you haven’t linked various programs with games to your profile, it’s worth trying it. It is quite possible that the server will start working. To delete an account, proceed as follows:
- You need to go to “Settings”;
- Then to “Accounts”;
- Tap on the email address;
- Then, you need to call up the drop-down menu using the button located on the front of the smartphone (it is not far from the “Back and Home” buttons). In some devices, a similar menu can be called up by tapping on the button with 3 dots, which is located in the right corner of the display;
- Then you need to uninstall the profile.
Then, you need to restart your smartphone and enter “Settings” again. Next, create another Google profile. Email with password is allowed to apply the same. Let's try to log into Google Play.
Selecting a different Wi-Fi point
Connecting to an alternative Wi-Fi access point has helped some users. Use an alternative public or private point to access Google servers.
Network time usage
There is an opinion that synchronizing time with the network helps to cope with the problem if it is disabled in the settings.
Open the Settings application.
In the search bar, enter “time” (without quotes) and select the desired menu item.
Enable network time usage.
Installation errors or corruption of the program executable file
Often the failure is manifested by constant messages “An error has occurred in the Google Play Market application.” It pops up when the user tries to launch the application or perform any action in it (search, download). And in some cases - on its own, when one of the installed programs decides to check for an update in the background.
You can try to deal with this error using the methods described above. If all else fails, the following options remain:
- Restore the system from a backup copy (if you created it in advance, for example, in the Android gadget management program for Windows MyPhoneExplorer).
- Remove Play Market from your device and install it again. To do this, you will need root rights (obtained in advance).
- Perform a factory reset on your tablet or phone (Hard Reset/Wipe).
How to reinstall Play Store
- Download or copy the Google Play Market executable file in .apk format from a properly working Android phone or tablet.
- Enable permission to install applications from unknown sources on the problematic device. The option is located in the Security or Protection menu of the Settings app.
- Transfer the file to the problematic device and start the installation (touch it with your finger).
- If nothing happens or you see the Play Market error message again, open the dataapp directory and place the file there.
By the way, to remove the faulty copy of the Market and reinstall it, you can use the same MyPhoneExplorer. After synchronizing your phone with the program, go to the “Files” - “Applications” section, click the line highlighted in the screenshot and click the “Delete” button.
Next, click on the “Download application” icon on the top panel and specify the path to the .apk file.
What to do if you can't log into your Google account
When entering information from your Google account on smartphones and tablets, the user may encounter a login problem. The system simply does not log into your Google account on Android. The reasons are different: the login or password was entered incorrectly, the profile has already been added to the device, or the connection to the server has not been established. The article provides examples of how to bypass these errors.
Depending on the error information, select the section you need and follow the advice.
Invalid login information
By entering a username or password manually, you can see information about incorrect data entry. In this case:
1. Check that the data entered via the computer is correct.
2. Write the correct data in a text note on your smartphone, and then use the “copy/paste” functions to transfer it to the fields to fill out.
3. Enter data through the form “Accounts” – “Add account” – “Google”.
4. If the password is not accepted, change it from an authorized computer or through the recovery form.
Unknown error
This behavior of the smartphone is possible if you recently changed your password and tried to enter data from your Google profile. This happens if the account on the smartphone was not logged out, but the smartphone was simply reset to its factory state. This is a kind of Google anti-theft system called Factory Reset Protection. You can read about ways to bypass it in the article Resetting your Google account.
In this case, it is recommended to wait from 24 hours to 3 days after changing the password and enter your data.
Reinstall Google Play
We will reinstall if you still haven’t logged into the service. So:
- Go to “Settings”;
- Next in “Applications”;
- Then you need to select Google Play;
- Stop;
- Tap to remove the update;
- Click on “Erase data”;
- After that, select “Remove from default startup”;
- Now you need to download the program that has the extension. ark;
- Next, you need to enter the “File Manager” of your smartphone;
- Launch element;
- When we have done everything, you need to try to log into Google Play by entering your login password.
Play Market does not work, close the program.
Remember: Google Play is embedded in the OS, and manufacturers did not intend to remove it. You won't find it on the main Google Play resource. Hence, you need to look for it on other sites. To do this, you need to use only safe resources so as not to catch the virus. For example, on the website 4PDA.
Changing DNS in Android if YouTube and Play Market do not see the Internet connection
As practice shows, it is changing the DNS addresses of the Wi-Fi network that helps get rid of this problem. Why is this happening? Honestly, I don't know. Either due to problems with the ISP's DNS servers, or something in the router settings.
Therefore, we need to register DNS addresses from Google in the properties of the “problematic” Wi-Fi network on the phone. Or register these addresses in the Internet connection properties in the router’s web interface. Let's consider both options. But I recommend checking everything on your Android device first. If it works, and you have several other devices with the same problem, then you can try changing the DNS on the router.
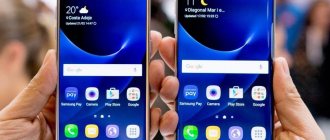
I will show you the example of a smartphone from Samsung. But there shouldn’t be any significant differences between other devices.
Go to settings, go to “Connections” – “Wi-Fi”. Click on your network and hold. A menu should appear where we need to select something like “Manage network settings”.
Next, we enable the display of additional parameters. In the IP settings, set “Static” and write: DNS 1 – 8.8.8.8 / DNS 2 – 8.8.4.4
These are DNS addresses from Google. Which I talked about in the article: 8.8.8.8 – what is this address? How to replace DNS with Google Public DNS.
We check that proxies are disabled (No) and save the settings.
After this everything should work.
One point: in Android there is no way to specify only static DNS and receive the IP and gateway automatically. And that's not very good. Since by disabling DHCP (automatically obtaining all addresses from the router), we set a static IP address. In my case 192.168.1.164. And if, when you reconnect to this network, this IP address is busy, then we will not be able to connect. Unless you reserve this IP address in the DHCP server settings on the router.
Therefore, if you have problems connecting to a Wi-Fi network, then know that it is most likely due to static addresses. Just change the last digit in the address (from 100 to 254), or set DHCP back in the Android settings. And DNS addresses can be registered in the router settings.
I show how to do this using the example of a TP-Link router.
After this, all devices connected to this router will use the set DNS addresses.
I hope you were able to solve the problem with accessing YouTube through the application and the Google Play store.
2) Rollback Chrome and WebView
Go to Settings → Applications and find two programs there - Chrome and Android System WebView . After that, we remove updates from both applications. Chrome only needs to remove updates, but WebView also needs to be Disabled .
Then we remove Vanced and microG, and also reboot the device. It's also worth disabling the Multi-CPU WebView . After the reboot, install Vanced and microG back and try to log in. If everything worked, then you can install Chrome and WebView back.
Disabling system protection
If BlueStacks cannot work properly, then there is a high probability that the program is being blocked by built-in Windows security or a third-party antivirus product. This often happens with various software.
Therefore, to restore the emulator to functionality, you will have to disable the built-in firewall and third-party antivirus. At least temporarily. And now we will try to do this.
- Click on the “ Start ” button in the taskbar and call up the corresponding menu.
- Move to the “ Utilities – Windows ” directory.
- Click on the “ Control Panel ” icon.
- In the main window of the panel, click on the “ Administration ” item, and then – “ Services ”.
- In the list of services, look for “ Windows Firewall ” and double-click on this entry.
- A window with service settings will open. Here we click on the button “ Stop».
- In the “ Startup type ” column we set “ Disabled ”.
- Consistently click the “ Apply ” and “ OK ” buttons.
We have just disabled Windows Firewall. This is much faster and more reliable than fiddling with its settings. Now we will deal with the antivirus. Let's take ESET Smart Security as an example. Here are the relevant instructions.
- You need to find the antivirus icon in the system tray. It is shaped like the letter "e". Click on it with the right mouse button.
- A menu will appear in which you need to select “ Temporarily disable protection ”.
- In the next window, the program will ask you to select a time interval to disable protection. 10 minutes is enough. We set this value in the appropriate column and click “ OK ”.
- Click on the “e” icon again and select “ Disable firewall ” from the menu.
- In the appropriate window, set a ten-minute time period and click on the “OK” button again.
Now all protection is disabled. We can check the functionality of Bluestacks. If it was a matter of defense mechanisms, then such a procedure should help. And if everything remains exactly the same, then it’s worth trying another option.
Attention! Even if the issue was to protect the operating system, it cannot be disabled forever. This is fraught with very serious consequences. Your computer may become filled with viruses. So after checking or using Tor, you need to return all protective functions to their place. Otherwise, the consequences can be sad.
Method 4: Uninstall third-party applications
Applications may be installed on the phone that change settings, which leads to a lack of communication with Google servers. One such application is Freedom. To solve the problem, you need to remove the application from your smartphone, but it is better to do this through special programs, for example, “Clean Master”, “History Eraser” and others.
If the application was previously installed and uninstalled, you can repeat the installation. If after this you are still unable to log into Google, remove Freedom and restart your phone.
Search and remove viruses
It is also possible that the operation of the emulator is blocked by viruses located on the user’s computer. They are quite capable of this. And if you don’t take any action, the consequences can be even more dire.
Therefore, you need to deal with malicious objects once and for all. First, we will look at the cleaning option using the built-in antivirus of Windows 10. Here are the instructions that must be strictly followed.
- In the system tray we look for an icon with a picture of a shield. This is an antivirus. We right-click on it.
- A menu will appear in which you need to select “ Open ”.
- The main window of the antivirus product will open. Here you need to select the type of verification. Full box .
- Click on the button "Check now».
Usually such a check is not enough. It is recommended to additionally use a third-party antivirus product. And now we will consider the option of searching for malicious objects using ESET Smart Security. Here are the instructions.
- We look at the system tray again and look for the antivirus icon there in the shape of the letter “e”. right-click on it.
- In the menu that appears, select “ Run Smart Security ”.
- In the right column, click “PC Scan”.
- Then select “ Custom Scan ”.
- Now you need to select objects to check. You need to check the boxes for all hard drive partitions, RAM and boot sector.
- Click on the “ Scan as admin ” button.
Scanning will occur automatically. After it is completed, it is best to restart your computer. Only after the restart will it be possible to fully check the operation of Bluestax. This method can help with a high degree of probability.