Read the article for step-by-step instructions on how to set up a network in Windows 7, 8 and 10. Home local network is easy.
When you have multiple Windows computers in your home or business, you often need to transfer files from one device to another. This can be done either using regular USB flash drives and other removable drives, or by setting up a Windows network.
Also, the local network provides a lot of other opportunities:
- Instant transfer of any documents;
- Communication in local chat;
- Setting up a game over the network.
Let's look at how easy it is to create your own local network and what you will need for this. The following instructions are for Windows 7 and Windows 10
Setting up file and folder sharing
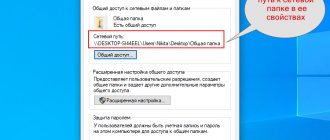
As I wrote above, access to shared folders is already available. But, we may need to share access to some other folder, which is located, for example, on local drive D. This can be done without any problems. After we open shared access to the folder, all computers on the local network will be able to view the files in it, change them, and add new files to this folder (however, this depends on what permissions we enable).
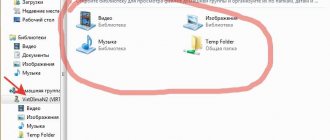
For example, I want to share the Pictures folder. To do this, right-click on it and select Properties . Go to the Access , and click on the Advanced settings . Check the box next to Share this folder and click on the Permissions .
In the window that opens after clicking on the Permissions , we need to set access rights to this folder. To ensure that network users can only view files, leave the checkbox next to Reading only. Well, for full access to the folder, with the ability to change files, check all three boxes.
Click Apply and Ok . In the Advanced sharing settings , also click the Apply and Ok .
In the folder properties, go to the Security , and click on the Edit . Another window will open in which we click on the Add . In the field we write “All” and click Ok .
Select the Everyone , and at the bottom, check the boxes next to the access points we need for this folder.
That’s it, after these steps, this folder will be shared with all computers on the network. It starts working without rebooting, I checked. Open this folder from another computer:
It’s all confusing, until you figure it out... It was possible to somehow make these settings easier and more understandable. But everything works. It turns out that I have access to a folder that is located on another computer. And this is all over the air, since both computers are connected to the router via Wi-Fi.
By the way, this folder will also be accessible from smartphones and tablets that are connected to this Wi-Fi router. To view network folders on Android, I recommend installing ES Explorer, or using standard Explorer. Everything is working:
Now we will also look at possible problems and errors that can very often be encountered during the setup process.
How to check the network operation?
In order to control the functioning of the LAN, it is recommended to use the command line (CL):
- Type “cmd” in the search bar;
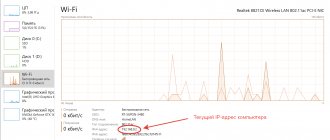
- Click on the result found and in the displayed text box type “ping” and the IP of one of the devices connected to the LAN;
- Click “Enter”;
- Next, read the statistics;
- Correct settings will be indicated by the same values of sent and received packets and delay time.
Instructions for setting up a local network in Windows 7
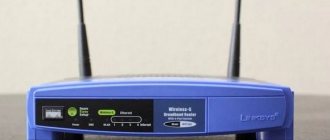
Let me remind you that the computers that you want to connect to the network must be connected to the same router, or connected directly with a cable. Also, all the actions that I will show in this section must be performed on both computers.
Important point! If you want to set up a network through a Wi-Fi router to which some third-party devices are connected (for example, your neighbor), then after setup, he will be able to access those folders on your computer that you set up shared access to. Set a good password for your Wi-Fi network to protect your network. If you still need to connect third-party devices to your router, but want to set up a home network, then you can create a “guest network” for guests, as we did on the Zyxel router in this article.
One more thing. If you are setting up a network by connecting computers directly, without a router, then you will also need to set static IP addresses in the properties of the local network connection. If you are connected via a router, then you do not need to do anything additional, continue to follow the instructions.
1 First of all, we need to check that all computers are working in the same workgroup. This needs to be checked on all computers that will be connected to the local network.
We do this: press the key combination Win+R , and in the window that appears, specify the command sysdm.cpl . Click Ok .
Opposite Working Group , it will most likely be written WORKGROUP . You can leave it. The main thing is that on other computers the workgroup should also be WORKGROUP.
If you want to change it, for example to MSHOME, then click the Change and specify a new group. Save the changes and restart your computer.
2 The second step is to change the sharing settings. We also perform these settings on all computers on the network. Now I'll show you what needs to be included.
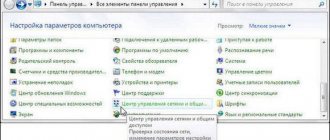
Right-click on the Internet connection icon in the notification panel, and open Network and Sharing Center . In the new window, select Change advanced sharing settings .
There will be two profiles. Home or Work, and General. We change the one that says the current profile . You can make these settings for both profiles.
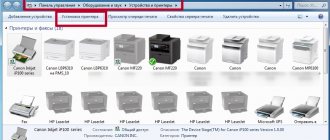
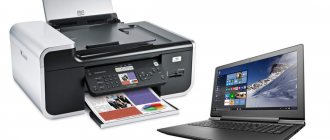
First of all, put the switch next to Enable network discovery . Also, enable File and Printer Sharing , and enable Folder Sharing . See screenshot below.
Scroll through the settings page, find and open the All Networks or General , and be sure to disable Password Protected Sharing .
After these steps, it is advisable to restart the computer. These are all the settings, the local network should already be working. To check, you need to go to Explorer (My Computer) on one of the computers and open the Network . All computers on the network will be displayed there. In the screenshot, you can see my computer, and another one from the network.
We can already log into a computer on our home network, there will be access to shared folders.
If you do not have computers on the network, or do not have access to a computer, then see the solutions at the end of this article.
Configuration process
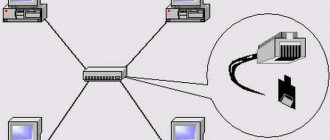
The main thing is to make sure that the devices are connected. A suitable option is twisted pair cables.
What are the differences between 3G and 4G networks: features, advantages and disadvantages
This example will cover further configuration steps.
- open “Start” or “Control Panel”;
- call an option that adjusts network connections;
- Enter the word “Center” into the search form. The results display several options, select the same one as before;
- a new window will appear. “Changing adapter settings” is an item required to change network-related settings;
- Double-click on the desired connection;
- A dialog box will open where one of the items is called “Connection Status”. To adjust the parameters, go to “Properties”;
- the next one is a double click on the protocol designated as TCP/ipV4. You can simply select the item of interest with a suitable name, go to the “Properties” tab;
- At this stage, network connections and their settings are adjusted manually. The Internet will work correctly only in this case;
- “Use the following IP” - here you need to move the first of the switches that appear later. Next, enter the subnet mask along with the IP address assigned to this or that computer.
Note! It is desirable that the last digit in the IP address be one, but any number in the range from 1 to 255 can be used. This number should be different for two computers with the same operating system.
The remaining fields are not needed during the formation of local networks, so they can be left completely empty. All that remains is to click on the confirmation button.
Firewall and connection security settings depend on what type of connection the user specifies for the first time. It is recommended to use the default options.
Microsoft typically supports three network placement options:
- Home - all known devices participate in organizing the network. Activation of the network environment function is required. Only in this case can you open files that are available on all devices.
- Working - a current solution for small offices. The operation scheme is similar to the previous solution. Network discovery and sharing of devices and files on them are available.
- Public is relevant for public institutions. Works with complete hiding of participating computers. This increases security and reduces the likelihood of encountering scammers.
The following actions also have a certain order:
- Checking whether all devices are members of the same network. In this case, the IP addresses and names must be different.
- If necessary, a separate check is carried out by name. If necessary, they are corrected. To do this, select “My Computer” and go to “Properties”.
- Inclusion in one local network is a mandatory step in completion.