Google Play Market is a proprietary application store that is installed by default on absolutely all smartphones and tablets with the Android operating system. It allows you to expand the capabilities of your devices, making them more useful, convenient and interesting. After creating a Google account to register in the Play Store, the store is automatically linked to a specific country of residence, which determines access to downloading certain applications. Therefore, sometimes users wonder how to change the country in Google Play.
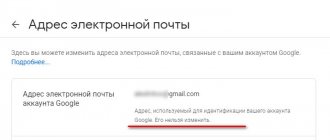
Add/change address
- Here we change the payment address: https://payments.google.com/payments/home#paymentMethods That is. If you have a bank card linked, then go to its settings and indicate your new address. There is no need to delete the card itself. Link to Google help.
- Here we change the home address: https://payments.google.com/payments/home#settings. In order to have a home address, there must be at least one added payment method (card or PayPal). Link to Google help.
- Here we check that all addresses belong to the new country: https://pay.google.com/payments/u/0/home#addressBook
- If you have two addresses left in any of the previous paragraphs, then be sure to set the new address by default.
What you need to know when changing the country in your profile
Changing the country on your phone is done for several reasons. The main factor is the possibility of visiting blocked Internet resources in the territory of the state where the user is located. This concerns changing the country in the gadget parameters. The Play Store talks about bypassing application blocking.
Changing the state in the device settings may result in new applications appearing on the home screen that are specific to the selected market. For example, by selecting “India”, the user installs the Mi Pay payment utility on the Xiaomi phone (when selecting “Russia” it is not available). Other parameters also change, including sound volume. Thus, owners of Xiaomi smartphones set the “India” region to listen to their favorite tracks at maximum volume without regional restrictions.
What you should pay attention to when changing the Google Play Store region
When “moving” from one region to another, it is important to understand that not all of your data will be transferred from the old store without changes. Of course, this will not affect browsing the web or reading news on our Yandex.Zen page, but if you, for example, used family access to the Google Play library, you will need to configure it again. Moreover, you will not be able to include family members from the “old” region. Or “look for a new family” (joke). Or your family members will also have to change their app store region.
In addition, you cannot use your old payment method. You will have to use the one that is accepted in your new region. Moreover, you also cannot spend money from your old Google Play account. Cards and any gift codes from other regions will also not be valid.
And finally, the most important thing: you can change your region in the Play Store only once a year, so we recommend that you change countries in the Play Store only if you really need it and there are simply no other alternatives. For example, in order to download an application, you can try proven sites for downloading applications, which for one reason or another may not be in the Google Play Store in your region.
What to do if an app from Google Play is not available in your country
How to add a map to Google Play - step-by-step instructions
As mentioned earlier, not all applications from the Play Store will be available for download in this country or another country. This may be due to state legislation or the specifics of the downloaded program. Perhaps the developers simply did not include the country in the list of available ones. To solve this problem, you need to use one of the above methods.
Google Play displays the message “The application is not available in your country” very often
The first method of changing your home address through your account settings will be useful for those who are going to purchase paid content from Google Market and, accordingly, pay with a bank card online. This is explained by the fact that for trouble-free downloading of the selected utility, the home address specified in the account in the bank card tab must correspond to the country where downloading the selected software, game, movie, or music track is allowed.
Note! The second method, using IP address change software, is recommended for downloading free content. If for some reason you cannot use it to open access to the desired application, you will have to use the first one.
How to bypass restrictions in Play Market?
How to bypass the “not supported on your device” restriction in Google Play
- Download and install Market
Helper. - Open Market
Helper, select the device type (tablet or phone), manufacturer and model, country, cellular operator. - Click Activate and wait for the new settings to apply.
Interesting materials:
How to programmatically turn off a hard drive? How to disable Windows 10 Defender once and for all? How to disable the immobilizer yourself? How to disable offline work in Outlook? How to disable offline mode in Outlook? How to disable power saving mode in BIOS? How to disable reboot in case of error in BIOS? How to disable smart check in BIOS? How to disable advertising in the Chrome browser? How can I disable reduced functionality mode in a document?
How to change the country in Google Play using the application to change the IP address
How to log into Google Play - step-by-step instructions for the user
This method of adjusting the location by changing the IP address is universal and simple. All you need to do is download one of the specialized free software from the Play Market. The most common and popular is HolaVPN. To use this utility, you need to follow the instructions:
- After downloading the application, you need to install it. No additional settings or registration are required.
- Open HolaVPN.
- In the window that appears, click on the national flag in the upper left corner.
- Select the desired country from the list that appears.
- In the new list, find and click on “Google Play”.
- Start the process by clicking on the appropriate button.
- Next, through the smartphone settings, go to the “Applications” tab, click on Play Market and clear the cache.
After these simple manipulations, the Google Play region will change to the one installed in HolaVPN.
Another program for masking the user’s location is TunnelBear VPN. To use it to change the country in your Google Market profile, you need to follow these steps:
- Download TunnelBear VPN for free from the same Play Store.
- Install the utility and complete the proposed registration.
- Open the program.
- At the bottom of the main window, click on the name of the state.
- From the list that opens, select the desired country and click on it.
- Clear the Google Play cache through the device settings in the “Applications” tab.
This concludes the fix procedure using TunnelBear VPN. And after the new launch of the Play Market, the version for the country selected in a special application will open.
TunnelBear VPN program interface
Note! In addition to the above programs, utilities such as Avira Phantom VPN, Hideman Free, CyberGhost and many others are perfect for changing the binding location in the Play Store.
How to set location in Google Chrome
Many users are suspicious of the algorithms that track their activity and deliberately indicate an incorrect location when asked by built-in algorithms on websites. Why? Because the confidentiality of personal information is more important. And today we’ll talk about how to set up a location in Google Chrome , and we’ll also look at options for achieving success for a number of computer versions of the product.
Instructions
Thanks to geolocation, sites analyze what content and material (products) will be useful to you in the first place. Determining your city of residence helps you conveniently arrange delivery via the Internet. But users don’t always like tracking. So we will figure out how to enable and disable the location in Google Chrome on a computer, and also consider a way to replace it.
Activation
For the PC version of Google Chrome, the algorithm of actions approximately corresponds to the above points:
- Open the browser and click LMB on the menu icon in the upper right corner of the screen.
- Go to the system settings section (select the appropriate item in the list that appears).
- Scroll the page to the “Additional” and click on it.
- Open the section "Site Settings".
- And then - tab "Geodata".
- Here you can enable or disable this option.
If you wish, you can set up a white list of pages and sites that are still trusted. The lower blocks on the same page will help you work with this.
When any Internet resource wants to know where you are, a corresponding notification will be displayed in the browser window. To give him access to geolocation data, click on the “Allow” .
And if it does not appear, then most likely you have previously blocked access. To return it, on the required site, click on the icon in the address bar with a “cross” hanging over it and click “Configure” .
And then remove this site from the “Block” and refresh it to see the desired alert.
Substitution
And to change the location in the Google Chrome browser, you need to download and configure a special extension. In principle, any VPN will cope with this task. But we will look at Location Guard - this is an official plugin developed by Google. It is configured as follows:
- Go to https://chrome.google.com/webstore/detail/location-guard/cfohepagpmnodfdmjliccbbigdkfcgia?hl=ru.
- Activate the installation procedure by clicking on the buttons marked in the picture one by one.
- The settings page will immediately appear. But in the future it will have to be called manually. To do this, click on the new icon and select Options.
- Next, click on any place on the map with LMB to close the window with hints.
- After that, go to the Fixed Location .
- On the world map, click on the desired geolocation. Currently, the search function does not work, so you will have to search for the desired location manually.
- Next, deactivate the option Fixed location disables geolocation.
- Then go to the Options .
- In chapter Default Level set value Use fixed location.
To check if the spoofing was successful, visit https://browserleaks.com/geo and click Allow . As a result, your chosen Chrome geolocation should be marked on the map.
And to disable the extension on the desired site, click LMB on its icon and select the option Pause Location Guard .
What should you write in the first line of the address?
Filled in Latin letters. What is the first line of the bank card address? In the line “Address1” you need to write the street (avenue, driveway, alley, etc.), its name, house and apartment number.
Interesting materials:
How to choose a bike for a 9 year old boy? How can a teenager make money at 12 years old? How can a schoolchild make money at 10 years old? How to make money at 13 years old in Ukraine? How to make money on the Internet at 12 years old? How can an 11-year-old teenager make money? What kind of cosmetics should a 12 year old wear? What should Mantoux be at 5 years old? What is the pension supplement after 90 years? What is the pension supplement after 75 years in Belarus?
Changing region, language and time zone
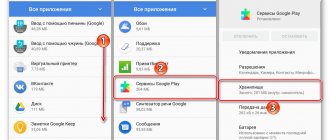
To change your country and set personal settings on Android, you must follow these steps:
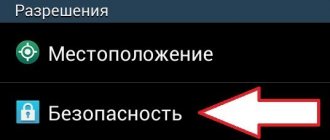
Step 1 . Open the settings and go to the “Advanced settings” menu (depending on the model, this device item may have a different name).
Step 2 . There will be sections “Date and time”, “Language and input”, “Region”. Change the country in each of these menus in turn (specify the desired region, the appropriate time zone and system language).
On older devices the procedure will be slightly different:
Step 1 . Launch the Settings and select the "Advanced" section in the "System & Device" category.
Step 2 . Click the "Region" button.
Step 3 . Select the country that will be set as the main one.
Step 4 . Return to the "Advanced" section and click the "Language and Input" button, then set the system language.
Step 5 . Return to the Advanced section and click the Date and Time button, then select your network time zone.
Geolocation settings in Google Chrome
Geolocation is the determination of the location (geoposition) of the user’s device.
Websites and apps request access to geolocation to better respond to search queries and provide relevant information based on the user's location.
You can allow or deny access to your location:
Allow or block location tracking Set general geolocation settings Reset settings
When a site asks for information about where you are, a warning appears at the top of the page:
Define geolocation parameters:
- Allow the site to track your location - click the Allow .
- Prevent a site from tracking your location until you restart your browser - click the icon.
- Block requests to determine your location from this site - click the Block button.
To set general geolocation settings for all sites and programs:
- In the upper right corner of the browser, click the button → Settings.
- Click the Show advanced settings (at the bottom of the page).
- In the Personal data , click the Content settings button.
- In the block Location set the switch to the desired position:
- Click the Finish .
You can reset access settings in the following ways:
In the address bar
- Click the icon → Clear these settings for future visits.
- The setting will be reset when the page is refreshed.
In browser settings
- In the upper right corner of the browser, click the button → Settings.
- Click the Show advanced settings (at the bottom of the page).
- In the Personal data , click the Content settings .
- In the Location , click the Configure exceptions .
- Select the line with the site name and click the icon.
- Click the Finish .