The problem of how to connect a network printer in the Windows 7, 8, 10 operating systems most often arises in the offices of large and medium-sized companies, where the use of one printing device by several computers is very important. If the device has not been used at all before, then you first need to connect it to any PC on the network or add it directly to the network, if this option is supported by the device, and install the drivers.
To set up a device for printing over a local network, you first need to give it general access, or, in IT slang, share it. This way we can make it a network one that other office users can use. This article will discuss all the ways to connect and configure a network printer on your own for inexperienced users. All instructions are current and applicable to versions of Windows 7 and 10.
Installation
If you have not already done so, you can connect the printer to the network in several ways, which we will consider each separately and in detail. If you are already using the device for printing on one PC, but want to print on it from several at once, then you can safely proceed to the setup section.
Connection methods
Router
Not all routers support the print server function. To make the printer networkable through this device, you need to check support for this feature. This can be done on the router manufacturer's website. The characteristics always indicate such information.
If such a connection option is available, connect the printing device to it as follows:
- Disconnect the router from power.
- Connect the printing device using a patch cord or USB cable.
- Turn on the router, and only then the printer.
- Set up your equipment to print according to the instructions.
Detailed instructions for connecting the printer to the router via a USB cable. Use it if you have any difficulties.
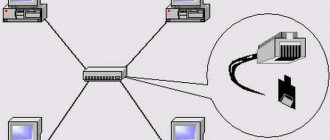
Ethernet patch cord
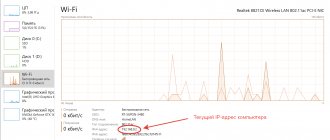
Modern printing devices allow you to connect to the network directly through a patch cord. Actually, for this you need the network cable itself and the power cord. Plug one side of the patch cord into a power outlet and the other into the corresponding connector on the printer. After a short period of time, the device will be registered on the network and will receive a unique IP address through which you can connect to it from any PC or laptop.
All the quick ways to find out the printer's IP address. A detailed description of eight ways to calculate the IP of a network device.
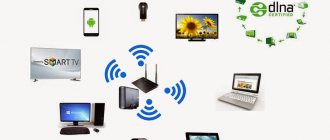
Wi-Hi
In models that have the Wi-Hi wireless connection function, it is recommended to use it. It's convenient, fast, reliable. Configure according to the instructions supplied with your device. As a rule, a special display on the printer body is used for this. Wi-Fi connection settings are located in the menu of the same name in the “Network” section. For the English-language designation, focus on the words “Setting” or “Setup” and “Network”. Names may vary between brands.
The router should already be configured for a droneless connection. You also need to know the Wi-Fi point name and access password.
Configuring the printer to print via a wireless WiFi network using WPS technology. Description of actions for HP, Canon, Epson equipment.
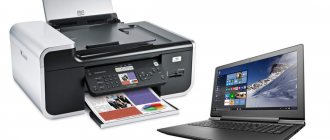
Via USB cable to another PC
Another simple and commonplace option is to connect via a USB cable (COM or LPT ports are practically no longer used) to another network PC. If the printer has just been purchased, then such a plug may not be in the box. This is not the sellers fault. It's just that new models are shipped without it. You can purchase the cord separately or use it from another device.
- Turn off your networked PC or laptop.
- Connect the flat side of the plug to the rear USB output of the computer, and the square side to the printer.
- Connect the device's power cord.
- Turn on your PC and wait for it to boot.
- Give power to the printer by pressing the appropriate button on it.
All ways to connect 1 printer to 2 computers over a network. Step-by-step instructions for user actions with explanations and screenshots.
The only disadvantage of this option of using a network printer is the need to constantly turn off the computer to which it is connected. This problem can be solved by setting the shutdown timer.
- Press the WINDOWS+R keys on your keyboard at the same time and enter the command “taskschd.msc”.
- In the right column, select the “Create a simple task” shortcut.
- Then we follow the prompts of the setup wizard.
- At the “Actions” step, select “Run the program”.
- Enter the “shutdown” command.
- Now the PC will turn itself off at the appointed time.
What connection method did you use?
Drivers
Regardless of the type of printer connection you choose to connect to the network, a mandatory step is to install device drivers. Such software will exchange information between printing applications and the printer itself. There are several sources where you can find the driver we need to work:
- Installation disk, which comes assembled upon purchase. This is an ideal option to quickly find the software you need.
- Device manufacturer's website. Downloading the required version does not take much time.
- OS driver database. Basically it has everything you need.
- Our collection of files.
Installing a Network Printer
In the command line, launch it via Windows + R, enter “control printers”. Click on “Install” in the top panel.
Select the first top option "Add Local".
О and select Standard TCP/IP Port.
Enter the name of the device model or IP. Read how to find out the IP address in one of the sections of this article. Leave the Port Name field blank.
ABOUT.
If you have an installation disk or downloaded drivers, you can use installation from disk. Otherwise, find your printer manufacturer in the left column and your printer model in the right column.
Wait until the driver installation process completes. It can take some time.
How to set up printer access on a local network: detailed instructions
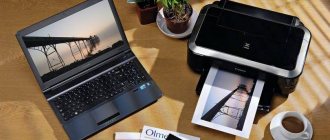
Hello! In the age of information technology, no one is surprised by the presence of many gadgets in the house: computers, laptops, tablets, smartphones, etc. And if there can be several duplicated devices and devices, then there is usually a printer.
In most cases, it doesn't make sense to buy multiple printers for home use, so it's a good idea to set up sharing on your local network so you can print the materials you need from all available computers and devices and connect to your local computer. Home network.
This material is intended to explain how to set up a printer to share on a local network.
Settings
In this section we will talk about how to now make the printer network, share it, and provide general access to other LAN users. To do this, we will first make some settings on the PC itself, namely, connect it to the desired network. The same must be done with all computers that will deal with the printer. Next, we will give others the opportunity to see it online.
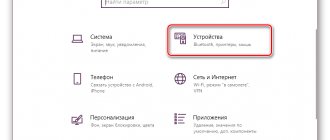
Adding a PC to the network
Open the properties of your computer.
On the right, find the “Change settings” link.
On the Name tab, click the Change button.
Enter a workgroup name. If you don’t know what to enter or you haven’t had a grid before, you can enter any name. For example "MyNetwork" or "Network1". The main thing is that all PCs should be the same.
Enable network discovery
Initially, your laptop or computer will not be visible on the network and, accordingly, the printer will not be visible either. To fix this, let's make some changes to the settings.
Click on the icon at the bottom right of the desktop with the left mouse button. Next to “Network and Sharing Center”.
On the left side of the window, select “Change advanced settings.”
If you know the type (home or public) of your network, then make changes only for that. If you don’t know, for all types.
In the same window below, disable password access. Save.
Set up printer sharing
Let's share access to the printing device. Using your mouse, go to properties. Select the ones highlighted in the screenshot.
Activate the "Access" tab. A. Enter the name that will be used for future searches.
If the network uses different versions of operating systems, for example, Win 7 and even old XP, then there is a high probability that among them there are 32-bit ones. It would be a good idea to install the appropriate drivers in advance. Click on the “Advanced” button in the window in the screenshot above. In the window that opens, select X86. Wait for the software to install.
How to create a PC group?
First, we will step by step consider the process of organizing one such working association with the most popular OS installed, Windows 7:
- Call the context menu from “Computer”;
- Then click “Properties” or you can launch the “Control Panel” and enter the “System” menu;
- After that, in the menu that appears, click “Advanced system settings”;
- Next, open the “Computer name” tab;
- Then click “Change”;
- A menu will appear where you need to print a self-invented name for the group; for convenience, you can name it by the name of the printer manufacturer, for example, “Canon”. Or enter another set of characters and numbers known to users;
- Click “Ok”;
- To save the adjustments made, click “Apply”;
- Ready. Now you can close all running windows.
Connection
When all the necessary settings have been made, you can begin connecting. This can be done in two ways, which we will now consider. After that, you also need to make the printer the default in Windows 10 or 7 (the procedure is slightly different for different OS versions). Follow the link for instructions for both options.
Network connection
The essence of the method is to search for the desired printing device on the network and directly connect to it on another computer from which you need to set up printing. If the connection was made through a router or directly to the network, then this option will not suit you. See the connection method through the Windows wizard.
Open “My Computer” and look for the “Network” shortcut at the bottom left. Open it and select the PC to which the printer is connected.
Connect the desired device through its context menu.
If the system does not find the necessary drivers on this PC, it will offer to install them. Agree and install.
Connection via Windows Master
Go to the "Devices and Printers" section of the control panel. Click the “Install” button, and in the next window select the second of the proposed options.
Wait for the network to scan and display a list of all print devices. Select the desired option. If what you need is not in the list, then click the “Not in the list” label below and proceed to the next subsection of this article.
You will see this window upon successful completion of the installation procedures.
You can immediately assign a default use and try to test printing using a test page.
If not listed
Let's consider a more complex case when the required device model was not in the list of available devices for connection. After clicking on the “Not in the list” label, a window similar to the one below will open. Then there are three options:
- Review. The method is suitable if the connection is made to the network through another PC.
- If you know the exact network name of the computer and printer, then you can specify them manually in the second option.
- When you know the IP address (you can find out from the next section of this material) of the printing device or it is connected via a router or directly via an ethernet patch cord, then the third option is what you need.
We choose the third option.
Change the device type to "TCP/IP". Enter the printer's IP address.
Make the selection as in the screenshot.
Install the driver. In column 1, find the company, in column 2, the model.
Wait until the required files are copied. Then follow the logic and prompts of the installation wizard. Make settings according to your requirements.
How to find out the printer's IP address
The device can be connected to the network in three ways and there are just as many ways to find out its IP address:
- Directly to the network. Print a test page via your computer or using the buttons on the device itself.
- To a network PC. The printer will have the same IP as the same computer. You can find out using the ipconfig command on the command line.
- Through a router. It will match the router’s IP, and in 99% of cases it is the first one in the subnet. For example, the subnet mask is 192.168.1, then the IP will be 192.168.1. 1. You can find out the network mask through any PC on the network according to the instructions in the second paragraph.
How else can I find out the printer's IP address? All ways to find and watch.
Windows 7
Windows 7 has a built-in automatic search for drivers, but it works very poorly. If the software disc is lost or the printer needs to be connected to a laptop without a DVD drive, you should first visit the manufacturer’s website. Using the model number, we look for and download the driver to the PC. Now you can connect the printer to your computer without a disk. Having connected the devices using a cord, we launch the driver installer.
We choose to install a new device.
The connection type will be determined automatically by the wizard. Regardless of the options for further use, it is better to perform the initial setup using USB.
Once the printer is turned on, it should be automatically recognized by the Setup Wizard. If the device is identified correctly, place a checkmark in the location indicated by the arrow.
The software package required for printing and printer management is being installed. Upon completion of all operations, we will be asked to print a test page.