Concluding our series of articles on updating the BIOS, we will tell you how to update the MSI BIOS, because motherboards from them have their own characteristics!
Updating the BIOS in a device equipped with an MSI motherboard is generally done as follows:
- the specific model of your motherboard is installed;
- checks for updated versions of the system you are interested in;
- install them directly.
If you know exactly the model of your equipment and the version of the system to reinstall, then all that remains is to figure out how to correctly update the BIOS on your motherboard from the MSI brand. The firmware you need can be downloaded either to the computer itself or to a portable device.
BIOS firmware for MSI motherboards
Like other manufacturers, MSI offers several ways to update the BIOS. From under Windows or through the utility built into the BIOS - MFLASH or from under DOS.
1. Update from Windows (for desktop computers only!) 2. Update UEFI BIOS from the built-in MFLASH utility (from a flash drive)
3. Update from a bootable USB flash drive (or memory card) under DOS
First, we need to find out the manufacturer of our motherboard and its model. You can look at the initial boot screen, or in the documentation for your computer, or on the motherboard itself (in laptops on the back side of the cover) or use any program to determine the hardware or the command line by typing “systeminfo”
Update from Windows
This update method via Live Update 6 is only suitable for using MSI desktop computers and related products such as motherboards and graphics cards. This utility does not support MSI laptops, tablets, or all-in-one PCs, because... Unexpected errors may occur during installation. Other methods are described below.
If you do not want to use the Live Update utility, you can simply download the archive with the firmware from the manufacturer’s website and run the firmware utility included in the archive with the BIOS file.
Download the utility, install and run. After launch, the main window will open in which you can select new versions of drivers and BIOS. You can choose to scan automatically or manually for needed updates.
Select MB BIOS (motherboard BIOS) and press the Scan . If there is a new version, click the Download and install
Once downloaded, the installer will launch automatically. We will update our BIOS in it, however, in this program you can also make a bootable USB flash drive for updating the BIOS. Once launched, click Next
Select In Windows mode and click Next
The next window recommends closing all running programs. Close and click Next
The last information window appears about the version of the firmware being updated and about rebooting the system after the update, click Start
The update process itself:
The second operating mode of the program is to create a bootable USB flash drive for updating the BIOS.
Launch the utility and this time select the In DOS mod (USB)
Select the flash drive, click Next and in the window that appears about the destruction of all data on the flash drive, click OK. It will take approximately 1 minute to create.
After successfully creating a boot disk, click OK and restart your computer
After restarting, set your computer to boot from USB. Once your computer boots from USB, follow the instructions to update the BIOS.
Updating UEFI BIOS from the built-in MFLASH utility
We go to the official website of the motherboard manufacturer MSI, enter the motherboard model in the search or use a manual search.
Download the archive with the firmware from the manufacturer’s official website and unpack its contents onto a USB flash drive. Before doing this, you just need to format the flash drive to FAT32. When you turn on your computer, press the Delete to enter BIOS Setup. Select Utility, then M - FLASH. Then Select one file to update BIOS
In the window that appears, specify your USB drive and select the downloaded firmware file and press Enter. After the BIOS update is completed, the system will automatically reboot.
Updating from a bootable USB flash drive (or memory card) under DOS
For work we need the following files:
- The firmware file itself (write its name on a piece of paper, it will come in handy later)
- HP USB Disk Storage FormatTool 2.2.3 utility (other versions available) (download)
- MS-DOS files for creating a DOS boot disk (download)
After downloading, unzip all files
We prepare the flash drive. It should not contain bugs or errors. To verify this, you can check the drive by going to the properties of the removable disk, tab Service » Check
Launch the HP USB Disk Storage FormatTool 2.2.3 utility. Check the boxes as shown in the picture. The path to the MS-DOS boot device folder is set to the place where the MS-DOS files were downloaded. (for example, for me this is drive C, folder usbdos. And the start button. When asked about deleting files, click Yes.
Updating the BIOS of the ASUS Transformer Book T100HA netbook from a flash drive
First of all, we will describe the process of updating the ASUS Transformer Book T100HA netbook. Let's use a flash drive with the saved BIOS file and reboot the netbook. When the netbook starts, press the Delete key and go to the main BIOS window. In this window, open the “ Advanced ” tab.
In the window that opens, click on the “ Start Easy Flash ” link. This link will allow us to open the BIOS Easy Flash .
MSI 450 Tomahawk BIOS Update
New third-generation processors from AMD will work perfectly on older motherboards, provided that you update the BIOS to the latest version. For most boards, manufacturers have already released an update and all you have to do is install it. This can be done in several ways. Firstly, you can use the Live Update utility in the operating system, and secondly, in the BIOS menu there is an M-Flash setting, with which you can update and install the desired version.
For those who bought a board on an old chipset and do not have an old processor, there is also a solution. This is a feature of MSI BIOS Flashback that allows you to update without a CPU. In this article we will look at how to update the MSI B450 Tomahawk BIOS for Ryzen 3000.
How to update MSI BIOS using Flashback+
This method allows you to update the MSI BIOS without a CPU. First, you need to go to the motherboard website and download the latest BIOS firmware. For B450 Tomahawk firmware can be downloaded from this link. At the moment, the latest version is 7C02v1A released on 07/19/2019.
It added support for new processors, and also greatly simplified the interface; now there is no possibility to search in the BIOS and take screenshots, the font has changed, but most of the functions are still in place.
The developers explain this by saying that motherboards do not have enough memory to accommodate the support code for new processors, so they had to sacrifice the interface.
In the downloaded archive you need to find the file E7C0AMS.1AO. This file must be placed on a USB flash drive and renamed MSI.ROM. It is important that the flash drive must be formatted with the FAT32 file system. Other motherboards may have different names, see the official documentation.
Next, you need to insert the resulting flash drive into the USB BIOS Flashback slot on the rear panel of the motherboard. This slot is labeled accordingly and outlined in white:
Then turn off your computer, unplug the power, and remove the BIOS battery for a few minutes to reset the settings. It is located at the bottom of the motherboard. Then put it back in and turn on the power. Some instructions also recommend removing the processor, but this is not necessary.
Next, on the same rear panel above our USB slot there is an MSI BIOS Flashback button, press it for three seconds. After a few seconds, the red LED light on the board will light up and begin to flicker. This is the firmware being installed, you cannot turn off the computer's power or remove the flash drive until the firmware is completed; installing the BIOS may take about 5 minutes. After this, the computer will reboot itself.
If the LED is constantly on or blinks three times and goes off, then you are doing something wrong, repeat the steps described above. Make sure the flash drive is formatted with the correct file system and installed in the correct slot. Once the update is complete, you will see the following BIOS screen:
Updating BIOS from a flash drive to M-Flash
It will be a little more convenient to use the M-Flash function available in the BIOS; for this you need to download the archive with the desired BIOS version as in the previous version and unpack its contents onto a flash drive. Then restart your computer and find the M-Flash item in the BIOS:
When you click on Select one file to update bios, the system will prompt you to reboot into Flash Mode:
After reboot, select your flash drive, and then select the firmware version. Next, just wait until the installation completes and the computer restarts:
Never turn off the power during the update. This method will only work if you have a processor installed.
Updating BIOS with Live Update
The last method is probably the easiest because it does not require entering the BIOS; you can update the BIOS for Ryzen 3000 directly on the system using the MSI Live Update utility. But I want to warn you that using this method is not recommended. On many forums, users report that their update failed. In this case, you will still have to deal with one of the previous methods. You can download the utility from the link.
Conclusion
From the examples discussed, it is clear that updating the BIOS is not a difficult task at all. But when updating, you need to be extremely careful and not allow the computer to turn off during this process.
I would also like to remind our readers once again that under no circumstances use BIOS files for firmware from unofficial sources, as this can lead to breakdowns and you will have to restore your computer at a service center.
We hope that, guided by our examples, readers will be able to update the BIOS, thereby ensuring stable operation of their PC.
MSI motherboard BIOS firmware: black screen when switching to m-flash mode
The problem that arose during the BIOS flashing came as a complete surprise. Moreover, previously there were no problems with the firmware of this motherboard. And there were no complaints about the work either. The entire update procedure was carried out according to the instructions from the manufacturer’s website:
Updating BIOS using M-FLASH
Preparatory operations:
- Insert the USB flash drive containing the update file into your computer;
The latest firmware file was downloaded from the MSI website and stored on a flash drive. The flash drive is inserted into the computer's USB port, the computer is rebooted and the BIOS is entered.
Next, the “m-flash” menu item was selected in the BIOS, and after rebooting in firmware mode, the computer simply did not start.
Black screen (no video signal on any of the three possible connectors): neither rebooting nor turning off the power gives any result, the computer does not boot.
It was not possible to find clear and understandable instructions right away. But it immediately became clear that people have this problem quite often. Problems occur not only with this board model, but with many other MSI boards and BIOSes. Below is a description of the solution to the problem in the form of a step-by-step algorithm.
Solving the problem with a black screen after switching to M-Flash mode
We do everything described below step by step. Let's try to see if the motherboard comes to life after each of the points below:
- We disconnect all external drives (drives): hard drives, SSD drives, even a flash drive with BIOS firmware (the flash drive can be bootable). It didn't help in my case;
- If the hardware configuration has changed since the last BIOS update, it is better to return everything to its previous form. For example, I recently added an additional 8GB memory stick. It was decided to remove it (I left only one memory stick on the board, removed all the additional ones). It’s better to do the same with the video card (I actually switched to built-in video);
- Reset BIOS settings. This can be done with a jumper on the board, or you can remove the BIOS battery (labeled battery CR2032 ) for 5-10 minutes.
In my case, the combined set of steps 2 and 3 worked (i.e., unnecessary hardware was turned off and the BIOS settings were reset). After that, the computer “sweared” at the BIOS checksum and started up. What’s interesting is that I immediately inserted the flash drive with the new firmware again, launched M-Flash, and further updating took place as per the instructions.
Source: https://1it.xyz/poleznoe/remont/bios-msi-m-flash-chernyj-ekran
Setting up the BIOS to boot from a flash drive
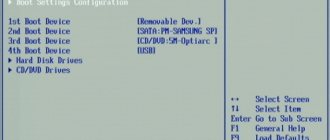
In my example there will be BIOS American Magatrends - AMIBIOS Press DEL to enter BIOS
Go to the “ Advanced Chipset Features ” section and switch the “ Legacy USB Support ” option to Enabled
Save the BIOS settings and exit - “Save Changes & Exit”
How to update the BIOS on a computer
BIOS... the average user rarely encounters this word. If a computer or laptop works normally, then its owner does not even know what it is.
BIOS (or UEFI) is the input/output system on your computer. BIOS is those same 1-2 seconds when, just after turning on the computer, you look at the splash screen of HP, MSI or another manufacturer of your system.
Some attentive readers will notice that they do not have a BIOS (Basic Input-Output System), but rather a UEFI (Unified Extensible Firmware Interface). Both solutions are low-level programs that run before your computer boots. UEFI is a more modern solution that replaced BIOS. By the way, Intel has promised to completely replace the BIOS with UEFI by 2022. And this is true, since the history of BIOS stretches back to the 1980s!
In 2007, Intel, AMD, Microsoft and other PC manufacturers agreed and adopted the UEFI standard. It brings support for large hard drives, new security standards, a beautiful interface and dozens of other changes.
Booting from a flash drive
When the computer boots, press the “F11” key to call up the boot menu.
On other motherboards, another function key, for example F8, can be used to call the boot menu
In the boot menu, select our bootable flash drive and the system loads DOS
After loading DOS, enter the following command at the command line to launch the AFUDOS utility to update the BIOS
[filename] is the name of the BIOS update file
Remember. The BIOS firmware file always has the extension ROM
My firmware file is called 070607s.rom. That's why I type this command
As a result of the utility’s operation, we will see the following messages on the screen:
Do not turn off or restart your computer while flashing the BIOS, otherwise you risk killing the system.
After the utility updates the BIOS, the DOS command line will return or the computer will reboot automatically.
We return to the BIOS menu and select the default BIOS settings (optimal settings) “ Load Default Settings ” or the name of the item can be “ Load Optimum Settings ”
Save the settings and exit the BIOS “Save Changes & Exit Setup”
Flashing via command line
The most useful ATIFlash commands are:
- atiflash.exe -i - will show a list of video cards installed on the AMD system. Useful for flashing the BIOS on a specific video card.
- atiflash.exe -p — reflash the video card with the specified BIOS number from the specified file.
- atiflash.exe -pa - flash ALL video cards with the specified BIOS file.
Examples of using:
- The system has one single AMD video card installed. In this case, everything is simple - we specify the flashing of all cards in the system, using a file with a modified BIOS (let's say it's called BIOS_mod_470.rom):
AtiFlash.exe -pa BIOS_mod_470.rom The system has two different video cards installed - AMD Radeon R9 390 and AMD Radeon RX 470, you need to reflash the BIOS only for the RX 470:
We run the program with the -i parameter and look at the list of video cards in the system. We remember the number of the RX 470 video card.
Seeing that the RX 470 (hidden behind the name Polaris10) has number 0, we indicate to reflash the video card number 0 with the BIOS_mod_470.rom file:
AtiFlash.exe -p 0 BIOS_mod_470.rom
After entering the command to flash the BIOS, we patiently wait for the procedure to complete. Upon completion, the program will display the following message on the command line:
Restart System To Complete VBIOS Update.
Which means that to finish updating the BIOS of the video card, you need to restart the computer. After the reboot, you can consider the BIOS flashing procedure complete.
Flashing via GUI
Launch ATIWinflash with administrator rights. Make sure that the video adapter you need is selected in the upper right corner of the program.
This is how the ATIWinflash program shows one single video card.
If the number of video cards in the system is more than 3, then the program will not be able to correctly display the entire list - the fourth and subsequent video cards simply will not fit in the window. In this case, you will have to use the firmware method via the command line (you can read about this in the same article below).
And this is how the ATIWinflash program shows four video cards - only three of them are visible, the fourth simply did not fit on the screen.
Having selected the desired video card, click on the “Load image” button and select the BIOS file with which we want to flash the video card.
And after that, click on the “Program” button.
After this, we wait until the video card firmware procedure is completed, which will be reported in a separate notification.
And then a reboot prompt will appear, which is necessary for the video card to work with the new BIOS.
Preparatory activities
If the user uses standard methods for updating the BIOS, it is recommended to take the following measures:
- open any program to view computer hardware (for example, AIDA 64), in which find the line “ Motherboard ”;
- then go to BIOS ;
- a window will open indicating manufacturer and version;
- in the same window you can find links to update files , but it is better to find them yourself on the official website;
- do the same for motherboard.
Download the necessary files from the official MSI website:
- in the search bar enter the name motherboard;
- after searching under the description there will be download link;
- choose optionBIOS;
- the most current version of the updates presented will be the one at the top of the list ;
- additionally recommended to download your current version for possible reinstallation.
Introduction and preparation
This article will discuss how to flash the BIOS in AMD video cards. To flash the video card, you will need the ATI Winflash utility, which can be downloaded from this link.
It is recommended to disable it in Windows before flashing the BIOS of the video card. To do this, you need to open “Device Manager”, and in the “Video adapters” item, select the one you need, right-click on it and select “Disable”.
Next we will talk about two possible ways to use the ATI Winflash utility - through its graphical interface, and through its console version.
LIVE UPDATE 6 INSTRUCTIONS
Download Live Update 6 Live Update 6 supports the following updates for MSI products: Motherboards: Drivers / BIOS / Utilities; Graphics Cards: Drivers/BIOS
DO NOT USE Live Update for AIOs and laptops.
1. After installing and launching Live Update 6, the main page of Live Update 6 will open - -. It will display information about the system, including the date of the last scan and numbers of items requiring special attention.
2. The page offers two modes for checking objects for the possibility of updating - manual [Manual] and automatic scanning [Automatic Scan]. Select automatic scanning [Automatic Scan] . The system will automatically scan all objects and search for the latest versions of files to update. [Manual] mode and specify the objects that you want to check for update capabilities.
Technical features
Depending on how you decide to update, you will have to download either a special utility for Windows or the firmware files itself.
If you decide to update from the built-in BIOS utility or DOS line, then you will need an archive with installation files. In the case of a utility that runs under Windows, downloading installation files in advance may not be necessary, since the functionality of the utility allows you to download everything you need from MSI servers (depending on the selected type of installation).
It is recommended to use standard methods for installing BIOS updates - built-in utilities or a DOS line. Updating through the operating system interface is dangerous because if any bug occurs, there is a risk of suspending the process, which can lead to serious consequences, including PC failure.
Stage 1: Preparatory
If you decide to use standard methods, then you need to make appropriate preparations. First, you will need to find out information about the BIOS version, its developer and the model of your motherboard. All this is needed so that you can download the correct BIOS version for your PC and make a backup copy of the existing one.
To do this, you can use both built-in Windows tools and third-party software. In this case, the second option will be more convenient, so further step-by-step instructions are considered using the example of the AIDA64 program. It has a convenient interface in Russian and a large set of functions, but it is paid (although there is a demo period). The instructions look like this:
- After opening the program, go to “System Board”. This can be done using icons in the main window or items in the left menu.
- Find the columns there. They will contain all the necessary information on the current version, which it is advisable to save somewhere.
By analogy with the previous step, you need to go to the “BIOS” item.
Now download all files for BIOS update from MSI official website using this guide:
- On the site, use the search icon at the top right of the screen. Enter the full name of your motherboard in the line.
Find it in the results and under its brief description, select “Downloads”.
To install using the standard method, you need to prepare a USB drive or CD/DVD in advance. Format the media to the FAT32 file system and transfer the BIOS installation files from the downloaded archive there. Make sure that among the files there are elements with the BIO and ROM extensions. Without them, the update will not be possible.
Stage 2: Flashing
At this stage, we will consider the standard flashing method using the utility built into the BIOS. This method is good because it is suitable for all MSI devices and does not require any additional work other than those discussed above. Immediately after you have dumped all the files onto the flash drive, you can proceed directly to the update:
- First, make sure that the computer boots from a USB drive. Restart your PC and enter the BIOS using the F2 to F12 or Delete keys.
- There, set the correct boot priority so that it initially comes from your media, not your hard drive.
Known Issues and Bugs
- When updating the BIOS of a video card, the computer or system freezes. When updating the BIOS of a video card, it is recommended to disable the video card through the “Device Manager”. How to do this is written at the very beginning of the article.
- After updating the BIOS and rebooting, the video card appears in the system, but does not work. Most likely the problem is that new AMD drivers are installed that block the operation of video cards with an unsigned BIOS. How to bypass the blocking is written here.
How to correctly install and configure the MSI BIOS: instructions
Gradually, over time, our computers begin to become a little outdated and need updating. This is especially true for the bios system utility, which is responsible for almost the entire performance of the computer. This is where the question arises: how to update the system utility. Setting up the bios is the basis for building a system for the operation of the entire computer, so you should regularly, at least once a month, be interested in the release of updates for your system utility. Updating a system utility is not that difficult, the main thing is to have patience and know where to get the updates.
It is necessary to update the BIOS, as this will increase the security and performance of your computer, can open up new opportunities and improve the quality of the BIOS settings itself. But you shouldn’t rush too much, since this procedure is quite complex and any error can have a detrimental effect on the entire performance of the computer. But how to update the BIOS? To do this, you should carefully study the steps for updating the bios so that you don’t have any questions and you know exactly what needs to be done.
Using DOS Mode
To use this method, it is necessary to create a special flash drive for loading and further work in the DOS interface. This method is not recommended for novice users.
To create a flash drive with update data, you must have the MSI Live Update utility. In this case, the program will independently select and download the latest files from the official MSI website. Follow the instructions:
- insert the flash card into the computer and click on the Live Update if it has not activated itself;
- Further, it is recommended to put marks on M.B.BIOS, and ManualScan, then click on Scan.
- As a result, the program will detect the presence of new update files. Download and install command will appear , you need to click on it;
- a window will appear, check the box for In DOS mode (USB) , then click Next ;
- In the field at the top , enter the name of the installed flash drive and click Next ;
- Once the download is complete, a notification will appear informing you that the process is complete.
Further work will be carried out in the DOS interface. Follow these steps:
- Restart your computer and openBIOS. Set to run from a flash card.
- Save the settings by clicking Save&Exit, then the DOS interface will appear.
- You must enter the command C:>AFUD4310 firmware_version.H00 .
- After installation, restart your computer.
The BIOS update process is not complicated, but it is recommended that you carefully follow the step-by-step instructions.