Text formatting in Word is an important part for documents intended for printing. This is especially noticeable when performing official work that has specific requirements for appearance. Microsoft's Word text editor has extensive text formatting options. One of them is margins from edges. In this article we will tell you how to make a paragraph in Word.
MS Word allows you to make a paragraph in a document in different ways. You can make a single indent or set it for all previous, subsequent or selected text. In different versions of the text editor, the sequence of actions is similar.
Paragraph in Word using single indentation with one key
Using the Tab key you can set a single indent. If you press it several times, the text will constantly shift to the right. This is a standard key for almost all text editors, so it works in any version of Word.
You can also use special buttons on the control panel. In the “Home” tab in the “Paragraph” category there are corresponding icons for indenting to the right or left. You can adjust the size of the red line using the settings. To go to them, click on the icon in the lower right corner of the “Paragraph” category.
Setting paragraph indentation
To set settings for the entire text or a specific passage, first select it, and then use one of the suggested options depending on the amount of work.
Option 1: Toolbar
Basic settings for setting intervals and indents are located on the toolbar in the “Home” tab.
- Text alignment (1) ;
- Increase/decrease left indent (2);
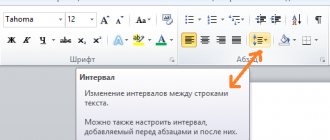
- Line spacing (3).
Option 2: Hotkeys
If you need to customize a paragraph with standard values, you'll need basic keyboard shortcuts. To apply hotkeys to a specific passage of text, select it and press the suggested combination.
You can make a paragraph with a ruler
At the top of the program interface there are controls. One of the most convenient ways to adjust paragraphs is to use the ruler found in this panel. It has 3 sliders that allow you to set the line size and indents. The lower left and right sliders are responsible for the length of the line. Just move one of them to change this parameter. The top left slider sets the indent at the beginning of each paragraph. This method is suitable for any version of Word.
The ruler function is not enabled as standard. To fix this, go to the “View” tab on the top panel, and then in the “Show” category.
To set the red line this way, you must:
- Click on the paragraph you want to edit, or select several. If you want to indent all text, press Ctrl + A.
- Use the lower left slider to place the beginning of a new paragraph.
One division on the ruler equals 2.5 mm.
At the end of each line
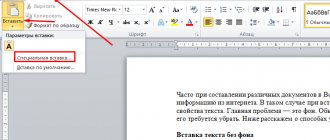
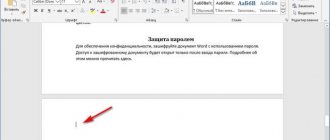
The end of line sign, after which a new paragraph begins, in Word looks like a vertical stick with a slight curve on the left side. To display them in the document, go to the “Home” tab and in the “Paragraph” group, click on the “Display all characters” button.
To avoid having to delete them manually in each line, we’ll use autocorrect. The site already has an article on how to make a replacement in Word. By clicking on the link, you can familiarize yourself with this topic in detail.
Replacing a non-printing character
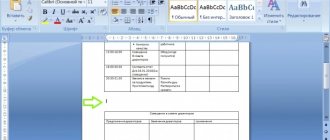
First, let's look at how to remove paragraphs in Word if they are set for each line. In this case, the sentence at the end of the line breaks off and continues on from a new line.
Press the key combination “Ctrl+H”, after which the “Find and Replace” window will open. In it, click on the “More” button at the bottom left to open additional settings.
Next, place the cursor in the “Find” field, click the “Special” button and select “Paragraph Mark” from the drop-down list. The corresponding “^p” symbols will appear in the field.
Place the cursor in the “Replace with” field and press the space bar on the keyboard once (the field will remain empty). After that, click on the “Replace All” button.
A dialog box will appear indicating the number of replacements performed, click “OK” in it.
Now all end-of-line characters in the document will be replaced with spaces. In the example, the text was initially divided into two parts according to its meaning. After the replacement she was left alone. If your text also needs to be divided into logical parts, you can arrange them manually. Simply place the cursor in front of the word with which the sentence in the new paragraph should begin and press “Enter”.
If you have a large document, this will take a lot of time. So let's look at another replacement method.
Replacing space and sign
Look carefully at your text. In the example, if the paragraph is forced, then there is a space and the corresponding symbol. If it is implied in the text by meaning, there is a punctuation mark, it can be a period, an exclamation or question mark, or the same symbol.
Now let's make the next change. In the “Find” field we put a space from the keyboard and the sign “^p”, in the “Replace with” field we put one space. Click Replace All.
As a result, we will replace only those characters that break sentences and are not implied in the text by meaning.
Replacing a punctuation mark with a non-printing character
There may be another situation - at the end of each line there is a character of interest to us without a space. In this case, first replace the period, exclamation mark, question mark and end of paragraph with various characters not found in the text.
For example, let’s replace the end-of-paragraph period with three consecutive greater than >>> signs.
Before the symbols you will replace, be sure to put in front what the sentence should end with - a period, an exclamation, a question. There should be a period in the example, and the “Replace with” line should be “.>>>”.
The text has changed as follows.
Now you need to replace one paragraph with one space. The text will look like this:
Next, you need to replace the special combination you used with the paragraph symbol.
As a result, we removed all unnecessary characters that appeared at the end of each sentence, and divided the text into parts where it is implied by the meaning.
Create a paragraph using settings
To set a red line for a paragraph, you can use the text editor settings:
- In the top panel, open the “Home” tab, click on the settings icon in the lower right corner of the “Paragraph” category.
- In the window that appears, open “Indents and Spacing.”
- In the “First line” item, you must select “Indent”.
- Set the indent distance. It is recommended to make the red line more than 1 cm.
- Click OK.
In Word 2007 the process is slightly different. You need to expand the “Format” category on the top panel, select “Paragraph”, and then do the same steps.
Mirror indentation in a document
This type of space is used mainly in printing houses for double-sided printing of magazines, books, newspapers and other works. The essence of the method is that the fields on the left page mirror the subjects printed on the right page. Means that all fields have the same width, both internal and external. To configure mirror fields, you need:
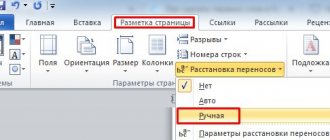
- Click on the "Layout" or "Page/Margin Layout" icon.
- In the “Multiple pages” item, you need to select the “mirror” section.
- At the end, press the “OK” key.
This function often saves you when printing any work or documents.
Context menu - a quick way to make a paragraph in Word
When you right-click on a text editor window, a context menu appears. With it you can change many text parameters. One of them is a paragraph. To set the indent this way, you need:
- Select the desired piece of text. If you need to edit all the text, press Ctrl + A.
- Use the right mouse button to call up the context menu.
- Select "Paragraph...".
- A menu will open in which you should set the size of the red line in the “First line” item.
- Click OK.
This method is suitable for all versions of Word.
Red line - its purpose and benefit?
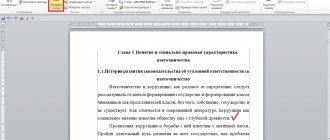
From an early age we were taught to make omissions in notebooks in educational institutions and called it the “red line”. Many have wondered why a person needs this stanza? The first reason is paragraph highlighting. Helps to separate semantic parts among themselves, to see the beginning of a new segment in a text fragment.
This method of highlighting text fragments has both its advantages and disadvantages. "Red Line" helps you save money when printing books or other works in a printing house. Many scientists and specialists have noticed that the “red line”, due to the small space range, compared to other methods of highlighting parts of a story (for example, skipping a stanza, drop cap, etc.), greatly saves paper and finances.
The disadvantages include the lack of beauty and aesthetics. Due to the shift in the starting point of the paragraph, the text no longer looks so complete. Many publishers who publish works on Internet sites have abandoned paragraphs and use vertical space.
The presented type of highlighting the beginning of the next semantic part is not very popular now, but remains the most convenient and practical.
Default paragraph
In Word, you can make a standard indent for each new paragraph. To do this you need:
- Go to the “Home” tab, right-click on “Normal”, select “Change...”.
- In the window that appears, open the “Format” drop-down menu, then go to “Paragraph.”
- In the Indents and Spacing category, you should set the Indent value for First Line. Set the size of the red line.
- Click "OK".
Forming paragraphs
The text should always look holistic and attractive; for this, many people use special services for creating paragraphs, which will be discussed now:
To change the entire passage, go to the “Format” menu, there click on the “Paragraph” box. In the “Paragraph” item on the “Indents and Spacing” tab, transform the desired piece of text, that is, align it. This should be done according to the following points: “along left/right edge”, “along . Next to the above icon there is a “Page Position” tab. Here you have the opportunity to perform various manipulations with the selected passage. For example, change part of the text that is at the junction between pages, prohibit breaking a fragment and one paragraph, and so on.
To make formatting easier, you can use the Ruler function. It is included in the "View" menu. There is a separate place for the “Ruler” function and you need to check the box next to the line. The padding helps set the side borders and tab position of the used part of the story.
How to remove a paragraph?
There are also several ways to do this. If the indentation was set using the TAB key, simply erase it by pressing "Backspace".
In other cases, you can also open the settings of the “Paragraph” category in the “Home” tab on the control panel. Then in “First Line” select “No”.
You can also remove the red line using a ruler. To do this, just move the slider to the left edge.
If you need to cancel the standard indents for each new paragraph, then in the “Normal” text mode settings, you need to set “None” for the “First line” item.
Using the built-in functions of MS Word, you can edit a document in different ways. This is useful both when a small text has already been printed, and when many new pages have to be created. One way or another, it is better to set standard indents, since they will be useful in almost any work.
How to customize margins in MS Word
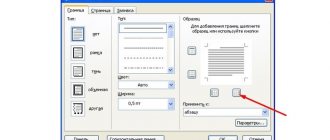
The user-friendly design of the program gives hints on how to set up the fields, and you need to do the following:
- Select the “Page Layout” tab. Next, click on the “Fields” function. You can choose any of the included standard options (regular, narrow, etc.) or adjust the width yourself.
- In the active window, you need to determine the paper orientation (portrait or landscape).
An even easier way to adjust margins is to manually define them with a ruler. If it is not visible, it is easy to fix. You need to select the “View” tab and check the box next to “Ruler”. The ruler arrows are moved manually and determine the size of the margins.
Thanks to simple automatic settings, working in MS Word will become even more enjoyable.