In this course, we will learn how to work with Microsoft Outlook 2016. Outlook is a universal organizer application that gives you access to mail, calendar, contacts, tasks and notes. I'll show you how to add an Office 365 account as well as an iMAP or POP account.
Then I'll show you how to create new messages and customize your inbox to suit your work. I'll show you how to work with your contacts to make mail addressing easier. You'll learn how to work with your calendar by viewing and creating appointments, and you'll also learn how to print your calendar.
Finally, I'll show you how to work with tasks and notes so you can get the most out of Outlook. So take out your notebook, make some tea and start watching this course that will make you more productive.
Your office may use Outlook as its default email client that connects to Microsoft Exchange Server, or you may use Outlook for a personal or small business with an Office 365 subscription or any standalone POP or IMAP email account.
Additional features
The Outlook mail client provides maximum opportunities for convenient work with a large number of mailboxes. One of the necessary functions is to create your own folder hierarchy for your mailbox; you can add your own folders and send letters to them for convenient sorting. This function is not present in all similar programs.
Creating folders
To create a folder, right-click on the mailbox in which you want to create an additional folder, then in the drop-down list, select “Create a folder...”, after which your folder will appear in the hierarchy, then you will need to enter a name for it. To change the order of folders, you just need to left-click on the desired folder and drag it to the desired location.
Creating tasks
The task creation function is also very useful. You can create a task in the task list, set due dates, importance and reminder. You will then be able to stay on top of important tasks and complete them on time.
To create a task, open the task tab; to do this, click on the icon of this function located in the lower left corner. After this, a window will open; to create a task, right-click on the empty area and click “Create task” in the drop-down menu.
When creating a task, a window will open in which you can set parameters, due dates, etc. Once created, this task will be displayed both in the task list and in the calendar.
Create a meeting
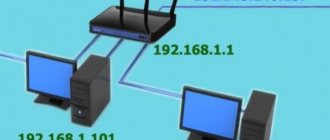
Using this feature, you can schedule a meeting of employees by notifying them by mail. If everyone who receives this notification uses the Outlook email client, they will be able to automatically mark the date of the meeting in their calendar.
To create a meeting, you need to go to the “Calendar” section, which is located in the lower left corner and select “Create a meeting” in the top menu, after which a window will open in which you can create a list of meeting participants, set a time limit and date for the meeting. After creating a meeting, click the “Send” button, and everyone who was on the mailing list will receive your email with information about the meeting
Mail settings in Outlook
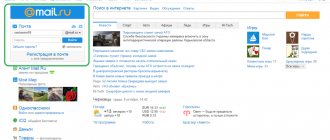
Now we will look at the instructions, which will describe how to connect an additional box through the program settings.
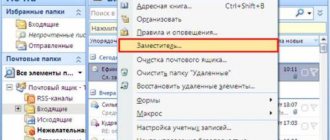
To enter the mail settings menu, you need to open the “File” menu, which is located in the upper left corner of the program window.
After opening the "File" menu, you need to go to the "Information" section. Having opened this menu, you need to left-click on the “Account Settings” section and select the same section again in the drop-down menu.
After you have selected the “Account Settings” item, a window will open in front of you in which, to create an additional mailbox, you need to go to the “Email” tab, and then select the “Create” button.
If you need to change the settings of a previously registered mail, to do this, select the desired mailbox from the list and click “Change”.
After clicking on the “Create” button, a registration window will open; further steps will be exactly the same as described above.
The "Default" button will help you determine the main mailbox. By marking the desired mailbox with this button, you will set this mailbox as the standard one for writing and sending letters.
In order to delete a mailbox registered in the program, you need to select the one you want and click the “Delete” button. After this action, the mailbox will be removed from the Outlook client, but not from the servers of your mail service, so you can connect it again in the future.
When you delete a mailbox from the Outlook email list, a mailbox file remains in which all letters are saved, so to completely delete all information from your computer, you need to go to the “Data Files” tab and delete the desired file from there.
Interface
The interface of the Outlook email client is quite simple and intuitive; it is also similar to the interfaces of the bazaar versions of email clients. Now we will describe the main components of the interface and its capabilities.
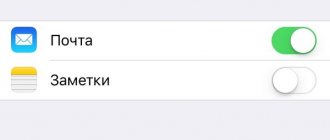
Let's start with the panel on the left side of the window. At the bottom there are 4 icons that will open “Mail”, “Calendar”, “Contacts” and “Notes”. The main section is mail; when you select the next section, its interface will open.
Above are lists of the main sections with separated folders for ease of working with mail. The first list is “Favorites”, in it you can view the common mail folder for all connected mailboxes. This list can be collapsed if necessary.
Below the Favorites list is a list of Outlook Data Files folders. Initially, all folders contained in it should be empty. Messages from all connected mailboxes will be duplicated there, but only fresh ones: those messages that were in the mailbox before it was registered by the system in Outlook will not be included in this list. If you want to move old messages to this list, you can do this manually.
Below there will be sections with incoming and outgoing mail folders for all other connected email accounts. All sent and received messages will be stored in Outlook data files.
When you select one of the folders from the left panel, the entire contents of this folder will be displayed to the right of it, namely the list of messages. The dimensions of such panels can be changed; to do this, it is enough to move the cursor over the border and, holding the left mouse button, move it to the desired distance.
When you select a letter from the central panel, you can display its contents in the panel on the right. Here you will see full details as well as the body of the email.
In order for you to be able to read all incoming messages from all mailboxes at once, you should place all folders with incoming messages in the “Favorites” list. This way you won’t have to view each inbox separately for each mailbox; all letters will arrive in one folder. To do this, you need to right-click on the desired folder and select “Show in favorites” from the drop-down menu.
If you need to duplicate all old messages located in different folders of different mailboxes in order to read all these messages in one big list. To do this, you need to select the folder from which you want to duplicate messages, then select any message or press the Ctrl+A key combination to select all messages. After selecting the required letters, right-click on any of the selected ones and in the drop-down menu click on the “Move” item, then “Copy to folder...”. After these steps, a window will open in which you need to select the folder corresponding to the type of messages and click OK.
Search folders
If you often search for letters by typing the same words and expressions into the search bar, you can simplify your task. Outlook supports search folders, or smart folders. Set them up and you can forget about manually sorting correspondence.
Go to the Folder tab → Create Search Folder. In the window that appears, you can select a search folder from the templates provided by Outlook or create your own. For example, the Unread Emails search folder will show all messages you haven't opened, no matter where they are or what accounts they belong to. Emails will not be moved anywhere: only links to them are displayed in search folders.
If you're not happy with the Outlook templates, select "Create a custom search folder" at the bottom of the list. Click Select. Then enter a name for the folder, click “Conditions” and specify the criteria by which messages should be selected for it.
Basic Outlook tools and features
In this section, we will examine in detail the main functions of the Outlook email client for which it was designed.
Creating and sending letters
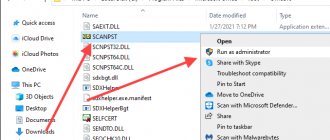
In order to send a letter, you must click the “Create message” button, which is located in the upper left corner of the window in the “Home” tab. Do not forget that letters will be sent on behalf of the mailbox that is selected by default in the account settings.
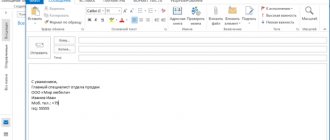
In the window that opens for creating a letter, everything is quite simple, fill out the fields and write the desired letter. To attach files, you can either drag x into this window or use the “Attach File” button
Deleting and restoring emails
Messages are deleted equally for all mailbox folders. To delete a letter, right-click on it and select “Delete” in the drop-down menu, or you can select the desired letter and click the Delete button.
All such messages will not be deleted immediately; they will first be placed in the “Deleted Items” folder and then, after a period of time, they will be permanently deleted. This is done to ensure that you do not accidentally lose important information.
To recover a previously deleted email, do the following: click on the “Deleted Items” folder and the email you want to recover, right-click on it and select “Move” and “Another folder...” in the drop-down menu. After this, a window will open with a list of folders, select the one you need and click “OK”. After that, look for your recovered email in the selected folder.
Error when deleting a message
If an error occurs during deletion, you should take some steps. First you need to clean out the “Deleted Items” folder, right-click on it and select “Empty Deleted Items”. When emptying this folder, a window will appear with two deletion options, you need to perform each option in turn.
If after the above steps the error does not disappear and the letter still cannot be deleted, then right-click on the problematic message and select “Move”, then “Another folder...”. In the window that opens with a list of folders, select any from the list and click “OK”. After this, restart the program and try again to delete this message, which is now located in a new folder.
Mail update
In order to update your mailbox and receive or send letters, open the “Sending and Receiving” tab, then click on the “Send and receive mail - all folders” button. After this, the program will connect to the servers to receive incoming letters and send outgoing ones. If you need to update only one mailbox, to do this, select the desired mailbox and in the same tab click the “Update folder” button.