Once upon a time, I worked as a system administrator in a small office and encountered this problem with regular frequency. Ordinary users also encounter it at home. And so you turn on the computer and immediately see this window: “Windows IP address conflict detected.” On 7, 10 the network error message will be the same, but on XP the message will be in the lower right corner in the network connection tray.
Let me try to explain what it is. This error occurs when the IP address of a computer or laptop is already used somewhere on the network. If we talk about a home network, then this can happen when, for example, 192.168.0.14 is used on a laptop. The computer was turned off, and the router somehow forgot that this address was already in use and automatically gave the same address to the laptop.
Now, after turning on the computer on which the address 192.168.0.14 was, an address conflict error occurs. Because the router receives a message with the same address. To put it simply, this problem occurs when two devices use the same IP, and the router cannot understand where exactly to send data packets and begins to ignore the second connection.
It doesn’t matter what kind of Windows you have: seven, eight or ten - the instructions are suitable for any OS. It also doesn’t matter when this error occurs: when connecting via Wi-Fi or cable, the solutions are the same
HELP! If new problems arise during the process or my recommendations do not help you, then write about it in the comments and I will try to help you. Best regards, Bearded Man!
First actions
ATTENTION! If this problem occurs at your workplace, then you don’t need to do anything yourself and call the system administrator or the employee who maintains the network. You can also call for further instructions.
The question immediately arises: what to do if a Windows IP address conflict is detected - how to fix it? First of all, let's reboot the router and computer. Sometimes the router hangs and at the same time can send the same conflicting IP addresses. When rebooting two devices, the router must reset the route table and reassign the IP to the computer, laptop or other devices.
To reboot your router, find the on/off button on the back. It is usually labeled “ON/OFF” or “ON/OFF”. But you can simply unplug the power supply from the outlet and plug it back in a minute later.
If after this nothing helps, then most likely your IP address settings are incorrect or you need to set them manually. I will write about this below.
Fixing the error “An IP address conflict has been detected in Windows”
Our path through the methods will not be thorny, since it consists mainly of two main methods and several small solutions that can correct the problem immediately.
So, first, let's just try to restart your computer with you, since errors and failures with the operating system are not news to anyone. It's possible that the "Windows IP Address Conflict Detected" error is just a minor annoyance. Well, did it help? If not, then we move on.
Next, you can try restarting your router. Perhaps he gave your computer an already issued IP address by mistake. Simply restarting the device may resolve the issue. To restart the router, you need to turn off the power to it for about half a minute, and then turn it on again. This can be done using a special button on the case or by disconnecting the power cable from a special connector on the back of the same case.
If neither restarting your computer nor restarting your router helped you, then it’s time to move on to something more complex, namely changing some settings in your network connection. Don't worry, as everything will be simple and clear.
Setting automatic acquisition of the IP address of the DNS server address
In an attempt to fix the “IP address conflict detected in Windows” error, we can try setting the options in your network connection settings to automatically obtain an IP address and DNS server address. If you've recently tried to set up a static IP address, then you probably already know where we're heading now.
Right-click on your network connection icon in the Start notification area and go to Network and Sharing Center. Once in the specified window, click on the “Change adapter settings” link located on the left side of the window.
Next, find your network connection. Right-click on it and select “Properties”.
Note: Now you need to find the Internet protocol that is used by your Internet service provider. In most cases, the outdated Internet Protocol version 4 is used. However, your provider may also use version 6. For illustrative purposes, we will use version 4 of the Internet Protocol.
Click once on the component called “Internet Protocol Version 4 (TCP/IPv4)”, and then click on the “Properties” button, which will be located below. Now you need to go to the “General” tab. Next, the most important thing is to check the boxes next to the options for obtaining an IP address and DNS server address automatically. Finally, confirm the changes to your network connection settings by clicking on the “Ok” button.
Once you are done setting up your network connection, restart your computer (very important!) and then try to access the Internet again. Same question again - has the "Windows IP address conflict detected" error been resolved?
If not, then we have one more method left, which will be the opposite of the previous one - setting a static IP address for connection, but only correctly.
Automatic detection
How to fix a network IP address conflict? You may have static settings on your computer. That is, an IP address is set that is used elsewhere. We will set the setting in such a way that the router itself will give us a free address.
- Press the key and the English R key at the same time.
- We write the magic command ncpa.cpl and click “OK”.
- Look further and you should see all your connections. You need to choose exactly the one you are connecting to. If you are using Wi-Fi, then select a wireless connection. Right-click and go to properties.
- We look for the item with the number 4 and click on it once. “Properties” button lights up – go there. Now we select points as in the picture above so that the computer receives IP and DNS addresses from your router.
- Click "OK".
Problem with internal network
The problem is in the internal network if:
- you are not connected to the Internet;
- In parallel with the Internet, you are connected to a local network and the problem occurs on the local network adapter.
To find out which adapter generates an error when connected, go to view the connection parameters:
On Windows Vista/7/8/10:
Right-click on the connections icon in the system tray.
Network and Sharing Center
Select Manage networks and sharing and click on it.
Go to view network connections
In the window that opens, left-click on “change adapter settings”
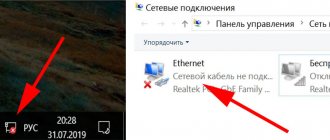
In the list of adapters, look which one is displayed with an exclamation mark or a red cross.
Looking for a problematic connection
If the problem is not with the internal network, then it is with the external one, that is, with the Internet connection.
Problem with external network
Your next step is to determine what is causing the problem. To do this, remember how you connect to the Internet: through a router; directly through an access point or cable.
If a cable is connected to the system unit of your computer that goes straight to the street or into the entrance, then you are connected to an access point and you cannot configure it. In this case, you need to call the technical support of your Internet provider.
If you connect to the Internet through a router - either wired or via Wi-Fi, then the problem may be there.
Static settings
If the previous method did not help much, then the problem is with your router’s DHCP. The service either does not work correctly or is completely disabled. But you can set the settings manually.
So first we need to find out the IP address of your router:
- + R and type “ cmd”.
- ipconfig and Enter.
- Look in the line “Default gateway” or “IPv4”. We need the first 3 digits. In my case it is 192.168.1.
- Go to the properties of the network connection. You already know how to do this from the last chapter.
- And so, I set 192.168.1 as the IP (here you can put any number from 100 to 254). I set it to 192.168.1.145. Next, place the cursor in the mask line, and it will be filled in automatically. We set the main gateway as 3 numbers, which you learned, and at the end we set it to 1. For me it is 192.168.1.1. Be careful with the third digit, if you have 0, then put 0, if 1, like mine, then put 1.
- As DNS we set the values that you see in the picture above.
- At the very end, click “OK”.
After this, the problem should resolve itself. But if it appears again, then it is better to set up obtaining IP addresses offline, as in the last chapter. If after this the problem appears again, then you need to look at the DHCP settings on the router. I wrote about this in this article.
What is an IP address
The Internet Protocol, commonly known as an IP address , is a unique digital address assigned to your computer. When your system is connected to the network and you go online, the network can easily identify your device.
But, when two devices share the same IP address, you get IP address conflict messages detected by Windows.
How can two devices have the same IP address? This happens when there is a problem with the PC settings, router or network card drivers.
Therefore, when you receive messages about conflicting IP addresses, to avoid complications, you should fix it immediately.
Disabling use of a static IP address
If the simple solutions described above do not help, check the connection properties and try disabling the use of a static IP address:
- Press the keys Win+R on the keyboard, enter ncpa.cpl and press Enter.
- Right-click on the problematic connection icon and open its properties.
- In the list of connection components, select “IP version 4” and click the “Properties” button.
- Attention: if in your case some special network settings are used and a static IP address is set, before the next step it is better to save the settings somewhere so that they can be easily restored. Set o and click OK to save the settings.
- In the next window (network properties), also click OK, the settings you made will be applied automatically.
Please note that for this method to work, the DHCP server must be enabled on the router; this is the default on almost all Wi-Fi router models. But just in case, go into your router's settings and check your DHCP settings.
Conflict with another system
Another less common, but common situation is when an IP address conflicts with another Windows system when 2 network cards are installed on the computer. For example, this may be needed on a PC in a small cafe or store, when one of them works with the local network and the Internet (how does a local network differ from the Internet?), and the other works with the cash register. It happens that either the computer does not see the cash register or cannot access the global network via WAN. All this is due to the fact that both independent LANs operate on the same subnet, that is, for both network cards the IP looks like 192.168. 1.
xxx.
To fix this problem, leave one network as is and set the other to a different value, such as 192.168. 0.xxx
. The easiest way to do this is in the router settings.
To do this, go to the section with its IP, change it to 192.168.0.1 and save and restart.
Connection error when accessing the Internet
If you had to deal with the detection of an IP address conflict in Windows 7/10 on a desktop PC with a dedicated Internet connection, changing the addresses will not give positive results, since the cause of the problem most likely lies on the side of the provider. The only thing you can do is try to disable and re-enable the problematic network connection, and at the same time run the ipconfig /renew , and of course, you should contact your Internet service provider for help.
- 4shared
- 0Facebook
- 2Twitter
- 0VKontakte
- 2Odnoklassniki

