Driver Update
But first, let's update the drivers for the video card and monitor. You can do this in Device Manager: press the Win+X key combination and select the item of the same name (read more here).
In the Manager we find the video adapter and monitor. Right-click on the device and select “Update Driver”. The system will automatically find the current version and install it.
A more convenient way is to install one of the utilities that will update all computer drivers on its own. We recommend the free program Driver Pack Solutions.
Updating drivers helps to fix, in particular, unclear pictures in games. In general, try to install toys with suitable system requirements.
Phone programs to blur the background
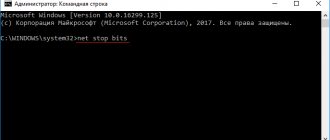
Blurry font in Windows 10: how to fix it
For lovers of mobile photography, applications that allow you to blur the background and highlight the most important thing in the photo in a couple of clicks are very useful. We will provide a list of those programs that can be found in official application stores: both in the AppStore and in Google Play
Fabby
This completely free application will help you give your photo the desired effect in just a couple of clicks. You just need to open the program, find the “Background Blur” function in the bottom tab and take a photo with the selected effect. If you need to apply blur to an old photo, then find it in your phone's gallery by clicking on the circle icon above the blur function. Save the resulting image back to the gallery.
The application offers not only to create bokeh, but also to select unusual background options. You can add hearts, flowers, stars, a photo of the island, cats and much more to your silhouette in the photo.
Tadaa
The program provides free access to its functions, but it also has a more advanced version - Tadaa SLR for 299 rubles. But both have all the necessary tools for working with images.
Open the application and select the “Blur” function in the bottom panel - this will open a mask that will select the entire clear area and blur the background. You can move the clarity area, reduce it, enlarge it, and make it the desired shape. Once you have achieved the desired effect, save the result to your phone’s camera roll.
Snapseed
This is one of the most popular mobile photo editing apps. It's free and makes blurring your background quick and easy: select the Tools tab and look for the Blur function. Again, the mask will open: move it and transform it exactly until the blurring result satisfies you. The result, again, is transferred to the phone’s memory.
AirBrush
Another free application available to smartphone owners of any OS. To blur the background, open the editor and select the desired image in your camera roll. In the bottom panel you will find the “Tools” tab: go to the “Blur” function and start painting the background. Here, to apply the function, you will use your finger, and use it to outline the desired area. The program allows you to adjust the brush size and blur strength, and then save the result to the gallery.
Facetune
Facetune is a hit among photo retouching programs, with which you can quickly and very efficiently create the desired background. Open the program and select the desired photo in the gallery: you will see the “Blur” option in the bottom panel. Here, in the same way, you will have to use your fingers as a tool and carefully blur out those areas of the background that should be less clear. Use the “Eraser” to remove processing errors. Save the result in your phone's camera roll.
As you can see, there are a lot of ways to improve a photograph, and certainly everyone will find their own one that will be convenient to use and the result will be excellent.
Scaling
The problem is especially relevant for computers with high-resolution monitors. The system may not scale the image correctly, resulting in unclear or blurry images.
- Scale for a single application.
If the problem occurs in one application, configure the correct scaling for it. Right-click on the shortcut on your desktop. Select "Properties".
Go to the “Compatibility” tab and check the box next to “Disable full screen optimization”. In older versions it will read "Disable image scaling at high resolutions."
- General scaling.
Let's use the Windows 10 settings to adjust the scale for all application windows.
Right-click on an empty area of the desktop and select “Display Settings.”
Make sure that the recommended settings for your monitor are set. The scale should be set to 100%, and the resolution depending on the model of your monitor.
Click then on “Advanced scaling options”. Here we can allow the system to automatically correct blur in applications. Set the marker to the “On” position.
Fixing app blur in Windows 10
If you have multiple displays connected to your computer or the screen configuration changes, some classic apps may appear blurry.
Windows 10 (version 1803 or later) may try to fix this problem automatically so apps don't appear blurry. Windows may not correct blur in some applications, so they will still appear blurry on high-resolution displays. Here are some examples of situations where this can happen.
You open an app on a high-resolution display and then move the app to another display with a different resolution.
You connect your laptop or tablet to a display with a different resolution, and then project the image in Second Screen Only
.
You are making a remote connection to another computer whose display resolution is different from the display resolution of the computer you are connecting from.
To use the option to automatically fix blurry apps, you must have Windows 10 (version 1803) installed. To find out the version of Windows on your computer, see the article What version of the Windows operating system do I have?
If you have Windows 10 (version 1903), the option to fix blurry apps is enabled by default. However, you can turn it off at any time. The notification to fix blurry apps varies by app and may still appear.
Fixing app blur
If an app appears blurry or a blurry app notification appears on your primary monitor, follow these steps:
Do one of the following depending on whether you see the "Fix blur in apps?" prompt.
If prompted, select Yes, open settings
and click the
Apply
.
additional scaling options in the search box on the taskbar
and select
Fix blur in apps.
In the Eliminate scaling for applications
turn on
windows to try to fix apps so they aren't blurry
.
To test Windows' ability to fix the problem, close a desktop app that appears blurry on your main display, and then open it again.
If an app still appears blurry, you can try using different high-resolution compatibility settings for that app rather than letting Windows try to fix apps so they don't appear blurry
. For more information about this, see Make older programs compatible with this version of Windows.
Whether you have had blurry apps or have seen a notification about unblurred apps, you can turn this feature on or off at any time.
In the search box on the taskbar, enter Advanced scaling options
and select
Fix unblurred apps
.
If you want to eliminate scaling for applications
, turn it on or off to have
Windows try to fix apps so they aren't blurry
.
Turn app blur notifications on or off
While a notification about how to fix blurry apps automatically can be helpful, sometimes you don't want the notification to appear. You can disable this notification in two ways:
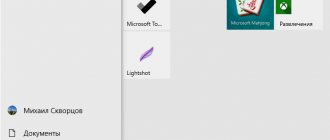
Click the » Start
" and then select
Settings > System Notifications > & Actions,
and then turn off
Display Options
.
Select Notification Center
, and then select
Focus
. This Windows 10 feature allows you to control the display of notifications. For more information, see Turn focus assist on or off in Windows 10.
Fixing blurry fonts
Often it's just the fonts that are unclear. This can be fixed in the Control Panel under ClearType text settings. Press the Win+S key combination and enter the name of the parameters in the search bar.
In the first window we see a description of the technology. The ClearType tool makes text clear and easy to read. The marker opposite “Enable...” is set automatically, but make sure once again that it is exactly set.
Click “Next”. There will be information about the monitor resolution. Click “Next” again. Then there will be 5 text settings. Choose those that you think are best for your perception. Here is an example of one of the settings.
After setting the text, the final window will appear. Click "Done". Please note: Administrator rights are required to complete the monitor text settings. We have a detailed article on how to obtain these rights.
We recommend that you restart your computer after setting the fonts.
We wrote in detail about how to fix blurry fonts in Windows 10 in this article.
How to fix a blurry image on the monitor (text and pictures seem blurry)
Question from a user
Hello.
Please tell me what to do with the image on the monitor: after reinstalling Windows, it became somehow blurry (the same effect as if water was splashed on a newspaper and some letters floated.).
The rest of the question has been cut as not informative.
In general, this kind of “thing” most often happens when the screen resolution is set incorrectly (also, the reason often lies in video drivers (or rather, their absence)).
It's hard to say for sure without more specific PC data. However, in this note I will try to go through the main reasons for the appearance of blur and their elimination (in any case, before taking the PC to a service center, it’s worth checking the basic things yourself ✌).
What to pay attention to if the image becomes blurry and cloudy
Settings for resolution (scaling), brightness, refresh rate
As I said above, in the vast majority of cases, an unclear image on the monitor screen is associated with incorrectly set resolution or scaling (especially since modern Windows 10 sets these parameters automatically and often makes mistakes).
In order to view (or change) these parameters, you need to open the screen/display settings (video driver). To go to them, just right-click anywhere on the desktop: in the menu that appears, select “Display settings” (as in the screenshot below).
Note: you can also press the Win+R button combination, enter the command desk.cpl and click OK. This is a universal method for all OS*.
Right click anywhere on the desktop
Next, pay attention to two lines:
- resolution (number 2 in the screenshot below) - for the clearest image, the recommended resolution* should be set (provided that you have the latest drivers installed, but more on that below. );
- scaling options (in Windows 10) - this option is more relevant for laptops (it can be used to make the image larger if, due to the high resolution, some small elements are invisible).
Resolution and scaling in Windows 10
In general, it is impossible to give specific values for these parameters (to whom and what to set) (depending on the model and screen diagonal of your monitor).
To help!
How to find out and change the screen resolution (if the image is too large/small, not clear, etc.) - https://ocomp.info/razreshenie-ekrana.html
A few words about interfaces
Now the most popular connection interfaces are: VGA, HDMI, DVI, Display Port. A lot can depend on the interface, for example, the quality of the transmitted image, max. resolution, the ability to simultaneously transmit audio and video signals.
For example, the “old” VGA interface, although still quite popular today, is noticeably inferior to DVI and HDMI. And, by the way, blurriness is more common with VGA.
Interfaces for connecting the monitor to a PC
The conversation about the interface comes to this: check how your monitor is connected to the system unit. If you are using a VGA interface, check if it is possible to use another one (as a rule, most monitors and video cards have 2-3 interfaces).
To help!
Monitor connectors (VGA, DVI, HDMI, Display Port). What cable and adapter is needed to connect the monitor to a laptop or PC - https://ocomp.info/razemyi-monitorov-dvi-display-port.html
The note!
By the way, I can’t help but note another common cause of various “inaccuracies” on a PC screen (especially associated with VGA) - the cable is intertwined with other wires and devices (which cause “interference”, for example, it could be a nearby mobile phone) , damage to the cable (connectors), etc.
Check if everything is in order with the cable, if it is pinched by furniture, try re-connecting the plug to the video connector. In some cases, such “shamanism” helps eliminate the problem.
Video drivers and their settings
In the video driver settings (for PCs/laptops, such things should not have any impact) there is a special one. scaling options. They are needed to ensure that there are no black stripes along the edges of your monitor (at the same time, this “adjustment” can affect the clarity of the “picture” on the screen!).
There are three ways to open the video driver settings:
- just right-click on any free space on the desktop - in the menu that appears, follow the link “AMD Radeon Settings” (or “NVIDIA Settings”);
- in the system tray (next to the clock) there is also an icon for quickly entering the video driver settings (see screenshot below);
- go to the Windows control panel, in the “Hardware and Sound” section there should be a link to the video driver control panel.
2 ways to open AMD Radeon video card settings / clickable
I note that if none of the methods suggested above allowed you to enter the settings (there is no link to the video driver control panel), most likely your drivers are simply not updated. How to do this is described in one of my previous articles, link below.
Among the video driver parameters, pay attention to the “Scaling settings” section (as an example, below are screenshots from the control panels of AMD and NVIDIA video cards). Try moving the slider responsible for scaling - you may very well immediately notice how the image on the monitor has become clearer!
AMD Radeon - Scaling Settings
AMD Vega - scaling settings (display) / Clickable
Please note that in the NVIDIA control panel you can adjust the image scale in the “Display/Adjust desktop size and position” tab.
Setting up font smoothing (and a few more words about fixing scaling)
Windows has a special tool called ClearType. It is designed to make text appear as clear as possible on your monitor. This is achieved through calibration - i.e. step-by-step sifting out of different display options (and this is justified, because everyone’s monitors are different, and the same text can be displayed differently for everyone.).
In general, I would recommend everyone to try using ClearType (especially those who notice that the text on their screen is blurry, for example).
To run ClearType:
- press the Win+R button combination (the “Run” window should appear);
- then enter the cttune command and click OK.
Adjusting the Color Rendering for the LCD Monitor
Error “dumping physical memory to disk” on Windows 7 and “blue screen of death” - what to do?
To get the best color performance from your LCD monitor, make sure the display mode is set to 32-bit color. This measurement refers to color depth: the number of color values that can be assigned to a single pixel in an image. The color depth value can range from 1 (black and white image) to 32 bits (more than 16.7 million colors).
- Open the Screen Resolution window.
- Click Advanced Options and go to the Monitor tab.
- Under Colors, select True Color (32-bit) and click OK.
Color management
Windows also includes additional color controls. Color management systems provide the most accurate color reproduction on any device, in particular on monitors and printers.
Display calibration
Display calibration software allows you to get accurate colors on your screen. If your computer has display calibration software from another vendor, use that software to calibrate your display.
Display calibration devices often come with the necessary software. By using the calibration device with the software it came with, you can achieve better color results.
Windows also has a display calibration feature.
Adjusting brightness and contrast
On external displays, brightness and contrast are adjusted using the monitor's controls rather than through Windows. Most CRT and LCD monitors have buttons or other controls on the front panel that allow you to control brightness and contrast.
On some monitors, a menu opens on the screen and allows you to make the appropriate settings. To learn how to use these controls, refer to your monitor's manual or the manufacturer's website.
The brightness of most laptop screens can be adjusted using Windows. If you are using a laptop, you can adjust the brightness in the Power Options window.
Improved text display
Windows uses ClearType technology, which is enabled by default. With this technology, fonts are displayed on the monitor as clearly and smoothly as possible. This makes it easier to read text for a long time without tiring your eyes. The greatest efficiency can be achieved when working with LCD displays, flat panel monitors, laptops and portable devices.
Make sure ClearType is not disabled, especially when text on the screen appears fuzzy. ClearType technology can be configured to work with a specific monitor.