In 2022, there are a large number of different methods for transferring and storing data. Cloud services, whose services are used by more and more people every year, are, of course, good, but a significant part of clients still actively use CDs and DVDs to store important information.
The release of the tenth version of Windows has become the primary reason for many to change to a newer system. But along with an attractive interface and advanced features came a misunderstanding of some processes. It turned out that writing files to a CD-R disk or similar drives is not so easy for those who are used to doing this in the 7th (XP/VISTA) version of the Microsoft OS.
We will correct this misunderstanding and provide several ways to burn a CD or DVD in Windows 10. Using additional software or utility tools built into the client, you can easily burn a movie to disk, transfer a photo library, and much more.
Recording Audio CD
Well, now the actual instructions on how to burn an audio CD in the Windows 10 operating system, without using special programs.
You need to insert a blank CD-R or CD-RW disk into the drive and open this disk in Windows 10 Explorer. In this case, the explorer will ask you to select the type of disk. You need to select the type “With CD/DVD player”:
After this, a blank CD panel will open in Explorer and a hint for further action:
Although it says that you need to drag the mouse, you can make it simpler. You can go to another folder (where the files to be written are located) and select and copy the necessary files there:
Then return to the disk folder and paste the copied files:
Now you can start recording:
After this, a window will open in which you can specify the disc label and recording speed:
The disc label does not need to be written in Russian, there is no need to use spaces and there is no need to make it long. The recording speed does not need to be set to the highest possible. It is better to reduce it by 8x or 10x. Music lovers record audio discs even at 2x speed
Next, specify the disk type again:
After this, Windows Media Player will open, it will contain a list of files and the total playing time, you need to click the “Start Recording” button:
Note: The CD Audio format allows you to record a maximum of 72 minutes of audio on a disc. Check the total duration of all files before starting recording.
Now you need to wait for the recording to finish:
The recording is finished, you can insert another copy. Or clear the recording list:
Deleting data on a DVD disc
Sometimes there are situations when a DVD+RW or DVD-RW disc needs to be cleared of data.
To do this, in the main program window, click on “ Erase CD- RW, DVD+ RW ”
You can check the “ Quick erase ” box to save time and click “ Erase DVD ”
Answer “ Yes ” to the program warning
Visually we see how the disk is cleaned
Ready! Click “ Exit ”
Note
Although it is possible to record an audio CD from MP3 or WMA files, you need to understand that in this case, although the disc format will be Audio-CD, the sound quality will correspond to the sound quality of the original MP3 or WMA files. So if you want to burn a really high-quality audio CD, you need to burn it from uncompressed WAV audio files.
For better compatibility with home players, do not use CD-RW discs for recording, but only CD-R.
The Audio-CD recording method described in this article is only suitable for those cases where the audio disc is planned to be played on a computer, car radio, portable player or boombox. But if you are a connoisseur of good music and have good audio equipment, then the approach to recording audio CDs should be completely different. Recording high-quality audio CDs is a rather complex topic that requires knowledge, specialized programs and equipment.
Nowadays, CDs and DVDs have become almost exotic. Cloud storage on the Internet, as well as removable HDDs and Flash drives have practically forced them out of use. However, it is difficult to completely abandon them. Disks are the best boot storage option because they are easy to store and not easily damaged. In addition, it is possible to install write protection on CDs and DVDs, which will prevent data from being changed or even illegally copied.
Types of optical discs
As you may have noticed, there is more than one type of optical disc. Moreover, their names are not just a set of symbols, but very specific designations.
The very first type of disc that you can find on store shelves is CD. These disks hold data volumes from 120 to 800 megabytes and come in three types: ROM, R and RW. The contents of CD-ROM discs are recorded at factories and you cannot interact with the data stored on them in any way. The user writes everything he needs on CD-R discs, but only once; such discs cannot be rewritten. Well, CD-RW discs can be rewritten as many times as you need.
Next come DVDs. They already have quite a few different types. To begin with, DVD discs also come in ROM, R and RW types (this means the same as for CDs). There are also two generations of DVD discs, which can be distinguished by the “+” and “-” signs in the name. Discs with a “+” in the name (eg DVD+R) are better because they are compatible with all drives. Also in the name of DVD discs there may be numbers that indicate the number of layers for recording. The higher the number, the more layers and the larger the amount of memory on the disk (from 4.7 to 17 gigabytes).
Burning discs using standard Windows 10 tools
To burn files to a CD or DVD, you must have a clean and undamaged media (“blank”), as well as a writable drive. It must be remembered that the volume of recorded data cannot exceed the capacity of the “blank”.
Recording using the "Like Flash Drive" option
Before you start recording, you must insert media into the drive. Otherwise, the operating system will say that the operation is impossible.
The “Like a flash drive” recording method means that you can work with files on the disk almost like a flash drive. RW (read-write) discs are suitable for recording. After the data saving procedure is completed, the files on the disk can be modified, erased, and rewritten.
To burn a disc, do the following:
- Open the folder with files prepared for recording, mark those that you are going to burn, and drag them into the window on the left to the line corresponding to the CD/DVD drive. Then in the “Burn disc” window and click the “Next” button. Drag the files to the CD/DVD drive, then in the window that appears, select “As a flash drive” and click the “Next” button
- Then we wait for the program to format the disk and write files to it.
Recording using the "With CD/DVD Player" option
The “With CD/DVD player” option is intended for disks of the -R (read) type, that is, for those on which once recorded files cannot be changed.
The recording is done like this:
- Open the disc burning wizard (as in the previous version), drag the files onto the disc, in the “Burn disc” window and click the “Next” button. If a disc of a suitable format is inserted, recording will begin instantly, otherwise the system will ask you to insert the correct disc. Drag the files onto the disc, in the window that appears, select “With a CD/DVD player” and click the “Next” button
- We wait until the program finishes writing data and remove the disk from the drive.
Burning a disc from an image in ISO file format
The procedure for burning a disc from an image in Windows 10 is different from the normal process of burning data. But no additional tools are required for this; everything is done using standard system tools.
Burning an image to disk is done like this:
- Open the folder with the image. Right-click on the ISO file and select “Burn disc image” from the context menu. Right-click on the ISO file and select “Burn disc image”
- In the window that opens, select a drive with a previously inserted blank disk and click on the “Burn” button, after which file recording will begin. Select the desired drive and click the “Next” button
Video: how to burn an image to disk in Windows 10
Creating a boot disk
Using the instructions above, you can record any type of file. However, if you want to burn a hard drive image to install an operating system, you'll have to do something completely different.
This must be done using special software. There are quite a few programs for this purpose, but as an example we will look at UltraISO. Here it is done like this:
- Open the program.
- In the lower left part of the window, specify the path to the image or files for installing the OS.
- After that, mark them a little to the right using the “Ctrl” and “Shift” keys.
- Then click on the “Add” button (folder with a blue arrow) located on the bottom panel.
- On the top panel, open the Bootstrap tab.
- In the menu that appears, select “Burn Hard Disk Image...”.
- In the new window, in the “Disk Drive” line, select the name of your disk, leave the rest of the items unchanged.
- Click on the “Record” button.
- In the window that appears, click on the “Yes” button.
After this, wait until the recording finishes, and the boot disk will be ready.
Third-party disc burning programs
The capabilities of standard Windows OS tools for burning CDs and DVDs are limited. For example, they do not allow you to create an audio CD or DVD with graphical menus for players. If the standard capabilities of the system are not enough, you can use third-party programs.
Nero Burning ROM
Nero Burning ROM is one of the oldest and most successful disc burning programs. The application has many functions and capabilities for burning various types of discs in CD, DVD and Blu-ray formats. It can work with ISO images and can convert music of all popular formats.
Nero Burning ROM is one of the oldest and most successful programs for burning CD and DVD discs
- Download and install the program. We launch the executable file and in the program window that opens, click the “New” button on the toolbar. To start the recording process, click the “New” button on the toolbar
- Select the required format of the disc to be recorded (for example, DVD-ROM (UDF) - a data disc) and click the “New” button. Select the format of the disc to be recorded and click the “New” button
- From the window on the right, drag the files for recording to the left window. From the window on the right, drag the files for recording to the left window
- We make sure that the bar at the bottom of the program window is green - this means that the disk is able to accommodate the selected files. Then on the toolbar, click the “Record” button. On the toolbar, click the “Record” button
- Select the recording speed (it is better to set the maximum available), then click on the “Burn” button. Set the recording speed and click the “Burn” button
- We wait until the program finishes copying files and the drive ejects the recorded disc.
ADVANTAGES:
Quality, convenience
DISADVANTAGES: No
Nero Burning Rom is a CD and DVD burning program for Windows, a program that I've been using for probably 10 years now. It's consistently good. In recent years, with the addition of a DVD drive, it has, accordingly, added the ability to record on DVD discs. A portable option has appeared (portable, without installation). There is an English version and a Russian one. In short, for every taste. I use both portable and installation. I’m already used to it and can’t imagine life without it. I recently discovered that Windows 7 has a built-in ability to burn discs. I was delighted, threw everything onto the disc, clicked “burn”, and the disc was irrevocably damaged. It seemed like something was recorded, but at the end an error was thrown. I didn’t understand why, even though I’m a competent PC user. And then Windows kept reminding me that I had unwritten files somewhere in the image. Some kind of mockery right there! In short, I was once again convinced that Nero is the best program. The same disc was recorded on Nero without problems and in 3 minutes.
Ashampoo Burning Studio
Ashampoo Burning Studio is a convenient and simple program for burning CD/DVD discs. Can work with CD, DVD and Blu-ray media. It can also make copies of disks, protecting them with a password. The application has a convenient and intuitive interface, so it is suitable for not very experienced users.
Ashampoo Burning Studio - a convenient and simple program for burning discs
- Download and install the program. Launch it, hover the cursor over the line “Write data” and select “New disk” in the menu that appears on the right. In the program window, move the cursor over the line “Write data” and select “New disk” in the drop-down menu
- Using the “+” button or by dragging the required files into the program window, add data for recording, and then click the “Next” button. Using the “+” button or by dragging files into the program window, add data for recording, and then click the “Next” button
- Select the recording speed and click the “Burn DVD” button. We wait until the program finishes working. Select the recording speed and click the “Burn DVD” button
ImgBurn
ImgBurn is a disk management program for those who prefer functionality and quality over a friendly and intuitive interface. The application is small compared to its analogues (less than 10 MB), but it can create disk images and burn disks from images, and also perfectly burns disks and tests the media surface for possible damage.
ImgBurn is a disk management program for those who prefer functionality and quality over a friendly and intuitive interface
- Download and install the program. We launch the executable file, in the window that opens, select “Burn files/folders to disk.” Open the ImgBurn interface and select “Burn files/folders to disk”
- Click on “Show Disk Layout Editor”. In the window that opens, drag the files to be recorded from the top to the bottom. Then in the lower right corner, uncheck the box and select the format of the disc to be written. Open the disc layout editor and drag the files to the bottom of the window
- Click on the burn icon (a folder with an arrow pointing to the disk) and wait for the program to finish burning. Click on the burn icon and wait for the program to finish burning
Really cool program. The author of this program is the hacker who created DVD Decrypter. It is free, but there is not a single paid program that would be cooler than this tool. The interface is simple, although you need to dig into the settings, but the effort will pay off. Don't use cracked Nero, use ImgBurn. This is the best of the free utilities. I use it in conjunction with MagicDisc, which I use to compress ISO images.
CDBurnerXP
CDBurnerXP is a small utility for burning discs, but it has great capabilities. The program works with ISO images, data discs, audio CDs and is capable of copying CD and DVD media.
CDBurnerXP - a small utility for burning discs with great capabilities
- Download and install the program. We launch the executable file, select “Data Disk” in the application interface and press the OK button. In the application interface, select the “Data Disk” option and press the OK button
- Drag files from the top window to the bottom, then click the “Burn” button on the top or middle toolbar. We wait until the program finishes recording the media. Drag the selected files into the lower window and click the “Burn” button
CyberLink Power2Go
CyberLink Power2Go is a powerful platform for working with disks and converting files. This program can also work as a small film studio: trim videos, make clips from photos and perform a number of other operations for processing video materials.
CyberLink Power2Go - a powerful platform for working with disks and converting files
- Download and install the program. Launch the executable file and select one of the options in the top panel of the program window:
- Data Disk - recording media with arbitrary data;
- Video Disk - recording media with video files;
- Music Disk - creating an audio CD;
- Photo Gallery Disk - recording media with photographs.
- In the bottom panel, select the disc format: CD, DVD or Blu-ray. In the main program window, select the recording type and media format
- Drag the selected files from the top window to the bottom, then click the Next button. We wait until the program finishes recording the media. Drag the selected files to the bottom window and click the Next button
Burning a CD or DVD in Windows 10 is very easy. To do this, you can use both a set of operating system tools and a large number of third-party programs.
- Alexey Gerus
Hello! My name is Aleksey. I am 27 years old. By education he is a manager and philologist.
Using programs
In addition to the above utility tools, you can also use special software to transfer data to disk. Numerous programs and utilities allow you to take advantage of advanced pre-configuration functions, as well as transfer multimedia files with better quality.
Astroburn Lite
The ability to burn a DVD disc in Windows 10 for further playback and installation of programs/systems is considered preferable for many. But among users, a common option that has been used for several years now is the Astroburn Lite utility. With it you can make bootable disks and much more.
BurnAware Free
But Astroburn is not the only one that is considered a reliable assistant when transferring data to a drive. Another popular burning program that you don't have to pay hard-earned money to use or go through a grueling authorization process is BurnAware Free.
After opening the program, select the required option. In our case, this is recording a disk with data.
In the window that opens, select the empty area in the middle, apply PCM to it and select “ Add files... ”.
Opening CD/DVD drives with emulators
As already mentioned, any version of Microsoft Windows 10 (be it Insider Preview or any other) is capable of opening ISO files on its own.
At the same time, the OS also creates a virtual drive, which can be removed by right-clicking and selecting “Eject”.
The choice of a third-party ISO opening tool directly depends on its content: if any game or application is provided in this form, then the correct decision would be not to open the file itself, but to mount the image. Before starting the procedure, make sure that the file is on an NTFS volume.
In other words, the ISO will open in a specialized program that will create a separate virtual disk. Through such a drive it will be possible to install a utility or game. Let's figure out what programs can be used to do this.
Daemon Tools Lite
This is the most common and popular tool for mounting an ISO image. You can download the utility from the official website, because in the Lite version it is absolutely free. The provided functionality will be more than enough.
This utility is installed in the same way as any other. You need to open the EXE file and follow the instructions. There is only one “BUT” - in the Windows security window that opens, you must activate the “Always trust Disk Soft Ltd software” option. To install, all you have to do is click on the appropriate button.
Before finally launching the program, be sure to check that there is a checkmark in the “ISO” item so that the ISO format is automatically opened through this utility.
The further sequence of actions for opening an ISO using DTL is as follows:
- We find the downloaded ISO and launch it using the standard method. Due to the fact that it was associated with the program we are describing, the file will be read in it.
- Activate the option “Always use this application to open .iso” and click “OK”.
- Click "Open" in the Microsoft Security Alert window.
- If the procedure was completed successfully, a new disk will appear at the bottom of the program window.
- We open “This PC” and in Explorer we see in the list of hard drives a new drive with the program that we downloaded as an ISO.
- The disk is available for opening and use. When you double click on it, automatic installation of the content will begin. Right-clicking on the disk and selecting “Open” will open the contents for further use.
After installation, it is not recommended to remove the virtual drive. A game or program may be tied to the disk, and therefore it will simply refuse to launch without it being present in the OS.
To unmount a drive, you need to open the application, select the appropriate drive, right-click on it and click on the “Unmount” button.
As a result, the disk will be removed from the explorer.
Let's move on to consider the next tool with similar functionality.
Ultra ISO
UltraISO is the simplest tool for working with ISO, which does not take up a lot of disk space, but provides a huge number of possibilities. Only one of them interests us.
We install the program like any other, and then follow the instructions below:
- Open the ISO object automatically associated with UltraISO.
- A program window will open, displaying the entire contents of the selected file.
- To get the necessary files at your disposal, select them, right-click, click on “Extract to...” and indicate the extraction path.
- The files are extracted to the desired folder and are ready for use. No additional drives were installed.
As you can see, working in this utility does not take much time. Let's move on to the next tool.
Alcohol 120%
Alcohol is a powerful utility for burning discs. In addition, it allows you to connect a large number of virtual drives. Its functionality is truly impressive, but in our case we will only work with a smaller part of it.
Install the application and follow the instructions:
- Open the program, click on the “File” button and select “Open”.
- Find the required ISO.
- Right-click on the added image in the application and click on “Mount to device”.
- If everything went well, the image data will be displayed in the virtual media status.
- Go to “This Computer” and check for the presence of a virtual disk. If successful, open it and use the necessary data.
To get rid of the image, go to the utility, right-click on the virtual drive and select the line “Dismount image”. The image will be dismounted, and the virtual drive will be removed and removed from the list of connected hard drives.
Let's move on to consider the last tool in this category.
Nero
Nero is a whole package of utilities containing all the necessary tools for working with multimedia. Projects in the program itself have the NRG extension. Unfortunately, the package no longer includes a utility that supports ISO - Nero Image Drive, however, the previous solutions should be more than enough to solve emerging problems.
All described emulators are provided in Russian, so the user will not have questions about how to translate the interface.
How to burn CD files from a computer to a disc
As you know, the standard size of a CD (an abbreviation for “Compact Disk”) is 700 megabytes (although there are CDs in sizes 140, 210, and 800 megabytes). To record a standard CD, take an empty “blank” of such a “CD-R” disc (designed for one-time recording on the disc, although there are options for “adding” files to such a disc to existing ones).
Insert such a disc into an optical CD or DVD drive that has a recording function. The system will quickly recognize an empty disk and ask you what to do with this disk. Typically, versions of this choice in different versions of the OS differ only visually, but in essence they are similar.
Here's what it looks like in Windows 10:
Here's what it looks like in Windows 7:
Here's what it looks like in Windows 8.1:
If for some reason you have the Auto-play function disabled, then you will need to open Explorer and double-click on the optical drive icon in the list of disks available on your PC.
In the Autorun menu that appears, select Burn files to disc. Next, a menu usually appears offering a choice of two options for using the disk:
Let's look at the features of recording a disc in the mentioned options.
How to burn a disc using the "as a flash drive" option
As I mentioned above, this option is suitable for RW disks that can be rewritten multiple times. If you decide to use your RW disk as a flash drive (that is, repeatedly write files to it and then delete them), select this (first) option and click on “Next”. The drive will be formatted with the Live file system, which may take some time.
Once the drive is formatted, you will need to drag (transfer) files onto it to write them to the drive.
Find the necessary folders (or files) to burn on your hard drive and, by clicking on them and holding down the left mouse button, drag them into the window of the disc to be burned (or use the “Copy” - “Paste” functions (Ctrl + C and Ctrl + V).When you add folders and files there, they will be automatically written to the disk.
Once these files are written to the disk, you can just as easily delete them from the disk. Simply select the file, right-click, and select Delete.
Please note that files deleted from such a disk are not placed in the Recycle Bin, but are immediately deleted from the disk.
After you have recorded all the necessary files, you need to close our session.
To do this, in Windows 8.1 and Windows 10, you need to go to the burned disc, unmark the selected files, and then click on the “Eject” button at the top.
In Windows 7 , you need to click “Close session” at the top, or click on the “Extract” button located there.
How to burn a disc using the "With CD/DVD player" option
This option is the most popular for burning discs, in particular because of the ability to use such a disc with various devices, and not just with a PC.
Select this option and drag and drop files onto the disk as described above. The difference will be that these files will not be automatically written to disk (as in the previous case), but will be placed in a temporary directory on the disk for subsequent recording.
When the files are added, Windows will notify the user that they have files waiting to be written to disk.
To burn to disk in Windows 10, you need to select the “Finish burning” menu item in the “Manage” menu.
In Windows 7, you need to select “Burn to disk” at the top.
In Windows 8, you need to select “Finish burning” from the top.
The system will prompt you to select a name for the disk and a recording speed, then click on “Next” (this choice is available in all OSes I mentioned).
If you choose to record audio files, the system will ask you whether you want to burn an “Audio CD” that will play in standard audio players, or whether you want to create a disc with audio data (“Make a data CD”). Select the desired option and click Next.
Your disc will begin recording. After the recording is complete, Windows will ask if you want to burn another disc with the same files. If you don't need it, then refuse and you will receive your burned disc.
Opening by archivers
Any ISO can be opened not only using specialized applications that mount images, or the OS itself, but also using modern archivers. This method is recommended to be used only if you only need data from the ISO, and there is no need to create a disk image.
Let's look at the two most common archivers and the process of working with ISOs using them.
WinRAR
WinRAR is the most common archiver today. The program is extremely easy to use and has the most intuitive interface.
To open ISO via WinRAR, install the archiver, then:
- The system automatically builds tools into the context menu. To use them, right-click on the downloaded ISO file and select “Open in WinRAR”. After this action, a separate window will open.
- In the window, click on the “Extract” button and indicate the path to which you want to move the files. Once extraction is complete, you can begin using them.
You can also open an ISO in WinRAR directly from the archiver window. To do this, you just need to open this utility, open the “File” tab in the top menu, click on “Open archive” and select ISO on your PC. Next, follow the steps described in paragraph 2 of the above instructions.
Let's consider an alternative archiver, no less common among PC users.
7-zip
7-zip is an absolutely free archiver, in no way inferior to the previously described WinRAR. Download the utility from the official website and install it on your computer or laptop.
Pay attention to which OS version is installed - x32 Bit or x64 Bit. Based on this information, you need to download and run the appropriate version of 7-zip.
To expand ISO via 7-zip:
- Right-click on the file, hover the cursor over “7-zip” and in the expanded add-on, click on “Unpack”.
- Select the extraction path and click OK. The files will be unpacked into the folder specified by the user, nothing else needs to be done.
As in the previous case, all actions can be performed through the interface of the application itself. For this:
- We find the required image directly from the utility and open it.
- Select the existing files and click on the “Extract” button. We indicate the appropriate path and click on “OK”.
That's all, actually. We have finished looking at how to open an ISO file on Windows 10 in just a few clicks.
Step-by-step description of the process of creating Windows 10 installation media
Now we will go through step by step all the steps that need to be performed to create installation media with Windows 10.
By the way, the method that we will now consider will also suit you if you need an ISO image of Windows 10, i.e. Right now you don't need installation media. In other words, you can officially download an ISO image of Windows 10 and burn it to a disk or USB drive at any other time and with any programs that allow you to burn ISO disk images, for example, to create a bootable USB flash drive you can use the Rufus program.
Step 1 – Download Media Creation Tool
The first thing you need to do is download the Media Creation Tool program, it can be downloaded from the official page on the Microsoft website - https://www.microsoft.com/ru-ru/software-download/windows10
After you go to the page, click “Download the tool now.”
As a result, you will download a file MediaCreationTool1803.exe approximately 18.5 megabytes in size.
Step 2 – Launch the program and accept the terms of the license agreement
We now have the main tool for downloading and creating installation media for Windows 10, then we launch the Microsoft Media Creation Tool program.
In the first window we need to accept the terms of the license agreement; to continue, click “Accept”.
Step 3 – Select an Action
Then we are asked what we want to do: immediately update our computer or create installation media. Since we need installation media, we accordingly select “Create installation media (USB flash drive, DVD)”. Click “Next”.
Step 4 – Selecting Language, Architecture and Edition
At this step, we need to select the language, architecture and edition of Windows 10. By default, the program has already selected all the necessary parameters. If necessary, you can change these parameters by unchecking the “Use recommended settings for this computer” checkbox. To continue, click “Next”.
Step 5 - Select Media Type
Now we need to select the media type, in other words, what kind of media we ultimately want to receive. We have two options available to us: to immediately create an installation flash drive with Windows 10 or download an ISO image of Windows 10 for subsequent independent recording on the installation device (I previously noted the possibility of downloading an ISO image).
In this material we are looking at an example of downloading and creating installation media with Windows 10, so we select the first item “USB flash memory device” and click “Next”.
Step 6 - Select Device
If you chose to create installation media on a USB device, then you will see a list of available devices (flash drives), select the device on which all Windows 10 installation files will be written. Click “Next”.
Step 7 – Download Windows 10 and Create Installation Media
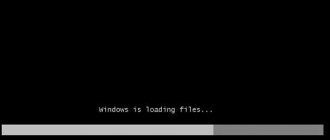
That's it, the process has started, first the download of all installation files will begin.
And after that the process of creating installation media will begin, i.e. writing installation files to a USB flash drive.
Step 8 – Completing the Process
When the message “USB flash drive is ready” is displayed, the Windows 10 installation media creation process is complete. Click “Finish”.
After that, you can use this USB flash drive to install Windows 10 on your computer. Don’t forget to set the flash drive as the boot priority in the BIOS so that the system boots from it; we discussed this process in detail in the material - “How to boot from a flash drive? Changing the boot order of devices in the BIOS."
That's all for me, I hope the material was useful to you, bye!