Hello, dear users. Today we will look at an issue that many have already encountered and few have found a way out of. Is it possible to delete an account in Windows 10, and how to do it?
When installing Windows 10, you will be prompted to enter a username
and
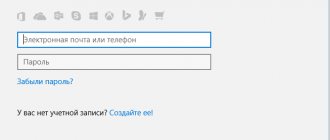
Microsoft account password By entering this information, you agree that Windows 10 will use it to start the operating system. Naturally, most users are not happy with this situation.
There can be many reasons, but the most common is the reluctance to enter a complex and difficult to remember password when logging in every time. That is why today I will talk about how to get rid of your account and work on your own “account”.
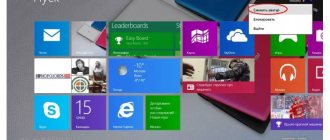
Click on the Start icon and then on your username. A small block should appear on the screen, on it you should click on the line “Change account settings”. A new window will then open where you can set up your personal account. Click on “Sign in with a local account instead”
You will see a window called “Switch to local account.” You must write your account password and click “Next”.
Then you will need to write a username, password and a hint if you suddenly forget your password. There are times when a person does not want to put a password on an account. In this case, simply leave the “password” line empty.
That's all. Now click on the “Log out and shut down” block.
After completing this sequence of actions, you will log out of your Microsoft account and log in as a local account. Now the switching between accounts has occurred, and to completely get rid of the Windows 10 account, you need to:
- Open the Start menu
- "Account Settings".
- At the bottom of the page you can delete the entry completely.
Delete multiple entries
This method will help those users who have more than one account.
First, log in as the administrator of the account you plan to keep.
- Launch the Start menu;
- Select Options";
- Then “Accounts”;
- In the new block, click on the “Family and other users” link.
- In the “Other Users” list that appears, find the account you are going to delete. Click first on it, and then on the “Delete” button, as shown in the screenshot.
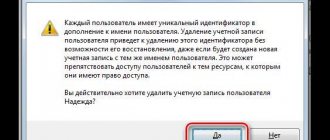
After this, you will see a warning block that if this account is destroyed, all user files (desktop files, photos, videos, documents, etc.) will be erased from the computer. Therefore, think in advance about the safety of the necessary data. If everything is okay with this, click on the “Delete account and data” block.
Within a short time the recording will be completely deleted from the device.
How to switch to another clean account
In Windows operating systems, it is possible to create several accounts: two, three, etc. You can switch from one to another as follows:
- Simultaneously hold down the “Ctrl + Alt + Delete” buttons on your PC keyboard.
- A window with system parameters will appear. Here the user can enter the task manager of the operating system, block the operation of his PC or change the user. The last option is interesting here.
- After clicking on the “Change user” option, a menu will appear with all previously created accounts.
- To switch, you need to select the account you are interested in and tap on its name.
Note! Each Windows account has its own settings and programs. The location of folders and files on the desktop will also differ.
Removing a local account using Control Panel
It differs in that when an account is destroyed, all the user’s files can be saved. We will work with the control panel. We log in with administrator rights.
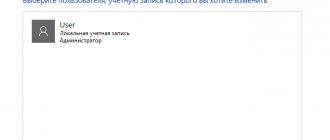
Open the Windows 10 control panel (select the “icons” view). Select the sub-item “User Accounts”. Select the Microsoft account that needs to be deleted. Click on the “Delete Account” button.
You will see a block where you will be asked to choose to delete or save user files. In a save situation, the files will be moved to the desktop in the current user's folder.
Agree with the selected team.
Here are three easy ways to get rid of an account on a Windows 10 computer. Now you know how to do it. All articles about Windows.
The most intuitive and simple solution to this problem is to change
status of the current entry through settings.
In addition, this method involves saving
all user data, for example, personalization.
To do this, click the “ Start”
" and select the "
Settings
" icon located above the "
Shutdown
" icon.
Win + I
may be somewhat more convenient .
Before making changes to the system, it is recommended to save
all working files, because after restarting the computer, unsaved changes will be lost. After this you need:
Using Windows Settings
How to change account on Windows 10
To completely delete someone else’s account through a standard operating system application, you need to perform a few simple manipulations:
- Press the “WIN + I” keys on your keyboard to launch the settings window. This procedure can also be carried out through “Start”.
- In the list of parameters, find “Accounts” and click on this line.
- Tap on the line “Family and other people” to display the next settings window.
- From the list presented, select the current operating system account and right-click on it.
- In the context menu, click the “Delete” button.
- A system notification window will appear. Here the user needs to agree to the notification and confirm the uninstallation by pressing the appropriate key.
Important! These actions will erase all user information from the computer. To avoid such a misunderstanding, it is recommended to save all important information to an external drive.
How to delete a user
This manipulation seems possible only if there are at least two of them. This is done through the administrator
. If you need to get rid of it, you must first grant administrator rights to another account and perform the operation through the latter.
As in the previous case, you need to go to the “ Accounts”
" in "
Options
".
Here you need to select “ Family and other users
”.
After clicking the “ Delete”
"The system will warn you that all files and data located at C:\Users\Deleted_User_Name
will be lost
.
After a short period of time, the data will be erased.
Uninstall via Control Panel
This solution provides slightly broader capabilities. First of all, you need to log in to the system with administrator rights
.
Right-clicking on “ Start
” will open a context menu, at the bottom of which there is a link to “
Control Panel
”.
Regardless of its design (“Category”, “Small Icons” or “Large Icons”), which can be changed in the upper right corner of the interface, you need to select the “ User Accounts
” section. After this, you need to follow the following algorithm of actions:
The last step is confirmation
removal, after which you should
restart
the computer.
out
using the Run utility, launched by the keyboard shortcut Win +
R. Here you need to enter the netplwiz
, after which the settings window will open.
Here you need to select the “ Delete”
", having previously
selected
the required user.
Removing a Microsoft profile using the built-in Windows PowerShell utility
As mentioned above, Windows PowerShell is a kind of command line for the Windows 10 OS. You can also uninstall an unnecessary account through it.
PowerShell console on Windows 10
To understand how to cope with the task, you can use simple instructions:
- Write the name of the console in the Start menu search.
- Launch Windows PowerShell. For this purpose, you need to right-click on the software shortcut and select the appropriate item in the context menu.
- Enter the command “Remove-LocalUser -Name” in the available line. Instead of username, enter the specific name of your Microsoft account. This process is in many ways similar to the command line method.
- After writing the required characters, press the “Enter” button and wait for the uninstallation procedure to complete, which may take several seconds. However, the duration of removal also depends on the speed of the operating system and the technical characteristics of the computer.
For your information! The PowerShell console can also be used to solve a wide range of tasks related to configuring Windows 10 OS settings, as well as to check its status.
User Accounts window in Windows Control Panel
Removing built-in entries (guest, administrator, etc.)
This action can complicate and slow down the operation of the system, since these accounts are used to manage
computer. To implement this procedure you will need:
Removing the administrator is not recommended
action.
If it gets in the way in any way, it's best to just hide
it. To do this, you can use the command line shell:
There are several ways to delete unnecessary accounts in Windows 10, but this does not mean that there is no difference in which one is used. Thus, an “incorrect” deletion can result in a whole bunch of junk files and incorrect paths in the file system remaining on your disk. Or, on the contrary, wanting to delete only the entry itself, while saving the profile files, the user, out of ignorance, can delete the data associated with it along with the profile.
Enabling Administrator Rights
Before you delete an account from the system, make sure that your account has administrator rights. Other accounts usually have limited capabilities, including not being able to delete other accounts.
In Windows 7, administrator rights are disabled by default, so you need to enable them first. To do this, use the Win+R key combination. In the window that opens, enter lusrmgr.msc and press Enter. Next, select “Users”, right-click on the “Administrator” account, open the “Properties” window and uncheck the “Disable account” box, then save the changes and restart the computer.
Sources used:
- https://iuni.ru/how-to-untie-windows-10-from-the-account-how-to-close-a-microsoft-account.html
- https://htfi.ru/windows_10/kak_otvyazat_uchetnuyu_zapis_microsoft_ot_windows_10.html
How to delete a Microsoft account on Windows 10
If you are planning to get rid of a profile that has become unnecessary, while saving all its files, we suggest using the following method.
In the Navigation Pane of Explorer, right-click on the “This PC” icon and select the “Manage” option from the context menu that appears.
In the Computer Management snap-in menu, select “Utilities” → “Local Users” → “Users”, in the right part of the window, right-click on the unnecessary profile and click “Delete”.
The deletion of the Windows 10 Microsoft account is completed, but the files belonging to it remain untouched.
Deactivating the profile through the management snap-in - netplwiz - will lead to the same results. Press Win + R and in the Run window that appears, run the command netplwiz.exe. Having selected the profile in the utility window, click the button shown in the screenshot.
The system will issue a warning asking you for confirmation again.
The profile itself is no longer on your computer, and its files will still be located in the directory of the same name in the “Users” folder.
Completely deleting a Windows 10 account along with all files is even easier. To do this, open the universal Settings app.
Go to the "Accounts" section
Switch to the “Family and other people” tab, select the one you don’t need and repeat the steps in the screenshot below.
Reconfirm the request in a pop-up window, where the operating system draws attention to the fact that all data from this computer will be lost forever
Now the profile and all personal files belonging to it will completely disappear from the computer.
Often, after installing Windows 10, many users encounter a problem when they need to delete Windows 10 accounts, either because they are not used, or due to the inconvenience of logging into the system. The root cause, in fact, is not particularly important. Let's look at the simplest options for actions that allow you to delete in Windows 10. This is done quite simply and literally within a few minutes to “account” for any type and priority.
How to delete a user in Windows 10 using the Netplwiz system utility
How to enable the administrator account in Windows 10
A simple and effective method. To delete a Windows account using this application, the user will need to do the following:
- Launch the “Run” window by pressing the “WIN + R” buttons on the PC keyboard.
- In the “Open” line, enter the name “netplwiz” and tap “Ok”.
- In the next window, switch to the “Users” section.
- Select the required account and click on “Delete”.
- Read the system notification information and agree to the information provided by clicking “Yes.”
Important! After uninstalling the Microsoft entry, it is recommended that you restart your PC to permanently apply the changes made.
What is a Microsoft account needed for?
Let's start a little from afar. Why do you need an activated Microsoft account? Yes, only because without its creation the system simply will not be installed on a computer, laptop or mobile device. In addition, it is these registration data that will subsequently be used to log in to the system with administrator rights.
Not everyone, however, knows that even in the “seven” there was a certain additional priority account of the so-called super administrator, on whose behalf it is sometimes necessary to run programs or installation processes of specific software that require changes to system files, even though the user has all the necessary rights. We'll dwell on this a little later.
As for the Microsoft “account”, very often there is a situation where the login password is very long or complex, and entering it constantly becomes a real problem, especially when it contains an almost unmemorable combination of characters, letters or symbols.
Local accounts
With local accounts the situation is much simpler. As a rule, they are created on terminals if several users are expected to work in the system. But the “ten” is such that it itself initially creates several “accounts”, which, in general, hang in the system as a dead weight.
In principle, for normal login and operation it is enough to leave one (current) local account and delete Windows 10 accounts of any other type. How to do this will now be discussed.
Switching from a Microsoft account to a local account
Before deciding how to delete an account on Windows 10 (meaning a Microsoft “account”), you should first rebuild your login parameters, that is, set the access condition not using a “Microsoft” registration, but a local account.
In general, the process of deactivating an “account” and changing its settings boils down to logging out of one account and logging in under another. To do this, we use the standard “Start” menu, where you just need to click on the user name and select change account settings from the drop-down menu. In the settings window we are interested in the email and “accounts” section. In the window on the right there is an additional login line under local registration. Click on it and go to the next menu.
Here you will have to enter your current password, and then enter new login information. In principle, if the password will not be used in the future, the corresponding field can be left empty. Next, we simply confirm logging out and shutting down. At this stage, this can be limited. The next time you boot, the system will use local registration. Let's stop there for now.
Removing an administrator account
Users often ask about how to delete an administrator account.
In Windows 7, this option is disabled, meaning it is impossible to delete this account. However, it can be disabled to prevent other users from accessing it. To do this, use the instructions described above to enable the administrator account. The only difference: you will need to check the box next to “Deactivate account”.
In WindowsXP, you can delete an administrator account only if there are at least two entries with administrator rights. So, having logged in under one of them, you can remove a friend’s administrator account by going to the “Control Panel” and then follow the chain: “Computer Management - Local Users”.
Owners of a new operating system often wonder how to delete a user in Windows 10 if the account is redundant or defective? The answer to this question lies in the specifics of working with user accounts. Microsoft developers have added a new design of system settings to the OS. Now, using a special section of Settings, you can delete a user in Windows 10 or temporarily disable a second account. This is a useful innovation, since the computer administrator may not delete the profile, but temporarily prohibit it from logging into the system. However, if disabling your profile on your computer is not an option for you, you can delete your user account in Windows 10.
How to remove unnecessary Windows 10 accounts: method one
Now let's look at the issues related to removing unnecessary data. There are two ways to do this. The first method to understand on Windows 10 is to use the same partition that was mentioned above.
Only in this case, you should use the “Family and other users” menu to carry out the deletion process. In the window on the right, select the entry to be deleted and the corresponding action.
Please note: after this, the system will issue a warning that all settings and files saved by this user in the corresponding section will be deleted. If some information should remain, it is better to first cancel the process, then move or copy them to another location on the disk and repeat the operation again. At the stage of deleting files, we agree, after which all registration data from the system will be deleted.
Ways to allow entries to be deleted
There are several methods by which you can remove an account on Windows 10:
- demolition of the operating system. The most effective method to permanently erase your previous account. However, the procedure for reinstalling OS Windows 10 can take a lot of time, especially if an untrained person does it;
- via Windows Settings. This is a Windows 10 system tool that allows you to customize the operation of the operating system at the user’s own discretion by adjusting some parameters;
Account icon in Windows 10
- through the Windows control panel. One of the fastest and most effective ways to accomplish the task, which requires compliance with a certain algorithm;
- using a Windows PowerShell application. This Microsoft tool resembles the Windows command line, but has distinctive features. The application is intended for system administration;
- use of third-party utilities, software downloaded from the Internet. This method is used last, as it has certain risks. For example, a person can infect their computer with malware.
Many of the methods presented above will be described in detail in the following sections of the article.
Windows 10 Command Prompt
How to delete a local Windows 10 account using method two
Let's consider the second, no less effective method. When you need to decide how to completely remove a Windows 10 account, you can use the classic method of accessing user accounts through the standard Control Panel.
First, you need to log in with administrator rights, select the accounts section in the “Control Panel” and go to the control point for another account. As in the previous option, select the entry that needs to be deleted and activate the process.
Again, the system will prompt you to delete or save user information (files). Depending on your needs, we choose what you need. By the way, this method is good because Windows initially offers to save files created under the “account” being deleted, rather than canceling the process and first copying or moving them to another location, as in the previous case. However, this does not in any way affect the process of deleting registration data and parameters.
Removing a Windows 10 user via the command line
You can also cope with the task via the command line. More detailed information can be found in the following algorithm:
- Launch the classic application. This task can be dealt with in several ways. The simplest and most effective is to type the name of the classic application into the Start menu, and then click on it with the left key of the manipulator.
- In the window that appears, write the command “net user “Username”/delete“. Instead of the name, you need to enter the name of your account “Microsoft”.
- Click on the “Enter” key on your keyboard.
- Restart the laptop and make sure that the selected entry was able to be deleted.
Windows 10 Settings Window
For your information! To view the name of your account, you need to hold down the “Ctrl + Alt + Delete” buttons on your keyboard. Next, select “Change user” and study the information provided.
Deactivate your Microsoft account
Now let's move on to the most important thing. It seems that the Microsoft account on the computer is deactivated. In fact, she hasn't gone anywhere. To completely delete Windows 10 accounts (in the sense of “Microsoft” ones), they need to be deactivated (closed) on the corporation’s official resource. Please note that if you choose not to use it, some online services will become unavailable.
To close registration, you need to go to the login page and enter the data originally specified during registration. Then we use the privacy and security section. At the bottom of the page there is a section to close your account, when you log in, a corresponding button will be displayed. Click it, select the reason for closing, and then mark the entry for closing.
Separately, it is worth paying attention to the fact that the “account” will not be closed immediately, but only after 60 days from the moment the process is activated. However, if the user has a linked device, such as a mobile phone, a special code will be sent to it, which can be used to restore registration during this period. But whether it’s worth doing such things, everyone decides for themselves. Of course, if the built-in “tens” services or the declared extended support are not used, as well as access to the online store, there will be nothing wrong with the user refusing such registration. As mentioned above, this will not affect the performance of the system, except that some services will stop functioning. In some cases, there may be problems with saving contacts, say, in Outlook.
In addition, if the user already had invoices for payment for the store’s services, he should either pay them or send a cancellation request.
Problems with user files
How to delete Windows 10 accounts is, in general, already clear. As for storing information, in principle, you can do two things. For example, you can initially move the files to another location on the disk or logical partition, or copy them to removable media. However, the method of deleting an “account” from the “Control Panel” in this sense seems more preferable, since the system itself will remind the user of the need to save important data. However, what to do depends on the user himself.
Why delete your account?
This circumstance has the following reasons:
- no need for an account. It often happens that one or another “Microsoft” record is no longer needed, i.e. they don't use it. In this case, it is better to uninstall the extra account. This circumstance will have a positive effect on the overall performance of the computer;
- to restore system functionality. If the user has forgotten the password for his account, it can be hacked by performing special actions using third-party programs. However, it is better to perform this procedure at a service center to avoid unpleasant consequences;
- to remove unnecessary information. If there is a lot of information on the computer that is unimportant for the user, then it is better to delete the entire account at once rather than delete each file separately;
- preparing your computer for sale. If the user is going to sell his PC, then the operating system needs to be cleaned. In this case, you need to know how to delete a Windows 10 user and create a new account by performing the simple steps described above.
Note! A new account is created in a similar way, for example, through the control panel or through the Windows OS settings window.
Windows 10 Installer Window
Thus, in order to uninstall a Microsoft Windows account, it is not necessary to have serious technical knowledge in the field of IT technologies. Even a beginner can cope with this task in no time. If you follow the instructions on how to delete an account on Windows 10, everything will work out the first time.
Working with files and data
Over time, Microsoft resources accumulate a variety of data that may later be useful to someone who decides to delete their account. For example, these could be:
- Letters and various files in Hotmail, Outlook.com and other similar services.
- Information stored in HealthVault and MSN Money.
- Skype contacts, if they were added using
Also, everything related to purchases in Microsoft systems will be lost. A person will lose access to information about various purchases from the official website, as well as keys to digital goods. Finally, not having an account will also affect music downloaded using Xbox Music. You can listen to it, but you won’t be able to transfer it to some other medium.
Xbox users will experience significant consequences from such actions .
After deletion, his account will be completely reset, all achievements received will disappear, as well as his gamertag. These are all things to keep in mind before closing your account. It is necessary to take measures to save the necessary files and make sure that nothing important is lost forever.
Deleting a profile on PC
After deleting an account from a computer, it is saved on the company’s server and remains accessible to the user. But data associated with the account, for example, emails, will be deleted from the operating system (device memory).
This approach allows you to quickly change your old Microsoft account to a new one on your PC and switch to using an exclusively local profile (without interacting with company services). And also exclude access to personal data, for example, in the case of selling a computer or laptop.
You can remove a profile in various ways. Let's take a step-by-step look at how to perform each one in the Windows 10 operating system.
Method #1: Login to a local account
The deletion principle is based on the fact that the system, at the user’s initiative, replaces the Microsoft profile with a local account (similar to the one in Windows 7) through registration and authorization using standard means.
1. In the taskbar, click the “Windows” icon. Then: shortcut “Profile” → in the “Change settings...” menu.
2. In the panel, select the option “Log in from local instead...”.
3. In the window that appears, enter the password for your Microsoft account to confirm your rights to it. Then click "Next".
4. Enter the data in the form for your local profile:
- Username;
- password (and again for verification on the next line);
- hint (as additional information if you suddenly forget your password).
When all fields are filled in, click “Next”.
4. In the “Switch to local...” window, activate the “Log off system...” command by clicking the mouse.
5. In the OS login panel, enter the password for the local profile.
Attention! If you previously added a PIN code to access the OS, the computer may request it for authorization. But it is possible to use a password by first switching the method in the “Login Options” tiled menu.
6. To check the settings, go to the profile panel again. The account settings panel should display local account information.
Paid subscriptions
Many Microsoft resources offer the opportunity to sign up for a paid subscription. For example, Outlook.com lets you pay to have no ads, and Xbox Live Gold lets you get free games and discounts on some products. Before deleting your entry, you need to make sure that money will not be charged for something that no one else uses.
You can find out more about this issue on the Microsoft website.
- On the page you need to find the “Payment and Invoicing” section.
- The “Subscriptions” button is located here.
- Next, you need to follow the instructions of the technical support service to confirm your ownership of this account.
- Then you need to select the subscriptions for which you want to stop paying and click on “Manage”.
- Most often, the system will cancel automatically, so you just need to follow the on-screen instructions.
- Sometimes this does not happen, and then you need to select the “Contact support” option.
Xbox-related subscriptions typically need to be found on another page, appropriately titled "Xbox Support." The same applies to Skype. In principle, if some service is not in the “Payment and Billing” section, then you need to contact directly the person who sold this subscription.
New address and Microsoft Points
Because a Microsoft account is also associated with various email services, you need to make sure that people have a different way to contact the account holder. In this case, it is necessary to pay attention to three points:
- Within sixty days after deletion, the owner will no longer be able to access his mailbox, but he will still receive letters.
- After this period, all data and materials stored inside the mail will be deleted.
- The address itself (in particular, from Outlook) can be transferred to someone else.
It's best to set up an automatic response for anyone who sends an email to that address before closing your account. In it you can inform about the deletion of your account, and also indicate another email to which you need to write. Automatic reply is set up in Account Management. You can access it through the Settings item.
Next, you need to make sure that there are no Microsoft Points on your account. If you have them, you need to spend them first. You can find out about the quantity using “Invoicing”, where you need to select the “Payment Methods” section.
Finally, we also need to address the issue of linked child accounts linked to the main one. Once all possible losses from account closure have been minimized, you can proceed directly to the main process.
How do I delete my Microsoft account?
The actual removal does not occur immediately. For about two months, the account will simply be inactive. During this time, the owner may decide that they do not want to close their record. In this case, he will be able to continue using it without any problems. If the deadline has already expired, it will be impossible to restore the account.
.
How to delete your Microsoft account:
- On the official website you need to go to the record review column. To do this, enter your email address and password.
- There you need to find Security and Privacy, and then click on “Change password and additional information”
- At the bottom of the page that opens is “Closing an account.”
- Inside it there is a button with the appropriate name “Close account”.
- After clicking Next, you will need to indicate the reason for deletion. The process ends with the Mark for Closing button.
To work with a Windows 10 account, you can use the internal resources of your computer. First, in Start you need to select a username. A small pop-up menu will appear, the first item in which will be the line “Change account settings”.
- Clicking on it will open a window with settings.
- In the Your Account column on the right side there will be an option “Sign in with a local account instead.”
- After this, you will need to enter your Microsoft account information and click Next.
- Now the data from the new record is entered. If desired, you don't have to add a password.
- After this, you need to log out of this system and log into a new account.
All that remains is to permanently delete the old account. To do this, you need to reopen the settings window and select your Microsoft account there. Below it is the Delete button. You need to click on it.
There is another way to delete your Microsoft account. For example, you can use the command line. This method is especially good because it will work for any version of Windows 10, although it requires administrator rights.
- Using a combination of Win and R, the command line is called up.
- netplwiz
into it , and then press Enter. - A small window will appear with the Users column. Here you need to mark the entry to be deleted.
Then all that remains is to confirm the deletion by pressing the appropriate button and close the window with OK.
Deleting family user accounts
It is worth considering that such records are usually not deleted in a standard way. In the “Settings” application, in the “Family and other users” item, click on the account of the desired user and by clicking on “Block”, confirm the ban on the account working directly on this PC.
If there are no password-protected accounts on a computer or laptop, then access to control of this computer device will be denied to an unauthorized user. Only the Administrator can allow him to use the PC by removing the lock in the reverse order - clicking on “Allow” with confirmation in the additional option.
The complete procedure for removing a user account from a family must be performed from the Microsoft account of the administrator of the computer. To do this, you need to enter the optional window of the browser you are using on the Microsoft website and log in to your account. Once in it, you need to find the “Family” section and click on the “Delete” item. After that, in the window that pops up, look for the user account that you want to exclude and click on the “Delete” line. Then you can erase your account using any of the standard deletion methods in Windows, which were discussed in this article.

