Every Windows user can remove the password from their computer, but it’s still worth thinking about it first. If someone else has access to the PC, then you should absolutely not do this, otherwise your data will be at risk. If only you work behind it, then you can refuse this security measure. The article will tell you how to remove the computer password that is requested when logging into the system.
How to remove the password in Windows 7 before logging in
In most cases, special third-party software will help the user, for example, Active Password Changer, Lazersoft Recover My Password or WinPassKey. Otherwise, just use the Windows installation disc.
In this method, you can also pre-load the operating system installation files onto a flash drive. A prerequisite is that one of the media must have the same version of Windows, for example, Home or Professional. To reset your password, follow several sequential steps.
Insert the drive before booting the system and go to BIOS. To enter the BIOS, the "F2" or "Del" keys are most often used, however, there are exceptions in the video "F1" and "Esc". Find the "Boot" section or a similar menu. Select the appropriate partition to boot the system from a disk or flash drive. To do this, you need to move this section higher in the list. Save the changes and restart the computer.
In most cases, to exit the BIOS and save the changes, you must press the “F10” key and click on the “Yes” button, but in rare cases other options may be used. Use the "Exit" section in the main menu and use the "Save & Exit Setup" item.
After loading the disc, click “Next” in the language selection window.
We use the “System Restore” button and wait some time to search for the installed operating system.
Select the system you are using and click “Next”.
In the list of sections, select “Command Line” and in the window that opens, enter “regedit” without quotes. The Registry Editor will open on the screen.
Open the “HKEY_LOKAL_MACHINE” folder and click the “File” button. In the list of actions, use the “Load hive” item and follow the path “Windows/System32/config”.
In the folder that opens, select the “SYSTEM” file.
In the field that appears, enter an arbitrary section name, for example, “2021” without quotes. Open the folder “HKEY_LOKAL_MACHINE” and go to the newly created section. Go to “Setup” and find the “CmdLine” parameter
Right-click on it and click the “Edit” button. In the window that opens, enter “cmd.exe” without quotes and click “OK” to save the changes.
Using the above method, we change the value of the “SetupType” parameter from “0” to “2” without quotes. Click “OK” to save the changes and click on the created section, for example, “2021”, with the left mouse button.
Go to the “File” section and use the “Unload Hive” button. Reboot the computer. First, you can remove the drive and return the system boot settings to their original state.
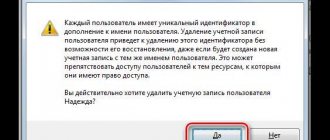
After Windows loads, a command line will immediately appear, in which we enter “net user” without quotes and press the “Enter” key. For example, "net user Admin". If you do not specify anything after entering the username, no password will be set, so the user can log in immediately. You can also use the “net user” command to view all available system profiles. Type “exit” and press “Enter”. After the system starts, enter a new password and log into Windows.
In rare cases, adding a new system profile may be useful. You will have to create a new user, add him to the administrators working group and remove him from the regular users group. To do this, after opening the command line, do the following:
- Enter “net user name_password /add” without quotes and press “Enter”.
- Type “net localgroup Administrators name /add” without quotes and press “Enter”.
- Type “net localgroup user name /delete” without quotes and press “Enter”.
Recovery floppy
This option, like the previous one, will not help if the password has already been successfully forgotten and the administrator or user session has been completed. That is why the floppy disk (it can be a flash drive) for password recovery should be written down in advance - especially if the sequence of characters is obviously long and difficult to remember. You can do this as follows:
- After logging in to your account (this is important), simultaneously hold down the Ctrl + Alt + Delete keys, and then select the “Change password” section on the lock screen that appears.
- Here the user can change the password on the computer, but to burn a flash drive with recovery data, he needs to leave all fields blank and click on the “Create floppy disk” link.
- And then, inserting any free flash drive into the connector, click the “Next” button in the recording form that appears.
- The next steps are to select the desired media from the drop-down list.
- Enter your current password.
- And, waiting for the end of data recording.
- Click on the “Next” button, and then “Finish”.
- Now a single file will appear on the flash drive: it contains data that allows you to reset your Windows 7 password and restore access to the system.
- After restarting the computer and encountering the impossibility of authorization, the user who has a ready-made flash drive must click on the “Recover Password” link.
- In the “Recovery Wizard” that appears, select the “Next” button.
- Indicate which of the connected removable media contains the required file.
- And if you wish, set a new password for authorization in Windows 7 - or, leaving all fields empty, click on the “Next” button.
- By clicking “Finish”, the user will complete the reset process.
- All that remains is to enter a new access code on the same welcome screen and click on the right-facing arrow.
Important: if the system displays a message about the absence of a recovery floppy, you need to remove and reconnect the flash drive, check the contacts, and so on - the problem is most likely hardware in nature.
How to remove password in Windows 7 through user accounts
This method will help you remove the password on your personal computer using the “Run” function. To do this you need to follow these steps:
- Click on “Start” and use the “Run” button.
- Enter the command “control userpassword2” without quotes and click “OK”.
- In the “Users” tab, double-click the left mouse button on the user and delete all values in the “Password” and “Password Confirmation” items.
- You also need to uncheck the “Require username and password” checkbox.
Using a third-party program ERD Commander
ERD Commander is a multifunctional application that allows you to remove administrator data. The utility will need to be written to a flash drive in advance and made the drive bootable.
Instructions for use:
- Start the computer from the USB drive and select the OS version on the start screen.
- Refuse to connect to the Network by clicking No.
- Reassign drive letters by clicking Yes.
- Select your preferred keyboard layout.
- From the list, determine the installed operating system.
- Select Microsoft Diagnostics and Recovery Toolset.
- Launch the "Password Change Wizard".
- On the initial screen of the utility, click Next.
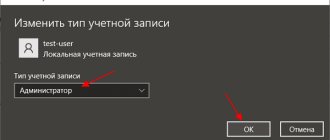
- Select the “Administrator” account from the list, enter a new password, click Next.
- Finish preparation with the Finish button.
- To restart a computer.
- On the profile selection screen, click on “Administrator”.
- Enter the previously set password.
- Confirm the data change by clicking OK.
- Enter new values in the appropriate fields.
The password will be changed. By logging into the admin profile, you can reset the data on other accounts by using the methods previously described in the article.
How to disable password in Windows 7 via Control Panel
One of the simplest methods that does not require additional skills from the user. To do this, use our instructions:
- Open the Start menu and go to Control Panel.
- Select "Large Icons" in the upper right corner of the window and go to the "User Accounts" section.
- Click the “Remove your password” button, enter your current password in the window that opens and use the “Remove password” button to confirm the action.
How to remove password in Windows 10 before logging in
The principle of resetting a password if you have a boot disk has remained almost unchanged. In this option, you must first write the operating system installation files onto a flash drive or disk. A prerequisite is that one of the media must have the same version of Windows, for example, Home or Professional. To reset your password, follow these steps:
- Insert the drive and open the BIOS before booting the system.
- Find the “Boot” hard drive priority section or a similar menu.
- Select the appropriate partition to boot the system from a disk or flash drive. To do this, you will need to move this section to the very top of the list.
- Save all changes and restart the computer.
- After loading the disk, in the language selection window, press the key combination “Shift + F10”, which will open the command line.
- Since the system letter in most cases changes when working with a boot disk, you will have to first find the correct path.
- Enter “notepad” and open “Explorer” using the key combination “Ctrl + O”.
- Click on the “This Computer” button and find the disk with the system. Most often it is renamed from “C” to “D”.
- Close the window and notepad.
Now you need to replace one of the login utilities with the command line. Below we will use the Sticky Keys feature:
- Type “move d:/windows/system32/sethc.exe d:/windows/system32/sethc2.exe” into the command line without quotes and press “Enter.”
- Also type the line “move d:/windows/system32/cmd.exe d:/windows/system32/sethc.exe” without quotes into the command line and press “Enter”.
- These steps will replace sticky with the command line. Also note that instead of these regular slashes, you must use backslashes, as in the screenshot.
Restart your computer and on the login or lock screen, press the “Shift” key five times. A command line will appear, in which we enter “net user” without quotes and press the “Enter” key. For example, “net user Reminaru”. If you do not specify anything after entering the username, no password will be set, so the user can log in immediately.
You can also use the “net user” command to view all available system profiles. Type “exit” and press “Enter”. After the system starts, enter a new password and log into Windows.
If there is no way to enter the current system profile, you must do the following on the command line:
- Type “net user Administrator /active:yes” without quotes and press “Enter”.
- Reboot the computer and log in using the created administrator profile.
- We disconnect this system user and disable the password for the main one using any of the methods indicated in this material.
How to unlock a laptop programmatically
Password on a laptop, how to unlock it - users often turn to specialists with this question. Technicians may offer to restore the device using specialized programs:
- Bios_pw.Exe.
- Hdd_pw.Exe.
Almost all modern computers already have these programs installed. The first thing you need to do is select the utility, go into it and go to the directory. Here you should enter the name of the account that needs to be unblocked. After the name you need to put 0. A randomly generated password will appear on the screen. You need to remember it, and then go to the hdd security window and enter this combination.
Reference! This unlocking method does not work with all computers. In some cases, special programs may be required.
How to remove password in Windows 10 before logging in without boot disk
Not all users have downloaded system files on their drive, so you can use another method to log into Windows, which will require you to change the accessibility key. To do this, take several steps.
When the password entry screen appears, hold down the “Shift” key and click on the “Restart computer” button. Confirm the action by selecting “Continue Anyway”. Go to “Troubleshooting”, select “Advanced options”.
Open "Command Prompt", enter "dir" without quotes and press "Enter". Type “cd windows/system32” without quotes and press “Enter”. Instead of a regular slash, we use a backslash.
Type “ren Utilman.exe Utilmanold.exe” without quotes and press “Enter.” Also enter “copy cmd.exe Utilman.exe” without quotes and press “Enter”.
Restart your computer and immediately click on the accessibility button. In some cases, it may not start, so you will need to restart the system and quickly press the key. Enter “net user” without quotes and press the “Enter” key. For example, “net user Reminaru”. If you do not specify anything after entering the username, no password will be set, so the user can log in immediately.
You can also use the “net user” command to view all available system profiles. Type “exit” and press “Enter”. After the system starts, enter a new password and log into Windows.
The above method does not work on the latest builds of Windows, since when saving all files or resetting data without a drive, the system asks for a password for your Microsoft account, so you will have to delete all data on the hard drive and return the operating system to its original state.
When the password entry screen appears, hold down the “Shift” key and click on the “Restart computer” button. Confirm the action by selecting “Continue Anyway”. Go to “Troubleshooting” and click on “Reset the computer to its original state.”
Use the “Delete everything” item and click on “Completely clean the disk”. After the notification appears, click on the “Return to original state” button. After recovery, access to the system will be open, and all other hard drives except the system one will save all available information. Otherwise, you will have to use reset programs, for example, PassFab 4WinKey.
Why set a password?
It often happens that some important and confidential data is stored on the PC, access to which should be limited. Microsoft Windows makes it possible to easily limit the circle of people who have access to files on your computer by installing a special key. Each person can have his own if there are several users.
An access code is also required to protect information on the PC to different owners from each other. For example, this is often necessary for parents so that curious children are not able to get acquainted with some information that they are not entitled to.
How to disable password in Windows 10 through Settings
This method will help you disable the automatic password request when logging into the operating system or exiting sleep and hibernation modes. Don't forget to disable PIN login first:
- Go to “Settings” and open the “Accounts” section.
- Click on “Sign-in options” and in the “Windows Hello PIN” section, use the “Delete” button.
- We confirm the action to complete it.
To disable the password, follow these steps:
- Open “Settings” and go to the “Accounts” section.
- Click on “Sign-in options” and turn the “Require sign-in with Windows Hello for Microsoft accounts” checkbox to the “Off” position.
- In the “Login required” section, set the drop-down list to “Never” and in the “Dynamic locking” section, uncheck the box next to “Allow Windows to automatically lock the device in your absence.”
- It is also recommended that at the very bottom of the window, set the “Use my login information to automatically complete device setup after a restart or update” option to “On” so that the operating system always logs you in automatically.
What to do if important data was lost due to manipulations with disabling the password?
Often, inexperienced users, in an attempt to disable the Windows login password, commit actions that cause the account or the entire operating system to stop working. This can be especially common when changes have been made to the Windows registry.
In both cases, users lost valuable information . In the first case, all the data that was stored on the desktop and in the user’s folders (“My Documents”, “My Images”, etc.) was lost, and in the second - all the information from the C
Whatever the reason for data loss , the main thing is to know what exactly to do to ensure successful data recovery . Therefore, as soon as you notice system malfunctions or data loss , immediately use RS Partition Recovery - a professional program for recovering lost files .
The main advantage of RS Partition Recovery over its competitors is its powerful modern media scanning algorithms, which can practically guarantee the successful recovery of lost information .
In addition, the program supports ALL modern file systems , and the presence of a deep scan mode allows you to recover even data that was lost several months ago .
To recover lost information follow these steps:
Step 1. Install and run RS Partition Recovery .
RS Partition Recovery program
One-stop data recovery solution
Step 2. Select the media or disk partition from which you want to recover data.
Step 3: Select analysis type.
Quick analysis should be used if files were recently deleted . The program will analyze and display the data available for recovery .
Full analysis allows you to find lost data after formatting, disk repartition or damage to the file structure (RAW).
Step 4. View and select files to recover.
Step 5. Adding files to save to the “Recovery List” or selecting the entire partition for recovery.
It is worth noting that it is best to select another disk or partition as a place to write the recovered file to avoid overwriting the file.