5
(3)
The Windows operating system is multi-user. Each of the users (users) has an autonomous account (account, profile), which contains information about the system, configured to his personal preferences.
In addition to the local accounts familiar from previous versions, in Windows 10 you can store your settings in a Microsoft account. In it, the user's name is his email address or phone number. Since such an account is synchronized online, you can work with it from different devices (desktop computer, tablet, smartphone). The profile is used to log in not only to Windows, but also to other Microsoft services.
Below we will discuss different methods and instructions for adding an additional user by creating his second profile. All actions to register the second and subsequent users are carried out in the administrator’s profile.
In Windows Settings
- Click the “Start” button and place the cursor on the gear. When “Options” appears, click on it. You can read more about the Start menu in the article Start Menu in Windows 10.
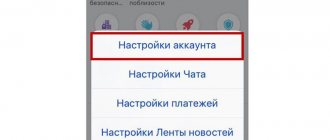
- In the window that appears, click on the “Accounts” section.
- In the new window, click “Add user” for this computer.”
The “Add family member” option is specific. It is used when the main Microsoft account exists in the system, and, in particular, allows you to control the child’s account, protecting him from unwanted information. - Further actions depend on the type of profile being created:
- for a local account, click “I don’t have data for this person”;
- For a Microsoft account, enter your email address or phone number and click “Next.”
- The selection continues in the next window:
- For a local account, click “Add a user without a Microsoft account”;
- for a Microsoft account – enter your email address or phone number and click “Next”.
- The final steps to create a local account are obvious - enter the user name, password, answer to the security question, and then click “Next”.
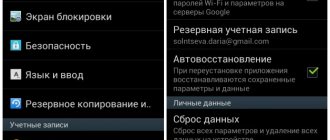
The created local profile has the “User” status by default. To assign it the “Administrator” status, several actions must be performed.
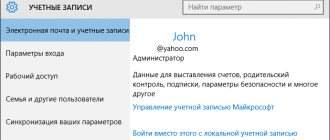
In the already familiar “Family and Other People” window, select the newly created account and click the “Change account type” item.
In the next window, open the “Account Type” list, select “Administrator” and click OK. Thus, the local user becomes an administrator.
Why do I need this?
Millions of Windows users never create secondary accounts on their computers and use their primary administrative account. This is an unsafe habit that needs to be broken.
Creating an additional account for yourself (so you don't always have to log in as an administrator) is a great idea and greatly improves the security of your computer. Creating separate local accounts for your kids and other users means they can set things up as they see fit, have separate user folders - Documents, Pictures, etc. - and ensures that those Minecraft downloads they find on dubious websites will not infect your account.
While you can use a Microsoft account for the online features it provides, a standard local account - the one you had in Windows 7 and previous versions - is great for people who don't want to link their login to Microsoft, and this is ideal for kids who don't need all the extras (and maybe don't even have an email address to contact the account in the first place).
Let's look at the process of creating new local user accounts in Windows 10.
Entering Windows Settings from Control Panel
There is an alternative option for calling “Windows Settings” - through the Control Panel.
- To call it, there is a magnifying glass icon in the command entry and search field (to the right of the “Start” button), start typing “Control Panel”, then click on the line of the application of the same name at the top.
- In the new window, click “User Accounts”.
- In the next window, click “Manage another account.”
- In the new window, click Add a new user in the Computer Settings window.
Further user actions to create an account do not differ from those discussed above. You can also add two accounts.
In this section, you used the search, you may be interested in how you can remove it, then read the article on how to remove Search in Windows 10
How to create an account with administrator rights
By default, the account is created with regular user rights. If you want to give the user administrator rights, then to do this you need to return to the “Options” menu, open the “Accounts - Family and other users” section, highlight the created account and click on the “Change account type” button.
As a result, a window will open in which you can select the “Administrator” account type.
After this, the created account will have Windows 10 administrator rights.
On the command line
In the Start context menu, click the “Command Prompt (Admin)” section.
On the black command line screen that appears, enter the command:
net user username password /add
then press the Enter key. For example, for a user with the name Denis and password cricket21, the command will look like this.
In the same mode, you can assign administrator rights to a regular account. To do this, enter the following command:
net localgroup Administrators username /add
On the screen it will look like this:
If after this administrator rights do not appear, then the command will need to be repeated, replacing “Administrators” with administrators.
Creating a user account using the command “control userpasswords2”
If you still have not been able to create accounts and no new local users have appeared on the device, we recommend using the “control userpasswords2” service. For this:
- Launch the “Run” window by pressing “Win + R” at the same time.
- Here we write (or better yet, copy to avoid mistakes) – control userpasswords2
- Next, click on the “Add new user” line.
- A user is automatically created using a Microsoft account. If this option suits you, then enter the email and password for your account.
- This will complete the creation process, and all the necessary data will be copied from your account.
You need to know that with this method, you create an account without special administration rights. To change its type, go to the “Parameters” section and there we change the degree of permissibility of rights using the method described above.
Super test on the topic “Money” and how can you be friends with it?
In the Local Users and Groups snap-in
- In the command input field, enter msc and press Enter.
- In the Local Users and Groups window, click the Users folder.
- In the context menu of the “Users” folder, click “New User”.
- In the window that appears, after entering the obvious parameters, the “Create” item is activated, clicking on which will create an account for a new user.
In the same snap-in, the created local account can be assigned to administrators.
- In the context menu of the created profile, click “Properties”.
- In the properties window, go to the “Group Membership” tab and click “Add”.
- In the new window, enter the name of the group “Administrators” and click OK.
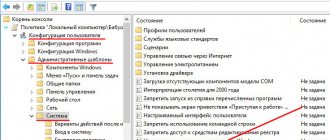
Group policies
On a computer with the Windows 10 operating system, there is a special tool for editing group policies, where the PC owner has the opportunity to register a new account. It is worth considering that it will only work locally. To create a shared account that is synchronized with Microsoft services, it is better to use the “Settings” functionality.
If you really want to create an exclusively local account, then follow the instructions below:
- Launch the Run window using the Win + R key combination.
- Enter the query "lusrmgr.msc" and click "OK".
- Expand the “Users” tab in the editor that opens.
- Right-click and select New User.
- Fill out some brief information including your profile name and password.
After saving the changes, you will be able to switch between profiles. You can get rid of your account at any time at your discretion.