Author of the article
Vitaly Leonidovich Cherkasov
System administrator, computer systems engineer.
Ask a Question
Taiwanese company D-Link produces a long line of routers. Setting up a D-Link router can be difficult for an inexperienced user. Despite the variety of devices, their adjustment is carried out according to the same scheme. First you need to connect the router to the Internet, and then establish a Wi-Fi connection. We'll tell you how to set up a D-Link Wi-Fi router yourself.
Features of routers
The D-Link brand is quite popular. Users note three qualities they like:
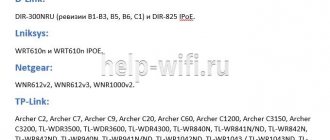
- Variety of products. The company produces both inexpensive budget devices (for example, D-Link DIR 615) and mid-price routers (D-Link DIR-842), as well as high-performance professional gadgets (D-link DIR-882). In this indicator, D-Link can be compared with another popular manufacturer - TP-Link.
- The D-Link company uses a convenient and intuitive interface in its devices, which is easy to master even for a beginner. But at the same time, the router has great functionality.
- Routers are reliable and can last quite a long time.
Possible connection problems
Sometimes you can’t immediately get into the router settings. There may be several possible reasons:
- The IP address for the network card can be set manually in the operating system settings. It is worth checking this parameter in the network control panel and switching it to the “obtain an IP address automatically” mode;
- Before entering the default IP address, you should make sure that it is actually equal to that indicated on the bottom of the device;
- Often the browser does not enter the settings due to an incorrectly crimped cable. Therefore, it is recommended to use the special one supplied with the router. As mentioned earlier, the main indicator of a network connection at the first stage will be the blinking LEDs of the network card and light bulbs on the router.
Preparation
First you need to select the location where the D-Link router will be installed. For a large apartment, it is best to choose a place in the center so that the distance from it to other connected gadgets is not too great.
It is not recommended to place the router near devices that cause radio interference, such as a microwave oven.
You will need a computer with a web browser installed, and a network cable to connect the router and PC. Usually a small patch cord is included with the router.
You also need to check whether the DHCP service is configured on your computer.
Read a detailed article about what a DHCP server is.
Algorithm:
- Right-click on the Internet icon in the lower right corner and select “Open Network and Internet Settings.”
- Select the item “Configure adapter settings”.
- Open the “Properties” of the desired adapter by right-clicking. Enable it if it is disabled.
- Select the item “IP version 4” and open its “Properties”.
- The IP address and DNS should be issued automatically.
Before you start setting up your D-Link router, you need to familiarize yourself with your gadget model.
There are two types of connectors for connecting an Internet cable:
- In D-Link routers, DIR is the WAN port. A regular network cable (twisted pair) coming from the provider is connected to the WAN port. Typically, this connector is painted in a different color and is located next to the LAN connectors, which are made according to the RJ45 standard. The difference between them is as follows: WAN is needed to receive the Internet, and LAN is needed for local (home) network devices.
- DSL routers have a built-in modem and a socket for connecting a telephone wire. If the Internet is connected by telephone, then you need to use DSL routers. These routers sometimes come with a splitter that separates the telephone line from the Internet. Many DSL devices can also be connected to a twisted pair cable of the RJ45 standard. To do this, you need to configure one of the LAN connectors.
Working with the D-Link 2640U modem
Let's now study how to configure the D-Link 2640U router. The first steps in working with this device will be the same as in the case of previous devices - we set up the automatic acquisition of a DNS address and IP through the “Control Panel” of the Windows operating system.
Next, as when setting up previous routers, we enter the modem settings panel through the browser. The address will look like this - 192.168.1.1. The login and password will be the same - admin. The router configuration interface in this case will probably be in Russian. Select “Network” and then “Connections”. Click the “Add” button.
The most likely “connection type” is PPPoE. Connection in the “Bridge” format is much less commonly used.
Next, we specify the VPI and VCI settings - we, as in previous cases, will find them out from the provider. Similarly, we ask the service provider for a login and password (by the way, they are often indicated in the subscription agreement - you can try to find them there). It is recommended to activate the Keep Alive option. Regarding indicators for LCP, it is also recommended to find out their optimal values from the provider. But, as a rule, it is optimal to set the number 15 in the “interval” option, and 2 in the “gaps” option. Also, activate IGMP. Click the “Save” button.
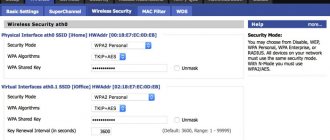
Now let's move on to working with another important function, which includes setting up a D-link router - WiFi. To do this, press the Wi-Fi button, then “basic settings”. We write the desired name of the network, then set the encryption standard - just like in the case of the D-Link 620 modem, this is WPA2-PSK, enter the password for the network. Save the settings. Then click “System”. Next is the “Save and Reload” item. After a few minutes we try to use the Internet.
Connection
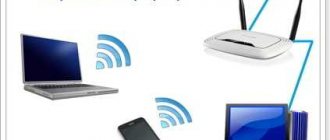
Connecting the router to the Internet can be done in three ways: via twisted pair cable, via a telephone line and via a USB modem. How exactly you need to connect your D-Link router depends on the provider’s equipment. Let's consider each of the methods in detail.
Over twisted pair
If your router has a WAN port, connect a network cable from your Internet provider to it. If you have a DSL router, connect a twisted pair cable to any of the LAN connectors, and remember the port number, you will need it during setup. In this case, you can configure the Internet only if the router supports reconfiguring port assignments. In some cases, you will need to reflash the device.
Telephone cable
There are two options for connecting a D-Link router to a telephone line with and without a landline phone. If the phone will not be used, you can connect one end of the telephone cable to the router and the other to the telephone line. To prevent the Internet from interfering with the use of your phone, you need to connect the splitter to the telephone socket, and then connect a landline phone and an access point to it.
USB modem
Only a compatible USB modem model can be connected to the router.
To do this you need:
- insert a SIM card into the USB modem;
- connect the modem to the corresponding port of the router;
- connect the router to the computer if wired Internet will be used;
- turn on the router and PC.
After the PC and router boot, the USB modem setup will begin.
Presets - Windows
If you are sure that everything is fine in your system, feel free to skip this section.
To eliminate all possible problems from the previous settings, I propose to delve a little into the system and make sure that the network settings are obtained automatically. At the setup stage, this is important, because there is a possibility that you either won’t connect to the router or won’t get internet. So it’s better to initially check that everything is set to automatic, and after the basic setup, do whatever you want with your network.
Login to the admin panel
To start setting up your D-Link router, you must first connect it to your computer using a network cable. One end of which is connected to the computer, and the other to any of the LAN connectors.
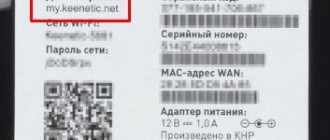
To enter the settings of the D-Link router, you need to enter the IP address of the router in the address bar of the browser to log in, and when the dialog box appears, enter the administrator name and password. All necessary data can be found on the sticker located on the bottom panel.
If the page with the administrative panel does not load, the reason may be an old version of the browser or that the web browser does not support JavaScript.
After successful login, some router models will prompt you to change the password for the settings panel.
Also, after entering the Wi-Fi settings of the D-Link router, you can change the language. To do this, click on the System menu located at the top left of the screen and select the one you need.
Router password
We have the Internet, we have secured Wi-Fi from our neighbors, now is the time to protect any router - because now any device from the outside can connect to it, enter admin-admin and, for example, replace all your sites with their own with evil intentions. That's why:
System - Administrator Password
And change the password here to a new complex one. Nothing complicated)
Quick setup
There are two ways to configure a D-Link router: using Click`n`Connect (quick setup) or manually. First, let's look at the Quick Setup Wizard.
To launch the Click`n`Connect wizard you need to:
- In the left menu, select the line “Start”, and then “Click`n`Connect”.
- If the router supports 3G/4G USB modems, then in the next window you need to select the country and name of the provider. If you are using a wired connection, then nothing needs to be changed; the “Provider” line should have the value “Manual”.
- After clicking the “Next” button, a new window will open in which you need to select the connection protocol. This information, like everything else related to connecting to the Internet, can be found in the agreement with the provider.
- Depending on what type of connection you have chosen, you will need to enter connection parameters in the next window. For example, if you chose PPPoE, you will need to enter the username and password that your provider will assign to you.
- After this, you need to check all the parameters of the configured connection, and if everything is fine, click the “Apply” button.
- The connection will be checked. The verification site address can be changed manually
- Some D-Link router models can work with the DNS application from Yandex. This service will help you avoid hacker attacks.
- The D-Link Wi-Fi setup begins. In the new window, select the line “Access point” and click “Next”.
- Now you will need to enter the name of the wireless network, you can come up with anything.
- A window will appear in which you need to select the connection mode (it is recommended to select “Secure Network”), and in the next line enter the security key (password), after which you can click the “Next” button.
- If your access point supports two Wi-Fi bands - 2.4 and 5 GHz - then in the next two dialog boxes you will need to enter the same information as for the 2.4 GHz network, that is, the SSID and password.
- In the next window, check the box next to “Do not configure guest network.”
- Now you need to check the settings made and click the “Apply” button.
- And in the last quick settings window, you need to select the IPTV port to which you plan to connect the set-top box. If you will not be using IPTV, click "Skip".
This completes the quick setup using the “Click'n'Connect” function.
Interesting advanced settings
Attention! The above points are usually enough to connect to the Internet and distribute it via Wi-Fi. I do not recommend using the complex settings of the D-Link DIR-300 for “hobbyists”.
I’ll just briefly touch on what else this model can do. Professionals will simply understand what we are talking about and organize their task without any problems. So for a mention.
- Routing. Allows you to create any routes. That's why it is a Router (router), and not just a modem. The model, although old, allows you to solve problems at home.
- VLAN – allows us to divide our networks into virtual spaces. This content filter will help to apply and separate IP television from the general traffic flow.
- Firewall, NAT and port forwarding are all present. I am attaching a video on forwarding below:
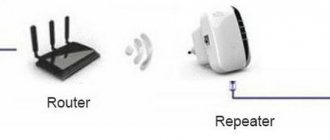
- Repeater (repeater, amplifier, repeater). If you already have some kind of network, then this router can be connected to it and simply duplicate it to expand the coverage area. This is done in the “Wi-Fi – Client” settings. Here we check the box to switch to and broadcast mode, select the desired network and everything works.
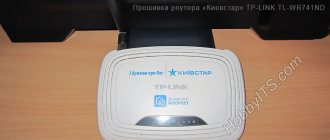
- The device is perfectly stitched. If you have an old model, go to the official website, look at the firmware for your revision and simply update the software. But for me, if there are no problems, it’s easier to leave the official firmware the same, and it only makes sense to update for professionals directly to some third-party OpenWRT.
Manual setting
In addition to quick settings, there is also a manual one, which allows you to configure more parameters. In this mode, a local network (LAN) and Internet connection are configured. On some router models, it is also possible to configure a connection via a 3G modem.
First of all, you need to set up a local network. To do this, select the “Network” line in the left menu and open the “LAN” settings. Here you need to make sure that the DHCP server mode is enabled. You can also change the range of IP addresses that are distributed and the time for which they are issued. It is better to leave other settings unchanged.
After this, you can begin setting up your Internet connection.
Step-by-step algorithm:
- Select “Network” in the left menu, then the “WAN” line.
- Specify your provider and connection type. If your Internet provider is not listed, leave the “Provider” field at the default value (“Manual”).
- If you selected PPPoE in the connection mode item, then in a new browser window you can change the connection name and interface. In the “PPP” section you need to enter the username and password assigned to you by your Internet provider.
- After entering all the data, click the “Apply” button to complete the connection settings.
If the router supports 3G modems, then to set up such a connection you need to:
- Go to the “3G/LTE modem” menu section and in the “Options” section, check the “Automatically create an LTE/3G connection” checkbox.
- In the “PIN” item “PIN code management” you can set connection authentication using a PIN code. To do this, you need to enter the code and click the “Enable PIN code request” button. After this, you will need to enter a code every time you connect.
Some D-Link router models can work with the DDNS protocol, which is used to automatically update domain name information on the DNS server. It can be used to access router settings via the Internet, access a video surveillance system, and in other cases when a static IP address is needed.
To set up a dynamic DNS protocol, you need to register on one of the sites that provide free DDNS services.
A list of DDNS providers supported by your router model can be found by going to the “Advanced” menu and going to the “DDNS” section. Here in the “DDNS service” drop-down menu you can find a list of companies providing these services. By going to one of the sites from this list, you need to register. After registration, you will receive a username and password, which you need to enter in the “DDNS” window.
After that, in the “Routing” item, click the “Add” button and specify the IP address for which static routing is being installed.
Procedure for setting up WiFi distribution
The following steps need to be taken:
- In the main settings window, enter the “Wireless network installation” section;
- Click “Set up wireless connection manually”;
- In the “Wifi Protected Setup” window that appears, uncheck o;
- Check the “Enable” box in the “Enable wireless access” section;
- Type WiFi name;
- After that, deactivate the “Enable Auto Channel Selection” item;
- Specify the sixth channel in the “Wireless channel” item, since it is usually not busy;
- Then, in the “Transmission speed” field, set the highest number offered;
- Activate “Enable WMM”;
- In the “Security Mode” column, set “Enable WPA/WPA2 Wireless Security”;
- Then in the next item “Encryption type” put “Both”;
- Type the access code in the “Network key” field; it is recommended to come up with a complex password consisting of various characters and changing the keyboard layout;
- Click “Save”.
Wi-Fi Settings
To configure the router's wireless network, you need to:
- In the “Wi-Fi” menu, select “Basic settings”. If you have two operating frequency bands 2.4 and 5 GHz, select the one you need. In the window that opens, you need to check the “Enable wireless connection” box, set the SSID network name, and select the country. You can also set the maximum number of connected clients and limit the connection speed.
- Go to “Security Settings”, select the type of network identification (it is recommended to use WPA2-PSK as the most secure at the moment) and set a password.
- In the “WPS” window, you can configure the operation of this function; here you need to check the “Enable WPS” line and click the “Apply” button.
We recommend enabling the WPS feature only if it will be used. With this feature, neighbors can hack your network.
Reboot required
The peculiarity of the devices in the series under consideration is that when changing the settings, the device must be rebooted every time. That is, if, for example, some important file is downloaded from the Internet, and a loss of connection is undesirable, it is better not to change the router settings, but to wait until the necessary information is downloaded. Also, it may turn out that some other person is connected to the network via Wi-Fi, and a forced Internet shutdown may also be undesirable for him. Therefore, we wait until the router is free from use, and only after that we make the necessary adjustments in the settings.
Setting up IPTV
IPTV is configured in the following order:
- Go to the “Advanced” menu item, the “VLAN” section and open the “LAN” profile.
- In the window that opens, you need to uncheck the port to which you plan to connect the TV. You can mark several ports if you have several TV set-top boxes
- After you click "Save", you will be returned to the original "Advanced/VLAN" window, here you need to click the "Add" button in the lower right corner.
- As a result, a window will load in which you need to enter the following data: name, type (transparent), VLAN ID (the value of this parameter must be obtained from your provider), tagged port (select WAN) and check the “Untagged port” line.
As a result, a new profile should appear in the Advanced/VLAN window.
Setting up a D-Link 615 modem
Let's look at how to configure the D-Link 615 router. First, we do everything as when working with previous modems: we connect the wires, set up automatic acquisition of the DNS address and IP in the Windows interfaces. Next, go to the browser and enter 192.168.0.1 in the address bar. Enter admin in the “login” and “password” fields. The system may offer to change the relevant data - if desired, we will carry out the replacement.
The distinctive specificity that characterizes this router released by D-link is that setting up a wireless connection is desirable first of all. To do this, you need to press the SETUP button in the start menu of the device control panel. Next, select Wireless Settings. After - Manual Wireless Connection Setup.
Next, it is important to set the correct wireless connection parameters. So, regarding the PROTECTED SETUP item, it is advisable to uncheck the Enable option. At the same time, you should make sure that the Enable Wireless and Always checkboxes are checked. In the Network Name section, enter the name for the network. We set the mixed type for the 802.11 communication protocol. Regarding security settings, Security Mode, it is optimal to set the WPA-Personal parameter. In the Cipher Type item, select AES. Next, enter the password (Pre-Shared Key) for the wireless network. After checking that all parameters are correct, save the settings by clicking the “Save” button.
Having configured the wireless network, you can move on to working with options related to connecting to the Internet. Press the SETUP button, then Internet, then Manual Internet Connection Setup. In the menu that opens, we have to indicate the communication protocol used (most likely it will be PPPoE), login and password (we ask the provider, look in the subscription agreement). You can also configure an additional setting by clicking on Clone MAC Address. The Connect Mode Select item should be set to Always On. The recommended MTU value should be obtained from your provider; most likely, it will be 1472. After checking that the settings are correct, click Save Settings, after which the router will save the settings and reboot. After a few minutes, you can try to start using the Internet.
Firmware update
Download the firmware file from the official website to your computer. To update the firmware, you need to go to the “System” menu and select “Software Update”. To update the router software, click the “Browse” button in the “Local update” section. After that, select the firmware file and click “Update”.
If the Internet is already configured on the router, you can update the software over the network without downloading the file to your computer. To do this, click the “Check for updates” button.
If new software has already been released, a dialog box will appear from which you can find out the firmware version. To install it , you need to click “Ok”.
Saving settings
The devices in the series under consideration have a useful function for saving settings (with the possibility of later restoring them in case of failures). To do this, you need to set the correct settings via the router management web interface and make sure that the Internet works with them. You can then save these settings. To do this, in the main menu of the router control panel, select the TOOLS button, then SYSTEM. To save the settings to a file on your computer's disk, click Save Configuration and then select the desired location in the file system. It is also useful to make a copy of the saved file on another medium, such as a flash drive. In order to, in turn, restore the settings, then, having entered the same area of the router control panel, you should click the “Browse” button (if the operating system version is Russian), and then specify the settings file that was previously written to disk or to a flash drive. Afterwards, click Restore Configuration Settings. Then you need to reboot the router by clicking the Reboot button. Also, through this interface, you can restore the factory settings by pressing the Restore Device button - the effect will be the same as when pressing the RESET button on the device body.
Reset
There are two ways to reset your D-Link router: using the “Reset” button and from the administrative panel. This procedure may be required if you have forgotten the password to enter the settings, or if the gadget starts working with errors.
To reset the router to factory default, you need to turn it over and find the “Reset” button, press it with a thin object and wait 10 seconds. As a result, the router will reboot with factory settings, and previous settings will be forgotten.
To return to factory settings, using the web interface you need to go to the “System” menu and select “Configuration”. After that, click on the “Factory settings” line and wait until the default settings are set.
Checking the functionality of the D-Link router after setup:
To check the functionality of the router, we need to perform a couple of points:
- In the main menu of the router, go to the “ Maintenance ”
- Next, open the “ System Check ”
- This page informs us about a broken cord from our router to the computer.
Either from the provider to our router. How to set up a router - By pressing the key "More information", a window with information about the patch cord will be displayed.
Router cable test - After we are sure that everything is in order, click the “ Exit ”
That's all, we figured out how to configure the router. If you have questions, wishes or suggestions, write comments. I will try to help you set up your router.
Possible problems
If configured correctly, no problems should arise. Therefore, if something does not work, you need to first check whether everything is configured correctly in Windows.
Perhaps your Internet provider uses MAC address binding. In this case, you need to call the provider’s technical support and change the address.
If everything is fine, try resetting the router to factory settings, and then reconfigure everything again. If after this the problem does not go away, update the firmware. If even flashing it doesn’t help, then the problem is in the gadget itself or on the provider’s side. A call to tech support will most likely solve the problem.
Features of setting up D-Link modems
If we have at our disposal a router manufactured by D-Link, the configuration of this device, as a rule, is performed within the framework of very simple algorithms, which are generally similar for all device models. What features can be highlighted regarding the configuration of the types of devices we have considered?
First of all, we note that information from the provider will be no less useful for us, along with knowledge of the router configuration algorithm - and this is the main feature of working with devices. Step-by-step setup of a D-Link router in any modification requires the appropriate data. If they are not at hand, then connecting to the Internet will be problematic, since the spread of indicators that determine the technological specifics of connecting to the network can be very large in practice, and it is not easy to guess the right one. Knowing the specifics of the standards used by the provider is an extremely important aspect; without it, it will be difficult to correctly configure a D-Link router. Beeline, Rostelecom, other large suppliers, as well as various operators may be characterized by noticeable differences in technological approaches. But, as a rule, the provider’s support service is open to communication with the user. Her specialist usually always tells you the necessary settings.
What other features does a router released under the D-Link brand have? Setting up devices within the series we reviewed, as we found out, at the very first stages of working with the devices requires entering a login and password. They are usually standard and sound like admin. But it may well turn out that the user will have at his disposal a device with changed login and password settings. Which he may not even know. But it's not a problem.
Nutrition
Connect the power adapter to the router and the power supply to a power outlet. At least one light on the router should light up.
Possible problems:
The indicators do not light up.
Solution:
Press the “ON/OFF” button on the back of the router, next to the power adapter connector. Try several times.
If there is no effect, the problem is in the outlet, power supply or the router itself.
Connect via wire
As an old man, I love a direct connection and therefore I connect to the router via cable. If you are not interested in this, go to the next chapter where I tell you how to connect over the air.
And so, in the box from under the router there should be a spare network cable. Take one end of the wire and plug it into the LAN port. There can be several of them, so you can insert them into any one. They also sometimes have numbers from 1 to 4 or more next to them. We insert the second end into the network connector on the computer or laptop.