Now we will figure out how to remove a second system if several Windows operating systems are installed on one computer. Some users install two or more operating systems on one PC.
For various reasons, a user needs to have several different systems on one computer: to run specific or outdated software that does not work on a newer version of Windows, to test a new system or programs, etc. Over time, the situation may change.
In the vast majority of cases, two Windows operating systems are installed on one computer, in different versions. Typically, systems are installed on different partitions of the same hard drive, or on different hard drives if a given PC has several hard drives.
There comes a time when using a second system becomes irrelevant, for example, the user needs the disk space occupied by another Windows, or there is no longer a need to use a second OS. Therefore, users have questions about how to remove a second operating system from a computer.
You need to do this correctly, without damaging the main system during removal, which will continue to work. In the article you will find instructions on how to remove a second Windows system, leaving only one OS on the computer.
The process of removing a second Windows operating system takes place in two stages:
- At the first stage, you need to remove the second system from the boot.
- Then you need to delete the files of the remote operating system from the corresponding partition of the hard drive or from another hard drive.
Using the example from this article, two operating systems are installed on one computer: Windows 7 and Windows 10. We need to remove one of these OSs, let it be Windows 7. The described actions with different versions of Windows are carried out in the same way.
Before removing an unnecessary OS, copy and save the necessary data from the Windows you are removing so as not to lose important information.
What does it mean to demolish Windows?
Removing Windows means formatting the disk with Windows installed and installing it on a blank disk. In simple terms, demolishing Windows means properly removing the old Windows.
Windows installers are divided into 2 types.
The first ones write it to disk. Launch the disk from under the old Windows and begin the installation. This is an INCORRECT SOLUTION for installing any Windows.
For proper installation of Windows Xp, 7, 8, 10
- you will need to run the disk or bootable USB flash drive AFTER you restart the computer and BEFORE loading the old Windows.
First, you need to restart your computer and go into bios. In some cases, you need to set USB adapter support in the bios settings
(or your keyboard and mouse will not respond to pressing and the Windows installation disc will not start)
After this, you need to set either disk loading or flash drive loading (depending on what you are doing the demolition of Windows and a clean installation of Windows)
If the key is not pressed, then you should set usb support (this is written above)
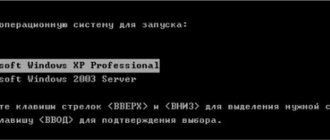
So the disk started loading. We wait and press next. We need a moment when we can delete partition C:
Windows demolition occurs after deleting partition C:
(most likely Windows is installed there)
Now, select the unallocated area and install Windows there.
This way you will remove ALL operating systems from your computer and install just one. This method is suitable for any Windows Xp/7/8/10. Now you know how to properly remove Windows
and install a new Windows Xp/7/8/10 as I advise you to do in every manual!
PS: This method is suitable for installing any Windows builds. It is recommended to install any build of Windows according to this manual. Do not run the disk under Windows, load it correctly!
From Microsoft at least once asks the question: how to tear down Windows. Despite the fact that the reliability of modern Windows 7 is significantly higher than that of older versions, nevertheless, sometimes you have to reinstall it. One of the reasons for this is the use of malfunctioning third-party software. That's why people often want to know how to uninstall Windows 7. Afterwards, you can reinstall the system and start working. Please note that the answer to the question “how to remove Windows 7 from a laptop” is the same as for the computer described below.
Once on one of the Internet forums, the interlocutor boasted that the hard drive of his computer consists of several sections, like those of real professionals. One of them runs the Windows operating system, and the other is used for programs. This method of distributing disk space is being used more and more often, because sellers of ready-made computers and laptops simply do not leave beginners a choice: “Here is your hard drive. It has two sections.” We’ll leave the search for an answer to the question “Which is more professional: one partition for the entire disk, or several” to philosophers. For us, the consequence is more important: the operating system can be installed on one of several partitions, or on just one. Accordingly, there are several ways to remove Windows 7, and they differ quite significantly.
So, there are three such options: one for a partitioned hard drive, another for the case with a shared partition, and the third is universal.
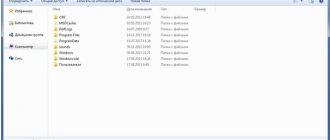
To determine how to remove Windows 7 from the system partition of a split disk, you must first prepare everything. By the way, it is recommended to do this kind of work using any method. It is necessary to save important data that may be on the disk. We create a folder and copy all our documents, passwords, codes, photos into it: in a word, everything that you don’t want to lose. Advanced users can also save the settings of their programs, located in the path DISC:\Users\USER NAME\AppData\Roaming\, and return them after reinstalling the system.
Please note that if the disk is partitioned, then such a storage folder must be created on another partition (and not where Windows is installed). Now everyone will understand, 7. Insert the Windows distribution disc into the DVD drive and boot from it (we look for the boot order setting in the BIOS). At one stage you will be asked to select a partition for installation. Select the system one and click “Format” - this will erase all data from it, which is why you need to copy everything useful first. Then we indicate to the installer our prepared partition. The main thing is not to confuse anything and save the necessary files in advance. This is one of the easiest ways. Its disadvantage is the limited volume of the partition: allocating too much space is impractical, and new operating systems may not have enough of what is available.
In the case of one partition, you will have to download some kind of Live-CD from the Internet and burn it to disk. From such a disk you can boot into familiar Windows without installation. While in it, create a folder and move the Windows, Documents and Settings, Program Files, ProgramData, System Volume Information, Users directories into it. Then we wash them all. Moving is required to gain access rights. If you need to reinstall the system, then boot from the distribution disk and select the partition, but do not format it! Otherwise, we just reboot - Win 7 is erased.
The universal method allows you to do without formatting and LiveCD. We simply select the desired partition, and respond in the affirmative to the installer’s message about the presence of another version of Windows on it and saving all folders. After installation, the old system (Windows.OLD) can be safely erased. There are two disadvantages: installation takes longer and additional disk space is required.
How to remove Windows?
Quite often it happens that when the next version of the operating system from Microsoft is released, users install it not instead of the previous one, but next to it. This step is justified as an experiment. It allows you to identify the advantages and disadvantages of the new OS without uninstalling the old one.
When everything has been tested from your own experience, it is advisable to get rid of one of the Windows, as this will significantly increase the free space of the HDD. It’s not difficult to demolish Windows on a laptop or desktop computer. Any user can handle this.
Removing a logical drive
The first way to remove the old Windows 7 is optimal if subsequently the owner of a computer or laptop wants to install the OS on a “bare” hard drive. However, it is completely unacceptable if several logical partitions are created on one physical medium - with other versions of Windows or important data. And in this case, the installation disk or flash drive will help the user; Having connected the media and configured the BIOS as described earlier, you should:
- After going through the preparatory steps, click on the “Install” button.
- Accept Microsoft's terms and click Next.
- And be sure to switch to “Custom installation”.
- In the list of logical partitions that opens, select the one in which the old version of Windows 7 is installed; In this case, you can focus on both the name and the volume allocated during the breakdown. If you plan to reinstall Windows 7 or install another operating system on the same partition (of course, if capacity allows), you should select the “Format” option for it.
- And confirm your consent to part with all the data contained in the section.
- If a logical drive is no longer needed, the correct option is to completely remove it.
- Also having gone through the mandatory confirmation procedure.
- In order not to leave the free space in limbo.
- It is necessary to select the logical partition that you plan to “expand” with the left mouse button and click on the “Expand” button.
- Next, select the size to add and click “Apply”.
- And, again agreeing to the terms of the OS.
- Make sure that the logical drive on which the old version of Windows 7 was installed was successfully erased.
Important: all program and user folders will disappear along with it - the user will not need to clean up anything additional.
Loader
Before proceeding directly to the demolition of Windows, you need to remove it from the bootloader. If you skip this step, when you turn on the computer, the system selection menu to boot will appear as before. To prevent this from happening, you should:
- load the operating system you want to keep;
- enter the Start menu;
- In the “Search programs and files” window, enter “msconfig”;
- press the “Enter” key on the keyboard;
- in the window that opens, select the “Download” tab;
- click on the line with the system you want to leave;
- click the “Use as default” button;
- click on the line with the system you want to demolish;
- click the “Delete” button;
- click the “Apply” button;
- press the “OK” button.
Now the bootloader program will “see” and use only one OS.
How to remove windows 10 from your computer completely under Ubuntu
How to completely remove Windows 10 from a computer that was recorded together with Ubuntu in multi-boot system installation mode and still keep Ubuntu?
The deletion logic is the same as when erasing data from a second Windows:
- When you launch the GRUB bootloader, select and launch Ubuntu.
- In the main window, in the sidebar on the left, click the menu button.
- Through the search, find and run the “Disks” utility.
- In the program, select the Windows partition that you want to erase. It is easy to recognize because it is in NTFS format. After clicking on the volume, click on the minus button below it.
- In the confirmation window, click “delete”.
- Confirm the operation with the administrator password.
- Ready. There is no main section now. But small ones may remain: “Reserved by the system”, “Restore”. If they are found, delete them in the same way as before.
- Restart your computer for the changes to take effect.
- Then launch Ubuntu again. Since Windows 10 has been removed, it needs to not be listed in the bootloader either. You can erase this information in the terminal. Use the key combination Ctrl + Alt + T to call it and enter the command sudo update-grub.
- Enter the administrator password and wait for the procedure to complete. After updating GRUB it will no longer show the remote Windows
Now you know how to completely remove Windows 10 from your computer. For this purpose, many tools are provided both within the system itself and outside of it. Thanks to the presence of a recovery environment, you can erase data and immediately restore it. And with a boot drive, you can do this or write a clean operating system onto a freshly formatted and prepared hard drive or solid-state drive.
How to customize the boot menu
Running multiple versions of Windows on the same PC gives you more options, but eventually you'll probably only want to go back to one. And when you do, you'll soon get tired of that dual-boot menu that keeps popping up when you start your computer. You can easily disable the Boot Menu, but uninstalling a previous version of Windows can be dangerous. These instructions assume you have Windows 10 and want to keep it. With minor modifications they will work with other versions:
- To close the boot menu, right-click Start and select System. In the left pane of the window, select "Advanced system settings."
- In the dialog box that appears, on the Advanced tab, click the Settings button in the Startup and Recovery section (the third and last Settings button on the tab).
- This will bring up the Startup and Recovery dialog box. Make sure the default OS is Windows 10. Then uncheck the "Operating system list display time" checkbox.
Overwriting files
If deleting the Windows.old folder using the previously described methods did not work out for some reason, you should try to forcefully erase the directory using a program to completely erase files. An example of a successful application is Wise Care Pro; To remove the remnants of old Windows using this program, the computer owner must:
- Download (link - wisecleaner.com), install, launch the application and go to the “Privacy” tab.
- Open the “Overwriting files” section.
- Click on the “Add files” button.
- And select the folder with traces of the old Windows in the Explorer window.
- By clicking on the “Erase” button, the user can finally and irrevocably remove the old Windows from his hard drive.
EasyBSD
A convenient, easy-to-use program that allows you to edit the download list without calling “System Configuration”. A user who wants to remove the old Windows after installing a new one does not need to know how to enter the BIOS, and does not have to use the command line - the whole process is completed in a few mouse clicks:
- After downloading (link - techspot.com), installing and launching the program, you need to switch to the “Edit boot menu” tab.
- Select the old OS with a mouse click and click on the “Delete” button located at the top right.
- Confirm that you want to remove the entry from the download list.
- Click on the “Save” button and close the program.
Tip: if the wrong entry about Windows startup was deleted by mistake, you can restore the list to its original form by going to the “Add entry” tab and checking the appropriate option in the top field.