The capabilities of the Android operating system are progressing with each new version, and one of the main innovations is split screen on a smartphone. For those who don’t know, split screen is a kind of multi-window mode that allows you to work with several applications simultaneously on one screen. The phone's display is divided into several parts, and you can, for example, launch a messenger on one part and a player on the other. They will not overlap each other, so you can interact with two at the same time.
The technology was called Split Screen and became available in Android 7 Nougat, but not immediately on all smartphones, but only on certain models, and later appeared in most smartphones.
How to enable split screen on Android
If you want to activate the multitasking function on Android 7.0, it is important to consider that it is hidden. However, root rights are not required to unlock it.
To do this you need to do the following:
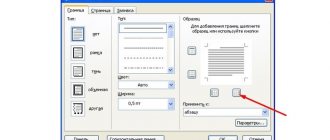
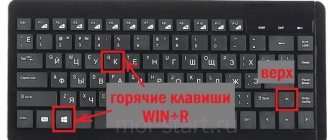
- Open the menu and go to settings. In the list, click on the “About phone” item.
- You need to click on the operating system build number until a notification appears that the builder mode is enabled.
- Select Developer options from the list.
- Click on the Resize option in multi-screen mode to activate it.
- Reboot your smartphone.
- After turning on the phone, open two software at once.
- In activated multi-screen mode, you need to click on the required icon, pull the tab to the side and release. Thus, two programs will run simultaneously. In this case, the user can change the size of the tabs by moving them.
In the same way, the multitasking function is enabled in other new versions of Android, as well as Android 9. The only difference can be that the mode is not hidden and does not require unlocking.
Possible reasons
There are two main reasons why the tablet stopped turning on:
- Hardware problem;
- Software problem.
In the first case, the device may not boot due to some mechanical damage. It is very easy to determine this - as a rule, such damage is noticeable visually. You might not even notice how you hit the gadget against something, even if only slightly. But in the end it doesn't work because of this.
It also cannot be ruled out that some internal part of the tablet, which is extremely important for turning it on, has failed. This could be, for example, a battery. Such a breakdown will not be catastrophic, because replacing a failed part is easy and requires a minimum of time.
Software problems are a little more difficult to diagnose. If the tablet does not turn on because of them, then the problem is some kind of virus or a malfunction of the software platform. You can determine what exactly is preventing the tablet from starting up experimentally, but practice shows that it is better to entrust this matter to a specialist.
Hardware failures
If the tablet does not turn on due to a hardware failure, then the first thing you need to do is hold down the power buttons for 10-15 seconds. If nothing happens and the power indicator is not lit, then remove the battery from the device, and after a while, insert it back and try to turn on the tablet again. Perhaps some contact has simply come loose, and by doing these manipulations you will solve the problem.
It is likely that the tablet will not boot due to a low battery. Many users sound the alarm when they see a tablet that is not working, but simply forget that the battery is completely drained. Of course, in this case, the gadget will not boot until you put the tablet on charge.
If a tablet computer that is put on charge still does not turn on, then most likely the problem is either in the charger, or in the connector of the tablet to which it is connected, or simply the battery has failed. It's also worth checking if the power button works.
Often the tablet does not turn on due to problems with the screen matrix. You are unlikely to be able to do anything to correct the situation at home, so immediately take it to a service center. I can say the same about cases when the system does not start after the gadget falls or hits something.
If you bought a mobile device at a licensed point of sale, and a problem with its operation began within a year after purchase, then you won’t even have to spend money on repairs, since this situation is covered by the seller’s warranty.
Software failures
Diagnosing software failures is more difficult, but in most cases it is not difficult to fix. To understand that the problem is in the software platform, look to see if the LED indicator lights up at startup. If it is on, but the download does not proceed, then the problem is most likely a software glitch.
Another obvious sign of a software malfunction is a tablet computer that starts up but constantly freezes. In this case, it is recommended to put the device into safe mode and not delay a visit to the service center.
There are many options as to which part of the software has failed. But it’s more important for us to know how to turn on the tablet, and not what exactly happened to it. There is one sure way to fix the situation by performing a flashing or a full reset to factory settings. We recommend starting with a reset, also called Hard Reset.
You can do this even if the tablet is turned off. To perform a Hard Reset, do the following:
- Press and hold the power button and the volume down key at the same time.
- We are waiting for the Android logo to appear on the screen.
- We get into Recovery mode and select Wipe Data using the volume keys.
- The system will ask if you are sure of your actions. We agree to completely delete all settings and data from the tablet.
- When the procedure is completed, click on Reboot System to reboot the tablet.
This is a rather radical method, because all user data will be deleted from the mobile device as a result. But if there is no choice left, you will have to use it. We recommend that you place all your tablet data on the cloud on the Internet, then the unexpected need to reset all data will not be a problem for you.
How to split your smartphone screen into two parts
You can divide your smartphone display into two parts in several simple ways, which we will consider below.
Method 1: using taps
This is the most popular and simplest option for splitting the screen, which is used on an OS no older than Android N. We open several programs or several windows in the browser.
Press the multi-screen button, which should be in the center of the screen panel or on the left. After which a list of all applications will appear on the display. Click once on the selected window and move up and down the display.
After these steps, the screen should split. We do the same with another utility. We move it a little and do a double tap. Then two screens appear with a dividing line that can be adjusted.
Method 2: Using the Quick Settings Panel
This option is not suitable for all smartphones, but it is much simpler than the previous one.
Step by step steps:
- You need to open the top panel and click on the setting in the form of a gear image. Hold down the button for a few seconds. After this, the System UI Tuner function should be activated, about which you will receive a notification.
- Go to the menu for this mode and turn it on. After this, the user will be able to activate the multitasking function by swiping up.
Method 3: Using Floating Apps Free
If the above methods do not help, then it is recommended to use the floating apps free utility. It will allow you to create real multi-windows. This means that the user is given the opportunity to create more than two screens on a smartphone or tablet. You can download the software for free on Google Play.
Floating Apps Free features:
- Working with a calculator and using notes.
- View email attachments without leaving the program.
- Ability to view PDF files simultaneously.
- Floating browser for deferred viewing of links.
- Quick text translation through a special dictionary.
Floating apps free has a Russian interface, thanks to which the user can easily master the utility. It is worth considering that the software does not support the mode of dividing the display into 2 windows in all applications.
What is Split Screen and why is it needed?
Split Screen or “Split Screen” is a special software feature of Android devices that have version 7 and higher.
It allows you to split the screen into two or more parts, depending on the build, and switch between created windows much faster. That is, the display is divided into different parts that have no relation or impact to each other. Thanks to the connection of multifunctionality, you can not prioritize and be distracted from one activity in favor of another, but perform several tasks simultaneously. For example, you can watch a training course and correspond with the trainer, or watch a conference and re-read your dissertation. Interestingly, some games also support multitasking, which allows, for example, to talk on the phone with the speakerphone on and play at the same time.
The windows created on the display are divided into equal parts and are independent of each other. They are active at the same time, allowing the user to interact between them without unnecessary sensor switching. This is especially true when transferring data from one application to another, which, thanks to multitasking, can be done using drag and drop.
But it is worth remembering that not all applications support this format. It is now impossible to “reduce” software such as e-readers, cameras and some social networks (Instagram, Facebook).
How to split the tablet screen into 2 parts
Many people probably think that multitasking mode on tablets is created differently. However, everything is similar here, so you need to download the appropriate application and follow the instructions:
- After downloading the software, launch it, then click on the multitasking button while holding it.
- A list will appear on the screen in which you need to select the desired software and transfer it to free space on the smartphone screen.
- Opened windows can be adjusted using a special dividing line.
Poor contact
So, the first and, perhaps, the most common reason why the image on the monitor doubles is poor contact of the cable with the connection connector. In fact, this is a fairly common phenomenon, since, one way or another, the cable periodically gets caught, so the contact is broken. As a result, various artifacts, picture distortion, ripples, jerking and ghosting may appear on the monitor.
If suddenly the image on your monitor begins to double, the first thing you need to do is check whether the cable connection to the computer has broken.
Problems with the video card
Well, the last reason for double image is problems with the video card itself. If the connection cable and connectors have absolutely nothing to do with it, then it is quite possible that the cause of the malfunction may be the video card. Here you definitely need to check: insert the video card into another PC.
If, according to the results of the test, there is ghosting on another computer, then with a 99% probability the video card is to blame, but if not, then perhaps the reason lies in one of the points described earlier.
The other day we received a question: “ How to deal with the fact that I have a double image on my monitor?” "(white shadows from the cursor, text)
That is, the image was blurry, with a trail of letters, windows, etc. It’s as if it’s blurring in one direction, leaving behind a barely visible trace. We are talking about LCD and LED monitors. There are several options to solve the problem:
— Specifically, the user who contacted us needed to manually configure the monitor through the corresponding menu built into it. It was a ViewSonic brand monitor. In the menu we selected “Manual image adjustment”, then “Fine adjustment” and changed the parameter from a value of 50 to a value of 70. The entire image became clear, these phantoms and ghosts of letters disappeared
- This problem can also be fixed if it is fixated on the drivers. Try the original version from the disk, or install the latest from the manufacturer's website. Test whether this bug appears at all screen resolutions.
Connector on the video card
The next reason why the image on the monitor is double is a problem with the connection connector on the video card itself. At the very beginning, we already talked about poor contact on the connectors, but, in addition, you need to remember that defects can easily appear on the connector itself, as a result of which the picture on the monitor through the cable will be displayed with various noise, artifacts, ripples, etc. d.
To find out for sure whether the connector is the culprit, you need to check it. As a rule, even the most budget video cards have at least 2 different connectors for connecting a monitor, so all you need to do is connect the monitor to a different input. If the problem disappears, then it’s all about the connector, but if not, then you should dig further.
What is this function?
Split screen – an option that allows you to install a double screen. The display is divided into several windows , which are interacted with separately. This is true multitasking mode. The user does not need to open tabs individually. He can simultaneously sort photos in Galleries and watch videos, or play a game and chat on Instagram.
The dual screen feature on Xiaomi first appeared in MIUI 9 (Android 7.0). Split screen works great on modern Miyuai 11 and 12 skins. Setting up two screens on your phone is very easy. No additional software required.
You may be interested in: How to make a second space on Xiaomi.
What to do, check did not help
If external research and checking the computer did not help fix the problem, then you should look for the cause inside the box. First of all, you need to find out whether the video card and monitor are working properly. For inexperienced users, it is best to contact an experienced technician. Otherwise, there is a risk of further damaging the gland. Experienced users can independently remove the video card, turn off the monitor and try connecting it to another device.
If the image begins to double and ripple on the laptop. This usually indicates a faulty cable. Over time, it tends to wear out and wear out. Most likely the part will need to be replaced. Only a technician can tell you more about this after a complete diagnosis of the laptop.
First of all, when connecting a new monitor, you need to install the correct drivers and extensions. So that he can fully function. To avoid problems, it is recommended that you first read the instructions and rules of use on the monitor box. If the package comes with a driver disc. Use them, don't look for third-party programs.
Dual images on the PC screen are one of the most common faults. It occurs in every second inexperienced user when purchasing a monitor or installing a new Windows. If your desktop is no longer clear, don't panic. First, find out what is the cause of this malfunction. And then the matter remains small.