Hi all! This may be hard to believe, but even in our age of mobile technology, many people have no idea how to transfer a photo from Android to Android so that your friend or relative can also enjoy viewing the photo. Of course, you can send photos to a computer and then to another phone, but I think this is outright nonsense in this case. How then to retreat? Well, that’s why I created the blog, to help people solve such issues.
Today only wireless transmission methods will be considered, because using wires between smartphones is, to say the least, stupid.
Cloud
If there are a lot of photos, then I would recommend transferring the files from your smartphone to a cloud service, for example mail cloud or Yandex disk. And then you just need to give a link to the folder to the person to whom you want to transfer the photo. Let's look at the example of mail cloud. To do this, you must have an account in the mail.ru service and the free cloud mail application installed.
- First you need to go into the application and create a special folder for files. To do this, click on the cloud icon at the bottom of the screen and click on the add button (plus sign in a circle). From the drop-down menu, select “create folder”.
- Now go to the newly created folder and click on the plus icon again. Only this time select “Add files”.
- Find the photos and videos on your smartphone that you want to send to your friend and click on each of them. Alternatively, click the three dots icon in the top right corner of the screen to highlight all the files in the folder. And when the files are highlighted, add them.
- Now go to the main directory, or the place where you have the folder into which you put the files, then click on the three vertical dots opposite it and select “Get link” from the context menu.
All! All that remains is to send this link to your friend via any message, be it mail, SMS, Viber, Telegram, VK, etc. As soon as he clicks on the link, all the photos will be at a glance, and he will be able to download them.
How to transfer photos from phone to phone
Our smartphones store a huge amount of photos, videos, music and other files that are important to us. Often there is a need to transfer photos from Android to Android, for example, to share beautiful shots with family or friends. In our article we will talk about the simplest and most effective methods.
One of the fastest ways to transfer photos from Android to Android. This option is available to owners of any smartphone. Transferring files is carried out in several steps:
Among the disadvantages of this method, it is worth noting the low speed of information transfer. For those who don’t know how to quickly transfer photos from Android to Android, we recommend paying attention to other options.
Cloud storage is very popular, and this is not surprising, because they are capable of storing huge amounts of information. Users' favorite services are Yandex.Disk, Google Drive and Mail Cloud. If you need to transfer a large number of photos from Android to Android, we recommend using these options.
To work with services, you must have an account. Let's look at the process of transferring photos using Mail Cloud as an example.
After logging into the system, you will need to create a special folder into which the images will be uploaded. Click on the cloud icon at the bottom of the screen and the “Add” button. In the pop-up window, select “Create a folder” and add the necessary files. To transfer photos from Android to Android, go to the main directory with folders and click on the three vertical dots opposite the desired album. Select the “Get link” option. All you need to do is share it on a social network or any messenger.
This method is the simplest and fastest. The vast majority of users use this method. And this is not surprising, because no third-party services are required, no time is wasted on creating folders and transferring pictures. It is enough to send the image in a personal message on VKontakte or Facebook. However, it is important to remember that when you transfer photos this way, their quality is significantly reduced. Therefore, if you want, for example, to print a photo, we recommend using a different method.
Another great way to transfer photos from Android. Its advantages are obvious: instant messengers are always at hand and do an excellent job of sending images. You can share photos on Viber, Whats Up or Hike. However, this also raises the question of image quality. When transferred, it is lost, and it will no longer be possible to print a beautiful, high-quality image.
Bluetooth
Good old wireless data technology from the early to mid-2000s. Oddly enough, despite the advent of more modern means of data transmission, Bluetooth is still built into smartphones, and it continues to be updated and improved.
If you don't know how to use it, then I'll tell you briefly. To do this, both you and the neighboring smartphone must have this function activated. To do this, go to the phone settings, and in the “Wireless Connections” group, find Bluetooth, then activate it so that we can transmit and receive data.
Now go to our gallery, or the place where we have photos and click on the “Select” icon, then select the images that you want to transfer and click on the “Share” button.
You will see many methods, among which you will see bluetooth. Click on it. Well, then all you have to do is wait for your phone to find your interlocutor’s device.
But I don’t think that nowadays transferring files from Android to another smartphone via bluetooth is a good idea, because there are many methods that are much better, simpler and more convenient. And this method will be tedious, long and risky.
Transfer files from phone to tablet via Bluetooth
All devices including iPhone, Android and Windows have built-in Bluetooth. By connecting your phone to your tablet via Bluetooth, you can easily transfer files from your phone to your tablet.
Step 1 Open Settings from the app drawer or notification tray on your Android tablet. Find the Wireless Networks area and click Bluetooth .
Step 2 Turn on Bluetooth connection on your phone and confirm the connection between the tablet and phone in the interface of the paired devices section.
Step 3 Open File Manager on your phone and find the file to transfer from your phone to your tablet. Click on the file or click the menu button, then select Share from the toolbar and select Bluetooth prompt to transfer the file.
Step 4 Click Accept on your tablet.
(Files can only be transferred if the two devices have the same Wi-Fi connection.)
Bluetooth is convenient for syncing files between phones and tablets. But there are also disadvantages:
Messengers
Today, the popularity of instant messengers is growing every day. Of course! It's super convenient, simple and always at hand! I think that most people can no longer imagine their life without Viber, Whats Up or Telegram? So, it’s no secret that these platforms also do an excellent job of sending photos and videos. There are, of course, restrictions on the number of photos you can send at one time, but no one is stopping you from doing this in several attempts.
Any messenger has a special button responsible for sending an image to your interlocutors. Click on it and select pictures from your gallery or find the folder where the images you want are stored. Therefore, this method of transferring photos is probably one of the most popular.
Special Applications
Naturally, mobile application developers also did not leave us in the lurch, having developed special software for this task.
Photo transfer
A cool application for those who want to transfer photos to a smartphone or any mobile device, computer or even iPhone. Very often it is used by people who bought themselves a new smartphone and want to transfer old photos from Android to Android.
The program's interface is very convenient and understandable; in addition, the application can work in the background.
Photosync
An excellent application that was also developed for a specific task - transferring photos from one smartphone to another. The only thing is that you will need to create your account to use this program.
The principle of operation is approximately the same as when working with the cloud, you must send pictures to a special storage, and then, from another phone, pick up the photos from this storage.
In fact, there are many more similar applications, but I don’t see the point in listing each of them. They are not so difficult to find on the Play Market.
In principle, I think that you will no longer need other methods of transferring photos between smartphones, since these are enough for your eyes. Therefore, I will conclude my article today.
I hope you found the information I presented today interesting and useful, so be sure to subscribe to my blog if you haven't already. Good luck to you. Bye bye!
Do you often encounter a situation where you urgently need to transfer photos from one Andro >
So, how to transfer photos from Android to Android and what will the user need for this?
Page navigation:
How to transfer photos from Android to Android: all methods
Transferring photos from one Android phone to another is a very important point when switching to a new smartphone.
There are several ways to do this, let's look at all of them. Plus, you'll learn how to use the cloud to protect yourself from unexpected loss of photos on your phone.
In the last publication, we looked at the simplest ways to transfer contacts from Android to Android, but today the material will be devoted to how to transfer photos from an Android phone to an Android phone quickly and without loss.
Transfer photos using Google Photos
This method will be most relevant if you have two Android devices (and you are logged in with your Google account on both) and you need to transfer photos from one to the other.
The convenience of this method lies in the fact that the Google Photo application synchronizes all photos in the cloud and makes them generally accessible from all the user’s Android gadgets. This way, you can access any of your photos from any device.
To synchronize photos in this way, you just need to download the application from Google Play on both devices and activate synchronization when you first launch it.
Important! When synchronization is activated, you can set the type of Internet connection that allows you to save photos to the cloud. If you have expensive mobile Internet, then it is recommended to transfer only using Wi-Fi.
Transfer photos from Android to Android
The easiest way to do this is to simply copy them from one smartphone to another. Better yet, use an SD card for this. So, no matter where you use it, photos will be stored on it.
Via computer or laptop via USB
It is enough to connect both phones via USB to a computer or laptop and copy files from the photo folder of one device to the same folder on the other. You must connect your smartphone in data transfer mode.
The folder may be located in a different path, but it will be called DCIM. Look for it, all your photos are in it.
Transfer photos using Bluetooth
Another popular method, which has been familiar to everyone since the early 2000s, is to transfer via Bluetooth.
Despite the fact that this technology is now mainly used to connect various peripherals to the device, it can still be used to transfer photos. Of course, using this method, you can transfer not only photos, but also any other files to which you have access.
- To transfer photos, you must first activate the Bluetooth module. This can be done through the curtain with quick settings or through the phone settings menu.
Now open the stock Gallery app.
- Mark the photo you want in the list or select several.
- In the upper right corner, click on the “Exchange” button. On some devices, this button may be called “Send”, and it may also be located at the bottom of the screen.
- Confirm the transfer and reception of the photo.
A list will open in which you need to select how you want to transfer. Select "Bluetooth".
In the list of devices, select the one to which you want to transfer the photo. Please note that it must be open via Bluetooth to other devices. If it is not available, change its settings.
As you can see, there is nothing complicated, almost as easy as sending an SMS. However, this technology is already quite outdated and the data transfer speed when using this method is not very high. Therefore, it is recommended to use it only if it is not possible to transfer photos via the Internet or Wi-Fi.
Step-by-step instructions for transferring photos using a USB cable
The simplest and most popular copying method is to use a USB cable to connect the smartphone to the PC. To do this, we need a computer, our smartphone, and a USB cable, which usually comes with the phone. If you do not have such a cord, then I recommend visiting the nearest gadget store with your smartphone and purchasing the specified cord.
Do the following:
- Turn on the PC and smartphone (unlock the smartphone);
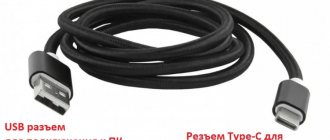
- Take a USB cable, connect one part with a smaller connector (usually a micro USB) to your smartphone in the appropriate socket, the second to the USB connector of your computer;
- In most cases, a message about switching to USB mode will appear on the screen of your gadget, and you will hear a characteristic sound (when the phone asks you to switch to USB mode, confirm the transition);
- A message about connecting a new device will appear on your PC screen, after which the detected mobile device will appear in the list of drives in “My Computer” (if your gadget uses a memory card, then both the gadget and the memory card will be displayed separately);
- Then autorun will work, and a small menu will appear on the PC, in which you will be offered various options for working with the found mobile device;
- Select “Open folder to view files” (your smartphone must be unlocked);
- You will see a list of files located on your gadget. You need to find the folder with your photos, usually it is called “Camera”, and is located in the “DCIM” directory (the English abbreviation for “images from a digital camera”).
- Find the photos you need, select them with the mouse, right-click and select “Copy”;
Select the photos you want and then click on “Copy”
- Then, using “My Computer,” go to the desired directory on your PC where you are going to copy the photo, move the cursor over an empty space, right-click, and select “Paste.”
You can also simply drag the desired photos to the PC by holding down the left mouse button (click on the desired photo, hold down the left mouse button, and drag the photo, for example, to the desktop).
After copying, it is recommended to delete unnecessary photos on your smartphone, for which you need to click on them, press the right mouse button, and select “Delete” in the menu that appears.
You can see how it looks visually in this video:
Transfer photos over Wi-Fi
Of course, Bluetooth is a very convenient technology, but its speed leaves much to be desired. What if there are a couple of gigabytes worth of photos? It cannot cope with large volumes of information, no matter how hard you try, the speed will not become higher.
If you plan to transfer photos in large volumes, then in this case it is best to use Wi-Fi.
There are great apps called TapPouch WiFi File Transfer for Phone and WiFi File Transfer. They make it easy to transfer photos using Wi-Fi technology.
Instructions for working with TapPouch Wi-Fi:
- First of all, download and install the TapPouch Wi-Fi File Transfer application from Google Play on both devices.
- Now connect both gadgets to the same Wi-Fi network.
- Launch the application.
- In order to open access to photos, it is enough to “share” them. This can be done using the “Share files” option. Of course, you need to share files on the device from which the sending will be carried out.
- When the files are selected, you need to use the “Share” button and confirm the transfer.
- On the receiving device, you must confirm the receipt of files by pressing the “Receive” button. In this case, a six-digit code is created on the device from which the shipment is sent. This code must be entered upon admission (for security reasons).
- After the transfer is confirmed, the files are saved on the memory card.
Overall, the application is very convenient and can be useful not only when transferring photos, but also other types of files.
Video instructions for working with WiFi File Transfer:
Transfer files from phone to tablet using Transfer Tool
Is there a way to transfer files from iPhone to Android tablet or Samsung to iPad via original USB cable directly? What is the best way to transfer files from phone to tablet or vice versa? FoneLab HyperTrans is a convenient and professional file transfer program that allows you to transfer files from iPhone, Android, iOS, computer to any device without any loss.
FoneLab HyperTrans is a powerful data transfer tool because it provides a series of supports:
Transfer data from iPhone, Android, iOS, computer to any place without any loss.
How to transfer files from phone to tablet using Transfer Tool
Step 1 Download and install the program, run the program on your computer. Connect your phone and tablet to your computer using the original USB cable. The program can easily detect both devices.
Step 2 Once the program detects and scans your device, you can browse and select the files you want to transfer.
Step 3 Click Export to Device . You can monitor the progress of the process and the transferred files.
HyperTrans converts files to JPEG or PNG directly if you intend to transfer HEIC images from iPhone to Android devices. Moreover, you can edit and manage files before transferring.
Note. The file transfer tool can transcode your files. Moreover, it does not require a network connection. Thus, it is more convenient to transfer large volumes of files between mobile devices.
Special software for this task
The Play Market offers a lot of useful software designed both for entertainment and for carrying out various user operations with Android. So, to carry out the task of transferring photos, you can use the convenient and wide functionality of special applications, including:
Let's look at them in more detail below.
PhotoSync - Transfer Photos
This is a development by Touchbyte. It was created precisely for this task. In addition to the main function of moving photos from one device to another as quickly as possible, it can also move video files, not only between Android, but also on iOS, Windows, Mac.
The operating principle is as follows:
- After installing the program, you need to register your account. The procedure is quite simple and takes no more than 5 minutes.
- Then you need to open the gallery through the program interface.
- Select the desired images by checking them, and by activating a special function, send everything to the cloud service.
- Now launch the software on another device and, after logging in using the previously registered account, simply move these images from the “cloud” to the internal memory or to the device’s memory card.
Modern smartphone users often wonder how to transfer photos from Android to Android. Previously, everyone used a computer for this: they transferred pictures to it, and then transferred them to the phone via a USB cable. This method has a number of inconveniences that are completely absent in modern methods. Let's look at moving photos via Bluetooth, WIFI, Google Drive and instant messengers.
How to transfer photos to a tablet?
Active use of a portable tablet necessarily entails the need to transfer files from a computer or smartphone to a device running on the Android OS. Photos may be required for working with text, creating your own accounts on social networks, setting up and uploading content to your own Internet resource. When considering the question of how to transfer photos to a tablet, you need to consider several simple methods.
Using a USB cable
When connecting tablets to a computer using a simple USB cable, the device is perceived as a regular flash drive. This makes it possible to seamlessly dump any files on the tablet, including photos.
Features of the proven method include:
To use this method, you need to have a cable on hand, but this is not always possible.
Using sharing
To do this, you need to leave a certain folder with photos open for public use. After this, by connecting to your computer using any device connected to the desired local network, you can download the necessary photo files. It’s quite convenient to work on a tablet this way; you just need to first download a special file manager. They can be found online and even downloaded for free.
Cloud storage - a new convenient way
Cloud storage is convenient for those who do not understand how the previous method works. To use cloud storage, you need to install DropBox or any other similar program. After installation, you can start using the program to upload photos. These files can be opened on any device – desktop PC or tablet.
The method will require a connection to the global network. The method is good when there is an inexpensive (free) opportunity to connect to the Internet, which will work fast enough to quickly download the required large files.
Let's use Bluetooth
This option is good for those tablets and desktop computers that are connected to Bluetooth modules. It can be used for prompt transfer of any data, including photographs. To transfer data, you will need to initiate this function on a desktop PC, and then turn on Bluetooth on the tablet.
Transfer photos using Bluetooth
This method is known to all users of push-button phones. Previously, it was the only device used to transfer files, games, music and videos. Modern smartphones also have Bluetooth, which is mainly used to connect headsets, headphones, speakers and smartwatches.
The first thing you need to do is turn on bluetooth . This can be done both from the notification shade and through the settings.
Now go to the gallery and select the photos you need. Tagged images receive a checkmark in the lower corner. Then click the “ Send ” or “ Transfer ” button.
A window opens where the selected pictures are visible. A menu appears at the bottom of the screen with possible options for transferring funds.
Now you should turn on Bluetooth on the device to which you want to transfer photos. It should appear in the open list, click on it.
Then on the display of the second phone you need to press the “ Accept ” button. The download of the selected files will begin.
You should not expect high transfer speeds from this method. Also, due to possible failures, it is not recommended to send a large number of photos. It is better to use Bluetooth transmission only as a last resort when the Internet does not work.
Transfer photos via Google Drive
Almost every modern phone has Google document storage installed by default. It is with the help of this service that you can transfer photos from Android to Android. First, turn on WiFI or mobile Internet .
First of all, open the “ Disk ” application by clicking on the icon on the desktop.
We get to the main page of the service, where the account from which you are logged in is displayed in the upper corner. To change your account, click on the image and select the desired profile from the list provided. After that, click the button “ +».
A menu opens from which we select “ Download ”.
We get to the smartphone gallery, where we mark the necessary photos and click “ OK ”.
After a few seconds, the images appear in the general list of downloaded files. Now go to Google Drive from the second device and simply download these images. To do this, click on the three dots next to the picture and select “ Download ” from the list that opens.
As you can see, transferring photos from Android to Android via Google Drive is quite convenient. All files are quickly uploaded and downloaded, allowing you to complete the operation in a few minutes.
Why transfer photos from phone to tablet
Along with a larger screen, a tablet provides you with a wide range of benefits, such as more storage space, better resolution, and of course, a backup solution in case photos are accidentally deleted from your phone. So, if you want to transfer multiple photos from your mobile phone (Android or iPhone) to your tablet (Android or iPad) without data loss and safely, we recommend using professional software such as Switch Mobile Transfer. This software is extremely reliable and allows you to get the job done in just a few minutes. Here's what you need to do:
Transfer photos using WIFI
Thanks to a wireless Internet connection, you can communicate on social networks, watch videos, visit websites, and share photos. We have compiled a selection of the most convenient services through which it is possible to transfer photos from phone to phone.
In contact with
This method allows you to use both the web version of the social network and the mobile application. You will also need to have two pages on VK. From one we will send photos, and from the second we will receive.
First, let's move on to a dialogue with our other profile. Here we click on the “ paperclip ” located next to the line with the message.
A list with possible pictures for transfer opens in front of us. To access the gallery, click " Photos ".
Mark the required images and click “ Attach ”. By the way, opposite this button the number of selected files is indicated.
Now click the “ arrow ” to send the message.
Then we go into the correspondence from the second smartphone and open the photo. In the upper right corner, click on the three dots, and then select save .
Now you know how to transfer photos from Android to Android. Among the shortcomings is the inability to simultaneously save all pictures. However, if you send photos in folder or archive format, this problem will not arise.
Another social network with the ability to send photos, videos and documents. First of all, open the mobile application or website. Of course, it is more convenient to transfer photos through program , but the web version also has enough functionality.
Now let's go to the chat with our second profile. Naturally, you need to log into it from a second smartphone. To send a photo, click on the “ gallery ” icon.
We see a list of our images, among which we mark the necessary options. After that, click on the “ Arrow ”.
Now we go to the dialogue from the second smartphone and upload pictures. To do this, hold your finger on the photo and click “ Save ”.
As you can see, we were able to transfer photos from Android to Android quickly and easily. We agree that it is inconvenient to upload each image separately. To do this, we recommend using archives into which the required photographs are loaded and sent in a convenient form.
Transferring photos via instant messengers
Now almost every second person corresponds in instant messengers. As you know, there is an opportunity to send photographs, documents, archives. It is this feature that will be used in this method.
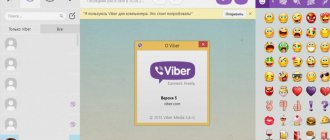
Viber
Launch the application by clicking on the icon on the desktop.
We open a chat with our second profile, which is entered from a different phone. Now click on the landscape icon, which is marked in the screenshot.
The latest saved photos are displayed in front of us. For easier selection you can go to the gallery by clicking on the icon in the lower left corner. Mark the photos you want and click on the send button. The number of photographs selected for sending will be marked next to it.
Now you have learned another way to transfer photos from Android to Android. With its help, the necessary images, videos, folders and archives are quickly and easily sent.
Telegram
The first step is to download the Telegram .
Now open the side menu by clicking on the “ three stripes ”. Here we click “ Saved Messages ”.
We get into a chat with ourselves, which allows us to use one account on two smartphones.
Here we click on the “ paperclip ” icon.
Then select “ Gallery ” and mark the desired photos. After that, click the “Send” button and send the images.
To view the transferred pictures, go to the “ Saved Messages ” section from another device and download the pictures (open the image, then click on the three dots and select “ Save to gallery ”).
Agree that the method is very convenient.
Fast data transfer between phones
Anywhere is an app that supports both sending and receiving photos directly between devices.
After installing the application, a screen will be displayed in which we must select whether we want to send the file (Send) or it can be received by someone (Receive).
We select Send. The app will now ask you to select the type of material you want to submit. For example, I want to send a photo, so I select "Photo".
A photo viewing window will appear - we mark the photos for sending and confirm the choice.
Now the screen will display a unique code for our package that we want to send. Anyone who scans this code will be able to immediately download from us until we stop sharing with the Stop button.
On the second device we also launch the "Anywhere" application, but this time we select "Receive", which means receiving the file.
In the ID field, enter the number of the downloaded package and confirm it. Phones will connect to each other and data will be transferred. To stop sharing the file and deactivating the code, click the Stop button in the lower left corner.
Anywhere makes the file available as long as we are on the screen displaying our package key.
When you click the Stop button, the code will become invalid and no one will be able to download the file until you enable it with a new key.
If you would like to share the file for a longer time and leave a link to someone, then after selecting the photo and receiving the code, use the "Upload" option in the bottom right corner.
The file will then be uploaded to the server and a permanent link will be created. You can share the link with a friend via email or Facebook Messenger.
Your friend will be able to download the file even if the app and phone are turned off. The link is valid for one day.
You can also control your files shared in this way from within the application. In the sidebar, you'll find a File on Server tab that displays files that have been in use longer. We may receive links to them again or remove them from the server.
Transferring photos via email
Almost every user has their own email account. This could be mail from Google, Yandex, Mail and another service. We will show the instructions using the example of the Gmail program, which is installed by default on most smartphones and tablets.
First of all, let's open the application.
Then click "+».
In the “ To ” field we indicate the recipient’s address, and in the subject field you can specify any word. Now click on “ paperclip ” and attach photos from the gallery.
Next, click the send button and download the pictures on the second phone.
As you can see, this method allows you to transfer photos from Android to Android, as well as sign the images with a text message. The advantages include high sending speed and ease of downloading. You don’t need to open each image separately, just click the “Download” icon. This makes it possible to upload many images in one click.
Transfer files from phone to tablet with Dropbox
Step 1 Download and install Dropbox on your phone and tablet.
Step 2 Present Dropbox on your phone and sign in to your account. Then create a new file transfer folder and click More icon to open the file upload interface.
Step 3 Select the files you want to transfer and check the files you want, then click Upload to transfer files from phone to tablet.
Step 4 Open Dropbox on your tablet and sign in to your account, then select and upload the files you downloaded from your phone.
Apart from the 5GB free storage limit, there are also some coding issues for downloading files from Dropbox to the tablet and the procedure will take a long time to complete without a stable Wi-Fi connection.