Using a USB cable
Method 1: standard connection
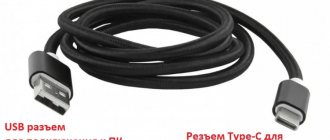
1. Connect one end of the cable to your phone and the other to your computer.
2. Your phone will prompt you to use USB. Select Photo Transfer or File Transfer.
3. On your PC, go to the “Computer” folder, open the icon with the name of your device.
A menu will appear with a choice of built-in or external memory.
4. Go to the desired folder with photos - they are usually stored in DCIM.
5. Select the pictures with the left mouse button. Right-click on any selection and select “Copy.”
You can select all files at once using the keyboard shortcut Ctrl + A (Russian F).
6. Create a new folder on your PC. Go into it and paste what you copied using the right mouse button.
To create a new folder, right-click on an empty space (for example, on an empty area of the Desktop), select New - Folder from the list. Then type a name for it. Read more about this in the lesson “How to create a folder”.
Ready!
Now the photos are on both your phone and computer in a separate folder.
On a note. It happens that when connected, the smartphone does not show the selection menu, but it immediately starts charging. Then try inserting the cable into another USB port on your computer. If that doesn't help, restart your phone and PC.
If the menu still does not appear, the cable or connector may be damaged. In this case, use other methods: Wi-Fi, Bluetooth, cloud services, etc.
Method 2: using a proprietary program
Many smartphone manufacturers have a proprietary program for PCs. As a rule, such programs allow you not only to transfer photos, but also to make backup copies of other data. For Samsung phones this is the Kies program, for MI it is MI PC Suite, for iPhone it is iTunes.
Using SD card
This method of transferring files is also better suited for laptops that have a slot for inserting an SD card. Of course, you can buy a special adapter in the form of a flash drive, where you can then insert the SD, but this is too lengthy a process.
Algorithm of actions:
- Find all the files you want to send in File Explorer.
- Select them, and then select the “Copy” or “Move” command.
- A window for selecting a new location will open. Select your SD card (assuming you have one, of course).
- Wait until the copy is complete.
- Remove the SD card from the device. On modern devices, this requires using a needle to push out the SIM card slot, where the SD card is usually installed.
- Insert the SD into your computer. Be careful not to mix up the sides. Sometimes this results in the card getting stuck.
- In Explorer, find a new object - SD card.
Ready. Thanks for reading.
Via Wi-Fi
Method 1: Using Explorer
Before you start, make sure your File Explorer supports file transfer over Wi-Fi. If not, install "File Manager +" from the Google Play Store.
Action on PC: open general access
1. Right-click on the folder into which you will transfer the photos. Select Properties.
2. Go to the “Access” tab and click on the “Sharing” button.
3. Click on the user selection field and select “All”.
4. Make sure the permissions are set to Read & Write. Click "Share".
Done: access to the folder is open. Next we need the computer's IP address.
5. In the Start menu, type “Command Prompt” and open the program.
6. Type the ipconfig command and press Enter.
Remember the address in the “IPv4 address” line.
Action on smartphone: connecting to a folder
1. Go to the smartphone explorer and open “Remote Services”.
2. Select “Local network”.
- In the “Host” field, enter the IP address of the PC.
- Type the username and password to log into the computer and click “OK.”
3. A shared folder will open where you can copy photos from your phone.
Method 2: Using SHAREit
If the previous method seemed complicated, you can take a simpler route and install the SHAREit application on your smartphone and computer.
Step 1: Download
Install the SHAREit app from Google Play on your phone.
On your PC, follow the link ushareit.ru to download and install the program.
Step 2: Launch and Exchange
1. Launch the program on your PC and click the “Show barcode” button.
A barcode will open, which we will scan on the phone.
2. Launch the SHAREit application on your smartphone and click the “Submit” button.
3. Select images from the gallery and click "Submit".
4. In the recipient search window, select “Connect to PC.”
5. Point your smartphone camera at the barcode of the SHAREit program. The connection and data transfer will occur.
6. A notification about the successfully received file will be sent to your PC.
By default, you will find all transferred photos in the “Downloads” – “Phone” – “photo” folder.
The first way to view photos from your phone on a laptop or computer is to connect via a browser
If you don't want to install any software on your computer (or just want to quickly connect from your computer), all you have to do is go to Mobizen.com in your browser.
The login panel will be displayed. Enter your email address and password for the account we created from your computer and sign in.
After some time, the connection with our device will be established and the control panel will be displayed.
On the main screen you will find a preview on the right. Everything we do on the phone is constantly displayed here.
Using the vertical bar with buttons next to it, we can record video material from the screen, as well as take a screenshot.
Via Bluetooth
If you have an old phone that doesn't have Wi-Fi but has a camera and Bluetooth, this method is for you. But for it you must have a Bluetooth-enabled laptop or a separate Bluetooth transmitter.
1. On a PC, right-click the Bluetooth icon on the taskbar and select Accept File.
2. Open your smartphone's gallery and mark pictures to send.
3. Click the "Bluetooth" icon to start the transfer.
4. After a short scan, the found PC will appear in the list. Click on it and the selected photos will be sent automatically.
5. Click on the “Done” button to save the data.
How to see how much free space is on your device.
- Connect your phone or tablet to your computer.
- If the AutoPlay dialog box opens, select Open device to view files.
- In the Explorer window, click on the device name (12).
- Look at the panel for the amount of remaining free space (13).
Smartphones or tablets running Andro >
Using the Internet
All photos can be uploaded to a cloud service, instant messengers or social network. Then download them to your PC at any convenient time, even without having your phone at hand.
Method 1: via the cloud
Let's consider two popular repositories: from Google and Yandex. They provide free downloads of files up to 10 GB, which is more than enough for our purposes.
Google Drive
1. Install Google Drive on your phone from the Google Play store.
2. Enter your Google account username and password.
3. After successful authorization, click on the “+” icon in the main menu.
4. Select "Download".
5. Go to the gallery, mark the photos and click “Open”.
The photos will be downloaded from the phone to the disk.
6. On your computer, go to the official website drive.google.com
Log in to the account through which you uploaded the photos on your smartphone.
7. Select the required data with the mouse and hold down the Ctrl key, right-click and select “Download”.
8. The disk will create an archive with the selected photos and download it to the PC in the “Downloads” folder.
Yandex.Disk
1. Install the Yandex.Disk application from the Google Play store on your phone.
2. Log in with your account, that is, enter your Yandex mail username and password.
3. Click on the “+” icon to add files.
4. Select “Picture from Gallery”.
5. Select photos to upload and click “Select”.
All selected files will be downloaded.
6. On your computer, go to the official website disk.yandex.ru and log in using the same data (mail login/password).
7. Select the pictures and click on the “Download” button.
The pictures will be packed into an archive, which will be transferred to the “Downloads” folder.
Method 2: via messenger
Modern instant messengers have both mobile and desktop versions. You can use this function to send photos to yourself and download them to your PC.
Telegram
Add your number to your phone book. Your profile will be automatically added to the “Your contacts” field, click on it.
Or simply open the Favorites folder in the Chats section.
Click on the "paperclip" icon to attach the data.
Select images from the gallery and send them to yourself.
Now install the program on your computer from the official website desktop.telegram.org and download the pictures through it.
Viber
Add your number to your phone book and open a dialogue with yourself in chats.
Or simply select the “My Notes” folder in chats.
Click on the camera icon.
Tag pictures from your gallery and submit them.
Install the desktop version on your PC - you can download it from the official website viber.com. And through it save the images to your computer.
Method 3: via social network
Any social network has the ability to create an album. You can use this function to move pictures to a new album and then download them to your PC.
To avoid errors during downloading, I recommend using the original application (not the web version).
I’ll show you how this is done on the VKontakte social network.
Open the Photos section of the app.
Create a new album using the “+” button.
Click the "Add Photos" button and upload them from the gallery.
On your computer, go to vk.com and log in. Go to the "Photos" section.
Open an image in an album. Right-click on it, select “Save Picture As” and save it in the desired folder.
Method 4: via email
This method is suitable if you need to transfer a small number of pictures.
All you need to do is go to the application to send emails. You can use the built-in Gmail.
Click on the "+" icon to create a new message.
Enter your email address. Click on the "paperclip" icon to attach files.
Select images.
Click on the "envelope" icon to send.
Open your mailbox on your computer and download the files.
The third way to view photos from your phone on a laptop or computer is through Windows 10 tools
Go to Windows 10 Settings and select the “phone” item (this is in version 1903, in others it may be a little different, and in very old ones it may be completely absent).
If you do not have a linked device, and at the time of writing you can only link one, click on the blue “Add phone” button.
Now you will need to sign in to a Microsoft account, and if you don’t have one, create one. This only happens once – it won’t be needed in the future.
After logging in, you will be offered a choice - select Android or iPhone, and then click “Continue.”
Next, the system will prompt you to install the application on your phone - this is also done only for the first time.
Write the correct number and click send. In a few seconds you will receive a message with a link to download the application. Check your phone or click on the download link.
After installing the application in it, you need to log in to the same account in which the laptop or computer is located.
After this, you can view your photos on a laptop or computer (it is advisable that the phone’s power saving mode is turned off and that the phone and laptop are on the same Wi-Fi network).
You can not only view photos from your phone, but also copy them, share them, or immediately save them in a convenient place.
Are there any disadvantages? Is there. You can only view the last 25 photos. That's all. Good luck.
Source
How to copy a drawing in Paint?
Copy and paste
- On the Home tab, in the Image group, click Select and drag to select the area or object you want to copy.
- In the Clipboard group, click Copy (Ctrl + C).
- In the Clipboard group, click Paste (Ctrl + V).
Interesting materials:
What does a tiger eat in the wild? What do the Ussuri tiger eat? How to feed cyclamen during flowering? How to feed an azalea after flowering? How to feed Gloxinia for flowering? How to cover a concrete porch? What are the benefits of thyme herb? How is Eleutherococcus beneficial for men? What are the benefits of ginger and how to use it? What are the benefits of quince compote?