In some cases, users are looking for an answer to the question of how to change the creation date of an Excel, Word, PowerPoint, JPG, PDF, MP3, MP4, or other file format. Such an operation is necessary in situations where, for some reason, you need to change the creation dates of a file by changing its properties.
How to change the creation date of a file, is it possible to change the creation date of a file? Yes, similar manipulations can be performed with files or folders in Windows. You can set any other date and time, both in the past and in the future.
This may be needed, for example, when you need to hide something, or pass off outdated files as new, recently created ones. These can be Word, Excel, PowerPoint files, files of other text formats, video, audio, photographs or other images. To solve this problem, we change the file creation date.
Before answering the question of how to change the creation date of a file, you first need to find out where this information is located in the file properties.
How to view the creation date of a file
In the operating system, files or folders retain created, modified, and opened date properties. The file creation date is displayed in the file properties.
To view this information, follow these steps:
- Right-click on the file or folder.
- In the context menu, click on the “Properties” item.
- In the properties window of a file or folder, in the “General” tab, information will be displayed about when the file or folder was created, when it was modified, when it was opened.
When creating or changing a file, Windows uses the current time in the operating system. The properties of the file or folder indicate the corresponding time, so we need to change the Windows file creation date.
You can change the file creation date using the Windows operating system or using third-party software. In this guide, you will find instructions on several ways to solve this problem, with the help of which we can change the creation or modification date of the file.
Issues
If in the course of your activities you pay attention to such attributes as dates of creation, modification, last access, then this article may be useful to you. After interviewing several people, I saw that in fact, tricky questions about timestamps stump many people. In fact, it would seem that there is nothing simpler - the creation date is when the file was created. Modified date – when changed. Last access date – when the file was accessed. Just? If this seems simple to you, then I suggest answering a number of questions for self-control. If the questions turned out to be simple for you and did not cause any confusion, then you can safely read other articles - there is nothing useful for you here. But if the questions made you think, then you are welcome...
How to change the creation date of a file in Total Commander
Using the popular file manager Total Commander, you can change the date and time of file creation. In Total Commander you can change the properties of one file or several files at once in batch mode.
The following recommendations must be followed:
- Open Total Commander on your computer.
- Select a file or multiple files.
- Go to the “Files” menu, in the context menu click on “Change attributes...”.
- In the "Change Attribute" window, check the "Change date/time" box, and then set the appropriate date and time.
- Click on the "Add attribute" button.
- In the “Field:” option, select “Date of creation” from the context menu, in the “Value:” option, click on the button with double quotes.
- The “Creation Date” window will open, in which you can change the date and time the file was created.
- Click on the "OK" button in both program windows.
- Make sure that the new date and time values appear in the file properties.
In Total Commander, you can change the date and time of modification, the date and time of last access in a similar way.
You may also be interested in:
- How to rename all files in a folder using Total Commander
- 5 ways to get a list of files in a folder
Changing dates using Windows OS
In fact, each file has three dates: creation, modification and last opening. The last two may be the same or may differ, because opening a file does not mean that changes will necessarily be made to it.
We have to admit that Windows does not allow you to change the creation date of existing files. The only thing you can do is create new files with any date, past or future. This is achieved by correspondingly changing the system time. The method is limited, very far from elegant, and besides, a situation may arise when the file modification date may turn out to be less than the creation date, which, of course, is nonsense.
But there is a way out - using programs from third-party developers. We bring to your attention a small list of such utilities with a description of their capabilities in terms of editing dates.
How to change the creation date of a file's contents in NewFileTime
NewFileTime is a free program that changes the creation date of a file. The program does not require installation on your computer; it is launched from a folder. The application supports Russian interface language.
NewFileTime can be downloaded from the official website using this link. After downloading to your computer, unpack the archive with the program.
In the NewFileTime program, follow these steps:
- When you launch for the first time, accept the terms of the license agreement.
- Drag a file or several files into the program window.
- In the fields “Date of modification”, “Date of creation”, “Date of access”, set the required values.
- Click on the “Set time” button.
- Close the program window.
Changes have been made to the file properties regarding the date the file was created, modified, or opened.
PowerShell Commands
If it is not possible to install third-party programs, you can change the date manually. To do this, you need to use the PowerShell command line. To launch PowerShell, you can press the Win-R key combination and run the command “powershell” or search in the Start menu.
After starting PowerShell, you need to run commands that will change the document information.
Below are examples of such commands for editing the creation date, modification date, and access date of a file (D:\tmp\file.txt). (Get-Item "D:\tmp\file.txt").CreationTime=("3 August 2019 17:00:00") (Get-Item "D:\tmp\file.txt").LastWriteTime=(" 3 August 2019 17:10:00") (Get-Item "D:\tmp\file.txt").LastAccessTime=("3 August 2022 17:10:00")
The screenshot below shows how these commands look in PowerShell console.
If you need to make changes for all files in the folder (“d:\test\” and in subfolders), then you need to use the following commands:
Get-ChildItem -force d:\test\ * | ForEach-Object{$_.CreationTime = (“3 August 2022 17:00:00”)} Get-ChildItem -force d:\test\ * | ForEach-Object{$_.LastWriteTime = (“3 August 2022 17:10:00”)} Get-ChildItem -force d:\test\ * | ForEach-Object{$_.LastAccessTime = (“3 August 2022 17:10:00”)}
If you need to make changes only for files (without traversing nested subfolders), then you need to use the following command option:
Get-ChildItem -force d:\test\ * | Where-Object {! $_.PSIsContainer} | ForEach-Object{$_.CreationTime = (“3 August 2019 17:00:00”)} Get-ChildItem -force d:\test\ * | Where-Object {! $_.PSIsContainer} | ForEach-Object{$_.LastWriteTime = (“3 August 2019 17:10:00”)} Get-ChildItem -force d:\test\ * | Where-Object {! $_.PSIsContainer} | ForEach-Object{$_.LastAccessTime = (“3 August 2019 17:10:00”)}
How to change the creation date of file contents FileDate Changer
FileDate Changer is a free program from the famous software developer NirSoft. Download the FileDate Changer program from the developer's website here.
Unpack the ZIP archive with the program, and then launch the application on your computer.
Follow these steps:
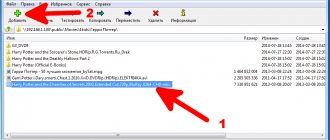
- Drag the file into the program window, or click on the “Add Files” button to add a file from your PC. Supports working with files in batch mode.
- In the fields “Created Date”, “Modified Date”, “Accessed Date”, set the appropriate values for the date and time.
- Click on the "Change Files Date" button to apply the changes.
- Close the FileDate Changer program and check the result.
Adding transitions
The last aspect regarding slides is setting up transitions. This function allows you to define the effect or animation of how one frame will replace another. This allows for a smooth transition between pages, and overall it looks very nice.
- The settings for this function are located in the tab of the same name in the program header - “Transitions”.
The first area, called Transition to This Slide, allows you to select the effect with which one slide will follow the next.
When you click on the corresponding button, a complete list of all available effects opens.
To further customize the animation, you should immediately click on the “Effects Options” button.
The second area - “Slide show time” - opens up opportunities to edit the duration of the automatic show, the type of transition switching, the sound during the transition, and so on.
With these settings, the presentation looks better when viewed. But it is also worth noting that a large number of slides with such transitions can significantly increase the presentation time due to the fact that it will be taken up by the costs of transitions. So it is best to do such effects for small documents.
How to change file properties, creation date in BulkFileChanger
BulkFileChanger is a free utility from NirSoft for bulk changing file properties, an analogue of the FileDate Changer program with advanced capabilities. Download the program from the official website. Download links are located at the bottom of the page, where you also need to download the localization language in order to Russify the program.
Complete the necessary steps:
- Unpack the archive with the program and the archive with the Russian language.
- Place the Russian language file in the program folder.
- Launch the BulkFileChanger program from the folder.
- Add a file from the application interface or drag and drop files from your computer.
- Enter the “Actions” menu, select “Change time/attributes” in the context menu.
- In the File Date and Time section, set the appropriate values.
- Click on the "Run" button.
- Close the program, look at the file properties.
EXIF Date Changer
This utility is not one of the universal ones, which is why we placed it at the bottom of the rating. Although the program copes well with the task of changing file dates, it can only work with images - photographs, drawings, icons, etc. Note that it cannot be called useless - the task of changing the date and time of taking photographs is not so rare.
As for the rest of the functionality, it is quite extensive, and a significant part of the functions concerns the settings of the images themselves, so we will not consider them.
Modification of dates/times is carried out in the “Time Difference” tab, located in the top menu of the lower block of the program. But before that, you should select a folder with images (All images in source folder) or a single file (Selected images). The format support here is quite complete.
As in the previous utility, it is possible to increase/decrease the creation date of graphic files by a specified number of days, up to a second. You can enter the desired date manually or use the built-in calendar. In the program properties, changing the file creation time is initiated by clicking the large Process Photos button. Note that this functionality is available in the free version of the utility, and if you want to use advanced options and photo settings, you will have to think about purchasing the Pro version.
Working with EXIF editors
We figured out that information is linked to photos using the EXIF standard. Accordingly, special editors should allow you to change any metadata. As an example, consider the free program ShowEXIF.
This small utility that does not require installation is equipped with all the necessary tools for working with metadata. Changing the record of when a photograph was taken is one of the standard and frequently used functions.
- Launch ShowEXIF. Select the folder in which the incorrectly dated images are stored via the directory tree on the left.
- Expand the “Tools” menu and expand the “Date/Time Operations” section.
- Select the Change date and time in EXIF section tool.
- Enter the required number and click “Write.”
The number you specify will be included in the metadata of all files located in the selected folder. Therefore, if different images require different creation marks, then scatter them into separate folders and repeat the procedure for each folder.
The same actions are performed through the ExifPilot program and a number of similar utilities, so that you can quickly change any image data if desired. Probably, such a small falsification will not pass a serious test, but at first glance everything will look as if no changes were made, because the basic information about the photo will remain untouched.
https://youtube.com/watch?v=bO2nYG7stAI%3F
28609
dateeditphoto
Changing file associations through the registry in Windows 10
As we said above, in Windows 10 the approach to changing file association settings has changed. In the previous section, we showed how to configure the association of a .html file with the Firefox browser through an XML file and group policy. Now let's see how it looks in the registry.
Run the regedit.exe editor and go to the Computer\HKEY_CURRENT_USER\Software\Microsoft\Windows\CurrentVersion\ Explorer\FileExts\.html\UserChoice branch.
Please note that in this branch with association settings for the html extension there are two parameters:
- ProgId – identifier of the registered program for opening this file type, which is specified in the XML file. If a long identifier is specified instead of the application name, then the file is associated with a modern UWP/Metro application. Check that it is not removed from your Windows 10 image;
- Hash is a hash that is generated automatically to validate the file type mapping settings to the program. The presence of this hash ensures that it was the user or administrator (via GPO) who configured this mapping. This mechanism is needed to protect users from malware that can change file associations without their knowledge.
If you try to manually change the ProgId value and assign another program, the Hash value will no longer be valid. In this case, Windows 10 will automatically reset the file association settings to the default value. In this case, the user will see a notification:
The default app has been reset. The app was having trouble setting up the default app for .html files, so it has been reset for Microsoft Edge. An app default was reset.An app caused a problem with the default app setting for .html files, so it was reset to Microsoft Edge.
Accordingly, in Windows 10 you will not be able to configure file associations through the registry, as it worked in Windows 7.
There is an unofficial utility on the Internet called SetUserFTA.exe, which allows you to calculate the hash and assign a program to a file type directly through the registry.
Editing in properties and through Windows Photo Album
The easiest way to change the date of a photo is to edit the corresponding column in the properties. The operation is performed in three steps, so you definitely won’t get confused:
- Open properties.
- Go to the "Details" tab.
- Find the line “Date of shooting” and change its value.
Click Apply to save the new entry. Now the parameters will contain the time that you specified yourself. The rest of the data will remain untouched, meaning the substitution is almost impossible to notice. You can create a presentation for a report and not worry that someone will suspect something is wrong.
If Windows has the Photo Album component installed, you can use its capabilities to edit data.
- Launch the Photo Album application.
- Select the directory where the photos are stored, the information about which you want to edit.
- Go to the View tab and o.
A time stamp will appear under each photo.
Click on the line and change the saved data. You can also change the time of photography if this is important. This is the advantage of the method using the Photo Album: other methods do not provide the opportunity to enter a different time
