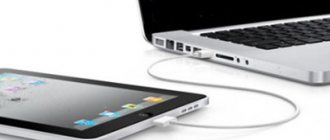
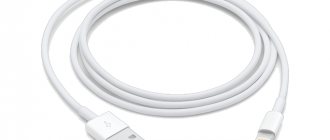
We connect our iPhone to the computer to copy photos, videos or documents, but we cannot access its folders and files. Why doesn't the computer see the connected device?
In our instructions you will learn how to quickly restore access to your Apple smartphone. See how in a simple and effective way you can fix the error that prevents your smartphone from connecting to your computer via a USB cable.
We explain why the computer does not see the iPhone via USB and how to fix it
First steps
You need to start with the simplest steps before looking for deeper sources of the problem:
- disconnect your iPhone and restart your computer;
- restart your iPhone;
- Make sure your Windows system is updated to the latest version;
- close all programs running on the computer;
- temporarily disable your antivirus and firewall - they can block communication between your computer and iPhone;
- check the USB cable for damage;
- use original Apple cables; options from third-party manufacturers may be cheaper, but of lower quality;
- try using a different USB cable;
- Make sure there is no dirt or damage on the USB ports on your computer and iPhone;
- If your smartphone's auto-lock is active, unlock it with a password;
- Make sure your iPhone is displaying the Home screen;
- reconnect the iPhone to the computer with a USB cable;
- do not use external USB hubs, but connect the iPhone directly to the port built into the computer;
- if you have a desktop PC, connect your iPhone to the USB slot on the motherboard;
- if iPhone shows a dialog box, select "Trust my computer";
- give the computer a few minutes to recognize the connected smartphone;
- Open My Computer and make sure the connected device appears as an iPhone, iPad, or iPod touch and not as a folder with an iPhone icon.
If the computer still does not see the iPhone
iPhone Drivers and Windows Computers
Windows computers need iOS drivers to correctly recognize iPhone, iPad, and iPod touch devices. If the device is not recognized, the drivers may not be installed, may be out of date, or may not be configured correctly. Drivers are installed using the iTunes media player, but there are other methods for installing them.
Installing iOS drivers without iTunes
Many people find iTunes cumbersome and inconvenient. Therefore, there is a tool for installing iOS drivers on a computer without iTunes, which can help you recognize your iPhone in a few minutes. CopyTrans Drivers Installer installs drivers automatically.
Installing, updating or restoring iOS drivers via iTunes
iTunes is not installed
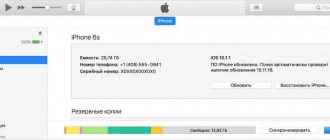
If iTunes is not on the computer, the computer will not recognize the iPhone correctly as a camera. When connecting an iPhone, you only have access to the camera gallery. You can't see, sync, or back up music, messages, videos, or other content on your device.
To get iOS drivers from iTunes, download them from the link.
iTunes is already installed
The version of iTunes may be outdated and may not support iPhone. Update iTunes by going to Help > Check for Updates.
iTunes is installed and updated, but the iPhone does not recognize:
- completely remove iTunes and its components from your computer (the contents of the library will not be deleted);
- restart your computer;
- reinstall iTunes;
- check your iPhone connection.
If problems remain
iTunes is installed, but iPhone does not recognize it
Check the Apple Mobile Device service:
- Log in to your PC using an administrator account and temporarily disable the antivirus;
- in the search in the Start menu, enter the command services.msc and press enter;
- in the Services window, find Apple Mobile Device Service, right-click and open Properties;
- in the properties window, make sure that the service is running and that the startup type is set to automatic;
- restart iTunes.
Second, make sure the Apple Mobile Device USB Driver is installed and active:
- Log in to your PC using an administrator account;
- connect iPhone with iTunes closed;
- in the search, type “Device Manager”;
- open the “USB Controllers” section, find the Apple Mobile Device USB Driver in the list;
- if this line is not present, iOS drivers are not installed. Install them.
If you see a "!" next to the Apple Mobile Device USB Driver line, right-click on the line and click “Enable”. If you see a "?" next to the line Apple Mobile Device USB Driver, right-click on the line and click “Uninstall”.
- Select the “USB Controllers” line with the right mouse button and click “Update Hardware Configuration”.
- Windows will try to automatically install the necessary drivers and recognize the iPhone.
It is possible that you can find out the reasons why the computer does not see the iPhone via USB and fix it using another method. We'd love for you to tell us about it in the comments below.
Installation and connection
Installing it and launching it will not take much time - all the instructions for this process fit into a couple of paragraphs. It takes up little disk space. There are two versions of the program: for Windows and for MacOS.
As soon as the iPad is connected to the computer, the application will immediately identify it and indicate it in the upper right corner.
Immediately after launch, the window provides access to files on the tablet, to applications, and also to the AppStore, from where you can download music, books, movies, and games while at the computer.
It happens that iFunbox does not see the iPhone or iPad. In this case, you need to completely remove iTunes from your computer and install it again. You need to delete it completely - that is, so that no traces remain either in the registry or in other places.
Why doesn't the computer see the iPhone?
The most common answer to the question of why the computer does not see the iPhone is a problem connecting to the iTunes service. Sometimes, to solve this problem, you need to click confirm connection to PC on your mobile device. If after this action the PC does not see the iPhone, it is worth checking the functionality of the USB port. Problems may arise due to old versions of programs, applications and drivers for motherboard chipsets. In other cases, consulting a specialist will help to find out the cause of the situation.
Cable breakage
The main reason for the device not connecting to the PC is a faulty or damaged connection cable. Inspect the existing USB cable for damage. There are cases when the contacts inside the wire are damaged (this is difficult to identify visually) and the computer does not see the iPhone. To check, compare the operation of the device with another cable: if the problem is in the accessory, then everything will work out. Have you verified that the cord is damaged? You can solve the problem as follows:
- purchase a new cable;
- try to fix it yourself;
- contact a specialized service center.
iPhone won't connect to computer via USB
The second most common are problems with USB ports: the connection is unstable or the device cannot be detected at all. There may be mechanical damage to the connectors of both the PC and the mobile device itself or their clogging. It is possible that if there is no synchronization, the computer does not see the iPhone: its operating system is outdated. Often there may be a solvable problem with the USB driver. The interaction between the PC and the phone is affected by security programs, which can also prevent the connection.
Error when starting the Apple Mobile Device service
Restarting the mobile device or laptop helps resolve the desynchronization issue. It happens that the PC is unable to start the Apple Mobile Device service. The obstacle may be third-party software or a regular “glitch” that can be corrected by restarting this service. The way to correct incorrect operation is to reinstall, which is done simultaneously with the reinstallation of all iTunes software components.
Why doesn't iTunes see iPhone?
Users of Apple devices constantly encounter problems interacting with their PC. In some cases, iTunes does not work on the computer, in others errors are displayed. Reasons for lack of response may be a faulty cable, USB port, or charger slot. An Apple service status error, old drivers, antivirus blocking, or malware influence occurs. An outdated version of iTunes or the device’s operating system interferes with normal synchronization and, as a result, the computer will not be able to see the iPhone.
Problems with iPhone
A laptop or PC will not be able to recognize the connected device when the iPhone is not working. It may not respond to clicks or touches on the screen, or it may simply turn off. Try to force restart your iPhone. Hold the bottom Volume button (for newer models) or the Home button (for iPhone 6 and below) and the Power button until the “Apple” appears on the display.
On average, this takes about 10 seconds. Otherwise, connect your phone to charge for at least an hour. Typically, the device starts charging within a few minutes. In case of failure, it is worth checking the integrity of the connector, cord and adapter. Parts must be undamaged and clean. After making sure that the charging system is visually in order, but the computer does not see the iPhone, you will have to use the help of a service center.
Disabling Fast Startup
Disabling the Fast Startup feature in Windows 10 can also resolve the USB recognition error. To do this, follow these steps.
Go to the Power Options section using the powercfg.cpl command, launched from the Run window (Win + R).
In the left pane, select "Power Button Action."
Click on the "Change settings that are currently unavailable" option to access the shutdown settings. Uncheck the option to enable Fast Launch, apply the changes, and close the window.
After the system restarts, plug in the USB device and see if the notification appears that it is not recognized.
Note: If the problem persists, reverse all settings back.
What to do if the computer does not see the iPhone
Users may encounter an issue where they receive an invalid iPhone response when trying to connect. This often happens due to the Lockdown folder in Apple software files. The fix for this problem is simple. Windows users need to go to the Apple folder in Explorer under Application Data or ProgramData and delete the folder called Lockdown to the trash. After the reboot, iTunes should resume, and the PC will begin to recognize the Apple communicator.
How to connect an iPhone to a computer via USB
Each Apple mobile gadget comes with a connecting cable. It connects an iPhone to a computer via USB using the principle of a flash drive for the purpose of exchanging videos, files, photos and others. In addition, you will need a PC with the latest version of iTunes installed. The disadvantage of this method is the physical attachment to a stationary PC or laptop. The process goes through stages that are important for you to complete:
- connect the USB cable to the device;
- connect to PC;
- Next comes the installation of iTunes (if this program has not been installed previously);
- launching and setting up synchronization.
Component malfunction
If the device is not recognized, then it would be a good idea to check the functionality of the computer hardware. In some cases, the iPhone is not visible in iTunes for the following reasons:
- The USB port on your iPhone is broken or clogged. Then the device will not charge and be recognized by other PCs and Macs.
- The USB port is faulty. Connect your iPhone to a nearby port or check its functionality using another device.
- A non-original USB cable is used. To synchronize data, choose only Apple branded cords.
If the reason is indeed faulty ports or cables, then problems with synchronization may also arise when connecting other mobile devices or flash drives to the PC.
What to do if iTunes doesn't see iPhone
In cases where the iPhone does not connect to iTunes, you can use the standard set of tips:
- check the integrity of the cable, phone connector, USB;
- allow the connection by clicking OK in the pop-up window on the device screen;
- update drivers, phone or PC OS;
- install the iTunes update or simply restart the program;
- restart Apple Mobile Device;
- Restart your iPhone or PC.
How to reinstall Apple Mobile Device
When Apple Mobile Device Service does not start, it is worth making several attempts to download it again. To do this you need:
- turn off the phone, turn off the iTunes application;
- for Windows OS, write services.msc in the command line;
- in the window that appears, find the service we need and open its properties;
- change the startup type to “Automatic” and stop the service;
- After waiting a little, click the “Run” button;
- Restart your computer and reconnect your iPhone via USB by opening iTunes.
If there is no solution to the problem, you will have to install this software component again. Removing and reinstalling Apple Mobile Device Service involves simultaneously removing and reinstalling all iTunes items. In the Program Files section, search for and delete the iTunes, iPod, Bonjour folders. In the Apple folder, Common Files section, delete Apple Application Support, Mobile Device Support, CoreFP. Then download the new installation file from the Internet and follow the simple instructions on how to connect your iPhone to your computer to restore operation.
Fixing the error
These methods will mainly help for connecting USB 2.0 or 3.0 flash drives or hard drives. Problems with a broken cable or physical damage are not solved in this section - I first recommend diagnosing your device on another computer.
Below I try to list all the current ways to solve this problem. Some things will work out for you, some things won't. We try, we do, we don’t whine.
Primary actions
If we receive an error for the first time, we try trivial methods based on a physical connection:
Trite? Yes. But 95% of cases, these four steps are easily closed. If it doesn’t help, I recommend connecting the same device to another computer or laptop - will it even work? This way you can determine that the problem is specifically in the computer hardware or depends solely on the software (usually drivers, updates).
Drivers – Search
Not always, but usually the error occurs due to the inability to select a driver or due to its absence altogether. Of course, your case may be different. But I would still check. I will show the steps below using Windows 10 as an example, but if you have something different, look for analogies yourself.
The search will take place without your participation (the Internet must be connected). For some, such banal automation helps. Did it help you? If not, let's move on.
It works especially well with error code 43. If you wish, you can search for the driver not automatically, but poke it manually among the installed ones or even download it from the official website.
You can also use automatic third-party driver installers. Personally, I prefer Driver Pack Solution, but there are really many others (look only for free solutions). The main disadvantage of DRP is that during installation it will try to install some unnecessary software for you. Therefore, only the administrator mode in the program and carefully checking all the checkboxes, then all drivers are updated just fine.
This is more from personal experience. I had one disk with the manufacturer’s native drivers. But after installing the “ten” (and she likes to pull the latest drivers) – it stood up tightly. Conclusion from history: sometimes you don’t need to install the latest drivers, and only a specific version will do. Usually the manufacturer writes this (but not always). Therefore, for experiments, you can download an older driver and test it.
Drivers - Rollback
You can also try to roll back the existing driver - what if it was installed incorrectly, then it is better to remove it completely.
As a note. The uninstall method works great when you need to install the driver manually. Those. you already downloaded the installer, but the system installed something wrong without you, and now nothing works. Then we do this - turn off the Internet (so that nothing is downloaded), roll back the drivers (until the button turns gray, you may have to repeat several times), and at the end we delete and reboot the system. After such a reboot, you can start the installation again. Sometimes you can simply try to install the driver on top, but removal always works flawlessly.
Power management
In VERY certain cases))) The essence of the problem is that USB hubs turn off the power, and as a result, a lack of power leads to the indicated problem. Which is what I asked at the very beginning to poke different ports. You can also disable this shutdown feature here.
What to do if the computer does not see the iPhone as a removable drive
The main reasons why an iPhone is not detected as a flash drive (removable disk) are the following problems:
- USB connection failure;
- problems with iTunes components;
- problems with the device.
To correct the situation is real, it is important to find out what was the result of the error. A damaged cable will require replacement. If the USB port is broken, you can use another available one. In case of software problems, restart your device, PC, or reinstall Apple software components through Control Panel. If the tips described above did not help and the laptop does not see the iPhone via USB, it is worth diagnosing the phone at an Apple service center.
Problems with your communicator
If after examination it was found that everything is in order with the port, cable and connector, then most likely there is a breakdown in the smartphone itself. Most often, Apples have problems with the lower loop. Especially if the phone has already fallen at least once. When this situation is the cause, the part should be replaced. For iPhone 5 it will cost 1 thousand rubles.
Some owners change the cable themselves. If a person does not have the necessary skills and knowledge, then he should abandon this venture. There is a huge probability that the owner simply will not put the smartphone back together after such a procedure, and, most likely, several more parts will fail.
Computer doesn't see iPhone? There is a solution23
Despite the fact that modern iOS devices can easily do without a computer, there are scenarios in which you still have to turn to it. It is quite logical that at the intersection of technologies certain rough edges may arise, and it is precisely these issues that we will try to understand in this material.
One of the common problems with iTunes is the inability to detect the connected device. There may be several reasons for this, but often a failure occurs in the trusted connection mechanism, when keys are saved on both gadgets for subsequent authorization. By default, the “Trust this computer” request should appear the next time you connect, but recently the author encountered the exact opposite situation, when after a negative response from the user the request was not repeated. The problem can be solved, as expected, in a few simple steps.
Let's start, as expected, with the “native” environment for iOS and iTunes - the OS X operating system. Of course, due to software and hardware integration, problems arise here less often, but no one is immune from accidents. So, if your iPhone stubbornly refuses to trust your Mac, you can try clearing the contents of the special Lockdown system directory. To do this, disconnect the iOS device from the computer, perform the key combination [ cmd ] + [ shift ] + [ G ] (or select the “Go to folder” item in the “Go” menu of the OS X menu bar) and go to /var/db /lockdown/. In the window that opens, you will see one or more (depending on the number of synchronized devices) certificate files that need to be deleted.
After that, we connect the gadget and answer the question about trusting the computer in the affirmative. The device should now be detected by the system.
For Windows OS, the “perseverance” of which your humble servant encountered, the essence of the procedure remains the same. The only difference here, besides the different location of the “culprit,” is the need to display hidden files and folders. To do this, open the Control Panel from the “Start” menu and go to the “Folder Options” section, where on the “View” tab we select the option of the same name. As for the address, it varies for different versions of Windows.
Windows XP : C:Documents and SettingsAll UsersApplication DataAppleLockdown
Windows 7, Windows 8, Windows 10 : C:ProgramDataAppleLockdown
If the above manipulations do not solve the problem, for Microsoft OS there is a more complex method associated with the mobile device driver and described by a YouTube user with the nickname STOK SHOK.
- Open "Device Manager", located in the Control Panel in Windows 7 and in the "System" sub-item in Windows XP
- Right-click on the line with the required Apple device, select “Update driver” from the context menu, then “Search for drivers on this computer” and “Select a driver from the list of already installed drivers”
- Click on the “Have from disk” button (if it is not available, you can select the “Mobile phone” or “Storage device” category and click on the “Next” button, after which the button will appear)
- In the “Install from Disk” dialog box, click on the “Browse” button
- Go to C:Program FilesCommon FilesAppleMobile Device SupportDrivers.
- Select the usbaapl file (in 64-bit editions of Windows it is called usbaapl64) and click “Open”. If the folder does not exist, or the required file is missing, look for it in the C:Program Files (x86)Common FilesAppleMobile Device SupportDrivers directory
- Click on the “OK” button in the “Install from disk” dialog box.
Problems with the official application
Very often there is a problem where 5 in official applications. This problem most often occurs with iTunes. First, you need to reinstall the software and make sure that the latest version of the utility is downloaded. If this method does not help, then you need to tinker with the settings of the operating system itself:
- In the case where Windows XP is installed on the computer, you need to close the problematic software and turn off the smartphone itself.
- Next, go to the Start menu and enter the following command: services.msc.
- In the menu that opens, you should find the item that is responsible for the operation of the Apple device.
- In the properties window you need to “stop” its operation and immediately “start” it again.
- After the switching process is completed, you need to try connecting your phone.
In the event that the equipment is running Windows 7/Vista, and the question of why the computer does not see the iPhone is quite relevant, then we recommend performing the following steps:
- You need to go to the “Device Manager”, find the item there that is responsible for the functionality of the functionality with the “Apple” and update its driver.
- The latter should be looked for in the computer itself.
- To do this, on drive “C” you should find the “Program Files” folder, then “General” and “Apple”.
- In “Mobile Device Support” there will be a “Drivers” directory. We are interested in the file usbaapl.
- All that remains is to wait for it to be installed.
- Next, you need to connect the device to the computer again.
If the problem occurs with a device that runs Mac OS X:
The computer does not see the iPhone or iPad - There is a solution!
Although the iPhone and iPad can completely do without a computer, there are situations when one may be needed. Well, since Apple technology is also not perfect and it may have errors, one of which I will try to help you solve.
One of the popular mistakes when working with iTunes is when the computer does not see the iPhone. There can be many reasons for this, but most often the cause of this error is: retained keys from past connections. Usually, every time you connect, the question “Trust this computer” should appear or not, but it happens that it does not appear. This problem can be solved in a few simple steps.
Breaking
If none of the methods described above solved the problem and the laptop or computer still does not see the iPhone, then something has broken in the device itself. I think that the power connector into which the cable is inserted has simply failed.
Try, test and I hope everything works out for you.
Although modern iOS devices can be used independently of a PC, there are situations when you need to use this option. When the computer does not see the iPhone connected via a cable to the USB port, the problem may be in the drivers for iTunes or other services. Sometimes things are simpler because the cable may have broken or the iPhone was simply connected incorrectly. First you need to find out the cause of the problem in order to correct the situation.
macOS computer doesn't see iPhone or iPad
I'll start with the native Mac computer running macOS for iPhone and iPad. Naturally, due to the fact that this is one “family”, users are less likely to have a problem when the computer does not see the iPhone. But such cases still happen.
So, if your iPhone stubbornly refuses to see your Mac computer, try clearing the contents of a special system folder - Lockdown. To do this, follow my steps:
Step 1: Disconnect all devices from your computer and close iTunes
Step 2. Go to the Finder and simultaneously press the cmd + shift + G buttons in the window that appears, enter /var/db/lockdown and press the go button.
Step 3. You will find yourself in a folder with certificates of all devices ever connected to your Mac; you need to delete them
Step 4. Press the cmd + a buttons simultaneously and move the selected files to the trash using the “Move to trash” button or simply dragging them
After that, connect the iPhone to the computer and when asked whether to trust it or not, answer trust. Your Mac will now be able to see your iPhone normally.
Program features
- manage files with music, pictures, movies, books and more on iPad: viewing, exporting, importing. It is worth noting that you can transfer files from and to the device either using the utility buttons or simply by dragging and dropping, which in itself is very convenient.
- In addition to the above files, you can transfer files of applications installed on it (.ipa format) to your computer from the tablet. You can also move applications in the opposite direction. To install applications on your iPad, you will need another separate application – Installous.
- All bookmarks created from a computer in the program will be saved and will subsequently become accessible from any computer or laptop after connecting iFunBox.
Update drivers for iPhone on Windows 7, 8 or 10
If the above method did not help, for Windows 7, 8 or 10 there is another way to solve the problem when the computer does not see the iPhone, but it is more difficult. You need to install drivers on your iPhone.
Step 1: Go to Control Panel on Windows 7, 8 or 10 and select Device Manager
Step 2. In the list, select the “Universal Serial Bus Controllers” section and find the Apple Mobile Device USB Driver
Step 3. Right-click on it and select “Update Driver”
Step 4. Now select “Browse this computer for drivers” and “Select a driver from the list of already installed drivers”
Step 5. Select “Install from disk” and specify the folder C:Program FilesCommon FilesAppleMobile Device SupportDrivers, select usbaapl and click “Open”
Step 6. Now click the “Ok” and “Next” button.
Step 7. Now you can open iTunes and check whether it sees the device or not, if not, try restarting your computer.
Stopping the temporary shutdown option
Setting the temporary USB shutdown option to "Completed" for both battery and mains may resolve the recognition issue.
Open the Power Options section again and go to the active power plan settings.
Click on the option to change advanced power settings.
Expand the USB Options tab. Then set the Temporary USB Disable option to “Disabled” in both the “On Battery” and “On Mains” sections.
Apply the changes and check if Windows recognizes the problematic USB device.
