When trying to navigate to a local disk (or flash drive), the user may encounter the message “The disk structure is corrupted and cannot be read.” Typically, this message indicates a violation of the integrity of the file structure of the disk due to a whole set of reasons, the essence of which I will describe below. In this material I will describe the symptoms of the problem and possible solutions to it.
Reasons for this error and what to do
Check the drive connection
First, don't agree to disk formatting (or error correction) that Windows may suggest you do.
Secondly, first try connecting the drive to another USB port; this is also true for flash drives. You can also recommend connecting the drive to another PC/laptop for diagnostics.
By the way, if you connect an external hard drive through various splitters (and adapters), try abandoning them for a while (errors may often occur due to the fact that many devices are connected to one USB port and there is simply not enough current for normal operation disk).
What Causes External Hard Drive Damage?
Many reasons cause hard drive problems, preventing it from working properly. Here are a few of them:
- Invalid operation: Removing a device connected to the computer without safely disconnecting it
- Damage or malware infection
- A large number of bad sectors on the disk
- File system errors
- Outdated/damaged driver
- Various error messages indicate a problem with the hard drive
Tech-savvy people usually keep their storage devices in good condition. For example, they use the device correctly, update drivers once or twice a month, and regularly check for viruses using an antivirus.
But what if a mistake does happen? How to restore it?
Here we will show you how to repair a damaged external hard drive yourself without losing data. Become an expert yourself by carefully reading and repairing your external hard drive.
How to fix "The disk structure is corrupted and unreadable" error in Windows
- Disconnect and reconnect your external hard drive or USB drive
- Run Check Disk Check (CHKDSK)
- Reinstall external hard drives
- Fix Hard Drive with M3 RAW
- Fixing your hard drive using MiniTool Partition Wizard
- Format your external drive
Disconnect and reconnect your external hard drive or USB drive
If you receive this error on a removable storage device such as a USB drive, disconnect the storage device. Then close all software on the taskbar and reconnect your external storage. Or restart Windows before connecting the external hard drive again. Then try opening the same files that you did before when you received the “Disk structure is corrupted” error message. ,
Run Check Disk Check (CHKDSK)
Windows has a Check Disk utility that scans hard drives and fixes any errors found. It checks the integrity of the disk file system, for example in the master file table. This is undoubtedly the best tool for Windows to fix the “Disk structure is corrupted” error.
- Click the Explorer button on the Windows taskbar.
- Click This PC on the left side of the Explorer window.
- Now you can right click on the C: drive or other external storage devices with corrupted drive structures. Select Properties from the context menu.
- Go to the Tools tab, which has a Check .
- Click the Check and click Scan Disk to run a CHKDSK scan.
- Alternatively, you can also run CHKDSK through the command line, which has switch options. First, press the Win key + X hotkey and select Command Prompt (Admin) .
- To scan the C: hard drive, type “chkdsk /rc:” at the command prompt and press Enter. Alternatively, for external storage or another disk partition, replace the letter C with the corresponding drive letter.
The scan will likely take several hours, but it all depends on the size of your hard drive. This will be slightly faster for external drives. Note that Windows may also schedule the scan to run the next time the system restarts.
Reinstall external hard drives
Reinstalling the storage device may also resolve this issue. This is not something you can do for hard drives with Windows on them, but you can reinstall external drives with a disk structure error. To do this, follow these steps:
- Type “Device Manager” into the Windows search box and select “Device Manager.”
- Click Drives to expand this partition and then right-click the external drive to fix it.
- Select the Delete from the context menu.
- Click the Scan for Hardware Changes to reinstall the drive.
- Restart Windows after reinstalling the disc.
Fix your hard drive with MiniTool Partition Wizard
MiniTool Partition Wizard is a high-quality free disk partition manager that boasts a user base of 20 million and supports most storage devices. It can also fix disk structure errors for disk partitions. Click the Download on the MiniTool home page to add the program to Windows and patch the software disk as follows.
- Open the MiniTool Partition Wizard window, which lists all connected hard drives.
- Select the damaged disk and click Check file system on the left side of the window.
- The Check File System window will open, where you can select the Check and fix detected errors .
- Click the Start to begin scanning.
- Restart Windows after scanning the file system with MiniTool Partition Wizard.
Format your external drive
This fix is more specific to external storage devices that do not include Windows, such as USB flash drives. Formatting a disk erases all of its contents and installs a new file system to replace the damaged one. This is a good fix if the files on the drive are not needed. But if you really need to save some of the drive's contents, save the files using a data recovery utility like EaseUS Data Recovery Wizard. Then format the drive as follows:
- Connect your external storage device to your desktop or laptop.
- Open File Explorer and click This PC to open a list of devices and drives.
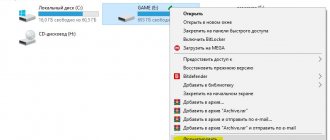
- Then right-click on the drive listed there and select Format to open the window below.
- Select a file system format from the File System drop-down menu.
- Select the Quick Format if it is not already selected and click the Start to format the drive.
These are some of the best ways to fix damaged disk structures using Windows tools and third-party software. This Windows Report guide provides more information about some other useful third-party disk management utilities that you can use to fix this error. If you still can't fix your hard drive, it might be a hardware issue.
Editor's note . This post was originally published in May 2022 and has since been completely revised and updated to ensure freshness, accuracy and comprehensiveness.
Let's try to fix the problem
To troubleshoot the problem, try the following:
- Turn off your computer, disconnect the hard drive from it, and connect it to another computer. It is worth immediately noting the fact that in the process of connecting the hard drive to another machine, it must be turned off.
- Turn on your computer. After this, the connected hard drive is initialized, which can take more than 5 minutes if the file system has been seriously damaged.
- When you try to start the operating system, the CHKDSK disk check program will be automatically enabled. It is worth noting that you will be asked to skip using it by pressing any key for 10 seconds, but in no case should you do this, since this tool is intended to identify and eliminate various errors by adjusting the file system.
- After the program has completely finished its work, remove the hard drive and install it into your computer.
- After loading the operating system, re-check for errors.
Prevent execution of DEP data
In the event that a Steam disk writing error occurs, preventing the execution of DEP data can help. To solve this problem, do the following:
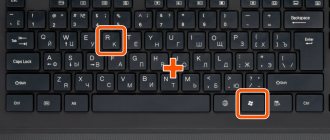
- Click on the Win+R button combination.
- Run the sysdm.cpl command to open system properties.
- Go to the Advanced section.
- On the Performance tab, click Settings.
- In the new tab, click on Data Execution Prevention.
- Make sure the feature is enabled. If it is disabled, click Add and specify the path to the Steam executive file (steam.exe).
Recovering data from a damaged disk
If none of the above methods helped restore the disk, you can recover data using Hetman Partition Recovery. Launch the program and specify a physical device as the scan target. The utility will analyze the disk and display a list of files available for recovery.
You can view the contents of the files and select the ones you need to save to a working disk. When restoring data from a failed disk, it is necessary to take into account that at any moment all information from it can be completely lost. Especially for this purpose, the program has developed a function for creating a disk image. After creating the image, you can disconnect the problematic media and continue working with the virtual image without fear of complete disk failure.
To create an image, select the problem disk in the program and click the Save disk button located on the main panel. Specify the path to store the image file and wait for the operation to complete.
To connect a virtual disk to the program, click the Mount disk button and specify the path to the image file. After this, another new disk will appear in the program, and you can select it for analysis. For more information about data recovery, watch the video:
Restoring a drive without saving data
To completely restore the storage media, you need to erase it and rebuild it into NTFS or FAT32 formats.
- You need to go to the context menu of the flash drive and select “Format”.
- Next, the program will show possible options.
- You must select FAT32 or NTFS.
- Don’t change anything else, click the “Start” button.
After checks and cleanings, the system will be recreated in the required format. It is recommended to double-check that the device is functioning correctly.
All described methods for restoring the file system of a flash drive can be used for other types of drives that can be rewritable - SSD, HDD, SD memory cards, etc. To prevent the loss of any data, you should regularly create copies. Failures and breakdowns occur when you least expect them.
What is RAW (file system)
Surely many of my readers, the overwhelming majority, know only the NTFS file system, since it is a standard in operating systems of the Windows family; those who are older and more technically savvy know FAT16 and FAT32. Those who follow the latest news and trends in the industry have already managed to read, and some have become acquainted with the new ReFS, but few know about the “file system” ( HDD state ) RAW, and this is not surprising, since if you are familiar with it , then in most cases you have problems.
A RAW file system is a state of a hard drive or other storage device that does not have a known Windows file system. Since there is no file system on the disk, there can be no files or folders on the disk, and it cannot be used to store data, that's what your Windows thinks and you shouldn't blame it for that.
You can read a little more about the RAW file system here https://ru.wikipedia.org/wiki/RAW_(file_system)
Run CHKDSK (Check Disk)
Windows OS offers a tool to check the disk and fix logical errors and bad sectors on it. This tool is called Check Disk
or CHKDSK
.
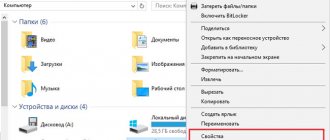
To start, right-click on the problem disk and select Properties
.
Then go to the Tools
and
click the Check button
.
You need to run the scan from a user with administrator rights. Depending on the size and type of drive, the scan may take several hours.
As an alternative to using the built-in utility, you can use the Victoria program. For more information on how to use the program, watch the video:
Checking the disk if Windows won't boot
If errors in the system disk prevent Windows 10 from loading, you can run a scan using the recovery environment. After 3 unsuccessful attempts to boot the system, the computer will launch the recovery environment automatically. You can also use the disk to run recovery tools. See all the ways to enter the recovery environment in our video:
After downloading, launch the command prompt, which is located in the recovery options and enter the command:
CHKDSK /r [HERE IS THE PROBLEM DISK LETTER]:
Wait for the operation to complete and restart your computer.
What's happened?
So, you decided to look at the photos that were sent to you on a flash drive. Insert the drive into the port and wait until the system synchronizes with it. But instead you see on the screen: “The disk structure is damaged. Reading is impossible." The flash drive was definitely working and you know about it, which means either it was broken for you, or some changes occurred in the system.
The same may apply to one of the disks on your PC. If you want to switch to HDD, and it shows you such a message, do not panic. This is not a problem yet and it is quite possible to cope with it.
Disk diagnostics with Victoria HDD program
Victoria HDD is the simplest, but very powerful program for complete diagnostics of a hard drive. The application was created as a tool for assessing the performance of the HDD, testing all its parameters, eliminating identified problems, as well as correct and clean formatting of the HDD.
The interface of the Victoria program is very simple, however, the program is designed for advanced users, or at least with an average level of knowledge and skills. The program is flexible and can be adjusted (configured) to your level of technical literacy/training. This changes the scanning and output algorithms. The data structure will be whatever suits you best. The program provides all the details on your disk that is scanned, from the model, overall size to functions.
Victoria also scans the physical surface of the disk plates, that is, it conducts a test using read heads. If any problems or malfunctions are detected, it issues a warning and marks where this malfunction is located. These may be bad/damaged sectors. A detailed report is then issued. The user can reassign all bad sectors, thus isolating the bad block so that the disk can continue to be used without fear of losing your data. The program is the development of Sergei Kazansky. Although there hasn't been an update for a long time, the application still does its job at a very high level of efficiency.
The main advantage of Victoria HDD is the program's operation at the grassroots level, scanning the surface of the disk and analyzing its structure through the ports. In this case, the efficiency cannot be low, like with programs that use virtual crutches. But to fully use the program, the user will need skills higher than the average user. We can say that this program is for HDD recovery professionals.
I am sure that this article will help you prevent frequent hard drive failures and fix the Windows slowdown problem , good luck!
Sources:
https://lp-digital.ru/articles/598-proverka-zhestkogo-diska-na-oshibki-utilita-chkdsk.html
https://commentarticle.xyz/programmy/instrukcii/5164-proverka-zhestkogo-diska-kompjutera-na-nalichie.html
https://ww.epicm.org/rtfm/chkdsk
https://www.softhome.ru/article/programmy-dlya-diagnostiki-vinchestera
More from my site
- How to check your computer's performance without third-party programs
- The flash drive is not formatted, there is a solution.
- Black screen in windows, there is a solution
- The screen driver has stopped working correctly - how to fix it?
- How to find out which programs are slowing down your computer
- How to reset a forgotten password in Windows
How to bypass the error “The disk structure is damaged...”?
If the system boots correctly, but an error occurs while working with the drive, you can resort to masking the problem drive from the system. This will allow you to bypass the error, go to the problematic disk and copy important data from there.
To do this you should:
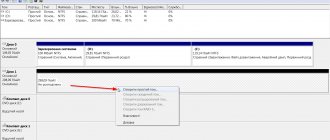
Step 1. Right- on the “Start” and select “Disk Management” .
Step 2. In the window that opens, right the problematic media and select “Change drive letter or drive path .
Step 3. In the window that opens, select “Delete” .
These steps will allow you to bypass the error and restore important information before further manipulation.
How to recover lost data and files?
Problems with drives are a serious reason to take care of the security of your data and important information on your computer, which may be lost due to logical or physical problems with the drive.
If you notice the loss of photos, videos, media files, documents or other information, you should use the convenient data recovery utility RS Partition Recovery. This program can quickly return data deleted by viruses, accidentally deleted and formatted, or simply damaged. RS Partition Recovery has wide functionality and allows you to conduct a deep scan of the disk to find lost information that was deleted several months ago. The capabilities, details and other features of RS Partition Recovery can be found on the official page of the program.
Point of no return
It happens that you were able to recover data after the notification “No access. The disk structure is damaged. Reading is impossible." And if everything is fine, then you are really lucky. But some users are not so lucky. The whole process turns out to be palliative. You have achieved the desired result, but temporarily. After a while, all recovered data is blocked again.
Usually this state of affairs is caused by the “aging” of the disk. This process is often called “shedding.” Due to long-term use, the railway has worn itself out and started the process of “self-destruction”. In this case, you can repair it or buy a new one.
How to recover damaged system files from an external hard drive
Missing or damaged system files are sometimes the cause of unusual hard drive symptoms. This usually happens when a problem occurs during the file saving process. So, when your hard drive seems damaged and you are unable to open it, you may need to repair the damaged system files first.
- Open Start, type cmd and press Enter to open the Console window (Command Prompt).
- Type chkdsk g:/f (if the external hard drive letter is g) and press Enter.
- Type sfc /scannow and press Enter.
When the recovery process is complete, you will see the message “Windows Resource Protection did not find any integrity violations” if no damage was found. Otherwise, it will correct them automatically.
Clear cache
When asked what to do if it says “Disk writing error” in Steam, many users recommend clearing the cache. This action helps save the situation if the cache is damaged or takes up too much RAM space. The action algorithm is as follows:
- Sign in to Steam.
- Go to the View category at the top left, and then Settings.
- Go to downloads and click Clear download cache.
After this, confirm the actions and check whether the error writing to the Steam disk has gone away or not. If there is no result, proceed to the next step.
CHKDSK console commands:
Command: CHKDSK
[volume: [/F] [/V] [/R] [/X] [/C] [/L[:size]]
checks the specified disk using the Check Disk program; when called without arguments, the check is performed current disk. Type into the console without parentheses. Example: C: /F /R
- volume—defines the volume label of the disk being checked, the mount point, or the disk name with a colon (for example, C:);
- path, filename—name of the file or group of files to check for fragmentation. Used only in the FAT/FAT32 file system;
- /F - checks for errors and automatically corrects them;
- /V—during the disk scan process, display the full paths and names of files stored on the disk. Disks containing NTFS partitions also display cleanup messages;
- /R - search for bad sectors and restore their contents. Requires the mandatory use of the /F switch;
- /X — if necessary, disable the volume before scanning it. Once unmounted, all current descriptors for that volume will be invalid. Requires the mandatory use of the /F switch;
- /I - Do not perform strict checking of index elements. Used only in the NTFS file system;
- /C - do not check for cycles within the folder structure. Used only in the NTFS file system.
- /L:size—during the scan, change the size of the log file to the specified size (in kilobytes). If no value is specified, the current file size is displayed. Used only in the NTFS file system;
Actually, that's all. Now you have an idea of what chkdsk and why it is needed.
There are special utilities for diagnosing hard and modern solid-state drives. Some of the applications allow you to promptly detect surface damage and other errors; some of the programs can even correct problems in the operation of drives.
- DiskCheckup - A good tool for diagnosing media. The highlight of the application is the ability to not only generate a report with SMART disk parameters, but also compare them with indicators obtained during an earlier analysis. If problems are detected in the operation of the drive, the program immediately sends a letter to a pre-specified email address.
- Crystal Disk Mark - The utility allows you to find out the real speed of reading and writing information to the disk, using four different testing methods. One of them, the “Seq” sequential recording algorithm, is used by drive manufacturers, so the user can compare the obtained figures with the indicators declared by the device developer.
- CrystalDiskInfo - A program for diagnosing a computer’s hard drive with a Russian version of the menu from the creator of the popular speed tester Crystal Disk Mark. Like DiskCheckup, the utility can keep a history of SMART indicators, the only difference being that it has more visualization tools. Thanks to this function, you can graphically build a history of the “health” of the drive and promptly identify deterioration in the condition of the disk.
- HDDScan - A utility for viewing information about storage devices and testing disks using different algorithms - SMART and linear processing mode. There is a function to display the temperature of the drive, as well as the ability to generate a report containing information about “slow” sectors.
- HDD Regenerator - To briefly describe this program, it can be called “a modern version of MHDD.” The utility uses its own methods for resuscitating broken areas, while it not only denies access to the problem area of the surface, but also tries to restore it with a special combination of high and low level signals. This algorithm is more efficient than the low-level formatting method. The application supports all popular drive connection interfaces.
- Western Digital Data Lifeguard Diagnostic - The basic analysis capabilities of this program are comparable to Seagate SeaTools, but we recommend the Western Digital application for more advanced users. The reason is the presence of a function of permanent deep formatting of the drive, after which there is no way to recover deleted files. In the menu it is called “WRITE ZEROS”.
- MHDD is a “veteran” program, familiar to all experienced users since the days of single-core processors. Using the application's tools, you can perform a low-level scan of your hard drive, identify damaged areas, and repurpose them. The utility also allows you to control the noise level of the hard drive and has the function of setting a password on the storage device. Due to the lack of support for Windows Vista, 7 and later, this utility is most often used in the form of a boot image as a portable option for diagnosing the HDD without starting the operating system.
- Seagate SeaTools is a proprietary utility from a well-known hard drive manufacturer. The application allows you to determine the status of the drive using the SMART algorithm. However, it is not possible to obtain detailed information about each indicator. At the user's request, using Seagate SeaTools, three types of analysis can be performed - the so-called short selftest, an express test using the method of short reading of sequential arrays, and a complete diagnostic of sequential reading.
Checking using Disk Manager
If the system boots successfully and crashes while Explorer is opening the My Computer folder, you can hide the problematic disk from the system. This will unlock File Explorer and you can back up the files you need.
To do this, right-click on Start and select Disk Management. You can do the same by running the DiskMgmt.msc command in the Run window.
Select the problematic partition with the right button and select “Change drive letters and paths...”
, then click "Delete" and confirm. This will hide the drive from File Explorer and allow you to access your system normally. Beware of deleting a letter from the system partition, it won't work.
Reinstall the device driver
Remember that updating the device driver or firmware may lead to loss of information, so make a backup copy of your data first. Also, you should not update the disk on which the operating system is installed.
To update the driver, remove the device from Device Manager
, to do this, right-click on the Start button and launch the application.
Expand the disk partition, then right-click on the problematic disk and click Delete
.
Wait for the disk to be removed and start searching for devices. Action in the main menu
–
Update hardware configuration
.
The system will detect a new device and offer to install the driver. Use the disk manufacturer's driver if errors occur in the driver installed by Windows.
What is this error and why does it occur?
Usually, after an error appears on the screen, the system immediately offers to clean the disk by formatting. This path is acceptable, but its use will result in complete loss of all existing data .
The cause of damage to the disk structure in the system, in most cases, is damage to the architecture of the drive or partition. Integrity failures in the file system are also possible.
Factors that cause disk structure problems:
- changes in the electrical network;
- abrupt disconnection of the computer from the network;
- spyware operation ;
- unplanned system failure ;
- physical wear and tear of the device;
- incorrect removal of the drive from the port;
- physical damage
A similar error also often occurs: “The file or folder is damaged.” Both errors can be accompanied by code 0x80070571. Before starting the treatment process, you should determine the possible factors that led to this.
We do prevention
To minimize the risk of this problem occurring in the future, you can do the following:
- Use only modern versions of operating systems (at least Windows XP).
- Format your hard drive's file system to the fault-tolerant NTFS format.
- Use specialized network air conditioners and uninterruptible power supplies. Of course, such equipment is quite expensive, but if you really value the files stored on your computer, you definitely need to install such devices to ensure their safe storage.
- Use paid anti-virus programs and firewalls, which will ensure full protection of your computer from the influence of third-party utilities, and also provide regularly updated databases.
Among other things, do not forget to back up all the information you need. In this case, even if you have some problems with the hard drive, you will be able to immediately access the data that is most important to you, returning it to working condition.
How to cure a HDD if the file system fails
The simplest program that can restore a hard drive with a faulty file system is CHKDSK, which is natively present in any version of the Microsoft OS. To run the utility:
- Go to the properties of the desired section by right-clicking on it;
- Go to the “Service” tab;
- Click on the button prompting you to check;
- In the next window, set the parameters by checking the boxes that allow errors to be corrected automatically.
You can run the application from the command line by entering chkdsk c: /f (if the “C” partition is system). If you are scanning a system partition, it will only be possible upon restart, and Windows will notify you about it.
Checking the disk if Windows won't boot
If errors in the system disk prevent Windows 10 from loading, you can run a scan using the recovery environment. After 3 unsuccessful attempts to boot the system, the computer will launch the recovery environment automatically. You can also use the disk to run recovery tools. See all the ways to enter the recovery environment in our video:
After downloading, launch the command prompt, which is located in the recovery options and enter the command:
CHKDSK /r [HERE IS THE PROBLEM DISK LETTER]:
Wait for the operation to complete and restart your computer.
Reasons behind “corrupt master file table windows cannot recover master file table” error
In many cases, corrupt NTFS partition is the result of damaged master file table. It seems that MFT corrupt is inevitable, as there are various accounting reasons for this issue. Let's see common cases together:
- Sudden crash of Windows system, such as BSOD (Blue Screen of Death)
- Severe virus or malware damage, some virus is designed for damaging MFT so that the entire partition cannot be accessed.
- Application malfunction
- Remove external disks improperly
- The storage device contains bad sectors
:/> Making a PDA out of a GPS navigator - Notes from a programmer - LiveJournal
Reasons why RAW appears on hard drives
Here is a list of the main problems due to which your HDD may appear as RAW:
- MBR partition table corruption
- Corruption of boot blocks on the file system
- If you had NTFS, then the MFT main file table area may have been damaged
- Your disk initially has a different file system, for example, when it was previously part of a RAID array, since storage systems have their own file systems.
- There is a problem with the drivers, your system could not find the correct driver that could correctly identify the HDD.
- Incorrect or abnormal computer shutdown
- Problem with USB ports on motherboard
- Problem with docking stations for externally connecting hard drives
- You do not correctly remove your flash drive or HDD, as a result of which you break its file system; unfortunately, NTFS is critical to this. Here, on the one hand, the user is illiterate, and on the other hand, he is slightly deceived by the operating system, a simple example, you copy a file to your flash drive. You logically have a slider with the copying status, it visually ends, but the problem is that the system continues copying it from the buffer in the background. The buffer is created to speed up copying, and if at this moment a person simply pulls out the flash drive, then the information on it will, at best, be damaged. For such things there is a safe removal of the device.
Change folder security
A common reason why writing to a disk in Steam does not work is incorrect write and read settings. As a result, an error appears during loading. To correct the situation, take the following steps:
- Log in to the drive where Steam is installed.
- Right-click on the folder.
- Select Properties.
- Enter the Security section.
- Select each user under Groups or Users.
- Please note that there is a prohibition regarding writing and reading.
If a restriction is detected, click on Edit and remove the restriction. After that, right-click on the Steam folder again and go to Properties. There, find Attributes and uncheck Read Only (if you haven't done so previously).
Causes of errors
Here are some of the common causes of error 0×80070571:
- Changed Windows files or settings
- Maxtor 750G driver is damaged or corrupted
- Damaged or corrupted registry keys
- System files are missing or damaged
In short, error code 0×80070571 indicates an unhealthy system and is a sure sign of poor PC maintenance.
It is recommended that you fix and resolve the error immediately, especially if the root cause of the error is related to the registry. Such errors can expose your computer to serious threats such as system crashes, crashes, and loss of valuable data. And getting the data is often the hardest part.
Software fix
Many people do not immediately manage to get rid of the error “The disk structure is damaged. Reading is impossible." What to do in this case? We use an already proven scheme. Download software like iCare Data Recovery and use it to recover all information, if possible. You can try several applications if this one does not give results. If everything worked out, all that remains is to format the flash drive.
You can try to transfer the drivers to the drive. To do this, go to the “Task Manager”. To do this, launch the command line and enter devmgmt.msc. The flash drive can be in the “Disk devices” or “USB controllers” sections. Right-click and delete. Afterwards you will have to download new “firewood”.
December 2022 update fix:
We encourage you to try this new tool. It fixes a variety of computer errors and also protects against things like file loss, malware, hardware failures, and optimizes your computer for maximum performance. This fixed our computer faster than doing it manually:
- Step 1: Download PC Repair & Optimizer Tool (Windows 10, 8, 7, XP, Vista – Microsoft Gold Certified).
- Step 2: Click “ Start Scan ” to find Windows registry issues that may be causing problems with your PC.
- Step 3: Click " Fix All " to fix all problems.
(additional offer for Advanced System Repair Pro -> Website | License Agreement | Privacy Policy | Delete)
Such files, if not deleted, take up a lot of disk space. This damages the registry and also damages system files.
Moreover, it also leads to disk fragmentation, which means that new files are stored in fragments in different places, so it takes a long time to call system files. The corruption and corruption of the registry then causes various errors on your computer and one of them is error 0×80070571.
Performing an SFC scan
To prevent and resolve error 0X80070571, you must first scan and repair damaged system files. If Windows can't find the file you need to start your computer, sooner or later you'll get an error message when you try to save, create, or delete a file. If this is the case, you should restore your system using System File Checker (SFC), a useful command line system tool included in all current versions of Windows to scan system files and replace erroneous or damaged files.
- Go to start, then run.
- Type "sfc /scannow" (without quotes, but with spaces) and follow the instructions.
- Your files will then be scanned and quickly restored as needed. Depending on your system, this task may take 10 to 15 minutes.
Remove the drive and then reinstall it.
In some cases, the structure of the hard drive is damaged and unreadable, which can be caused by a simple error or a kink between the hardware (your hard drive) and the software that allows the Windows operating system to communicate with the hardware. In this case, you should be able to fix the problem by simply deleting the drive in Device Manager and then reinstalling it. It should be noted that this solution only makes sense if the user can still run the Windows installation. This method should not be performed on the Windows installation drive, usually C:.
- Press the Windows logo button + R to open the race. Type diskmgmt.msc in the Run dialog box and press Enter.
- Increase readers. Right-click on the drive that contains the partition where you are having problems. Click on Delete. Confirm the action. Click on Action at the top of the toolbar. Click Check for hardware changes.
- Wait until the uninstalled drive is detected and reinstalled, then restart your computer and make sure the boot problem is resolved.
CCNA, Web Developer, PC Troubleshooter
I am a computer enthusiast and practicing IT professional. I have many years of experience in computer programming, troubleshooting and hardware repair. I specialize in web development and database design. I also have a CCNA certification in network design and troubleshooting.
What does a partition with a RAW file system look like?
And so, before I show you what to do when restoring your HDD or flash drive, I will show you what it all looks like. I have the Windows 8.1 operating system installed on my home computer, and I am satisfied with it in all respects. I also use regular 3.5-inch hard drives to store various information. On them I have films, music and a huge number of video lessons and courses. To connect hard drives I use Agestar docking stations, they are shown in the photo below.
One fine day, when connecting the drives, autorun did not work on one of them. I go to “My Computer” and what I see is that the drive I need has the letter G, but it does not display information about its size and load. When I tried to open it, Windows Explorer simply froze and did not respond for about 5 minutes.
After about five minutes, instead of opening the disk, a window appeared:
To use a disk in drive G: format it first. Do you want to format it?
Naturally, this was not part of my plans, since the disk is full of information. Sometimes I encountered this and it was related to the fact that the connected disk through the docking station did not have enough voltage, I switched it to another one, the effect was the same. I connected it directly via SATA, it was still unavailable.
I opened the Disk Management (diskmgmt.msc) snap-in. The equipment itself also took about 5 minutes to open and become dull. As a result, I received a list of my hard drives, and what a surprise I was when I saw that my 4 terabyte drive had a RAW file system, and it had a letter assigned.
When I tried to open a RAW disk from Disk Management, I received the following error:
No access to G:\. The file or folder is damaged. Reading is impossible.
Methods for repairing a RAW file system disk
There is a lot written on the Internet about various methods that supposedly help in restoring a hard drive or flash drive with RAW, but the problem with most sites is that they are not run by specialists who check everything from their own experience, but by stupid copywriters who simply rewrite other people’s articles with errors and mistakes, and to additional questions or errors, the authors of these articles simply blur and do not answer. As a result, the user loses his data and is disappointed with everything and everyone. Among the methods I want to highlight:
- Checking the disk for errors via CHKDSK, whether it only applies to the system disk or not, and in system recovery mode
- AOMEI Partition Assistant is a smart tool with extensive tools, thanks to which we enlarged the C drive in Windows 10 or converted a GPT drive to MBR.
- DMDE utility - it allows you to find lost partitions
- TestDisk - The utility also allows you to find lost partitions
- Active Partition Recovery for Windows Professional - can also correct errors in the boot sector
- Minitool Power Data Recovery is another tool that allows you to scan your hard drive for other file systems and allows you to recover RAW.
