Every user who has installed Windows more than a dozen times on a computer or laptop for their friends or colleagues has encountered problems that prevent them from installing Windows. I didn’t choose the topic of today’s article by chance, because recently such an incident happened to me and I remembered that I didn’t talk about this problem on the blog. Well, we need to fix it! First of all, you need to understand why Windows 7 cannot be installed from a flash drive or disk on your computer or laptop (this is the system we will talk about now). Although we will talk about this system, all methods can also be considered for other systems. Thus, you will find out why Windows 8, XP and 7 will not install.
In fact, there may be a lot of nuances, but I will try to mention the main problems and situations. And I’ll give you tips that will help you find a way out of this situation. I hope that one of the methods I suggest will help you install Windows 7.
I can’t install windows 7: how to solve basic errors
I can't install Windows 7!
Inexperienced users often encounter this problem and go to the Internet in search of a solution. And rightly so, because our material will really help you get rid of a number of possible problems.
Installing Windows 7 OS on a computer or laptop is a complex process that involves many software and hardware objects.
An error when installing Windows 7 can occur in any of them.
Content:
To make it easier to determine the “culprit” of installation problems, we will group these objects into several general categories:
- installation image – OS installation files;
- installation image media – CD, DVD or USB FLASH disk;
- image carrier reader;
- BIOS of the computer on which the OS is installed;
- computer hard drive;
- computer equipment;
- computer peripheral devices.
When an error occurs, you need to check the groups one by one, narrowing the search for the faulty category, the cause of the fault, and how to solve the problem.
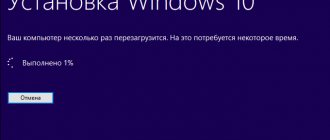
Nowadays, reinstalling the operating system is more often done using a USB FLASH than from a DVD.
This installation requires preparation of both the media and special BOIS settings on the computer.
Preparing a flash drive involves deploying a bootable installation image on it. The following programs are useful for this: UltraISO, WinSetupFromUSB, etc.
Often errors when installing from a flash drive are associated with incorrect deployment of the image.
Causes of malfunctions during OS installation
There may be several reasons why error 0x8007025d appears when installing a new operating system:
- there is not enough disk space for all files or the disk is faulty (for example, broken);
- lack of necessary files during installation. For example, the image does not contain important data, which is why it fails;
- the presence of other devices connected to the computer, which cause the failure.
Of course, these are not all possible reasons, but these are the most common. Therefore, we will talk about them.
Can you tell a cringe from a crash? Take this fun test and find out!
Case 1. If you can’t install Windows 7 from a flash drive
- We check the functionality of the flash drive - connect it to a working computer, try to copy and write several files. We check the disk using standard means (right-click – Properties – Tools – Run check);
- We try to boot the computer from a flash drive by inserting it into the rear connectors. There are long wires stretching from the front USB connectors to the motherboard, which can cause interference that distorts the data read from the media. A telltale sign of a problem is that the installation is interrupted by an error at an unpredictable point during the process.
- We check whether the flash drive is detected in the computer’s BIOS. Having connected the flash drive to the computer, we enter the BIOS interface. Its name should appear among other hard drives. If this does not happen, then you need to use another flash drive. The flash drive is detected normally, then we try to prepare it with other programs, use other installation images.
What should I do if the installer does not start from a flash drive, but the flash drive is visible in the primary system?
Despite the correctness of the steps described above, you can encounter another problem: Windows 10 cannot be installed from a flash drive, which is somewhat incomprehensible to many users. The device seems to be detected in the primary system, but when you try to start from it, the installer does not start. Why? As mentioned above, initially, when creating bootable media, two types of bootloader are assigned to it, and you can often see two flash drives appear in the list of available devices, one of which has an EFI prefix before the main name. If the BIOS is used as the primary system, you need to select regular media, and not one that is marked as an EFI boot loader.
How to install Windows 10 with 32 bits from a flash drive if UEFI is used as the primary system?
Here it is strongly recommended to change the main boot mode by simply switching it from UEFI to Legacy.
Note: one of the symptoms of an incorrect start may be damage to the file system, for example, if the flash drive is incorrectly removed from the port after recording the image. In this situation, it is better to check the disk using standard tools of the system itself or the command line, and if the firmware is damaged, download it from the official website and reinstall it. Low-level formatting programs are also a good idea, after which the image will need to be rewritten.
Case 2. If you can’t install Windows 7 via BIOS
In this case, we proceed in the same sequence as in case of problems with a flash drive: is the media working, is the reading device working correctly, is the image deployed on the media working.
If the problem is due to the fact that you cannot get into the BIOS settings window, then we try to set the boot device when turning on the computer using the function keys.
As a rule, the “Boot device selection” function is activated by the F8, F11, F12 or ESC button, via the selection menu.
It is important not to miss the moment and press the button immediately after turning on the computer.
This function can also be used to check whether the USB flash drive is detected by the system.
WILL NOT BOOT FROM A FLASH DRIVE? 100% solution! BIOS and UEFI (#92)
Hello friends! Having made a bootable USB flash drive, are you disappointed that it does not start from the BIOS when you turn on the computer? There could be several reasons for this, including UEFI settings and BIOS security. Let's find out!
A bootable USB flash drive may not start for several reasons.
Firstly, it must be written down correctly. If you are simply writing an ISO image of Windows or a low-level program like Acronis, which is designed to work with a hard drive, onto a flash drive, then you should use a special program such as ultra-ISO or others. I think it’s clear that you need to not just copy files to a flash drive, but burn the image! If you don't know how to do this, watch video number 57, it is also in popular videos.
But what if you are not new to this matter, you recorded an image on a flash drive, but it still does not boot from the BIOS? The second reason for this is the BIOS settings. Once again, pay attention to the boot order in the BIOS BOOT section. The flash drive should come first. Let me remind you that to enter the BIOS, as soon as the computer turns on, you need to quickly press, or better yet press many times and often, until the BIOS setup starts, one of the following buttons: F2, ESC, DEL, or other F depending on the manufacturer. In the BIOS itself everything is simple, using the arrows and F keys you can navigate through the menu and move items; Usually F5 and F6 are used to move devices into the BOOT menu. To save everything, press F10 and enter to agree.
Also, many BIOS have a separate menu for selecting the device from which to boot. It can be accessed by pressing the F12 key or one of the other F keys when starting the computer.
If you have checked all this and know how to boot from a flash drive, check another BIOS setting - Uefi.
UEFI (Unified Extensible Firmware Interface) is essentially a replacement for the outdated BIOS, and after 2010 this interface began to appear on all computers. UEFI is very different from BIOS both in the boot procedure itself and in its interaction with the operating system. And it happens that instead of shelling a bootable flash drive like grub4dos or syslinux, it loads the OS, ignoring the flash drive. To fix this, find the UEFI item in the BIOS settings. In my case, it is located in the ADVANCED... tab in the...system configuration header. Boot mod item.
Case 3. If you can’t install Windows 7, the driver was not found
The probable cause is a hard drive or media that is not supported by standard means. The problem has become especially relevant with the spread of USB 3.0.
The Windows 7 distribution does not support USB 3.0 by default.
Therefore, you need to stock up on drivers or use a non-original image for installation, in which these drivers are already present.
You can find and download a suitable image by searching for “Windows 7 USB 3.0”. When this error is detected, the system provides the opportunity to install the necessary drivers.
If the flash drive from which you are installing the operating system is in USB 3.0 format, then you need to disable the USB XHCI Controller option in the BIOS, and enable AHCI mode for hard drives.
Another reason for the missing driver error is an outdated BIOS version.
Updating the BIOS program helps overcome the problem. The problem is that the outdated BIOS does not contain instructions for working with large media.
This means that you need a shortened (stripped down) installation image and media with a small amount of memory.
There are cases when a driver search error was associated with minor mechanical damage to the optical media - a DVD disc.
The problem can be solved by recording the installation image onto a working medium.
Source
Lack of free space
However, not all users want to format the system partition and for installation choose the option of saving their own data and running applications, completely forgetting that there may simply not be enough space on the hard drive for the files of the new system. For example, you have 50 GB of unallocated disk space in your system partition, and this is believed to be quite enough for Windows 10 files. Why then is Windows 10 not installed from a flash drive? An error during the installation process indicates the problem very clearly. The fact is that almost as much space as the system itself “weighs” can be used to save temporary files, driver databases, etc. Thus, if such a need is ripe, the hard drive must first be at least cleaned, removing unnecessary files or unused applications. Also, during the installation process, if some suitable utility for working with disk partitions is recorded on the flash drive along with the distribution, free up some space by changing the size of the system partition up (“pinching off” the required volume from the virtual partitions, if any).
And just as easily, you can delete unnecessary partitions by attaching the unallocated space that appears after their removal to the system partition.
When using a clean installation, you can work with partitions directly in the installer window, choosing to delete unused ones and then format them or create new ones of a smaller size.
Reasons for the error starting Windows 7 from a flash drive
Let's look at the most common reasons that lead to problems starting the operating system from a USB device.
Reason 1: Flash drive malfunction
Check your flash drive for functionality. Use it on any other desktop computer or laptop and check if the external device is detected in the system.
A situation is possible when a flash drive, which has been used for many years to install Windows, fails completely unexpectedly. Be sure to check the external drive for serviceability in order to avoid wasting a lot of time searching for the cause of the problem.
Reason 2: OS distribution with an error
Reinstall the operating system distribution. You can make a flash drive bootable using specialized software solutions. How to do this is described in the lesson.
Reason 3: Faulty port
Perhaps one of your USB ports is broken. Use a different connector if you do not have a laptop, but a desktop computer - install the flash drive on the back of the case.
If you are using a USB extension cable, check it with another external drive. Perhaps the problem lies in its malfunction.
Reason 4: Motherboard
In extremely rare cases, it is also possible that the motherboard is not able to support starting the system from a USB drive. For example, Abit boards do not support this function. So installation on such machines will have to be done from a boot disk.
Reason 5: BIOS
There are often cases when the reason lies in the USB controller being disabled in the BIOS. To enable it, find the item “USB Controller” (possibly “USB Controller 2.0”) and make sure that the value is set to “Enabled”.
If it is turned off (“Disabled”), turn it on by setting the value to “Enabled”. We exit the BIOS, saving the changes made.
Having established the cause of the failure to launch Windows 7 installation from an external USB device, you can install the OS from a flash drive using one of the methods described in this article.
Source
Why Windows won't install, reasons for installation errors
Incorrect BIOS setting.
Any clean installation of Windows begins with preparing the computer's BIOS. At this stage, when you try to install Windows from a disk or flash drive, problems appear and nothing is installed. For everything to work, you need to set for boot the device that will read the Windows media.
For example, if the installation will be performed from a DVD/CD disk, then the first boot device should be a DVD/CD drive with an optical drive (disk). If you need to install from a flash drive, then the first boot device should be the flash drive itself, or rather a USB HDD, USB Flash, USB Drive also in the BIOS there may be a signature based on the name of your flash drive or something similar, depending on the BIOS firmware version and the model of the computer’s motherboard. Before saving the selected settings, you need to make sure that the floppy drive is disabled. You need to go to the “Standard CMOS Features” section, where you need to disable “Floppy - 1.44 or Drive A”. Next you need to save the settings, press F10 and YES. The computer will reboot and the system will begin installing Windows from the disk or flash drive. Even when installing from a flash drive, problems may arise with the type of use of the hard drive. On modern computers, the hard drive can operate in IDE AHCI and RAID modes. If you don’t have a raid array of disks, then let’s look at the remaining settings. You can find these settings in the IDE configuration section. I recommend using AHCI mode, but when installing Windows from old flash drives, a message about the absence of a driver may appear. If you have such a problem, switch to IDE mode and then the installation will proceed without errors. Learn more about BIOS settings.
A broken system image or damaged media.
Another persistent problem is the incorrect image capture from Windows. A bad disc (blank disc), a damaged DVD/CD drive through which Windows was recorded. The same can happen with a flash drive - bad memory or faulty USB ports on the mainland.
It also happens that the equipment is in good working order and works correctly, but the image itself is damaged initially even before the moment of recording, for example, it was under-downloaded or was even damaged when uploaded to the site. In this case, you need to have several Windows images on hand, on different drives. You can try installing the operating system using another drive, for example an external one.
Use different Windows installation methods and devices to achieve your goal of installing Windows by elimination.
The computer hardware is damaged.
Another problem is computer hardware failure. This could be a damaged motherboard, video card, hard drive, RAM, power supply, or processor. It is necessary to conduct a comprehensive diagnostic of your computer.
Identify the damaged part and replace or repair it. There are many tests for this that do not require an OS. You can check the motherboard, processor and video card using the PC Test utility. The hard drive can be checked with the HDD Regenerator program. RAM using the MemTest utility.
The power supply can be checked through the BIOS or simply physically.
Outdated PC hardware
Here I think everything is clear, if the computer hardware does not meet the minimum system requirements for installing Windows, then you will not be able to install it. For example, to install Windows 10, you must have at least 1GB of RAM on your computer, at least 16GB of hard drive space, and a processor frequency of at least 1 GHz.
The card must support DirectX 9.0c. It is clear that such a computer will not be able to provide comfortable work. Therefore, for normal operation you need a multi-core processor with a frequency of more than 1.6 GHz and 2 GB of RAM. Sometimes all parameters may be suitable except the video or sound card.
For example, many still have ATI Radeon x700 video cards with 256 or 512 MB of memory. It seems that the video cards are not very old. But they don't have DirectX 9.0c support. They support DirectX 9.0b but can no longer work on Windows 8, 8.1 and 10.
Carefully review all the specifications of your computer before installing Windows to ensure it meets the system requirements. And if they are suitable, only then start the installation.
What else could be causing Windows to fail to install?
Old BIOS of the motherboard or video card. Update them. Disconnected cable or power, check the connections of all cables and cables. Conflicting parts – network cards, sound cards, TV tuners and the like.
Windows builds, many download operating system builds and try to install them. Such operating systems often simply cannot be installed on certain computers.
Use clean original Windows images for installation and then you should not have any problems.
Source: https://zen.yandex.ru/media/aleksanderxxl/pochemu-ne-ustanavlivaetsia-windows-prichiny-oshibok-pri-ustanovke-5e5110faa5d3230c1ce7e5a6
Technical reason
Quite often, Windows 7 cannot be installed from a bootable flash drive or disk due to internal problems with the computer. A user who is faced with a problem should check the main components: the connection of the cord to the power supply, the quality of the connection of the power wires and cables to the hard drive on which the operating system is installed, and also, if an optical disk is used for installation, to the drive.
In fact, performing a quick inspection of the system unit is no more difficult than changing the password on Windows 7. For a desktop computer, it is enough to remove the side wall, visually check, or better yet, remove and reconnect the listed elements. For a laptop, a simple external inspection is enough: if the user has not previously opened the case or subjected the device to mechanical overloads, there will be no problems with attaching the cables.
If broken wires and other faults are detected, it is necessary, depending on the degree and nature of the damage, to purchase and install a new cable to replace the damaged one, solder the “falling off” parts in place, isolate the “breakdowns” with electrical tape, or, if repairs at home are not possible, seek help to the service center.
Important: it is especially recommended to remove dust from the case, including the RAM dies - you can use a paint brush for this. Coping with the task is easier than restoring the Windows 7 bootloader, and even if it is not possible to eliminate the reason why the OS cannot be installed, the user will protect himself from unexpected computer shutdowns due to overheating.
Installer download
The first problem that you may encounter is persistent loading from the hard drive and ignoring the disk or flash drive inserted into the drive with the distribution of the operating system, for example Windows XP/7/10. This happens because the BIOS is not configured correctly, namely, the boot order is set incorrectly. We need to first enter the BIOS setup. This is done at the initial stage of booting the laptop, a few seconds after turning it on, before loading FREE Dos.
The system will write that to enter the BIOS (or SETUP) you must press the DEL key or one of the “F1-F12” buttons, usually F2 (depending on the model). On Lenovo G500 series models, you need to press the OneKey Recovery key when the laptop is turned off, and on some models Fn+F2(F12) works.
Next, find the “Boot menu” and set the boot priority there. To do this, look for the inscription “First boot device”, go into it and select “CD\DVD-Rom” from the list that appears. Sometimes the boot device selection list is not offered, then we simply go to the “CD\DVD-Rom” position and move it to the very top by pressing the +\- keys.
For G500 series models, and indeed in general, it is recommended to first reset all settings to default (“Load Defaults”) and only then set the desired boot priority. Also check that on the “Startup” tab the “UEFI/Legacy Boot” value is set to “Legacy Only”, otherwise the installer may not start.
Media problem
If the installation of Windows 7 starts, but suddenly breaks down, or does not start at all, it is also worth checking the condition of the optical disk, flash drive or external HDD - in a word, the media on which the distribution is recorded. As a rule, minor damage to the surface or microcircuit allows the installation to be completed, but if irreparable damage is caused to the device, the simplest solution is to re-write the Windows 7 bootable USB flash drive.
When using an optical disc as the installation source, you should:
- Carefully inspect the working surface of the media. If it is smooth, without specks of dust or scratches, proceed immediately to the second step. If there is micro-contamination or damage, clean the disc with a dry cloth or napkin. If the scratches are deep and/or extend across the entire recorded surface, your best bet would be to burn a new DVD and try installing Windows 7 again.
- Next, check the quality of recording to the disc using any suitable program. For example, CDCheck is a convenient, shareware tool: in a few minutes it will help you identify the problem that is causing Windows 7 to not install, or switch to the following solutions. After downloading and installing the program, the computer owner must click on the Check button.
- Select your optical drive from the drop-down list.
- Click on Continue in the lower right corner.
- And wait until the verification process is completed; Depending on the amount of recorded information (for Windows 7 this is usually about 5 gigabytes) and the characteristics of the equipment, the program can take from five minutes to half an hour or more.
- During the scan, information about detected errors and inconsistencies will be displayed in the lower information panel.
If, as shown in the example, the only problem is a hash mismatch, the user may continue to look for reasons why Windows 7 won't install; if bad sectors are detected, you should, as already mentioned, rewrite the distribution onto a new optical disk.
Flash drives and removable hard drives can be checked using the lightweight, free software Check Flash. After downloading and installing it, a user whose Windows 7 installation does not start must:
- Launch the application and select the verification method “As a physical device”.
- Indicate in the drop-down list which USB flash drive with Windows 7 you want to check.
- And wait for the procedure to complete. The test results are color coded on the Legend tab in the left sidebar.
- Ideally, all memory sectors should be colored blue.
- Upon completion of the scan, the user will see information about the errors found on the “Log” tab.
If no errors are found, great - the flash drive is working properly, and you can move on to the next test option; otherwise, the owner of a computer who is unable to install or reinstall Windows 7 is recommended to write the bootable media again - for example, using the convenient UltraISO program.
Why Windows won't boot from a flash drive via BIOS
Windows does not boot from a flash drive, often due to a faulty hardware component or an incorrectly configured input and output program. To solve the problem, you will need to double-check the BIOS settings and the devices used: external drive, as well as USB ports of the computer.
Why Windows won't boot from a flash drive
Windows cannot be installed from a flash drive via BIOS due to the inability to start a personal computer (PC) from a boot drive. This is affected by hardware faults:
- Incorrect USB connector.
- Mechanical damage to external media.
- Lack of support for starting a computer from a flash drive.
Software issues include the following:
- Incorrectly created boot drive.
- Disabled USB controller in I/O utility.
- Secure Boot mode activated in BIOS.
Important! In case of a software malfunction, you can fix the problem without the help of a specialist. Otherwise, you need to resort to the services of a specialist or replace non-working equipment.
Incorrectly recorded system image
Often, Windows installation from a flash drive does not start due to an incorrectly created boot drive. For this, it is recommended to use the Rufus portable application. You will need to log into the operating system and perform the following steps:
- Insert the media into the port and run the program.
- From the first list, select the name of the flash drive.
- Click on the SELECT button and in the file manager specify the address of the system distribution image.
- Click START and wait for the operation to complete.
Important! It is not recommended to change the remaining parameters - the utility automatically detects the PC configuration and sets the correct settings.
Faulty USB port
The system may not detect external media if the connector into which the flash drive is inserted does not work correctly. To eliminate this possibility, you need to move the drive to a different USB port.
In the case of a computer, it is recommended to use the connectors on the back of the system unit. When using an extension cord, you need to check the integrity.
Drive failure
The flash drive is subject to mechanical stress and may fail. The device needs to be checked. To do this, you will need to connect the media to a working PC and open the file manager. If the removable disk is detected, everything is fine.
There is no support for starting a computer from a flash drive
On older motherboard models there is no support for boot drives, but the flash drive is detected in the working system. This function cannot be activated, so you must use an optical drive.
USB controller disabled in BIOS
Most computer ports are controlled in software through an input and output utility. To enable USB controllers, you need to enter the BIOS by pressing the Del or F2 key when starting the PC (depending on the device model), and perform the following steps:
- Go to the Integrated Peripherals or Advanced section.
- Enter the USB Configuration category (in some BIOS versions you need to skip this step).
- Opposite the USB 2.0 Controller and USB Function parameters, set the value to Enabled.
- Press the F10 key, confirm saving the settings and restart the computer.
Secure Boot mode is active
If the computer detects the flash drive, but does not load data due to Secure Boot mode being activated, you need to go to the BIOS and perform the following steps:
- Open the System Configuration, Security, Boot or Authentication section.
- Find the Secure Boot or OS Type option.
- Change the value to Disable or Other OS.
Problems with the distribution
Even if the Windows 7 installation image is perfectly recorded on a flash drive or optical disk, this does not guarantee the absence of errors, especially if we are not talking about an original product, but about an amateur modification. The easiest way to make sure that the image does not contain errors is to calculate the hash and compare it with the original one; however, as you might guess, it only works with unmodified content from Microsoft.
A truly universal solution is the freely distributed WimVerify program, which allows you to, if not identify all errors (this is only possible in full testing mode), then at least make sure that the WIM distribution, the main core of the installation image, is working. The owner of the computer on which Windows 7 is supposed to be installed will need:
- Download (link - blog.simplix.info) the executable file, saving it to any directory on your hard drive.
- Unzip the Windows 7 installation image and copy the newly downloaded program to the same folder.
- Run the program and wait for the WIM check to complete.
- As usual, the process can take from a couple of minutes to half an hour or more. As a result, the user will see a report - a notification that no problems were identified during the scan.
In the first case, the user who does not install Windows 7 should continue to search for possible reasons; in the second, look for another, working image of the operating system.
The selected disk has a GPT partition style - convert to MBR
Important! You can only install a 64-bit system on GPT; if you want to install a 32-bit system, you will have to convert to MBR in any case.
Change GPT to MBR directly during installation
The easiest way is to delete the disk partitions and continue with the installation. But, in this case, all data/files that are on it will be deleted. Therefore, if there is something important there, make backup copies first, for example, simply transfer the necessary files to a flash drive or a second hard drive/SSD.
1. In the window for selecting a partition to install the OS - select the partition on which you are installing the system, click on the disk settings link and then on the delete button. And so, with each partition, until only the inscription remains - Unallocated space/space on the disk.
Important! Remove partitions only from the drive on which you are installing the system. Usually this is “Disk 0”.
2. Select this “Unallocated Space” and you can immediately start installing the system by clicking on the “Next” button or first create a new volume and format it.
Interesting! You can also delete partitions from Windows itself using the built-in disk management utility. But it’s easier to do this right away during installation.
Convert the disk during installation
You can also do the same procedure in another way - convert the disk via the command line. All this is done in the same window for selecting a partition for installing the OS.
Important! Remember that when you change the partition scheme, the drive will be completely formatted. If it was split into several parts, all will be formatted. Therefore, copy important files to another medium.
1. Right in the window for selecting a partition for installing Windows, press two keys on your keyboard at the same time - SHIFT + F10 to open the command line.
2. Enter the commands one by one:
- diskpart - launch the disk utility
- list disk - will display a list of drives, we need the one with a GPT partition
- select disk N - instead of N, enter the number of your
- clean - clean the drive
- convert mbr - convert to mbr
- exit - close the utility, then close the command line itself - click on the cross icon
3. Next, in the partition selection window, click on the “Update” link and you can continue installing the system.
Incorrect BIOS settings
Installing the relatively outdated Windows 7 operating system with the widespread introduction of UEFI instead of BIOS has become complicated. Nothing wrong with that; Following simple instructions, a user who is unable to install the OS on a hard drive with standard settings will solve the problem quickly. To allow the installation of Windows 7 in the BIOS, you should:
- Boot into the BIOS using a key or key combination suitable for a particular computer, and use the keyboard to go to the Boot or Startup section.
- And set it to Legacy Support/Legacy Only instead of UEFI.
- If such an option is not provided, stop at the Auto value, and then go to the adjacent parameter - Boot Priority.
- And define the value of Legacy First.
- If, as a result of the actions taken or from the very beginning, the CSM parameter, which is responsible for compatibility with older versions of the operating system, was disabled, go to the corresponding heading.
- And activate it again by selecting Enabled.
- Next, open the Primary Boot Sequence section.
- And set as the first boot device the one from which you plan to install Windows 7: a flash drive, a removable HDD or a floppy drive.
- Go to the Exit tab, select the Save Changes option.
- And confirm exiting the BIOS.
Tip: If you are using older versions of the basic I/O system, you will not need to activate Legacy mode, but it is highly advisable to disable all other boot sources during installation to avoid unexpected failures.
Laptop won't boot from flash drive
How to reinstall Windows or attempt to revive the operating system using Live disks if the laptop does not boot from a flash drive? This does not mean rare devices, which in principle do not support booting from USB drives, but modern laptops, which allow booting from a flash drive, but do not offer a clear mechanism for setting boot priority from the start. Using one of the tested Asus models as an example, below we will understand the specifics of booting modern laptops from a flash drive and consider common reasons why problems may arise with this matter.
Setting boot priority in the hard drive selection menu
The inability to prioritize booting a BIOS flash drive is a problem not only for laptops, but also for PCs, and it is usually due to the fact that many programs for writing bootable media create a bootable flash drive based on the principle of a hard drive. In such cases, the flash drive is not included in the general list of boot device priorities; you need to look for it in a separate menu, where the priority hard drive is determined. In this menu, connected USB media are listed as hard drives along with the laptop’s internal storage devices – HDD or SSD. But even users who have previously encountered this nuance may not remember it, since they may be misled by the fact that in the BIOS UEFI the flash drive is listed as a UEFI boot device (with the addition “UEFI” in front). It appears, but in fact the laptop does not boot from such a flash drive. If the bootable flash drive is not UEFI or we are dealing with a laptop based on a regular BIOS, the flash drive needs to be set in the hard drive priority menu. For example, in the Asus laptop we are testing, you need to go to the “Boot” section and install the hard drive in the “Boot Option #1” column.
1
Then go down to the “Hard Drive BBS Priorities” column.
2
And choose a flash drive.
3
In the general list of boot devices, the flash drive will not be listed as a UEFI device, and boot will take place from it.
Hard drive partitioning
Modern hard drives, especially if the memory capacity exceeds 2 terabytes, have GPT partitioning, which is undoubtedly more reliable and functional, but does not support the installation of Windows 7 in normal mode. In this case, the operating system is identified, but is not installed at the disk selection stage, giving the user a message about the “incorrect” partitioning.
There are exactly two ways out of the situation: format the hard drive into a traditional MBR, losing all saved data and, if Windows 7 is installed as a second OS, already configured systems, or come to terms with minor restrictions and use the Windows 7 Professional version as the installation image "and with a bit depth of 64 bits. As practice shows, only this edition can be installed on a newly created partition on a GPT disk - and, most likely, the user will not find any significant difference from the “Maximum”.
Preparing a distribution kit for installing Windows on Lenovo
It is assumed that you have an original disk with the Windows operating system.
In this case, it is enough to insert the disk into the drive, restart the laptop and follow the further instructions of the bootloader. But if you have to install the operating system from a flash drive, or if the original disk is lost, you will have to make a boot image yourself. There is nothing complicated about it. First download/save the required version of Windows onto a working computer and get started.
Disk error
A hard drive on which Windows 7 is not installed may be partitioned correctly, but contain several problem sectors. If they end up in the area of file unpacking or OS installation, it will be impossible to continue the process. To check the hard drive and fix minor errors, the user must:
- Run the installation again and wait until the source data is copied to the disk.
- Go through the standard preparatory steps: select an interface.
- Then click on the “System Restore” link located at the bottom left.
- Regardless of whether other OSes are installed on the disk or whether it is completely clean, select the “Use recovery tools” option in the next window and click “Continue”.
- Launch command line.
- Enter and, pressing the Enter key, apply the command chkdsk / f - it will check and, if necessary, restore the problematic hard drive.
- Depending on the current usage of the HDD, the system may refuse to scan the hard drive in “full” mode.
- Then you should enter and apply the same command, but without the / f .
- The verification will take a few minutes. As a result, the computer owner will either find out that no failures in the file system have been detected (and then will be able to switch to any of the other described options), or will receive a notification about errors found.
If they are unimportant, the utility will correct them on its own; If the recovery is unsuccessful, you will most likely have to take the hard drive to a service center and use a working one to install Windows 7.
Errors in installing the system into MBR partitions
Finally, one of the most common problems is a message indicating that it is impossible to continue the installation process to the selected MBR partition, since the operating system itself requires a GPT partition. Windows 10 cannot be installed from a flash drive or other removable media precisely because the selected location does not match the desired style. In this situation, sometimes even an attempt at formatting does not help. Thus, the user faces a rather serious problem associated with converting MBR to GPT. If your computer has some kind of source OS, you can use utilities like AOMEI Partition Assistant to perform such actions. But if the corresponding program is present on the flash drive you are using as an additional tool, you can first run it and then continue the installation. But this can only be found in unofficial distributions.
If the user has the original official installer, it makes sense to use their own MBR to GPT conversion tools. Windows 10 won't install from a flash drive? No problem! In this case, you can use the command line at an early stage.
In a sense, the actions performed are akin to restoring Windows 10 from a flash drive, since it is the recovery that is selected first, and not the installation of the system; only for the Shell, the set of commands presented in the image above is used. The most important thing here is to choose the right section number, which can be done at least by visually determining its full volume, which will be shown opposite each of the available ones. After completing the full list of commands, you can return to the installation and complete it in full.
RAM error
Unfortunately, the RAM sticks worked and continue to work extremely unstable, and it happens that the installation of Windows 7 does not start or is interrupted precisely because of them. The easiest way to make sure that the problem is not in the RAM is to go to the “System Restore” menu again, and then:
- Click on the “Windows Memory Diagnostics” link.
- Select the “Reboot and check” option.
- Wait for the results of the RAM test.
Important: a message about the inability to check RAM, as shown in the example, may indicate not only problems with RAM, but also errors when writing the installation disk or flash drive. The owner of the computer should, as indicated in the advice, reboot and try to run the test from another medium - and only then draw conclusions.
A few words about reinstalling the system and restoring its functionality
The main problems have been sorted out. It remains to add a few words about how to reinstall Windows 10 from a flash drive or return the system to a working state. As for rolling back the OS, in principle, removable media does not need to be used.
To do this, it is enough to use the reset tool, which is available in the parameters of the OS itself. You can find it either in the security and recovery menu or in special boot options.
But if the system does not work at all, when starting from a flash drive, you can first try to select the necessary items, using access to the toolkit of the same name. In most cases, you shouldn’t rely on automated tools, but using the command line is advisable. It is in it that you can set up a disk check, system file testing, RAM diagnostics, a hard reset, and much more.
If none of the options presented in the diagnostics and troubleshooting section gives the desired result, you can simply reinstall the system (although most often you will have to format the system partition).
Note: if the tenth modification was installed as an upgrade to the existing OS, you can return to the previous system within 30 days from the date of installation (there is a corresponding item for this in the recovery options), and after performing such actions the user will receive a computer device with exactly that system , which was installed before the upgrade.
Wrong disk type
A very rare, but no less unpleasant error associated with an incorrectly assigned attribute to the hard drive. It usually occurs when installing Windows 7 on a blank HDD and is due to the fact that the area for system files is marked as logical and not main.
Typically, in this case, the user sees an error notification 0x80300024 on the screen; to correct the situation you will need:
- Open the System Restore menu again and launch the Command Prompt, then enter and apply the first command diskpart .
- Next, after waiting for the system to respond, list disk .
- Select the “wrong” hard drive from the table that appears on the screen (you should focus primarily on the capacity) and identify it for further actions by using the select disk NN , where NN is the drive number from the first column.
- As soon as a notification appears about the activation of the desired HDD.
- Enter and apply the list part .
- If no partitions are found on the hard drive, a user who is not installing Windows 7 may skip the next step.
- And if they are, you should first run the clean .
- As a result, a notification will appear indicating that the hard drive has been completely cleared.
- Now - create the “correct” working partition for Windows 7 using the command create part primary size= SS , where SS is the desired area size in megabytes; The text should not contain any extra spaces or punctuation marks.
- When the "primary" partition is created.
- Format it using the following command: format fs = ntfs label = " NAME" , where NAME is any name for the system disk, very preferably written in Latin. Instead of NTFS, you can specify FAT32, but changing a modern convenient file system to an outdated one is not recommended. The section name must be enclosed in quotation marks.
- Wait for formatting to complete.
- When a message appears about the successful formation of the “primary” partition.
- active command to it .
- After a few more seconds have passed, you will receive a notification that the reassignment was successful.
- You need to assign a letter to the newly created partition using the command assign letter= AA , where AA is any letter of the computer owner’s choice, usually C.
- Almost all. All that remains is to read the notice.
- And leave the diskpart by entering the final exit .
- If all manipulations are performed correctly, after a reboot the user will be able to finally install Windows 7 in normal mode - and continue to use it without any difficulties.
Why Windows 10 cannot be installed from a flash drive: the main and most common reasons
So, let's start by describing an approximate list of all the reasons that may affect the occurrence of such unforeseen situations. Among the countless number of them, the following are particularly noteworthy:
- the hardware does not meet the requirements of Windows 10;
- some computer devices do not work correctly or do not work at all;
- the upgrade is impossible due to the lack of installed updates for the existing OS;
- there is not enough free space in the system partition;
- incorrect parameters of the primary system are set;
- The bootable USB flash drive was created incorrectly;
- installation is performed on an MBR partition, not a GPT partition;
- The device is protected at the hardware level.
Please note that the list shows only the most common causes and not all possible causes. It is also possible that installing Windows 10 from a flash drive can be completed successfully, but after a reboot or during the installation of updates, if an Internet connection was made at one of the stages, the computer stops responding to user actions, and a blue color appears during the restart process. or a black screen, the update process freezes, etc. Most often this is due to either hardware, or a lack of free disk space, or an Internet connection.
Windows installation
The BIOS is configured and the boot device is prepared. Let's proceed directly to installing Windows. To do this, insert a disk or flash drive into the laptop and reboot the device. The laptop will independently “understand” how it needs to boot. As a rule, no additional user action is required. Some models “ask” to press any key to boot from a removable drive - we do this.
We wait for Windows to unpack the files, then select “Full installation”.
Further events can develop according to 2 scenarios:
Here we can divide the free space into several sections. To do this, click the “Create” button, indicate the desired size (preferably 30–60 GB for the system) and confirm your actions. We repeat until we have allocated all the available space on the hard drive.
Select the partition reserved for installing the operating system and click on installation. There will be no further features that require detailed individual consideration. You need to follow the installer's instructions.
Installing Windows 7
Calling the boot menu (Boot-menu) and starting the installation
And so, the bootable media is ready, the drivers are pre-loaded, the backup is made. Now you can start installation.
Windows 7 (as mentioned above) does not see USB 3.0 ports (they are marked in blue). Therefore, insert the flash drive into a USB 2.0 port (the difference is shown in the photo below).
Another illustrative example: USB 2.0 and USB3.0
Next, on Lenovo B70 laptops there is a special button to enter the BIOS and call the boot menu (Boot-menu). It is located next to the power plug, on the left side of the device. Click it (photo below).
By the way, on some laptops this button may be next to the power button (photo below).
Then select the device from which we will boot. In our case, this is USB DISK 2.0.
Please note that if you created a boot DVD, then you need to insert it into the drive tray, then turn off the laptop and turn it on using the button to enter the BIOS (see above in the photo). Otherwise, your boot disk simply will not be in the list of devices and you will not be able to select it.
Boot device selection
Next (if everything went well), the GRUB4DOS window should appear, in which you need to select a boot option - select the first one with the line “Windows NT6 (Vista|7.)” (as in the screenshot below).
If you used a flash drive (and it is written correctly) - You should see Windows files start loading “Windows is loading files. "(Installation has begun.)
Windows is loading files
For those who install from disk, don’t miss the moment when there is only one message on the screen: “Press any key to boot from CD or DVD. "- at this moment you need to press a key to start installing the OS!
Press any key to boot from CD
For those who experienced an error at the beginning of the installation or the flash drive/disk is simply not visible in the boot menu
In most cases, the problem lies in the BIOS settings (support for older operating systems that do not support secure boot is not enabled).
Instructions for entering the BIOS (for those who did not succeed, or another laptop model).
Boot menu button
In the BIOS you need to open the BOOT section and set the following parameters:
BIOS Settings (Legacy Support)
After that, call Boot Menu , select boot from a flash drive (disk) and start the installation. I think there shouldn't be any problems now.
Creating bootable media
And even if you connect a flash drive to a USB 2.0 port and start installing Windows 7, the OS still won’t see it, because A driver is required for the Universal Serial Bus controller (for USB 2.0 and USB 3.0 ports to work).
How to get out of this situation: