On vacation, you don’t want to read corporate email and be distracted by work issues. Auto Reply in Outlook allows you to notify colleagues and clients that you are out of office and unable to respond to an email.
You can write any clarifying information, for example, the telephone number of a colleague who is replacing you during your vacation, and immediately redirect all letters to his mailbox.
The function is available in all versions of the program and is very easy to activate. Let's figure out how to set up auto-reply in Outlook 2007 and newer versions.
Set up Automatic Reply in Outlook 2007
10 years have passed since the release of Outlook 2007, but it is still actively used by users of weak computers. Therefore, first we need to talk about setting up auto-reply in this version of Outlook, especially since it differs significantly from new versions.
Auto Reply in Outlook 2007 is called "Deputy". To configure it, go to the “Service” - “Deputy” menu.
Oh and write the text of the notification that people should receive when you are not there.
Note. The rules for processing messages are located in the same menu, under the text of your auto-reply.
After making all changes, close the “proxy” window by clicking OK.
Related Posts
How to disable private browsing mode in Edge and IE?
How to record your iPhone screen?
10 Best Google Chrome Extensions for Productivity » WebNots
10 Essential Features of macOS Catalina » WebNots
How to show the last updated date on a WordPress blog?
Fix Microsoft Word Slow to Open, Enter and Process Files?
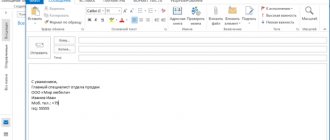
Set up Automatic Reply in Outlook 2010
To set up auto-reply in Outlook 2010, click the "File" menu in the upper left corner. Go to the “Details” menu and select “Auto Replies” there.
In the window that opens, you can enable or disable auto replies. By default, autoresponder is disabled. To enable auto replies, select Send Auto Replies.
If you leave your workplace for a certain time, for example, go on vacation, then you can set a time frame within which auto-replies will be active. To specify the validity period, check the box next to “Send only during the next period” and indicate the time and date of validity of auto-responses.
If the checkbox is not checked, then auto-replies will be enabled until you disable them.
Next, you need to come up with the text of the letter for senders when you are on vacation or on a business trip.
An example of an Outlook 2010 vacation auto-reply:
Good afternoon
I am on vacation from July 1st to July 14th and cannot respond to your letter. During my absence, please contact my colleague Anna Petrova for any questions.
Telephone
An example of an Outlook 2010 auto-reply during a business trip:
Greetings!
I am on a business trip until July 10 and, unfortunately, I cannot answer you now.
If the question is urgent, contact me by phone +7 123 456-78-90.
Paste your auto-reply text into the “Within Organization” field.
I recommend going to the “Outside the Organization” tab, check the “Auto-reply outside the organization” checkbox and paste the same text there. This way, all senders will receive notifications of your absence.
You can create autoresponder rules that will apply while you are away. Click "Rules" in the current window.
To create a rule, click the “Add” button.
In the menu that opens, you can set emails received from a specific person (for example, a very important client) to be forwarded to your colleague. Or so that letters containing the word “account” in the subject line are immediately sent to the accounting department.
After creation, press the OK button twice to exit the auto-reply settings mode.
This completes setting up auto replies in Outlook 2010.
Function Purpose
By enabling this function and setting it up, you can achieve the ability to quickly send messages in response to incoming messages. This simplifies the work of many services, allowing users to be guided in terms of consideration of applications and similar things. In addition, this creates the feeling that the company is really interested in communicating with the client/partner. The most common uses of autoreply in Outlook are:
- Service centers . Sometimes, with the help of complex scripts, information about the approximate deadlines for completing the application is also provided (in the CIS countries this is not used, in a sense, a distinctive feature of some large Western companies).
- Contact centers for which it is important to show respect to the user. In their case, such a response often contains gratitude for their contact.
- Support services (in particular in online games). Here the deadlines for consideration of the application are indicated or data on fields missing in the application are sent (found at Zenimax and Blizzard).
- During vacation . Turned on to notify colleagues/clients that you are currently unavailable. Used in large organizations with strict business etiquette.
You can find other uses for this function, or use it just for fun - the choice depends on the task at hand.
Set up automatic reply in Outlook 2013 and Outlook 2016
Setting up auto-reply in Outlook 2013 and 2016 is identical, so we will consider using the newer version as an example.
Open Outlook and go to the File menu at the top left of the program.
Go to the “Details” tab and select “Auto-responses”.
The auto-reply creation window will open, which is basically identical to Outlook 2010.
To enable auto replies, change the switch to the “Send auto replies” option.
To send automatic replies in Outlook only during a certain period, check the box next to “Send only during the next period.” Don't forget to indicate the start and end time of the autoresponder. For example, the date of your last day before vacation and the date of the first working day after vacation.
Write a text that your senders will receive while you are away.
Example of Auto Reply in Outlook 2013 and Outlook 2016:
Greetings!
I am on vacation until July 18 inclusive.
For any questions, please contact Viktor Kozlov.
Website: computernotes.ru
Telephone
If necessary, format the text to your preferred font size and color.
Write an automatic reply text for senders outside your organization. To do this, go to the “Outside the Organization” tab and enable this item.
By clicking on the “Rules” button, you can fine-tune the processing of incoming letters. The program allows you to configure many parameters and conditions for incoming mail.
For example, the picture shows a rule that forwards all letters from a mailbox with the subject URGENT to
Once completed, click OK to close the window.
You can change auto-responses and configured rules at any time by returning to the “Start” menu - “Information” - “Auto-responses”.
Adding an “Auto Replies” item
In any version of Outlook, you can attach a separate “auto replies” option; to do this, you will need to perform the following steps:
- Open file "
- Go to " Options ".
- Select " Customize Ribbon ".
- In a convenient place “ Create a group ” and rename it if necessary. This is a required step because this tab cannot be added to existing groups.
- Move “auto-responses” to the group created in step 4.
Note! Creating a group may not be necessary - it all depends on the version of Office. But all versions older than 2010 required this step.
This method may not work, in which case you will need to go to the “ Creating a Rule ” section.
Disabling the answering machine
How to turn off auto-reply to incoming messages depends on how you turned it on: with or without an Exchange account.
With an Exchange account
- Expand the "File" tab.
Select the “File” section
Click on the “Manage rules and alerts” button
Activating a Deputy without an Exchange Account
If you are not authorized in the program through an Exchange account, you can use this method to create an autoresponder.
Outlook 2010, 2013, 2016
- Open the File menu.
Expand the “File” menu
Select the item “Information”
Click the "Auto Replies" button
Setting up auto-reply settings
Enter the text for the message
Outlook 2007
- Expand the “Service” tab in the main menu of the program.
Select the “Service” menu
Select the item “Deputy”
Selecting the deputy settings
Enter text for auto-reply
Yandex.ru
Yandex also has the ability to set up an autoresponder to respond to incoming email messages that meet specific conditions:
- Click the settings icon in the upper right corner. Select the “Rules for processing letters” section.
- Create a new filter.
- In the “Apply” section, specify the type of message to which you want to apply the filter.
- In the “If” item, set the filtering conditions.
- Enter the value of the selected parameter. Indicate how strictly the condition must be met.
- You can specify multiple conditions for one filter. These conditions can be met simultaneously or separately.
- Check the box next to “Reply with the following text” and enter the required text.
- Click on the “Create Rule” button located at the bottom of the page.
Setting up auto-reply in Outlook for vacation periods
On vacation, you don’t want to read corporate email and be distracted by work issues. Auto Reply in Outlook allows you to notify colleagues and clients that you are out of office and unable to respond to an email.
You can write any clarifying information, for example, the telephone number of a colleague who is replacing you during your vacation, and immediately redirect all letters to his mailbox.
The function is available in all versions of the program and is very easy to activate. Let's figure out how to set up auto-reply in Outlook 2007 and newer versions.
Mail.ru
Almost every email service provider offers this feature, including Mail.ru. The following steps must be followed:
- At the bottom of the page, open your mail settings and go to the “All settings” section.
- A new page will load. Open “General” in the left menu panel.
- The “Answering machine” item will appear—move the slider to the right to turn it on.
- After this, a form will appear where you can enter the text of the message and indicate the dates from which date and until which this notification will be sent to all users who wrote it. You can also specify the sending time interval.
- At the end, don't forget to save the changes.
The sender will receive an auto-response every 12 hours. That is, if a user sends several emails within 12 hours, he will receive an auto-reply only to the first email.