Mobile email is the email service app I use on my phone every day, multiple times a day. Since I have to launch the email client very often, the main criterion for me for a mobile email application is the speed of its operation - so that nothing hangs or lags. It so happened that earlier, when my main smartphone was an iPhone, I used the application from Mail.RU as a permanent mobile email client.
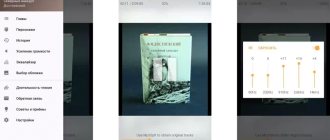
Mobile mail Mail.RU
It made me happy for five long years, because I haven’t changed it since the days of my old Samsung. However, with the transition to Xiaomi, I had to look for a new program, since it turned out that today Mail mail on Android is wildly slow - I don’t know whether the reason is in the MIUI shell or this is a feature of its work on the Xiaomi Redmi 4X specifically, but the fact remains that at the moment It is absolutely impossible to use it at this point.
Therefore, I had to conduct a small market study of existing mobile applications for working with mail on Android, identify their advantages and disadvantages, and find the most suitable option.
When choosing, it was necessary that the email application for Android meet the following qualities:
- Operation speed
- Support for multiple mailboxes from different services
- Intuitive interface, uncluttered with graphics and functionality
- Receive emails instantly and display notification icon
It would seem, why install an additional third-party client if any Android already has the Google Apps package, which includes GMail mail?
How to create an email on an Android phone
Nowadays, email is often required to register accounts on different sites, subscribe, or exchange messages with other users. Not all users have constant access to a PC in order to create an account through the official website of the mail service. Therefore, we offer you instructions on how to complete this process on a smartphone or tablet with the Android operating system on board.
How to create an email on an Android phone
Contents - How to create an email on an Android phone
- Create an email on a smartphone running Android OS
- Gmail
- Yandex Mail
- Rambler mail
- Mail.ru
Create an email on a smartphone running Android OS
First, we recommend choosing the service that suits you where you will register your mailbox. Each service has an official application, its own features, additional tools and privileges for users. Below we will look at guides for creating an account in the four most popular services. You can choose one of them and immediately proceed to the manipulations.
Gmail
A Gmail mailbox is created immediately after registering a Google account. In addition, you have access to all the resources of this company, for example, spreadsheets, Google Photos, Drive or YouTube. At the link below you will find another article from our author, which describes in detail the process of creating a Google account. Follow all the points, and you will definitely be able to solve the problem.
Read more: Creating a Google account on an Android smartphone
Yandex Mail
The postal service from Yandex is considered one of the most popular in the CIS. An application was released especially for mobile device users, making interaction with the service even more comfortable. Registration is carried out through this program. You need to do the following:
1. Go to Google Play Market and search for Yandex.Mail, then tap on “ Install ”.
2. Wait for the installation to complete and launch the application.
3. You can immediately connect mailboxes from different services, but to create a new one you should click on “ Start Yandex.Mail ”.
4. Enter basic registration information and proceed further.
5. If you specified a phone number, wait for a message with a code. In some cases it will be entered into the line automatically. After that, select " Done ".
6. Familiarize yourself with the main features of the application.
7. You will now be taken to the Inbox . Your account has been created and you can get started.
We recommend setting up the application right away to optimize its performance for you. Our other article will help you figure this out, which you will find at the following link:
Read more: Setting up Yandex.Mail on Android devices
Rambler mail
Gradually, email from Rambler is losing its relevance, more and more users are switching to other services, which is associated with frequent malfunctions and limited capabilities. However, if you want to register with Rambler/Mail, you will need to perform the following steps:
1. Go to the application page in the Play Market. Install it on your smartphone.
2. Launch the program and proceed to registration.
3. Enter your first name, last name, date of birth, password and create a mailbox address. In addition, creating a profile can be done by connecting to another social network or service. To do this, tap on the required icon at the top.
4. You will see instructions for using the application, which will also show you the main tools and functions.
5. This completes the process of creating a box. Get started with the service.
Mail.ru
The Mail.ru company produces many services, supports social networks, and also has its own postal service. Registration in it is available not only through the official website. This can be done through a special mobile application:
1. In the Play Market search, find the Mail.ru program and click on “ Install ”.
2. After installation is complete, launch the application.
3. At the bottom, find and tap on the “ Create mail on Mail.ru ” button.
4. Fill out all the necessary fields with registration data, check that the entries are correct and proceed further.
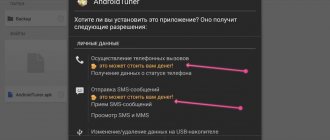
5. Enter your phone number or choose another means to confirm account creation.
6. Allow certain options or skip them. You can edit permissions later through the settings menu.
7. The mailbox has been created, all that remains is to click on “ Done ”.
8. In the “ Inbox ” folder you will already have three letters from the Mail.ru group. They contain useful information on managing the service.
We recommend taking a little time to set up your email client, as this will help make interacting with it as easy as possible. Read the detailed guide on this topic at the following link:
Read more: Setting up Mail.ru mail for Android
Above, we tried to describe in as much detail as possible the process of creating email in four popular email services. We hope our guide helped you complete your task without any problems. If the required service was not mentioned in this article, simply find its official application in the Play Market, install it and follow the standard registration procedure using one of the examples given.
GMail email
Your truth! Indeed, at first glance I really liked GMail - minimalistic design, convenient and intuitive layout of functional buttons, correctly placed accents in the interface for reading and sending letters, which is not annoying, but rather helps you concentrate on the current task.
It would seem, what more could you want? I thought so too, until I started sending my first letters. But the problem turned out to be some kind of so-called childhood disease of the application, which in theory should be corrected by the developer during the current update.
It consists in the fact that sent letters hang in the “Outbox” folder for a long time and may not be sent at all. At the same time, Google is aware of the problem and even wrote entire instructions on what to do in this case, including rolling back to the previous version of the program. Is this even a thing? Personally, nothing helped me and I would happily cut it out of the system, but this requires root access, and not everyone will dare to risk the warranty of a new smartphone.
Mobile mail “My Mail” - myMail
Having abandoned the idea of using the built-in Android mail application, I went to the Play Market in search of an alternative. And the first thing that caught my eye was the myMail program, or translated as “My Mail,” which has a fairly high rating and good reviews.
On the whole, it justified them. The logic of working with it turned out to be slightly different than on gmail, but identical to the application from Mail Ru - it seems that they were written by the same developer.
All buttons and links are in the same places, the only difference is in the graphic elements - different colors and images of icons, which does not change the essence. But where it really compares favorably is the speed of operation - for me personally, it is noticeably higher than that of the official Mail.ru. If there you had to poke the screen several times to open the desired mailbox or letter, here the reaction is instantaneous.
Therefore, if you are used to using one of the most popular mail applications, then it makes sense to switch to myMail without any inconvenience.
I didn’t stop at the achieved search result - before coming to the final choice, it was decided to check several more Android email clients.
What is your opinion: is WiFi harmful?
Yes
22.91%
No
77.09%
Voted: 36474
BlueMail
The first was BlueMail. This application turned out to be a combined application, containing not only mail, but also a calendar. It also turned out to be quite convenient, although the location of the function buttons is slightly different.
However, after an hour of use, three things began to bother me:
- New inboxes are indicated only by a small icon on the side, which is almost invisible, while in other programs the subject of an unread message is highlighted in bold.
- Too large fonts and insufficiently developed visualization (colors, dividing elements between blocks, etc.) create a feeling of some clutter in the interface and cause discomfort for the eyes.
- There are no separate important functions placed on the head panel, for example, attaching a file. To call it, you need to open an additional menu
This is the main thing - you can also find fault with little things, but this is nonsense. In general, BlueMail can be used.
Outlook mobile email
The mobile version of Microsoft's Outlook email client also turned out to be a combined version, containing a calendar, as well as an extension for saving attachments to Google Drive. I don’t really need these excesses in the mail, so I won’t evaluate them in any way. But the ease of use of this program is excellent.
Proper arrangement and display - everything is clear and at your fingertips. Recent messages, as they should be, are marked in bold, and in the main window there is an icon for attaching a document.
I was a little confused by the grouping of incoming letters - those with a chain of correspondence are put aside in a separate “Sorting” tab. At first, not yet getting your bearings, you look for other messages with your eyes - and they end up in the “Others” tab. To display everything together by the date they were received, you need to open the main menu and go to the “All mail” section - some kind of dubious decision, although for some it will certainly be convenient.
Method 2. Save mail to PDF file on Android
- Open the Gmail app on your smartphone.
- Tap on the Email you want to save as PDF.
- After the message opens, tap on the ⋮ icon in the upper right corner to open a drop-down menu with mail processing options.
- If you have selected a message chain and want to save only one of them as a PDF file, the procedure will be the same. Open Email from the chain and tap the ⋮ icon next to the sender's address.
- Select “Print” from the drop-down menu and tap on it. This will open a message preview window that will show how it will look on the print page in the ordered paper size (in our case, ISO A4).
- Next, click on the “Save as PDF” drop-down menu button in the upper left corner and tap on the menu item of the same name.
- Now that the mail is saved in Android memory as a PDF file, you need to download it to the flash memory of your smartphone. Find a round blue icon with an avatar of the PDF page in the upper right corner of the viewing screen. Tap on it.
- As a result, you will be taken to the file manager, to the download directory “Downloads”. By default, this is where mail will be saved as a PDF file. But you can choose another directory or even cloud storage like Google Disk or Dropbox if you are connected to it.
- Click the "Save" button at the bottom of the file manager window. This way you will save a copy of the email message as a PDF file.
- If you wish, before saving your mail to Android as PDF, you can change the file name. Tap on the proposed name and to the left of the “Save” button enter your option.
Now, knowing how to download mail on Android, you can make a backup copy of an important Email message at any time. This way you will be able to access important emails, regardless of the availability of the Internet and the functionality of email clients.
Mail AquaMail
Finally, the last installed program was AquaMail - I closed it immediately after launching and logging into the mailbox, because it turned out to be full of advertising, which is disabled only in the paid version. Guys, are you serious? Your app is so awesome that I have to ignore the other free options to spend money on your crap??
Now regarding another criterion that is important when choosing an email application - notifications about new letters. Of the three clients that turned out to be suitable for work, Outlook responded the fastest to a new letter. After it, we learn about incoming messages from myMail and the last one is BlueMail. At the same time, AquaMail didn’t even move - do you have to pay for that too??
We also note the convenience of the Mail Ru and myMail applications when calling the “Send” menu from any application that supports this function, for example, if we want to send a photo by mail directly from the “Gallery”. When we click this link, myMail has two icons at once - “New message” and “Send to yourself”. The last point allows you to immediately send photos to your own address without calling the main Android email client.
While other applications have only one icon and in order to send files, you need to launch the application separately.
Let's sum up our subjective result. The best mobile email applications for Android phones are myMail and its twin brother Mail.Ru, which for some reason was slow on my smartphone. The Outlook email client also turned out to be very convenient. BlueMail is also not bad, but the interface needs a little work to make it more convenient.
Method 1. Save Email contents to another Android application
- Open the Gmail email app on Android. For those who don't know, this app's icon looks like a white envelope with a red outline.
- Find the message you want to copy. Open it.
- Tap on the text of the message and hold for a while (1-2 seconds) until one of the words of the message is highlighted and a pop-up menu appears above it with options for selecting and copying text.
- Click on the “SELECT ALL” button. If the “SELECT ALL” button is not visible in the context menu, tap on the “ellipsis” and find it there!
- By clicking on the indicated button, you will mark (highlight) all the text and images in the body of the email.
- Neither contact information nor the date of the letter will be included in the selected area. Only the content of the message itself will be copied.
- Click on the “COPY” button. This action will allow you to copy the entire selected fragment of the letter to the buffer memory.
- If you are faced with the task of saving copied text from mail to another location on Android (in a new letter, in a text editor or in a messenger), make a long tap in the text input field. In the menu that appears, select the “Insert” button. All previously copied content will be pasted from the smartphone’s memory into the text field of the document.