Fixing the display of Russian letters in Windows 10
There are two ways to solve the problem under consideration. They are associated with editing system settings or certain files. They vary in difficulty and effectiveness, so we'll start with the easy ones. If the first option does not bring any results, go to the second and carefully follow the instructions described there.
First of all, I would like to note such a setting as “Regional standards”. Depending on its state, the text is further displayed in many system and third-party programs. You can edit it for Russian as follows:
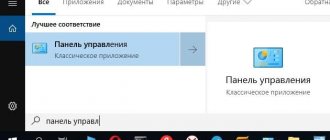
- Open the Start menu and type “Control Panel” in the search bar. Click on the result displayed to go to that application.
- Among the elements present, find “Regional standards” and left-click on this icon.
- A new menu with several tabs will appear. In this case, you are interested in “Advanced”, where you need to click on the “Change system language...” button.
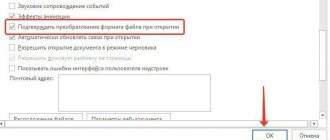
- Make sure that “Russian (Russia)” is selected; if not, then select it in the pop-up menu. We can also recommend activating the beta version of Unicode - this also sometimes affects the correct display of the Cyrillic alphabet. After all the edits, click on “OK”.
- The adjustments will take effect only after you restart the PC, which you will be notified about when you exit the settings menu.
Wait until your computer restarts and check if you can fix the problem with Russian letters. If not, move on to the next, more complex solution to this problem.
Code pages perform the function of mapping characters to bytes. There are many varieties of such tables, each of which works with a specific language. Often the reason for the appearance of cracks is precisely the wrong page. Next we will tell you how to edit values in the Registry Editor.
Before performing this method, we strongly recommend that you create a restore point; it will help you return the configuration before you made your changes if something goes wrong after them. You will find a detailed guide on this topic in our other material at the link below.
Read more: Instructions for creating a Windows 10 restore point
- By pressing the Win + R key combination, launch the Run application, type regedit in the line and click OK.
- The registry editing window contains many directories and parameters. They are all structured, and the folder you need is located in the following path: HKEY_LOCAL_MACHINESYSTEMCurrentControlSetControlNls
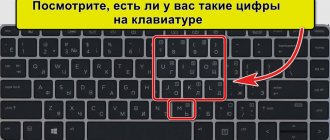
- Select "CodePage" and scroll down to the bottom to find the name "ACP". In the “Value” column you will see four numbers; if the value is not 1251, double-click on the line.
- Double-clicking with the left mouse button opens a window for changing the string setting, where you need to set the value to 1251.
If the value is already 1251, you should perform slightly different actions:
- In the same “CodePage” folder, go up the list and find a string parameter called “1252”. On the right you will see that its value looks like c_1252.nls. It needs to be corrected by replacing the last two with a one. Double click on the line.
- An editing window will open in which you can perform the required manipulation.
After finishing working with the Registry Editor, be sure to restart your PC for all changes to take effect.
Code page substitution
Some users do not want to edit the registry for certain reasons, or they find this task too difficult. An alternative option for changing the code page is to change it manually. It is done in just a few steps:
- Open “This PC” and go to the path C:WindowsSystem32, find the C_1252.NLS file in the folder, right-click on it and select “Properties”.
- Go to the "Security" tab and find the "Advanced" button.
- You need to set the owner's name, to do this, click on the appropriate link at the top.
- In the empty field, enter the name of an active user with administrator rights, then click “OK.”
- You will again be taken to the “Security” tab, where you need to adjust administrator access settings.
- LMB select the “Administrators” line and grant them full access by checking the box next to the appropriate item. When finished, be sure to apply the changes.
- Return to the previously opened directory and rename the edited file, changing its extension from NLS, for example, to TXT. Next, hold down CTRL and drag the “C_1251.NLS” element up to create a copy of it.
- Right-click on the created copy and rename the object to C_1252.NLS.
This is how code pages are changed in a simple way. All that remains is to restart the PC and make sure that the method was effective.
As you can see, two fairly easy methods help correct the error with displaying Russian text in the Windows 10 operating system. You have been introduced to each one above. We hope the guide we provided helped you resolve this issue.
Adjusting web page encoding
Character encoding is an integral part of how browsers work for surfing the Internet. Therefore, each user simply needs to be able to configure it. To quickly change the Google Chrome encoding, you will need to install an additional extension, since the developers have removed the ability to change this parameter.
In order to change the encoding to the required one, you need to:
- Launch the browser.
- Follow the link chrome://extensions/.
What to do to change the default encoding in Notepad from ANSI to another:
- Open Notepad or create a new text document and then open it in Notepad
- Changing the encoding of a text file
- Save this document (I named mine after the encoding name UTF-8.txt) If the file extension is not visible, you can make it visible
- You can save the file and rename it
- If the folder does not exist (which is unlikely), then you need to create it and also move it to the following location: C:WindowsShellNew
- With nameFileName
Now, when creating a text file using the context menu, it will have the encoding that we set in the sample file located in the C:WindowsShellNew folder.
A few lyrics about why everything is this way and not otherwise:
But even for users who remain ordinary “PC users”, the problem with Cyrillic character encodings sometimes becomes quite acute. “Krakozabliki” is a legacy of a previous era, when each programmer wrote his own encoding table. For example, you downloaded it and want to read an interesting book, but here it is >=O
And this continued until standards began to be introduced. But there are already a lot of standards at the moment. For example, there is Unicode, there is UTF-8, there is UTF-16, and so on.
I still haven’t found how to change the default encoding when opening Notepad and creating a new document from an open Notepad session.
But I found how to change the default encoding when a text document is first created (from the context menu) and only then opened with Notepad. Then the file encoding will be the one that will be specified by default. This will be discussed below.
So, in order to change the default encoding of created text documents, we need to make changes to the Windows Registry.
Well, enough of the lyrics. Get to the point!
Instructions for changing the encoding in a standard notepad
It can usually be found in the following path: “start”, “all programs”, “standard”. Found it? Let's open. If you need to work with an existing document, then click “file”, “open” and select it.
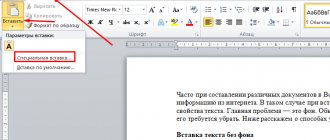
After writing the text or opening the finished document, click “save as” in the “file” menu.
After this, a window appears on the screen in which you can select the appropriate option from the list presented.
We select the appropriate option, where to save the document and confirm the operation. That's all. Was it easy? In fact, it may only take a matter of seconds to complete the necessary work.
Definition
Before talking about how to change the encoding in Word, it is worth defining this concept. Now we will try to do this in simple language, so that even a person far from this topic will understand everything.
Let's come from afar. The Word file does not contain text, as many people believe, but only a set of numbers. It is they who are converted into understandable symbols by the program. It is for these purposes that encoding is used.
Encoding is a numbering scheme in which the numerical value corresponds to a specific character. By the way, the encoding can contain not only a digital set, but also letters and special characters. And due to the fact that each language uses different characters, the encoding is different in different countries.
How to fix gibberish and hieroglyphs in Windows 10
- Press Win + R and type control. The system will open the classic Control Panel.
- On the main page, go to the group Clock, language and region - Change date, time and number formats.
- In the Region window that opens, open the Advanced tab.
- Click the Change system language button in the Language of non-Unicode programs section of the window.
- In the window that opens, select the language you need from the drop-down list, for example, Russian (Russia). Click OK.
- Windows will warn you that you must restart your computer for the changes to take effect. Agree to reboot now and click Reboot Now.
Once the computer starts, the text should appear as expected.
Method two: while saving the document
The essence of the second method is quite simple: open a file with an incorrect encoding and save it in a suitable one. This is done as follows:
- Click File.
- Select "Save As".
- In the drop-down list located in the “File Type” section, select “Plain Text”.
- Click on “Save”.
- In the file conversion window, select your preferred encoding and click OK.
Now you know two ways to change text encoding in Word. We hope that this article helped you in resolving the issue.
When a person works with MS Word, he rarely has the need to delve into the nuances of encoding. But as soon as there is a need to share a document with colleagues, there is a possibility that the file sent by the user may simply not be read by the recipient. This happens due to a mismatch of settings, specifically encodings, in different versions of the program.
Simple solutions
The solutions below are simple because they do not require any serious action from the user. However, they may be enough to solve the problem. In this case, you can do without any problems.
Most often, hieroglyphs appear instead of text when printing via MS Word. Try printing the text using another program.
To do this, you can save the file in PDF format and open it using Adobe Acrobat Reader or FoxitReader. You can also print through a browser, for example, Google Chrome or Internet Explorer.
Try printing an image instead of text. To do this you need:
- Open a window in the program that is used to send a file for printing.
- Finding the “Advanced” or “Advanced Settings” button on it depends on the program in which printing is performed.
- In the window that opens, find the “Print as image” or “Raster printing” option and check the box next to it.
The machine now prints text as an image. You most likely will not see hieroglyphs instead of Russian letters.
The problem may be with the fonts. The device does not read them, but prints incomprehensible symbols instead of Russian letters. Try simply using different fonts for text. This will be especially true if you chose exotic fonts rather than classic ones (Arial, Calibri).
Also try this: disable substituting Courier New. For this:
- On the Control Panel, find the item with devices.
Devices and Printers
- Find the problematic printer there.
- Open “Printer Properties”, go to the “Device Settings” tab.
- Find the font substitution table and select "Do not substitute" for the font listed above.
Working with the image
- If you try to open an image in Word, strange characters will appear on the page.
- To get a readable document, do this:
- Open the document
- Select parameters using the “file” tab
- In the “additional” line we find the “General” section
- Confirm file conversion
- Select the “Encoded Text” command
- Select the desired encoding and confirm the action
Sometimes, when changing the encoding, you can change the font, which will also have a positive effect on the quality of the encoded text.
Conclusion
Why do you need to change the encoding? PC word processors automatically select the encoding that displays documents most correctly. But we are faced with the task of not just convenient text recognition, but bypassing the anti-plagiarism system. Therefore, we need to force this insidious computer program to move away from its usual patterns and accept our work as unique.
The algorithm for each version of anti-plagiarism works differently. But the principle, in general, is the same for everyone. It will not be able to recognize any document unfamiliar to the program, which means it will skip it without checking.
Your main task when changing the encoding is to save all documents, assigning them new names. Otherwise, earlier versions of the text will be lost. As you can see for yourself, changing the text code to bypass anti-plagiarism is not so difficult.
Complex decisions
It’s worth moving on to these solutions if the problem refuses to go away and continues to annoy you. The device prints hieroglyphs instead of Russian letters for reasons that will be discussed below.
The issue may be in system files. Restoring them may solve the problem.
Open the command line as administrator. Type the command “sfc /scannow” and press “Enter”.
Command "sfc /scannow"
We wait a few minutes or seconds. Then we check if the problem is resolved.
Often this error appears due to drivers. The printer is printing hieroglyphs because the drivers are incorrect or malfunctioning. Therefore, you can try to reinstall them. For this:
- In the Control Panel “Hardware and Sound” tab we find our printer.
Hardware and Sound Tab
- Right-click and select “Remove device”.
- In “Programs and Features” we remove all programs related to the operation of our device.
- After removal, we find the disk that comes with the printing device. We reinstall all the necessary programs and drivers.
If you do not have a disk, then Windows 7 or older, as a rule, will offer to install the necessary drivers if you reconnect the printer to the computer. If this does not happen, then you should go to the manufacturer’s website and download the necessary software yourself.
Check your computer with an antivirus. The reason may lie in malware.
Here are the main ways to solve this problem. As a rule, you can limit yourself to simple actions, since this error appears and disappears by itself.
Copy text from a PDF file to Word using ABBYY FineReader
ABBYY FineReader is a text recognition program. Typically, this program is used to recognize text on scanned images. But, using ABBYY FineReader you can also recognize PDF files. To do this, open ABBYY FineReader, click on the “Open” button and select the PDF file you need.
After the program finishes text recognition, click on the “Transfer to Word” button.
After this, a Word document with text from your PDF file should open in front of you.
Change your printing program
Try printing the document in another program. Often the problem lies precisely in the printing software. To open PDF files, you can use software from Adobe or Foxit reader. If Adobe displays hieroglyphs instead of text on the sheet, then you can try printing the file as an image.
Additionally, try opening the document in a browser and printing.
The reason may also be in the font that was used when typing. It is always recommended to choose standard fonts such as Arial, Tahoma, Verdana, Times New Roman.
If the Word office package fails, then you can save the file in another format, for example, PDF. This is done through the menu “File” - “Save As”.
The described solutions to the problem are working, but temporary. The printer should print text without hieroglyphs in any program. Therefore, we need to dig deeper and try to identify the reason for the appearance of hieroglyphs.
Sources
- https://smile-emoji.ru/simvoly-dlya-nika/
- https://lumpics.ru/crackdowns-appeared-instead-of-russian-letters-in-windows-10/
- https://win10m.ru/krakozyabry-i-ieroglify-vmesto-bukv.html
- https://mb4.ru/text-editors/notepad/146-notepad-change-default-encoding.html
- https://o-dns.ru/programmy/vybor-kodirovki-teksta-pri-otkrytii-i-sohranenii-fajlov-kak-pomenyat-kodirovku-v-bloknote
- https://wp-seven.ru/instruktsii/system/windows-10-system/krakozyabry-v-windows-10.html
- https://nastroyvse.ru/devices/raznoe/ispravit-ieroglify-pri-pechati-na-printerax.html
- https://PoPrinteram.ru/pechataet-ieroglify.html
[collapse]
Correcting hieroglyphs to text
Browser
In general, Internet Explorer used to often produce such cracks, but modern browsers (Chrome, Yandex Browser, Opera, Firefox) detect the encoding quite well and make mistakes very rarely. I’ll say even more, in some versions of the browser the choice of encoding has already been removed, and to “manually” configure this parameter you need to download add-ons, or go into the jungle of settings for 10 ticks...
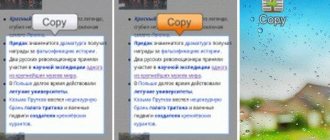
And so, suppose the browser incorrectly detected the encoding and you saw the following (as in the screenshot below)...
Most often, confusion occurs between the UTF (Unicode) and Windows-1251 encodings (most Russian-language sites are made in these encodings).
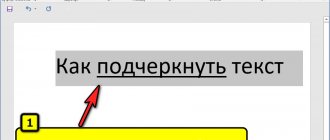
- press left ALT so that the menu appears at the top. Click the “View” menu;
- select “Text encoding”
, then select
Unicode
. Voila - the hieroglyphs on the pages immediately became regular text (screenshot below)!
Another tip: if you can’t find how to change the encoding in your browser (and it’s generally unrealistic to give instructions for each browser!), I recommend trying to open the page in a different browser. Very often another program opens the page the way it should.
Text documents
A lot of questions about crackers are asked when opening some text documents. Especially old ones, for example, when reading the Readme in some program of the last century (for example, for games).
Of course, many modern notepads simply cannot read the DOS encoding that was used previously. To solve this problem, I recommend using the Bread 3 editor.
Bred 3
A simple and convenient text notepad. An irreplaceable thing when you need to work with old text files. Bred 3 allows you to change the encoding in one click and make unreadable text readable! In addition to text files, it supports a fairly wide variety of documents. In general, I recommend it!
Try opening your text document (which is having problems) in Bred 3. An example is shown in my screenshot below.
Another notepad is also suitable for working with text files of various encodings - Notepad++. In general, of course, it is more suitable for programming, because... Supports various backlights for easier code reading.
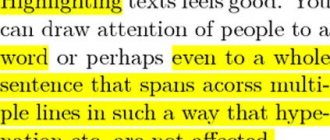
An example of changing the encoding is shown below: to read the text, in the example below, it was enough to change the ANSI encoding to UTF-8.
WORD documents
Very often the problem with cracks in Word is due to the fact that the two formats Doc and Docx
.
The fact is that since 2007 Word (if I’m not mistaken), the Docx
(it allows you to compress a document more strongly than Doc, and it also protects it more reliably).
So, if you have an old Word that does not support this format, then when you open a document in Docx, you will see hieroglyphs and nothing more.
There are 2 solutions:
- download on the Microsoft website special. an add-on that allows you to open new documents in the old Word. Only from personal experience can I say that not all documents are opened, and besides, the document markup suffers greatly (which in some cases is very critical);
- use Word analogues (although the markup in the document will also suffer);
- update Word to a modern version.
Also, when you open any document in Word (the encoding of which he “doubts”), he offers you a choice of specifying it yourself. An example is shown in the picture below, try selecting:
- Windows (default);
- MS DOS;
- Another...
Windows in various Windows applications
It happens that some window or menu in a program is shown with hieroglyphs (of course, it’s impossible to read or understand something).
- Russifier. Quite often there is no official support for the Russian language in the program, but many craftsmen make Russifiers. Most likely, this Russifier refused to work on your system. Therefore, the advice is simple: try installing another one;
- Switch language. Many programs can be used without Russian by switching the language to English in the settings. Well, really: why do you need to translate “start” instead of the “Start” button in some utility?
- If your text was displayed normally before, but now it’s not, try restoring Windows, if, of course, you have restore points (more about this here -);
- Check the language and regional settings in Windows, often the reason lies precisely in them.
Regions and Languages in Windows
To open the settings menu:
- press Win+R
; - type intl.cpl
, press Enter.
intl.cpl - language and region. standards
Check that in the “Formats” tab there is “Russian (Russia) // Use Windows interface language (recommended)”
(example in the screenshot below).
In the location tab, set the location to Russia.
And in the tab, additionally set the system language to “Russian (Russia)”. After this, save the settings and restart your PC. Then check again whether the interface of the desired program is displayed normally.
And finally, this is probably obvious to many, and yet some open certain files in programs that are not intended for this: for example, in a regular notepad they try to read a DOCX or PDF file. Naturally, in this case, instead of text, you will be watching crackers; use those programs that are designed for this file type (WORD 2007+ and Adobe Reader for the example above).
That's all for now, good luck!
Good day.
Probably, every PC user has encountered a similar problem: you open an Internet page or a Microsoft Word document - and instead of text you see hieroglyphs (various “kryakozabry”, unfamiliar letters, numbers, etc. (like in the picture on the left...)).
It’s good if this document (with hieroglyphs) is not particularly important to you, but what if you need to read it?! Quite often, similar questions and requests for help with opening such texts are asked to me. In this short article I want to look at the most popular reasons for the appearance of hieroglyphs (and, of course, eliminate them).
Hieroglyphs in text files (.txt)
The most popular problem. The fact is that a text file (usually in txt format, but there are also formats: php, css, info, etc.) can be saved in various encodings.
Encoding
- this is a set of characters necessary to fully ensure the writing of text in a specific alphabet (including numbers and special characters). More details about this here: https://ru.wikipedia.org/wiki/Character_set
Most often, one thing happens: the document is simply opened in the wrong encoding, which causes confusion, and instead of the code of some characters, others will be called. Various strange symbols appear on the screen (see Fig. 1)…
Rice. 1. Notepad - encoding problem
How to deal with this?
In my opinion, the best option is to install an advanced notepad, such as Notepad++ or Bred 3. Let's take a closer look at each of them.
Notepad++
One of the best notepads for both beginners and professionals. Pros: free program, supports Russian language, works very quickly, code highlighting, opens all common file formats, a huge number of options allow you to customize it for yourself.
In terms of encodings, there is generally complete order here: there is a separate section “Encodings” (see Fig. 2). Just try changing ANSI to UTF-8 (for example).
After changing the encoding, my text document became normal and readable - the hieroglyphs disappeared (see Fig. 3)!
Rice. 3. The text has become readable... Notepad++
Bred 3
Another great program designed to completely replace the standard notepad in Windows. It also “easily” works with many encodings, easily changes them, supports a huge number of file formats, and supports new Windows operating systems (8, 10).
By the way, Bred 3 is very helpful when working with “old” files saved in MS DOS formats. When other programs show only hieroglyphs, Bred 3 easily opens them and allows you to work with them calmly (see Fig. 4).
If there are hieroglyphs instead of text in Microsoft Word
The very first thing you need to pay attention to is the file format. The fact is that starting with Word 2007, a new format appeared - “docx” (previously it was just “doc”). Usually, new file formats cannot be opened in the “old” Word, but sometimes it happens that these “new” files open in the old program.
Just open the file properties, and then look at the “Details” tab (as in Fig. 5). This way you will find out the file format (in Fig. 5 - the “txt” file format).
If the file format is docx - and you have an old Word (below version 2007) - then simply update Word to 2007 or higher (2010, 2013, 2016).
Next, when opening a file, pay attention (by default, this option is always enabled, unless, of course, you have a “don’t understand which assembly”) - Word will ask you again: what encoding to open the file in (this message appears at any “hint” of problems when opening the file, see Fig. 5).
Rice. 6. Word - File Conversion
Most often, Word automatically determines the required encoding, but the text is not always readable. You need to set the slider to the desired encoding when the text becomes readable. Sometimes you have to literally guess how a file was saved in order to read it.
Rice. 8. The browser detected the wrong encoding
To fix the display of the site: change the encoding. This is done in the browser settings:
- Google chrome: options (icon in the upper right corner)/advanced options/encoding/Windows-1251 (or UTF-8);
- Firefox: left ALT button (if you have the top panel turned off), then view/page encoding/select the desired one (most often Windows-1251 or UTF-8);
- Opera: Opera (red icon in the upper left corner)/page/encoding/select the desired one.
PS
Thus, in this article, the most common cases of the appearance of hieroglyphs associated with an incorrectly defined encoding were analyzed. Using the above methods, you can solve all the main problems with incorrect encoding.
I would be grateful for additions on the topic. Good Luck