When working in Microsoft Word, some users have to solve the problem: how to remove the background in Word in order to return the document to a white background, if the background on the document page is colored a different color. In Word documents, a background is used that fills the entire sheet of the page, or they use a background located only behind the text or a fragment of text in the document.
Filling the page or background color behind the text is not always justified from a visual point of view. The bright background of the page can make it difficult to read the text because the letters are not easy to make out. Such a background strains the eyes and the reader experiences discomfort.
It is necessary to solve the problem that has arisen: how to remove the background in Word? The best option to correct the situation is to return the Word program settings to default. In this case, the background will be a virtual blank sheet of paper on which the text for reading will be placed.
In this guide, we will look at the following options: how to remove the background in Word from an entire page, how to remove the background of text in Word, how to remove the background in Word after copying. The instructions can be used in different versions of the program: Word 2022, Word 2016, Word 2013, Word 2010, Word 2007.
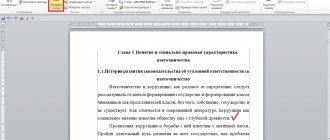
To remove the background from a page, the Word document must be opened in one of the display modes:
- Page layout.
- Web document.
We will remove the background using the built-in tools of MS Word.
How to remove background in Word
First, let's remove the background from the entire page of the document. With such placement, the entire page is filled with a background of a certain color, or more complex filling methods are used as the background, or an image (drawing) added from the computer serves as the background.
Previously, an article about creating a background in a Word document was already written on my website. Now we will need to do the opposite: remove the background in Word.
You may also be interested in:
- How to make a background in a Word document - 5 ways
- Word online for free - 5 ways
Follow these steps:
- In Word, go to the Design menu (in Word 2019), and then go to the Page Background group.
In Word 2016 or Word 2013, go to the Design menu, and in Word 2010 or Word 2007, go to the Page Layout menu.
- Click on the "Page Color" button.
- In the Theme Colors window that opens, select the No Color option.
As a result of this operation, the background will be removed from the Word document.
How to remove text highlight color in Word?
It depends on what you have managed to highlight. Therefore, we will consider different methods.
Clearing the page
- So, if you have Word 2007 or 2010, in this case we need to go to the “Markup” tab, which is located in the top menu of Word. If you have newer versions of the program, you need to go to the “Designer” tab of the program. Previously, this tab was called “Design”;
- After this, look at the desired tab on the right side of this menu, namely “Page Color”;
- Click and see a drop-down color palette. Under this palette there is a “No Color” tab. That's what we need.
I think you did everything correctly, and the unnecessary colors have disappeared.
How to remove text background in Word - 1 way
In the next way we will try to remove the background located behind the text. With this method of filling the background, there can be different display options: the background is located behind a certain piece of text, or all the text on the page in the form of a quadrangle, or individual words, sentences, paragraphs are highlighted in the text, but the spacing between lines is white, which is used in the document by default .
Let's look at both design display options. First we'll remove the solid background from a piece of text.
To do this, you need to do the following:
- Select a piece of text from which you want to remove the background.
- Enter the “Home” menu, go to the “Paragraph” group.
- Click on the "Fill" button, select the "No color" option.
After this, the background will disappear from the Word document.
Deleting a marker
Everything typed in a document can be highlighted using a marker. Look at the picture below. The green fragment is highlighting with a marker, the lilac fragment is using a fill. In this case, the discharge is no different. Therefore, if in the previous method, the field we needed already had “No color”, let’s look at how to remove the text selection made with a marker.
Select the part for which you want to remove the fill, and on the “Home” tab, in the “Font” group, click the black arrow next to the button on which the underlined letters A and B are drawn.
How to remove a copied background in Word - method 2
Another possible option: removing the background from text that has unfilled spaces between lines. We have a section of text with a background, but no background between the lines. We need to remove the background from this text.
Follow the steps:
- Select the test fragment from which you want to remove the background.
- Open the "Home" menu, go to the "Font" group.
- Click on the “Text Highlight Color” button, select the “No Color” option.
Removing the selection color and background fill
If you need to remove the background color of text in Word 2007 (and later), the easiest way is to use the "Highlight Color" and "Fill" buttons on the "Home" tab. These two buttons are used to control the background color in Word documents.
To remove the background, just select the desired text, click the “Selection Color” button and select the “No Color” option.
The same action must be performed with the “Fill” button. Select the text, click on the “Fill” button and select “No color”.
If you are using Word 2003, you can remove the background using the menu “Format – Background – No Fill”.
This method is the most universal and suitable in most cases. In particular, in this way you can remove the colored background of the text that remains after copying from the Internet.
How to remove the background in Word text using style clearing
After inserting text from the Internet, styles from a website can be inserted into a Word document, which will result in a background fill of one type or another in the document. The Text Highlight Color and Fill tools may not be able to resolve this issue. Therefore, you will need to reset the styles, clearing the original formatting.
Follow these steps:
- Select a piece of text from which you want to remove the background.
- In the "Home" menu, in the "Styles" group (or "Styles and Formatting"), click on the button in the lower right corner (other way: press the "Alt" + "Ctrl" + "Shift" + "S" keys).
In Word 2010 or Word 2007, you need to go to the “Page Layout” menu.
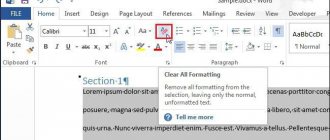
- In the drop-down window, click on the option “Clear Format” (in Word 2019) or “Clear All” (in other versions of Word).
As a result, formatting and styles will be removed from the selected text. Only text will remain in the document.
How to remove a colored background under text in Word 2003
Fortunately, in the old version of the program, the background can also be removed in a few clicks, so you shouldn’t have any problems.
So, let's start analyzing the instructions: 1. In the horizontal menu located at the top, select the “Format” item and click on it;
2. Next we find the sub-item “Styles and Formatting”; 3. A window has opened where you need to click on the “Clear all” button; 4. Now the text has the same background as the rest of the document.
Now you understand that, regardless of the version of the program, in a few clicks you can remove the background you don’t like, which spoils the appearance of the entire document. Finally, I would like to recommend that you remember one of the methods for removing the background: if you often copy information from different Internet resources, it will be useful to you many times!
How to remove the background in Word when copying - 1 way
Now we will look at how we can clear the background that may appear when copying from another Word document, or from a website on the Internet. After copying, we need to get a “clean” document with only text, without background and other elements that may end up on the document page after pasting.
Do the following:
- Copy text from a Word document or from an Internet site.
- Open Word.
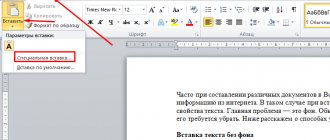
- In the "Home" menu, click on the "Insert" button.
- The paste options will open, in which you need to click on the “Paste Special” item.
- In the “Paste Special” window, from the available options, select “Unformatted Text”, click on the “OK” button.
Only text will be pasted into Word.
Method 1: Change Page Color
The essence of this method is that you transform the page by adding a colored background. In this case, the object itself can be further edited by adding additional text and other objects. To implement the task, you will need to perform a set of the following actions:
- Open the tab called "Design" and then select the "Page Color" option. It is located in the block of tools, which are labeled “Page Background”.
Additional Information. Labels for some elements may differ between versions of Word. To be more precise, the “Design” tab may have alternatives: “Format”, “Page Layout” or “Designer”.
- Now you will be offered a whole set of shades. All you have to do is indicate the one that is best suited for the project. If the standard shades do not satisfy you, click on “Other colors...” and perform manual adjustments to obtain any option.
- As a result of all operations, you will be able to observe how the color of the pages changes. Keep working on adding different content.
In this case, the answer to the question of how to make a background in Word implies a situation in which you observe a uniform shade. But this visual solution is not suitable for everyone. If you want to use more unique fill options, follow these instructions:
- As in the previous case, you will need to open the “Design” tab, and then click on the “Page Color” button. You will be offered some options, but in this situation one button is important - “Other filling methods.”
- A small window will appear in front of you, through which various settings can be made. They offer several tabs, each of which implies a certain visual design option:
- Gradient. You adjust the image, as a result of which it will have characteristic shimmers. There are a lot of variations on what this will look like. The type of hatching, level of transparency, and so on change.
- Texture. Ready-made solutions for texture images. Use the slider to scroll down the contents until you find the most attractive solution for you personally. Rest assured, there will definitely be something you like, a worthy choice.
- Pattern. The name itself speaks for itself. The page will be presented with a specific pattern, you just have to choose it from a huge list. Small icons contain a demo that you can use to guide you.
- Drawing. The most interesting solution for several reasons. Here you are not limited in anything, it can be any photo.
Additional Information. When choosing an image, you should consider its size. Otherwise, display issues may arise.
As a result of certain manipulations, you will be able to see already transformed pages with a unique background. The only thing worth considering is the font color. Try to choose shades that will not blend into the background. This will make the content easier to read.
How to remove a copied background in Word - method 2
This method is almost identical to the first option. It can also be applied in the “Insert” button, where there are corresponding icons in the “Insert Options” option.
You need to do the following:
- Copy text from a Word document or website.
- Right-click in the Word document window where you want to paste the copied text.
- A window with a menu will open, in the “Insert Options:” item there are several options for inserting text (they are indicated by icons): “Keep original formatting”, “Merge formatting”, “Picture”, “Keep text only”.
- To remove the background, you will need to select "Keep text only."
Radical
Pre-process the text using an editor with less functionality in advance, which does not have the ability to edit the background color, for example, Notepad. In this case, when the text is rewritten, its markup, formatting information, various markers and, as a result, an indication of the design color are lost. This method can be used without any special consequences if you are working with pure text: without diagrams, tables, pictures.
How to change the page background
If necessary, the page background can be changed. To do this, you need to set new background settings and the previous background will be replaced with a new one.
For example, let's change the background of the sheet we have already created.
- Going to the “Design” tab → “Page Background” → “Page Color” → “Fill Methods”.
- In the window that appears, select the “Drawing” tab.
As you can see, in our case we already have a background image installed.
- Click the “Picture” button and select a new picture.
- Click OK.
Thus, we were able to change the previously selected background and insert a new picture.
How to print a background
By default, page background printing is not configured and many people wonder “Why the background is not printed.” Therefore, when preparing to print in the preview window, the document may appear without a background color or pattern.
In order to print the background, you need to make the appropriate settings:
- Open the “File” tab;
- Select the “Options” section;
- In the “Word Options” window, open the “Display” section;
- In the “Print Options” section, check the “Print background pictures and colors” checkbox.
You can access the Word Options window from the Print window. To do this, you need to go to “Page Setup” → “Print Options”.
This is one of the main user errors, after which the printer does not print the page background.
Remove image background
- Select the image for which you want to remove the background.
- Select Image format
>
Remove Background
or
Format
>
Remove Background
.If you don't see Remove background
, make sure you select the image. You may have to double-click the image to select it and open the
Format
. - The background area will be colored purple by default to mark it for removal, while the foreground will retain its natural color.
- If the default scope is incorrect, go to Removing the background
>
Working with Images
and do one or both of the following:- If the parts of the image you want to keep are magenta (marked for removal), select Mark areas to save
and use a pencil to draw freeform shapes. to mark the areas in the image that you want to keep.
- To remove other parts of the image, select Mark areas for removal
and use a pencil to draw. to mark these areas.
- When you're done, select Save changes
or
Cancel all changes
.To save the image as a separate file for later use, right-click the image and select Save as Image
.
You can apply an artistic effect or add image effects to the image remaining after removing the background.
Support
Office 2010 is ending soon.
Upgrade to Microsoft 365 to work anywhere, on any device, and continue to receive support.
- Select the image for which you want to remove the background.
- In chapter Working with drawings
On
the Format
in the
Customize
select
Remove Background
. - Click one of the handles on the selection lines, and then drag the line so that it contains the part of the image that you want to keep and excludes most of the areas that you want to remove.
Sometimes you can get the result you want without extra work by experimenting with the position and size of the selection lines.
Advice:
To unmark areas, select
Unmark
and then select the row. - If the default scope is incorrect, go to Removing the background
>
Working with Images
and do one or both of the following:- Select Mark areas to save
and use a pencil to draw. to mark the areas in the image that you want to keep.
- Select Mark areas to remove
and use a pencil to draw. to mark the areas that need to be removed.
- When you're done, select Save changes
or
Cancel all changes
.To save the image as a separate file for later use, right-click the image and select Save as Image
.
You can apply an artistic effect or add image effects to the image remaining after removing the background.
,
Image as the background of a Word page - method 2
There is another way to add a picture as a background image to a Word document page.
- Click the Insert tab in the Illustrations group.
- Click on the "Drawings" button ("Drawing").
- In the window that opens, select a picture from your PC.
- Click on the picture, markers will appear along the edges of the image, with which you can stretch the picture to the desired size.
- In the “Picture Format” tab, find the “Text Wrap” item, and select the “Behind Text” option in the context menu.
- Click on the image, enter the text that will be displayed on the image.
To ensure that the text you enter is clearly visible against the background of the picture, change the font color to match the color of the background picture.
A few final words
More recent versions of the editor have become convenient in that there are not only extended tips for all occasions, but also pop-up panels that appear when you select fragments of text or other elements. It is enough to simply select a part of the text or cells in the table, and a quick access panel to the main functions will immediately appear, among which there are buttons responsible for calling up context menus for working with the background and color.
But in any version of the program, in order not to use alternate transitions in different menus, the necessary buttons for accessing such functions can be placed directly on the main panel. In Word 2003, you can do this by using the view menu with a selection of toolbars or the service menu with going to settings, where there is a section for selecting commands. For the corresponding command, the button is simply dragged to the desired location on the panel.
In Word 2007, the setting is carried out by entering the “Office” button menu, and in version 2013 and higher, from the “File” menu in the “Options” section, where the quick access panel line is selected. A window with all available commands will be displayed on the right side. Simply select the one you need and click on the add button in the center of the screen. The button will automatically appear on the main panel.
"Word" 2013-2016
Versions of Word 2013 and 2016 are also different from all previous ones. In order to perform operations to remove any type of background, you first need to use the design tab on the main panel.
Next, you move to the page background section, which contains a special button. After clicking on it, a drop-down menu will appear, in which you need to select the “No background” item.
The nuances of printing documents with a background
When answering the question of how to make a background in Word, it is fair to immediately consider the issue of printing a document, because the visual component is most often of interest to users in this aspect. There are some subtleties of the process that determine the final result.
In order for the background to be displayed on paper when printing, you need to implement the simplest instructions:
- Open the "File" tab in the very top left corner of the window.
- The next step is to find the “Options” element among the menu items.
- An additional window will appear in front of you. There is a whole set of sections presented here. In this case, you are interested in “Screen”, click with the left mouse button.
- Check the box next to "Print background colors and designs" as shown in the image below. The required option is located in the block called “Print Options”.
- At the very end of the procedure, do not forget to click on “OK” in order to complete the entire process and save the changes made. Now print the file. You can be sure that everything will be successful and you will get the desired quality.

