Rotation, three-finger swipe, vertical scrolling, zooming and other touchpad functions on a laptop. Description and use of the touch panel.
This article describes the features of the Synaptics touchpad. We will talk about the device of this particular company, since it was the developer of the classic touchpad and was the first to introduce a touchpad into a laptop after the trackball.
As laptops have become thinner, the desire for a "flat trackball" prompts Synaptics to develop the world's first touchpad.
Where to find touchpad settings. How to start setup
All touchpad functions on a laptop can be enabled or disabled completely or individually.
You can find the touchpad settings by right-clicking on the icon in the system tray.
Next, go to the Device Settings tab and then Settings on the tab itself. Here you can change the speed of cursor movement (sensitivity, as gamers sometimes say), scrolling speed, and the speed of the device’s response to a double click.
First way
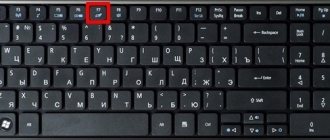
Turning the touchpad off or on couldn't be easier. As a rule, manufacturers have provided special buttons or key combinations for this. If you find the instructions for the laptop, you can probably find it there. If documents are lost, try using the following combinations - hold down the “Fn” key and at the same time try pressing F5-12. By the way, in this way you can find out some other combinations, because each of them allows you to adjust the screen brightness or sound volume, as well as change other computer settings. Let’s say if you have an Acer laptop, then in this case you can turn on the touchpad by pressing the “Fn” + “F7” key combination.
Light finger touch
When enabled, tapping with your finger performs the same action as pressing the left mouse button. When this check box is cleared, pointing device clicks can only be performed using the TouchPad™ device buttons.
A “finger touch” is performed by quickly touching the surface of the TouchPad™ device and then quickly removing your finger.
The best results are achieved with a quick, light touch. Touches that are too strong or too slow are less effective.
Perform the Finger Touch once to simulate a single click, or quickly repeat the gesture twice to simulate a double click.
Ways to connect a mouse to a computer.
With all the variety of manipulators, there are only two connection methods (wired and wireless). Each of them has its own advantages and disadvantages.
Wired. This type of connection includes manipulators with PS/2 and USB interfaces. Mice with a USB interface are now available in a wide range, but devices with a PS/2 connector can still be found, but despite this they are gradually becoming a thing of the past. On the one hand, progress is taking over, but I don’t want to say goodbye to mice that have a PS/2 interface, because they do not have device polling, and this, in turn, has a positive effect on response time.
Wireless. This type of connection can be divided into the following groups:
- Bluetooth. Manipulators are good because they do not take up the interface on the computer, but unfortunately, they have a low response speed. To pair the mouse with a computer, the latter must have a Bluetooth module.
- Wi-Fi. Mice with this connection have the lowest power consumption of all those presented in this group. To connect, the computer must have a module to receive the signal.
- Radio channel. Devices with this type of connection have a stable connection and high response speed. To connect, you need to insert the USB module of the manipulator into the appropriate port of the computer.
Undoubtedly, a wireless connection of a mouse to a computer prevails over a wired one in terms of ease of use, for example, on the road, but connection to batteries or rechargeable batteries can fail at the wrong time. Therefore, it is advisable to have a spare set of batteries with you on the road.
Clicks
By default, buttons function the same as mouse buttons for a given pointing device.
If this checkbox is not checked, the buttons will be disabled and clicking on them will have no effect, and clicking with the pointing device can only be done using a light, quick touch.
The buttons can also be reprogrammed to perform other actions. For example, you could set the right-click action to “go to a web page in your default browser.”
Thus, every time you click the right button, the default browser on the pointing device will automatically launch, after which the specified page will load.
Detection of physical damage when the tauchpad is not working
The touchpad sagged
A breakdown is the reason for the inactivity of many elements, but it is extremely difficult to detect a defect in the touchpad. A visual examination may not reveal any violations that become apparent when the device is opened.
But there are a number of nuances in which it is easy to suspect a breakdown:
- the touchpad worked when purchased, and then stopped working for no apparent reason (disconnection);
- the laptop fell into the hands of children or an inexperienced technician;
- the user requested an OS reinstallation at the service center;
- The laptop had already been repaired and the touchpad had been disabled at the client’s request.
In any of the above cases, there is a chance that the touch panel is already broken and needs to be replaced or connected. These works are performed in a service center; the technician will quickly determine the cause and name the amount for repairs. As a rule, connection is inexpensive, but you will have to tinker with replacement - not always the necessary consumables are in stock.
Enabling ChiralScrolling
This feature allows you to scroll continuously in one smooth circular motion. Scrolling speed depends on the speed of your finger movement.
To enable this feature, select the Enable ChiralRotate™ checkbox.
To use the ChiralScrolling feature:
- Place your finger on the target area. The target area for scrolling up or down is the right side of the TouchPad™ device. The target area for scrolling left or right is the bottom edge of the TouchPad.
- Move to indicate the direction you want to scroll, and then make circular movements either clockwise or counterclockwise. Once ChiralScrolling is enabled, you can use circular motions to move your finger anywhere on the TouchPad. Note. To change the scroll direction, simply change the direction you move your finger. After this, scrolling in the opposite direction will begin.
- To stop scrolling and return to pointer mode, lift your finger from the surface of the device.
Application and appearance
A touchpad, like other pointing devices, is typically used to control a menu "cursor" (portable electronics), a mouse "pointer" (computers), or to replace certain keyboard keys.
Finger movements on the surface of the device are converted into movements of the “cursor”/“pointer” on the screen. Touching the surface simulates pressing mouse buttons or keyboard keys. Touchpads can be placed next to the keyboards of various devices: computers, laptops, electronic keyboards, musical instruments, mobile devices.
Touchpads can be placed on dashboards of household and industrial equipment, can be remote (made as separate devices connected to a computer via a PS/2, USB or other interface), can be transparent and placed on top of the display (see touch screen).
The sensitive surfaces of touchpads are most often made in the form of a rectangle with rounded corners, but there are also models with surfaces of other shapes (for example, in the form of a circle). Typically, the surface area of the touchpad does not exceed 50 cm².
Pinch zoom
The Pinch to Zoom gesture lets you use the pinch-to-zoom feature in many apps.
Using the Pinch to Zoom gesture, you can perform the same actions that you can use with the scroll wheel in standard Windows applications that support zooming using the scroll wheel in combination with the CTRL key.
Select the Pinch Zoom checkbox to enable the ability to zoom using the pinch gesture. To learn how to perform this gesture, watch the instructional video.
For best results, perform the gesture with your fingertips.
Operating principle
Electronic circuit and sensitive surface of the touchpad
Touchpads work by measuring the electrical capacitance between a finger and a sensor or between two sensors. Capacitive sensors are located along the vertical and horizontal axes of the touchpad, which allows you to determine the position of your finger with the required accuracy. The sensitive surface of the device is a grid of two layers of metal conductors separated by a layer of thin insulating spacer. The gasket is a lavsan film. Conductors in one layer are located parallel to each other; layers of conductors are arranged so that conductors from one layer are perpendicular to conductors from another. Two layers of conductors act as plates, and the spacer acts as a dielectric; capacitors are formed at the intersection of perpendicular conductors.
After turning on the device, an electric field is formed between the plates of the capacitor. The preparation of the device for operation begins. The microcontroller applies voltage to two conductors located in different layers, measures the resistance between them, stores the measured value in memory, then stops supplying voltage and applies voltage to two other conductors located in different layers. This is repeated until the microcontroller measures and stores the resistance between each pair of conductors located in different layers.
The device then returns to normal operation. The microcontroller continues to measure resistance between pairs of conductors, but now compares the measured values with those stored in memory. The time during which the microcontroller manages to “take readings from all sensors” (period T or frequency ν = 1/T) is one of the characteristics of touchpads.
The human body is a good conductor. When a finger approaches the sensitive surface, the finger acts as a capacitor plate; for capacitors located near the finger, the electric field changes, and, accordingly, the capacitance. The microcontroller measures the resistance between pairs of conductors and compares the measured values with those stored in memory. By analyzing deviations of the measured values from the saved ones, the microcontroller can determine the coordinates (X, Y) of the contact point and the pressure (Z) exerted on the surface. This is possible due to the fact that the more pressure is applied to the surface or the more fingers are near the surface, the greater the total capacitance of the capacitor formed by the surface of the device and the finger.
The capacitance of the grid capacitors is affected not only by the finger, but also by external electric fields and other physical effects. As a result, the capacity is constantly changing (jitter). To eliminate jitter in measured values, “filtering” algorithms are used. Algorithms replace sudden changes in measured values with smooth ones (smooth). The most commonly used is a simple algorithm called an algorithm. According to this algorithm, the value of the current coordinates is determined by averaging the last two unsmoothed values:
Xcurrent = (Unew + Uprevious) / 2,
Where:
- Xcurrent—smoothed value;
- Unew, Uprevious—measured and unsmoothed values.
To increase the degree of jitter smoothing, use the averaging of three or more new (just measured and not smoothed) values or use weighted algorithms, for example, this one:
Xcurrent = 1/2 Unew + 3/4 Uprevious.
By measuring the full capacity, you can determine the degree of pressing, that is, the third Z coordinate. If there is no finger on the sensitive surface, the Z coordinate is zero. To determine the movement of the finger, the device monitors the increase in the Z coordinate above a certain threshold, then calculates the change in the X and Y coordinates until the Z coordinate becomes zero, which corresponds to the end of the movement and the removal of the finger from the sensitive surface of the device. The obtained values of ΔX and ΔY are then used to move the pointer displayed on the screen.
Three finger swipe
The Three-Finger Swipe gesture improves navigation across a variety of apps. You can use the gesture to browse the Internet or view photos in a photo viewer.
When performing this gesture, the fingers should be at some distance from each other.
Select the Enable border movement when scrolling check box if you want to continue scrolling when your finger reaches the edge of the TouchPad.
The function of disabling the touchpad when connecting a USB is described in the article: Driver capabilities for the Synaptics touchpad.
Story
For a long time, manufacturers could not choose a common name for touchpads of different designs. The terms "glidepoint", "touch sensitive input device", "touchpad", "trackpad" and "pointing device" were used.
In 1982, Apollo Computer equipped its workstation computers with keyboards with a touchpad on the right side. A year later, Gavilan SC placed a touchpad on the top of its keyboards.
In 1988, George E. Gerpheide invented a type of touchpad.
In 1989, a type of touchpad was developed for the Psion “MC 200/400/600/WORD” series of computers.
In 1994, Cirque Corporation released the first touchpad, which became widely used and was known as the GlidePoint.
In May 1994, Apple Inc. used “GlidePoint” touchpads in “PowerBook” series laptops (see photo), replacing the trackball with them. After some time, the PowerBook and MacBook series of laptops began to use touchpads developed by Apple itself and called “trackpads”.
Sharp also used GlidePoint touchpads in its products.
Synaptics soon introduced touchpads known as “TouchPads” to the market.
Epson used TouchPads in its products.
Since the 1990s, touchpads have been used in laptops.
Alternatives to the touchpad on laptops are:
- strain gauge joystick (English pointing stick);
- "trackball" (English trackball).
Devices containing both a touchpad and a trackball are rare.
Since its introduction, the touchpad has become the most common mouse pointer control device for laptops.
How to return the cursor on a Samsung TV?
Reboot the TV by pressing the power button and then on the remote control, press and hold VOL and the fast access menu will appear and remove the green circle. Then go to the Internet menu and everything will appear, your cursor is in place. If it doesn’t help, write to the Support Service, describe the problem and the guys will help you.
Interesting materials:
Why a gigabit router? Why HDR in a monitor? Why wash the floors every day? Why do surgeons put a patch on the bridge of the nose? Why boil the soup a second time? Why put laundry in the freezer? Why do they put a patch on the bridge of the nose? Why put a patch on your nose after rhinoplasty? Why does a cat touch with its paw? Why mow the grass in October?
Possibilities
Using a driver program, the capabilities of the touchpad can be significantly expanded, but these functions must be supported in hardware by the touchpad itself. For example, it becomes possible to simulate pressing mouse buttons, simulate the rotation of the mouse wheel, use gestures and multi-touch.
List of some features:
- dragging and selecting (incomplete double tap with one finger slide);
- pressing the right mouse button (short press with two fingers);
- pressing the middle mouse button (short press with three fingers);
- mouse wheel rotation (vertical scrolling) (two-finger sliding);
- vertical scrolling (sliding one finger along an area located at the edge of the sensitive surface on the right or left);
- horizontal scrolling (sliding with one finger along an area located at the edge of the sensitive surface at the top or bottom);
- increase or decrease (sliding two fingers along a straight line towards each other or away from each other);
- flip (touching with one finger, sliding the second finger around the first in a circle);
- swiping (light touch with three fingers while moving from left to right or right to left);
- emulation of pressing additional keyboard keys (for example, “Play”, “Pause”, “Search”, “Email”).
Moving your finger along the touchpad to the edge of the sensitive surface and holding it near it can be perceived as a gesture to automatically move the “pointer” in a given direction at a constant speed.
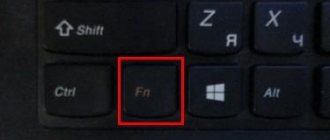
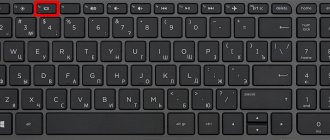
You can disable the laptop touchpad by pressing the Fn+Fxx key combination, where:
- the Fn key is located next to the Ctrl key;
- Fxx is one of the keys from F1 to F12.
On some laptops, the touchpad is disabled with a separate button.
Touchpads are fairly low resolution devices. The touchpad resolution is sufficient for playing logic games, for everyday work with office applications and web browsers, but not enough for working with graphics programs, and makes playing 3D shooters almost impossible.
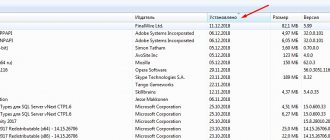
Updating drivers using third-party utilities
Sometimes suitable drivers may not be found in Windows' own database. The system will simply write that the latest driver versions are currently installed for the device. You can update them manually by visiting the laptop manufacturer's website, where you can find your model and download the appropriate driver.
But why do this if the update can be done automatically? The best solution would be to install software like Driver Booster. Such utilities are able to independently access the resources of hardware manufacturers on the Internet, search for and install the appropriate drivers without user intervention. The advantage of such applications is that they work exclusively directly with the websites of hardware manufacturers and software developers for its components and find the latest updates for absolutely all drivers identified in the system during the scanning process.
Reason 3: Touchpad is disabled in BIOS
Very often, the touchpad is simply disabled in the BIOS - the user usually does this out of convenience, but forgets it the moment he needs to use it again. Less often, this happens by accident or after resetting the BIOS settings.
When you turn on the laptop, press the key assigned by the developer to enter the BIOS several times and quickly. If you don't know what this key is, read our other article.
Read more: Entering the BIOS on an ASUS laptop
Use the arrow keys on your keyboard to select the “Advanced” section and find the “Internal Pointing Device” option there. Press the Enter key on it and change the status to “Enabled”. Then press the F10 key to save the settings and exit the BIOS and then start the system.
Gaming and simply non-budget models may have a UEFI interface (that is, with a graphical shell). If you have one, first go to the mode with advanced settings - “Advanced Mode” - with the corresponding button or by pressing the F7 key.
Next you need to do the same thing as described in the paragraph about the regular BIOS above.
There is a possibility that touchpad control is not present in all BIOS of ASUS laptops. Therefore, if you do not find the specified option, simply move on to other sections of the article.