Good time everyone! We continue to study such a wonderful program as Photoshop. In today's review we'll talk about how to work with pictures. This is a very useful function, once you master it you can easily create different types of collages from several small images.
These skills will be useful if you have to work with frameworks. For example, you want to place a photo of your child in a New Year’s frame and give a beautiful portrait, but you never know what else you can do. In a word, it will come in handy. Today there will be simple and easy techniques with videos on the topic. We read, remember, adopt! So…
A small image can be inserted so that it is located both in the background and in the foreground. When inserting a photo, you will naturally have to change its size. Well, the most interesting thing that especially attracts many is cutting out the head of an object and inserting it into another picture. If you want to surprise your friend, “cut off” his head and attach it, for example, to Stallone or Schwarzenegger. All these techniques will be discussed in the article.
And one more thing I would like to mention. If the entire picture is placed in the foreground, then for convenience it should be on a transparent background , that is, in png . It will be easier and faster to work this way.
First, let's learn how to combine images without any actions or transformations. Open the program and through the “File” - “Open” menu, select any background photo. It can also be inserted by simply dragging it from the folder into the program window. To make it convenient to work, as always, in the layers window, create a copy of the background.
Next, in the same way, through the menu - “File” - “Open”, select another photo to insert. It will open in another window.
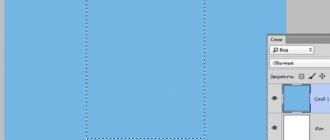
Open this window, select the “Rectangular Marquee” tool, and trace the picture.
Along the edges of the picture we will see a flickering dotted line. Now copy the selected image using the “Edit” - “Copy” command. Open the background image and use the top menu item “Edit” - “Insert” to insert it. The image will appear in the foreground.
This is what happened. Please note that the inserted image in the layers window is placed on top of the background one. This means that she is in the foreground.
You can move it to the background, that is, move the layer down in the Layers workspace. However, the inserted image will no longer be visible.
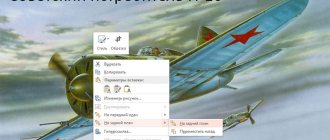
In order for the picture in the background to be visible, select the layer with the background. Above, open the menu with a drop-down list and select “Darkening” from it. As a result, a picture appeared in the background. Moreover, note that the white background on which it was located has disappeared.
The second option for inserting a picture without using the “File - Open” menu command is to immediately drag the picture from its location to the background.
Here, please note, guides have appeared in the picture, along which you can edit the inserted picture. Stretch, shrink, resize, rotate.
After editing the picture, press the “Enter” key and the guides will disappear. However, the picture is on a white background. If you apply the “darken” function to it, the background will disappear, as in the operation described above. Thus, to summarize:
- a picture can be inserted by simply dragging it from its location directly onto the background.
- Load the image directly into the program, copy it and paste it into the background image.
Insert the image into the picture and reduce it
So, the picture was inserted using any of the methods described above. Now you need to resize it. If you inserted it directly from its location by dragging it onto the background image, then, as mentioned earlier, in the picture you will see lines along which you can resize.
If you move the mouse arrow to the corner of the picture, it will take the form of a double arrow. By holding down the left mouse button you can increase or decrease the size of the picture. If you move the mouse cursor to a point located in the middle of one of the sides of the picture, you can change the size in width. However, the height of the image remains unchanged.
Don’t forget to press “Enter” after the changes so that the lines disappear and the picture accepts the changes. If you inserted a picture from the program itself by copying, then its dimensions are changed through the menu “Editing - “Transform” - “Scaling”.
A frame will appear around the picture with squares in the corners and in the middle. If you press the “Shift” key and right-click one of the corners, the picture will resize proportionally. If you don’t press the “Shift” key, the image resizes unevenly.
Method number 3: menu command “Place”
This is a special method and it is qualitatively different from the previous two. A distinctive feature is the automatic creation of a smart object.
With the original image open, select File - Place.
A Windows Explorer window will open. In this window you need to find the image you need to insert and click the “Place” button.
As a result, this picture will appear on the main image. But:
- it will not match its original size;
- it will appear in an editable frame.
What happened?
By using the Place menu command, we automatically created smart objects. I have already written a detailed article about what smart objects are. In short: this is a container layer that can be resized as you like and as much as you like without the slightest loss in pixel quality (I wrote about the process of losing the quality of a photo when reducing its size in this article).
The picture did not appear at all in the size that we would like. It needs to be corrected. To do this, pull the ends of the black frame in the direction of decreasing or increasing. When you're done, click on the checkmark button located in the options bar.
Advice
To resize the picture proportionally, hold down the Shift .
To bring up the editable frame again, press Ctrl+T .
How to insert a picture into an image in Photoshop and color it the background color?
Why is this necessary? For example, we have a photograph of a monument where the background needs to be changed. To do this, load a background image with the sky into Photoshop. We copy here the picture with the monument. Please note that in the layers window, the picture with the sculpture is above the background, in the foreground.
If one of the pictures is smaller, you need to make them the same. It's best to change the background size. Now select the layer with the monument and give it a mask by clicking on the icon with a circle in a square.
As a result, next to the picture of the monument we will see a white square. In this case, the main color on the toolbar should be black, and the secondary color should be white. We will replace the background on the resulting layer mask. To do this, select “Brush” on the toolbar. And in the layers panel, select the mask by clicking on it with the mouse.
Having set the brush to the desired size and hardness, move it over the drawing. As a result, we see how the background of the picture with the monument is erased, and a new background appears in its place.
As a result, we get an image like this with a changed background, that is, painted over in the background color.
Preliminary preparation
Before you add a picture to a picture in Photoshop, you need to open the images in an editor. To do this, do the following:
- Click the "File" button in the top left corner of the screen.
- From the drop-down list, select "Insert".
- Find the image you want to work with, select it, and click OK.
After adding both images, they will be in separate tabs where you can work with them independently of each other. It remains to transfer one of the pictures.
Insert the image into the image and make it transparent, without a background
The listed operations are good for those pictures that are on a uniform background, for example white. Making them transparent will not be difficult at all. If the background is not uniform, then you will have to, as they say, “sweat.” So, we load the image as a background, copy the second one onto it, from which we will remove the white background.
There are several ways to remove the background. One of them was mentioned earlier. Move the layer with the image below the background layer and apply the “Darken” style to the background. As a result, the layer that was moved down and without a white background will appear in the picture.
The next background removal option uses the Magic Wand tool. Select this tool.
Next, click with this tool on the white background and get a dotted selection of the object.
Now press the “Delete” key and the background will be deleted. That's the whole procedure. If the object has smooth sides, without sharp corners of complex boundaries, then you can use the Magnetic Lasso tool.
Using this tool, select the object along the contour, then select “Selection” => “Inversion” and only then “delete”. The background will be removed. These methods are good for plain backgrounds. If the background color is not uniform, then you need to use the “Quick Mask” mode.
Select the mode, select the brush tool and drag it over the object.
After finishing working with the brush, click on the “Quick Mask” tool again, and then “Delete”. The object was left without a background.
If it turns out to be not very contrasting or light, then we make corrections in the “Image” tab. There are all the necessary tools for this.
Where to begin?
In order to start analyzing how to insert a picture into a painting in Photoshop, very little is required. First, of course, you need to install Photoshop itself and run it. Then work with images begins.
It is necessary to select a base, that is, a picture on which another object will be placed. It could be anything. For example, in Photoshop you can create your own drawings and then attach other images or inscriptions to them.
In addition, you can borrow freely available pictures from the Internet. Finally, it is often necessary to combine a personally taken photograph with some other image.
Whatever is chosen as the base, this file must be opened in Photoshop. This can be done using the File – Open items, or simply drag the selected object directly into the work field.
After this, all that remains is to find the second picture, which should be placed in the first.
Inserting an image into a layer (selected area)
You can insert not only the entire picture, but also a selected area. For this purpose, open the image in Photoshop and select it in any way depending on the background. If the background is monochromatic, then immediately use a “magic wand” or “magnetic lasso”. Here it is as convenient for anyone. In the example, the picture is highlighted with a “magic wand”.
If you selected using the “magic wand” tool, then in the next step you need to open the “selection” tab and select “Invert” there.
This way we will select the object itself and not the background around it. Now we make a copy (“Editing” - “Copy”), open the desired picture and through “Editing” - “Paste” we complete the operation.
Method number 2: copy-paste
A painfully familiar combination of actions also works in Photoshop. The essence is the same: copy one image to the clipboard, and then paste it in the right place.
Now in more detail how to do this
Open the picture you want to copy and press Ctrl+A (select all). “Marching ants” should appear around the image - this means that we have created a selected area. And this, in turn, is important for Photoshop, because it always needs to indicate what we want to copy. Thus, everything that is inside the selected area will be copied.
Let's copy the selected area - press Ctrl+C. Now the drawing is on the clipboard!
Return to the main image and press Ctrl+V. If everything is done correctly, Photoshop will place the contents of the buffer in the center of the open document:
Select a person’s face and paste it into another photo (picture)
A similar function is useful when we have some kind of template - an object where a person’s head can be inserted. This is often used for friendly collages, greeting cards, etc. For example, it is not always possible to find the right suit, dress a child in it, create an appropriate background and take a photograph. By downloading the required template and inserting the child’s face into it, we will get the desired option without any difficulties.
The procedure is the same. First select a background photo. Then we select a photo of the child, or someone else. Select the head in any convenient way and copy. Then we insert it into the first picture, move it so that everything fits - as a result, we get the photo we need. Below is a very simple example of this action. That's all the operations for inserting pictures. Good luck!
Author of the publication
offline 1 year
Several main points about how Photoshop works
As you know, there are various options for overlaying images on top of each other in Photoshop, directly depending on the specifics of the images being added. I will present a fairly simple and convenient method for merging photos, which will be useful even for beginners.
Before you start overlaying photos, you need to understand the following about how Photoshop works:
- Ideally, the photos you use should have the same resolution. If one photo is 300 dpi and the other is 74 dpi, you may need to convert one of them to make one match the other;
- Try to select images with the same light source. Of course, you can create artificial shadows and highlights yourself, but in this case it can be difficult to achieve a natural look in the final photo. It would be optimal to find a photo with similar light characteristics;
- Try not to overcomplicate the photo overlay process itself. Trying to add various curved elements and other similar complexities often results in the end result not looking realistic.
Let's take a detailed look at the steps to make a collage of two pictures in Photoshop.
Some tips on what and how to shoot for the site
- The main thing in photography is light. It can make a shot a masterpiece, or it can ruin it. Therefore, the light must be managed competently, without expecting that all errors will be corrected by subsequent processing. Believe me, if the light is set poorly, even the most ingenious program will not help. For shooting, choose the first half of a sunny day and a place near the window. However, direct rays will produce too sharp shadows and rough outlines of objects. The role of a diffuser can be played by an ordinary sheet of white paper attached to the window glass. By gluing the same sheet of paper or foil onto a cardboard, you will get a completely suitable reflector. And after a little practice, you will probably want to purchase more professional accessories.
- The next most important element of the frame is the background. Strange as it may sound, first of all, it must exist. That is, it’s not everything that accidentally ended up in the background. The background needs to be carefully thought out, unnecessary objects removed (and if it’s still difficult for you to create a good composition, remove everything). A light background will give additional natural illumination to the object. Another win-win option is a wooden desk or at least a laminate floor.
- Once you've mastered shooting with simple backgrounds, you can start experimenting with additional objects. Their main task is to create an interesting environment around the main object, emphasizing its style, color, texture and mood of the frame. Life hack: after you have selected and arranged the accessories, remove the last one (as a rule, this is an extra detail). Now you can shoot.
- You cannot do without Photoshop and other “processors,” if only because before publishing, the captured images will need to be cropped and their pixel sizes changed. However, now these programs are a powerful creative tool that allows you to create independent works of art from “raw” photographs.
- The conclusion naturally suggests itself that for the sake of unique and high-quality photographs, it would be useful to learn from professionals and take photography courses. Having acquired basic knowledge in the technical and creative fundamentals of photography, mastery of equipment and programs, you can continue learning on the Internet and practice, practice, practice.
- And only now we got to the main thing - what to shoot with. The camera must be of unconditional quality, belong to a well-known, trustworthy brand, and there are not many of them. Experienced photographers recommend starting immediately with a DSLR camera. At first, you can limit yourself to a “body” with two or three lenses, and expand the collection of tools as needed. DSLRs are more expensive than point-and-shoot cameras, but the quality of the images will undoubtedly make your blog stand out from others. By the way, you can devote several articles to how you chose a camera and mastered the art of photography.
So, good luck to the heights of blogging - with a cool camera and a diploma from a good photography school in your hands! And even if you haven’t calculated all the costs of blogging, don’t put off important investments for later, take advantage of a loan that will give you the opportunity to get everything you want at once.
Good luck to you! See you soon on the blog pages KtoNaNovenkogo.ru
How to unfreeze a PNG image
And one more small addition. If you use images in jpeg format, then there should be no problems with moving the image into the image. But, for example, I used the png format. And in the “Layers” window, the layer with the image was pinned. This can be seen from the closed lock icon on the layer with the png image.
In this situation I could not do anything with the images. In order to remove this limitation, you need to do the following: convert the image to the RGB 8 bits/channel color mode.
How to do it? It’s very simple: click on the “Image” link in the horizontal menu, then “Mode” and check the RGB line. Now in the “Layers” window, double-click on the layer with the image and click “OK” in the window that appears. And then we work with the image.
What are the ways
So where do we start? Well, of course, from the opening of the program. Just kidding! You know this perfectly well even without me. I am one thousand percent sure! Now let's move on to more serious things and leave the jokes aside.
I list all the ways you can do this:
- Drag an image from tab to tab
- Copy and paste via clipboard - Ctrl+C - Ctrl+V
- Place command
- Drag and drop from a computer folder
Not bad, right? It seems like such a simple action, but there are so many variations! We will look at each one. I won’t wait too long and get straight to the information you need. Get ready to absorb new information like new sponges.
Drag from folder
And here is the finish line! The fourth method is to drag and drop a file from a computer folder. This is a simpler version of the previous method. The result will also be a smart object, but we don't need to go into the menu. To do this, we need to find our picture in the folder, then hold it with the mouse and drag it into the Photoshop window.
Moreover, if you have Photoshop minimized, then you can drag the picture onto the Photoshop icon in the lower area of your screen, and then, automatically, the photo will go into the program itself. Do you understand how to do this?
Or you can drag the picture directly into the program window if you have a photo folder open directly on top of Photoshop.
The easiest way is to drag and drop from the tab
Let's say you have 2 tabs with photos open, and you need to make sure that both photos are in one window. You need to press the “V” key, so you will switch to the “Move” mode. Or click this icon on the panel:
Once you have done this and are in move mode, you need to grab one image with the mouse (i.e. click on the image and do not release the mouse) and drag it to the tab of another image.
This way, the picture from one tab will fit on top of the photo in the other tab. It must be said that this method copies an image from one tab to another. Those. your image remains in the first tab and appears in the second. Happened? Go ahead.
At the finish line
Methods for combining images work in any case (even when overlaying images without a white background). Choose the best option and enjoy it for your health!
Finally, I would like to recommend you an impressive selection of video tutorials from real virtuosos who know the graphic editor like the back of their hand. We are talking about representatives of the Internet project “Photoshop Master”. They offer 88 lessons in high quality video format . Even I (a person who has been creating images for websites for a long time) learned a lot of useful things. Try it too!
With that, I’ll take my leave, dear readers. Don't forget to subscribe to blog updates so you don't miss a single article from the web design treasury. You can keep your finger on the pulse using the VKontakte group , where I duplicate the most important details. Let's conquer new heights together! Good luck.
Outlining a specific area
Since we insert the second image into a specific place on the first image, we select an area to place the second photo. To select an area, Photoshop provides useful tools that even novice designers use: Lasso, Quick Selection, Straight Line Lasso, Magnetic Lasso . Select the first function and select the area (displayed as dotted lines after selection).