Of course, on the Internet you can find many presentation templates that will already have some kind of background design. But often you want to design presentation slides in your own way, for a specific task . Doing this in PowerPoint is not at all difficult, there are 2 ways. The 1st is very fast - using the “Format Background” button on the Design ribbon tab. The 2nd one is a little more complicated, but much more functional - using the “Slide Master” mode on the View tab. Below is a detailed analysis of each method and their comparison. But first of all, let's look at the basic rules of good form when choosing a presentation background.
to the begining
How to Insert a Background in a PowerPoint 2016 Presentation
If you use PowerPoint 2016, then in order to make a picture as the background of your presentation, you need to right-click on the slide in the left part of the window and select “Background Format” from the menu that opens.
You will then see a Format Background menu on the right side of the PowerPoint window, where you can customize your background image. Here you need to select the “Picture or Texture” option and click on the “File” button in order to select a picture that should become the background of the presentation. This way you will set a background image for one selected slide, but if you want to use this background for all other slides in the presentation, then click on the “Apply to all” button.
Also, there are several settings available here that allow you to change the appearance and location of the image in the background of the presentation. For example, you can set the background transparency value, and also place the image with an offset.
There are three tabs at the top of the Background Format menu. If you go to the last tab, you will have access to even more settings that you can add to the background image. In particular, here you can change the sharpness, brightness, contrast, saturation and temperature of the image.
As in the previous case, the settings apply only to the current slide of the presentation.
In order to apply them to all slides, you need to click on the corresponding button at the bottom of the menu.
Please note that if you want to remove the previously installed background, then you need to open this menu again and select the “Solid Fill” option.
Adjusting Picture Settings
If the image turns out to be too bright and stands out against the background of other elements, it is advisable to process it. More precisely, change a number of settings. To do this, go to the same “Background Format” where you installed the background image. Using the transparency slider, you can beautifully fit a picture into a slide - so that the information is clearly readable, but the image still remains noticeable.
In PowerPoint, you can change several other picture parameters, from brightness, contrast, and sharpness to color saturation. You can access these settings using the icons that appear on the background format tab. Here the user has the opportunity to add artistic effects to the picture and even convert the picture into a texture so that the background illustration is neatly included in the slides.
Slide background features
Before you make a picture into the background of your presentation, consider ensuring that the text does not blend into it. It is important to note that the contrast on the projector will be lower than on your monitor. Of course, the best thing is a background of light shades. The best text color is a color that contrasts with the background, black or dark in an appropriate shade.
The tone of the background image or photograph should be in harmony with the content of the slide. The right color scheme can enhance the effect of your presentation. The background should not dominate or distract the listeners' attention.
How else can you get rid of the background of an image?
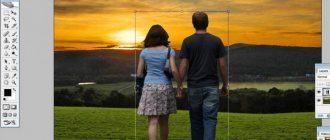
Sometimes it's easier not to get rid of the background of the image, but to simply cover it up a little or recompose the image. Firstly, it always makes sense to place the image as the lowest “layer” of the presentation slide. Click on it with the mouse and select “Move to background” - this way the picture will not cover the text and interfere with reading.
Place the picture in the background of the slide.
Secondly, for the text located on top of the image, it would not hurt to set a background color - this will allow the inscription to stand out so that it does not get lost against the background of the image. Express document styles are perfect for this.
As a result, without even removing the background from the image, you can get a pretty decent slide that will decorate your presentation. Well that's it for this time!
We apply styles and it turns out that it is not necessary to remove the background at all. Although this of course depends on the presentation.
Remove unnecessary parts of the picture using the commands in the “Background Removal” group
Also, as before, activate the “remove background”
Next, use the “Mark areas for removal” to remove unnecessary parts of the pictures.
If the program automatically removes the necessary parts of the drawing, return them by marking them with the “Mark areas for saving” button. As a result, we get the desired picture with a transparent background, which can be further refined by adjusting the basic parameters of the image or adding effects.
That's it, make good PowerPoint slides!
Add a presentation template from the Microsoft Office website
The main tool for changing the appearance of a document created using PowerPoint is built-in themes. They are quite universal, but sometimes their design does not suit the topic of the report. In this case, you can add other templates by downloading them from the official Microsoft website. To do this in PowerPoint 2007 or 2010, you need:
- Go to the “Design” tab and fully expand the list of all available themes.
- At the bottom of the new menu, select the sub-item “Other topics...”.
- In the browser window that opens, select the desired design in one of the categories and go to the download page.
- On it, click the “Load\Save” button and select a location to save the template.
To permanently add a new template to PowerPoint 2007, you need to:
- Execute the first step from the previous algorithm.
- Select “Search for topics” and open the previously downloaded template in the Explorer window.
- In the drop-down menu, select the “Save current theme” sub-item.
- In the new window, without changing the settings, click the “Save” button.
These two algorithms are the first way to create your own background in a presentation.
How to achieve transparency
For example, you need an image of an apple without a background. Go to:
The program will highlight the illustration with a purple area. It will become transparent after applying the effect.
Beginning of work
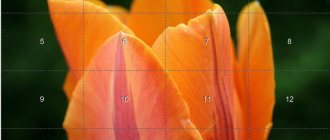
Change the scope of the Delete tool. Click LMB on the white circles of the frame. Pull them until you get the right result. Activate the “Mark Areas” button. Click with your mouse on the parts of the images that should be transparent. A circle with a “-” sign will appear where you clicked.
Click through unnecessary fragments. Use purple to highlight unnecessary elements.
If the result is not out of date, add more points.
Click the "Save" button.
The result is the following:
If it doesn't work, cancel the changes.
Note
When choosing your background image, it is not enough to choose a solution with the same proportions for the slide. It is better to take a picture in high resolution, since when shown in full screen, low-format backdrops can become pixelated and look terrible.
When choosing website designs, individual elements remain dependent on the specific choice. In most cases, these are various decorative particles along the edges of the slide. This allows you to create interesting combinations with your images. If this interferes, it is better not to choose any type of design at all and work with the original presentation.
Thank the author and share the article on social networks.
For LibreOffice Impress
Right-click on the slide, select the Set background image and specify a picture for the background on your computer. The drawing will be stretched to the edges of the slide. The background mode settings are sparse, but some things can be changed through the context menu Slide Format - Background .
Well, dear reader, now you know how to make a picture the background in a presentation. I wish you bright performances. Yes, by the way, in order for your speech to remain in the memory of the audience even longer, I recommend making an information booklet on the topic of the speech and distributing it to the audience.
Method 1
On the Design tab, find the Background Styles setting. Select Background Format and then set the fill to Picture in the dialog box that appears. Provide the address of your image.
But such a solution is possible if you are satisfied with the size, and you were going to use the entire picture as the background, and not a fragment of it. And when creating new slides, you will have to either copy a slide with an already installed background or set it from scratch.
Conclusion
Use a transparency effect. This is a good way to more effectively present the necessary information. The result depends on the illustration. If you can't edit the picture, use a graphics editor. For example, Photoshop, or choose another illustration.
Sources
- https://public-pc.com/kak-v-powerpoint-sdelat-fon-kartinki-prozrachnym/
- https://nice-slides.ru/powerpoint/lessons/themes/how-to-add-slide-background
- https://comp-security.net/%D1%84%D0%BE%D0%BD-%D0%BF%D1%80%D0%B5%D0%B7%D0%B5%D0%BD%D1% 82%D0%B0%D1%86%D0%B8%D0%B8-%D0%B2-powerpoint/
- https://presen.ru/23-kak-sdelat-svoy-fon-dlya-prezentacii-powerpoint-iz-risunka.html
- https://pc-consultant.ru/tekstovy-e-redaktory/kak-sdelat-risunok-prozrachnym-v-powerpoint/
- https://officeassist.ru/powerpoint/kak-sdelat-poluprozrachnuyu-kartinku-v-powerpoint/
- https://nice-slides.ru/powerpoint/lessons/pictures/how-to-remove-background-from-picture
- https://lumpics.ru/how-make-picture-transparent-in-powerpoint/
- https://bussoft.ru/prezentatsii/kak-sdelat-prozrachnyiy-fon-kartinki-v-powerpoint.html