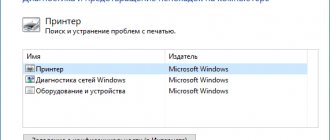
The instructions describe in detail all the ways to connect the printer to a computer using different connection options. We will separately talk about options for installing special software (drivers) for proper operation. Even an inexperienced user will not have any difficulty connecting to the device via a USB cable, router, Wi-Hi, ethernet cable or other personal computer.
Using the recommendations from the article, it is easy to connect a printer from HP, Brother, Kyocera, Samsung, Epson, Canon and many others in operating systems of the Unix family, Windows 7, 8, Mac OS. Special attention is paid to connecting the phone to a printing device and possible problems in this process.
If you have little experience using technology, we recommend that you first study our short instructions “How to use the printer” and only then proceed to the direct process of connection and installation.
Connection features
Device connection may differ depending on the PC operating system.
Installing a printer on a Windows PC:
- We place the printer taking into account the need for unhindered work with it and the length of the cable;
- turn on the device to a 220V network;
- turn on the PC and wait for it to fully load, then turn on the printer;
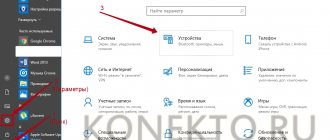
- Through the Start menu, go to Settings, then to Devices and Printers; if there is no printer, click on Add device - select the brand, model and move step by step until complete installation.
Printing from a smartphone
Modern phones have a built-in operating system. It can be IOS or Android. Setting up printing from a smartphone or tablet involves connecting a printer in one of these mobile operating systems. As is the case with Windows, there are two connection methods:
- A direct connection via cable will require the use of a special adapter.
- Network access requires the installation of special applications. This could be AirPrint for Apple equipment, Google Cloud Print for Android systems, software from printer manufacturers - ePrint from HP.
All methods of connecting a phone or tablet to a printer and setting up printing via Wi-Hi. A detailed description of the options for all possible options to 'make friends' with Android or IOS equipment with your printing equipment.
Connecting the printer using a USB cable
- Position the printer so that the cable is long enough to connect to the computer.
- Plug the printer into a power outlet and press the power button. Turn on your computer.
- Connect the printer to one of the USB connectors located on the computer system unit.
- Depending on your device model, the system may automatically begin the installation process, in which case you only need to follow the on-screen instructions. If this does not happen, proceed to the next step.
- Open the Start menu and select the Settings button at the bottom left of the menu.
- In Settings, select the Devices button at the top of the window that opens.
- Select the "Printers and Scanners" tab on the left side of the window and click the "Add a Printer or Scanner" button at the top of the window.
- Click on the name of your printer and the “Add Device” button.
- If the printer name is not displayed, click the "The printer you want is not listed" button and follow the on-screen instructions.
- Next, the Printer Installation Wizard will launch and the process will be carried out automatically. When prompted, insert the software CD. If the disk is missing, the necessary software should be downloaded from the printer manufacturer's website.
The printer can be connected to any free USB port
Adding and setting up a printer in Windows 10
Open the Start menu and go to Windows 10 Settings, then select Devices.
In the new window, on the left, use the “Printers and Scanners” option, and then, on the right side of the window, select “Add a printer or scanner.” Wait for Windows 10 to detect the printer.
If the procedure was successful, your printer will appear in the list below. When you click on its name, action buttons that can be performed with the device will appear. The following options will be available to you: print queue, printer management, device removal.
After the installation process is complete, you need to check the printer. To do this, click on the “Manage” button and, in a new window, run “Print test page”.
In this section, other useful options are available: printing settings, printer properties and troubleshooting.
Wi-Fi and Bluetooth connectivity
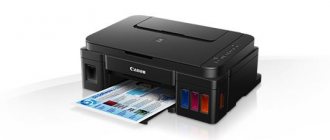
There are models of MFPs, inkjet printers and laser printers that support connection using wireless technologies. For example, you can take the Canon PIXMA G3400 inkjet, which has the ability to connect via Wi-Fi. A small nuance should be taken into account: this device connects to a Wi-Fi router using WPS technology. Therefore, you need to buy a router that supports WPS, and this feature must be enabled on it. The following figure shows how to enable WPS on the D-Link DIR-615 router.
Next, to connect your Canon PIXMA G3400 to a wireless network on Windows 10, you will need to follow these steps.
- Turn on the device to the network and press the button marked “Wi-Fi” located on it. Keep it pressed until the orange LED flashes once. After this, the blue Wi-Fi indicator will start blinking, indicating that the device has started searching for a wireless network.
- At this stage, you will need to connect the router to your inkjet machine (laser machine). Press the WPS button on it and hold it until the blue indicator on the inkjet stops blinking and begins to glow steadily. This will indicate that the printer has connected to the Wi-Fi network.
- Next, it is necessary for the OS to see the equipment. To do this, through the “Start” menu, select the “Settings” tab, after which a new window will open.
- Select the “Devices” section and click on “Add a printer or scanner”. The system will begin searching for equipment and ultimately display a link “The printer you need is not in the list,” which you will need to click.
- Next, you should place a marker near the item, as shown in the following figure.
- By clicking the “Next” button, a search for equipment (Bluetooth or Wi-Fi printer) will start. Select the required found equipment and click “Next”.
- After this, the necessary drivers will be installed and the equipment will be ready for use.
How to connect a printer to a computer over a network
If there is a computer on the local network to which a printer is connected, then it is quite possible to set up printing documents from any PC on this network. To do this, you need to open access to the printer on the computer to which it is connected.
To use a local printer as a network printer, all you need to do is:
- Share the printer so that it is visible to all computers on the network.
- On each PC, perform simple manipulations to detect the printer.
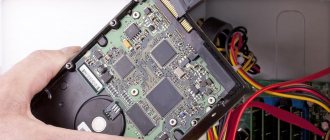
Possible problems
Doesn't print
You have successfully completed all the steps in the installation instructions, but the printer refuses to print. There may be several reasons for this:
- The device is not selected as master by default.
- The print service has stopped.
- The required drivers are not installed.
If the “device” is networked, then it is possible:
- Public access is not available.
- You are not authorized to use the device for printing.
- The PC on which the printer is configured as a network printer is turned off.
Is wireless connection possible?
You can connect without cables only if certain factors are met:
- The apartment or office has Internet access, which works via a Wi-Fi router. That is, the cable from the provider is connected to the router, and the latter is connected to the computer’s network connector with another wire. The exception is if the computer is a laptop, which does not require a wired connection to connect to the router. Or a desktop PC uses an external wireless module.
- The printer supports Wi-Fi connection.
- If you don’t have a router, but your computer can work with Wi-Fi networks, then you can connect directly. In this case, printing office equipment must be able to create its own network without a working Internet point.
The standard situation is with a cable connection through an intermediary - a router.
How to connect:
- If the router is already connected to the computer with a cable, then nothing additional needs to be done. Otherwise, you will need to use a patch cord (crimped Internet cable) to connect the router to the system unit. When there are many computers, you will need a separator (switch), you can use a regular router, since there are also several LAN connectors.
- If you don’t want to use another connecting cable, for example, when the router is located in another room, then you can purchase an inexpensive Wi-Fi adapter. The device resembles a regular flash drive with an antenna and connects to any USB input. Afterwards, you just need to connect to the Wi-Fi access point provided by the router.
Then the printer should join the wireless network where the computer is located.
Depending on the manufacturer, model and functionality of the device, the steps may vary. This is especially true whether the printer contains a control menu (display) on the body, or whether there is only a button panel.
- If there is no screen, then the easiest way is to connect in protected mode (WPS - Wi-Fi Protected Setup). There is no need to enter a password. You will need to press or hold down the Wi-Fi button for a while (you can find out exactly in the operating instructions or experimentally). The button can be indicated by a separate signal pattern, a combined communication and telephone icon, or called “WPS”. The light on the button should start flashing red or green, depending on the model. Afterwards, find the “WPS” button on the router and no later than 2 minutes, hold it for at least 2-3 seconds until the light with the corresponding name starts blinking on the indicator panel.
Both devices will automatically synchronize for some time. The indicators will start to light constantly, which will indicate a successful connection. - If the panel contains a screen, you need to go to the wireless network settings. The item can be located immediately in the list of settings sections on the first screen and have the same name.
Or there will be a small “Wi-Fi” icon that you can press with your finger. - Sometimes the “Wi-Fi” settings are located inside the general menu items “Settings”, “Settings”, “Options”, “Configuration”, etc. Inside the “Wi-Fi” section, several connection options will be available for the user to choose from - normal with selecting a network and entering a password, WPS or Wi-Fi Direct (the device will create the network itself). Use the first or second option to complete the printer connection.
Finally, you need to add a printing printer to the system. Also, if necessary, certain settings are made in Windows.
Instructions for Windows
It would seem that the process is purely technical in nature, and there should be no difference between the operating systems. However, in addition to purely mechanical actions, small system settings are required that will differ. Therefore, the connection algorithms will be slightly different.
- First you need to decide on the location of the devices. It is necessary to prepare a place for the printer so that it is located not far from the computer. The main criterion in this matter is that the cord should be positioned freely between the devices, without unnecessary tension.
- Connect the printer to a power source and turn it on. The power button is located on the front panel of the printer and has a standard marking.
- Turn on your computer and wait for it to fully boot into working condition.
- Take a USB cable and connect the printer and computer.
- If your printer model provides this option, then the system setup may occur automatically. That is, the PC will independently recognize the external device, install the necessary drivers, and after a couple of minutes the printer will be ready for use. This is the most ideal option. But there are situations when manual configuration becomes necessary. Open the Start menu.
- In the right menu block, select the “Devices and Printers” section. You can also find it by entering the corresponding phrase in the search.
- Then select the “Add Device” command, it is usually located in the upper left part of the system dialog box.
- The search for devices will start. Wait until it's finished and click on your printer name.
- Click Next and follow the onscreen instructions. If additional configuration and driver installation is required, when prompted, insert the media supplied with the printer into the drive. Alternatively, drivers can be installed via the Internet from the manufacturer’s website.
After this, your printer will be ready for use and you can send documents for printing.
Connecting to Windows OS
In order to solve the question of how to connect a printer to a computer, just follow the following algorithm.
- Turn on the printer and, if necessary, connect the printer to the router via a special Internet cable. This is often required for initial setup. But some printers immediately support wireless connections.
- In the instructions or on the manufacturer's website, check how a specific model connects to the network. Some need to be connected to the PC first (instructions above). If the printer can connect to the wireless network on its own, use the on-screen menu to locate the access point and enter the password.
- If the printer supports a WiFi module, then just find the network to which the PC is connected and enter the security code. To connect via Bluetooth, just find and press the pairing button.
- Then on your PC, open the “Start” menu and go to the “Printers and Devices” section and follow the procedure described above to add a device if it is not already shown in the list of available ones. If the connection is made via Bluetooth, then to detect the printer you need to enable this module on the PC.
- Click the "Add" or "Connect" command next to your printer name.
After this, you can use the printing device. It is important that the printer is located closer to the router so that there are no interruptions in the signal.
Physical connection with USB cable
A USB cable is the most common option for connecting a printer today. Outdated LPT or COM are practically no longer used. The essence of connecting with a cable is to establish physical contact between devices through a wire.
After unpacking the new device, you may not find the required cable in the box. The fact is that many manufacturers do not include such a cord with their products, especially if it supports other connection methods. The cord is easy to buy at any computer store and is very inexpensive. If everything is in stock, then we can start.
- Unpack the box. Carefully slowly remove the device and free it from the protective tapes. Pay special attention to the cartridge in this regard.
- Find the USB input at the back. It is square shaped and looks like an Ethernet input. Do not mix it up so as not to damage the equipment.
- Insert the second end of the cable, where the plug is flat, into the corresponding input on the computer. We recommend not using interfaces on the front panel of the PC.
- Connect the power cord to the printer and plug it into a power outlet.
- Apply power to the device by pressing the corresponding button on its body.
- Wait a while for the system to be able to “see” and identify the device.
- Check the result by printing any document.
Via network cable
Connecting a device via a network cable involves several steps.
Stage 1.
- One end of the wire is connected to the printer, and the other to the system unit.
We connect one end of the wire to the printer, and the other to the system unit - Click the Printscreen button. The device will “spit out” the sheet with the IP address.
Press the “Printscreen” button on the printer - On the PC, press the start button, the printing devices section, as in the picture. Expand the “Start” menu, open the “Devices and Printers” section
- Click the “Add Printer” button located at the top.
Click the “Add a printer” button at the top - The installation wizard will ask you what type of device you are connecting to. Select the first item in the window. That is, a local device, with a note that its use is permissible only in the absence of a USB printer.
Click on “Add a local printer” and click “Next”
Stage 2.
- A window will appear where the system will ask you to select the port for the connected device. In the field, click create new.
Oh, click “Next”On a note! In the English version, “Use the following” means select the proposed one, the second means “Create a new port” - set up a new one.
- From all the available options, after clicking the corresponding line, select “Standard TCP/IP Port”. Confirm with the “Next” or “Next” button if the selected language is English. Select “Standard TCP/IP Port”, click “Next”
- The system will prompt you to select an IP address. The piece of paper with IP printed out at the very beginning will come in handy here. The numbers from it are entered into the form. All that remains is to confirm the action by clicking on the “OK” button.
In the “Port name” field, enter the printer’s IP from the printed sheet, click “OK”
Stage 3.
Now the lack of a driver separates the user from using the device as intended. To search, click the “Browse” button, update center. Windows itself will download what you need.
Select your printer in the list, click “Windows Update”
Attention! The Internet must be available for this!
Stage 4.
All that remains is to designate who will have access to the device:
- open the device properties by right-clicking on the printer name icon;
Right-click on the printer icon, then left-click on the line “Printer properties”- and in the “Access” tab, mark the item for sharing the printer.
In the “Access” tab, check the box for sharing the printer
How to change a printer from a local network to a network one
To do this you need:
- open the already familiar “Devices and Printers” address on the computer system;
Expand the “Start” menu, open the “Devices and Printers” section - Click on the same printer installation button, but unlike the first time, we add a device that is listed as network, wireless or Bluetooth.
Click the “Add a printer” button at the top
Click on the second link “Add network...”
The system will try to find the designated device on the network. You can help her by assigning one yourself, selecting the appropriate function. You just need to click on the review button. A list of devices connected to the network will open - if one printer is connected, then it will be displayed alone there.
If the search is successful, no more requests from the system will follow and a notification will appear indicating the completion of the procedure.
Windows will recognize the printer and you can print from it.
Connecting equipment via cable in Mac OS X
Apple's rules for connecting equipment differ from Windows, but are also simple. All principles are initially carried out along the same path: click on the corresponding symbol on the panel and go to the desired subsection, and in it there is the desired option. The general algorithm looks like this:
- connect the printer and MAC via cable;
- On the Dock panel, click on the picture with gears;
- go to the printing equipment subsection, as in the photo;
Click on the “Printers and Scanners” icon - for a new device, click on the “+” sign; Click on the “+” icon
- The Mac will proceed to download the software. Once connected, you can use the printing device for its intended purpose.
Click “Add”
The printer is set up for Windows but needs to be used on a Mac
Sometimes this happens: the printer is connected to a gadget running Windows, but you need to connect it to a Mac. To do this, you need to change the printer from a local one to a network one.
- the algorithm is similar to the previous one, the difference is that in the printing equipment subsection, select the “Windows” tab;
Select the “Windows” tab - after scanning, the service will display the computer name and printing device identifier. There are difficulties with provision. After clicking on the printer and in the “Used” field it would be necessary to decide on the security. But often the user does not know which driver to choose. It all depends on whether there is “native” software for the device. If there is none, they settle on the universal option: PostScript, as in the photo;
Click on the printer, then in the “Use” field. select “PostScript Shared Printer”On a note! It’s better, of course, to stop at the point of selecting software - the service itself will recognize and install it. You can download the driver yourself, but only from an official or trustworthy source.
- When the software is installed, click the “Add” button.
Click the “Add” button
The printer will successfully appear on the desktop and you can print everything you need on it.
Connecting the printer to a PC with Windows 7 - 10
Manufacturers of inkjet and laser printers have still not been able to develop the same algorithm for connecting a printing device to a computer. Since PC operating systems are constantly changing, the way you connect peripherals may differ slightly with each update.
To connect the printer to a Windows 7 computer, you will need to follow these steps.
- Connect the device to the power supply using a special cable.
- Connect the device to your computer using a USB cable. Usually it comes with the unit, but if it is not, then the cord can be bought at a store that sells electronics. There are different connectors at different ends of the cable. The version of the connector shown in the figure on the left should be connected to a laptop or PC, and the one on the right should be connected to a printer.
If you have an installation disk
After connecting all cables, you need to install a program (driver) that will control the operation of the device. Usually, if you install an inkjet or laser machine under Windows 7 - 8, the drivers will be installed automatically if they are present in the system. If the OS does not find the driver, you will need to install it from the disk that should come with the printer.
Insert the disc into the optical drive of your PC, after which the program will automatically install. Everything is simple here - follow the installer's instructions until the process is completed. There may be a situation where the installation wizard does not start when you place the disc in the drive. In this case, you need to go to “My Computer”, select from the list the disk located in the optical drive, and after its contents open, you should find the file called “Setup” and click on it. After this, the driver installation will begin.
If there is no driver disk
The equipment can be connected without an installation disk. If you do not have software for the printer, you can download it from the Internet. To do this, it is enough to know the model of the device (you can peep from the back of the case). Knowing the model, type it into a search engine and download the driver to your PC. The folder with the downloaded data may contain an installation file “Setup”, which you need to click on to launch. If this file does not exist, then do the following:
- connect the printer to your computer (via USB cable);
- go to “Control Panel” - “Device Manager”;
- in the list of equipment that the OS has identified, one unknown device will be visible, opposite which there will be an exclamation mark;
- right-click on the unknown hardware and select “Update Driver”;
- A window will appear in front of you, asking you to select a driver from the Internet or find it on this computer - click the latter;
- A window will open where you can select the folder with drivers downloaded from the Internet and click “next”;
- As a result, software for the equipment will be installed.
How to install a printer without an installation disk on a laptop
Hello, dear readers of my blog. Have you ever had problems installing the printer? Has it ever happened that you urgently needed to install a printer, but you didn’t have the installation disk at hand? Then here are some tips for you on how to install a printer without an installation disk.
Most people think that you need a CD to install a printer. But that's not true. You can easily and simply install your printing device with or without a disk. There are two ways to install a printer without an installation disk, here they are:
Method one
- Click on the “Start” button.
In Windows XP, in the window that opens, click “Control Panel” and select “Printers and Other Hardware” or “Printers and Faxes”.
In Windows Vista or Windows 7, select “Printers” or “Devices and Printers” from the right side of the Start menu.
Click the “Add a Printer” button.
In Windows XP it is located in the “Printing Tasks” column. The “Add Printer Wizard” will open.
In Windows Vista or Windows 7, the Add a Printer button is located on the toolbar. The “Add a Printer” window opens.
Click “Next” to launch the wizard in Windows XP.
On all operating systems, select “Add a local printer” if you are installing a printer that is connected directly to your computer.
Or select “Add Network Printer” to add a printer connected to your home or office network.
Windows Vista and Windows 7 also provide the ability to connect the printer wirelessly to a computer via WiFi or using Bluetuth.
Select the printer connection port from the drop-down menu (most likely it will be USB001). Click Next. Specify the printer manufacturer in the “Manufacturer” list. Select your printer model from the “Printers” list. Click "Next".
In the next window, enter the printer name you created or leave the default printer name. Click Next. Windows will install the printer on your computer.
To check the functionality in the window that opens, you can click the “Print test page” button. When finished, click “Done.” The printer installation is complete.
Method two
If you don't have a printer driver disk, don't worry, just go to the manufacturer's website (HP, Dell, Epson, Canon, etc.).
Go to the support page, where all the drivers for this company's products are posted. I have posted the addresses of these pages for some manufacturers at the end of the article.
Find and download drivers for your printer model, pay attention to their compatibility with your operating system. Typically the downloaded file is an archive
Unzip it
Typically the downloaded file is an archive. Unzip it.
If, as a result of unzipping, you received a folder with files of different types, find and run the SETUP. If the downloaded drivers are one or more executable files (.exe extension), run the one that is most suitable for your operating system (usually the OS type is indicated in the file name, for example: Dell_AAY_Vista_x64_PS_sys_en).
Follow the instructions in the installer window, and in a few minutes the printer drivers will be successfully installed on your operating system. Please note that some models require that the printer be disabled when installing drivers.
Using one of these methods, you can install the printer yourself without an installation disc. Here are the addresses of support pages on the websites of some printer manufacturers, where you can find and download the drivers you need:
- Brother https://welcome.solutions.brother.com/bsc/Public/CountryTop.aspx?reg=eu&c=ru&lang=ru
- Canon https://software.canon-europe.com/
- Dell https://www.dell.com/support/drivers/ru/ru/rudhs1/ProductSelector/Select?rquery=fkey-e-Drivers_PS
- Epson https://support.epson.ru/
- HP https://h20025.www1.hp.com/ewfrf/wc/siteHome?lc=ru&dlc=ru&cc=ru&lang=ru&product=top
- Lexmark https://support.lexmark.com/index?page=productSelection&channel=supportAndDownloads&locale=RU&userlocale=RU_RU
- Samsung https://www.samsung.com/ru/support/download/supportDownloadMain.do
- Xerox
ActionTeaser.ru - teaser advertising
Installing drivers
If the Windows system does not automatically install the drivers, then you need to do it manually yourself. The printer will not print without special software. An excellent scenario for you is to have an installation disk. If the device is not new or comes without a disk, then the situation is more complicated.
Using the installation disk
In the box with the equipment there should be a disk with drivers, or maybe several for different operating systems and types of systems. The installation process is very simple:
- Find the correct type of disk. Must correspond to the OS version and its bit depth.
- Insert it into the drive and wait for the installation wizard to autostart.
- Follow the program's instructions.
- Choose customizable settings to suit your needs.
If there is no disk
There is also a way out of this situation, and even several.
- You can download the driver on the website of the manufacturer of your device model. Cybersecurity experts recommend downloading any software from the original source sites. All you need to know is the exact model name. It is indicated on the product itself or its box. After downloading, run the exe or msi installation file and follow the instructions of the installation wizard.
- You can also use the built-in driver database in the Windows system itself. This database is available in any version. Through the control panel, go to the devices and printers section. Click on the button to install a new device.
In the first window, select installing a local printer.
At the next step you will be able to select drivers for your model.
Follow the prompts and click “Next” everywhere. After the installation is complete, we find this new device in the list. Using the context menu, remove the newly installed printer.
We turn on the device, wait a bit and try to print. - Enable automatic detection and installation of software for any connected device. In the “Devices and Printers” section, you need to find your PC in the list. In the context menu, select “Installation options”. In the window that opens, agree to automatic downloading.
We reboot our computer, wait for the system to try to download drivers from the Internet on its own.
Is it possible to connect an MFP to a laptop without a disk?
You will need:
- Wi-Fi hotspot
- Connection cable
- Internet access
#1
And in principle, even the most inexperienced user can cope with the task without much difficulty, because there is nothing difficult in inserting the installation disk into the drive and performing simple installation operations, having first connected the device to the PC using a cord.
#2
After successfully unpacking and installing the files, you should go to the “Devices and Printers” submenu in the “Control Panel” of the computer operating system, where a shortcut to the new device will be displayed and, if everything was done correctly, then you can safely proceed to further work and setting up the MFP itself . There are several other simple ways to connect an MFP to a laptop, and one of them is to connect and configure it with a PC via a Wi-Fi point. And first of all, the unconfigured device should be connected to the laptop using the included USB cable for this purpose. The next stage involves creating and configuring a new access point directly for the multifunctional device itself, after which it must be connected to Wi-Fi. Next, you need to install the drivers following the scheme suggested above or using the original installation disk.
#3
As for setting up the multifunctional device itself after connecting to a personal computer, it is also not difficult. To do this, in the “Settings” menu on the MFP itself, you must agree to connect the device to a Wi-Fi point.
It is then recommended to go to the “Quick Setup” submenu to enter the network key after the MFP detects it. If everything was done correctly, the indicator light on the device panel should light up green or blue, after which you can start working.
Connecting an MFP to a desktop computer, either with or without a disk, will also not be difficult, and the first thing you should do is download the drivers for this model.
#4
After connecting the MFP to the PC using a USB cable, the treasured “Found a new device” should appear in the lower corner of the monitor. By clicking on this window, you can automatically go to the “Wizard”, where step-by-step instructions will be provided for setting up new equipment.
After completing the setup, you need to go to the “Start” menu by selecting the “Devices and Printers” submenu in the tab that opens. It is more than easy to check the success of the connection, because if everything was done correctly, then all the MFP shortcuts (printer, scanner, and fax) will be displayed in the window that opens.
The absence of shortcuts indicates that the connection was never completed and you should look for the causes of the problem.
#5
In any case, this is not a problem at all, because to fix the problem you just need to download the latest version of the installer from the manufacturer’s official website and restart the device itself.
The absence of shortcuts in the “Devices and Printers” submenu can also be caused by a more primitive problem - the lack of connection between the PC and the MFP, which most often happens when the user forgets to connect the USB cable, turn on the equipment itself, or activate its power button.
#6
After successful installation and connection, you need to check the print quality, for which it is recommended to select the “Properties” submenu in the window that appears after one click on the printer shortcut.
The operation of the scanner and fax is checked in the same way.
What to do if the printer does not connect
There are times when the OS does not see the MFP or other printing equipment, and it does not connect. For example, if you take an HP LaserJet 1010 laser printer with such a problem, you will have to install it manually.
- Connect the device to your computer (via USB) and connect it to the network.
- In the “Start” menu, click on “Devices and Printers”.
- In the window that opens, select “Add a printer.”
- Now you need to decide which connection option suits you. In this case, select “Add a local printer.”
- Next, the system will prompt you to select a port. At this stage, it is better to leave everything unchanged, that is, LPT1 port, and click “Next”.
- The next step requires installing a driver for an MFP or other printer. As mentioned above, it can be installed from a disk, downloaded from the Internet, or installed through the Windows Update Wizard (if there is no disk or the PC does not have an optical drive).
What should you do when there is no official software for the HP LaserJet 1010 in Windows, or you do not have an Internet connection? You can temporarily get out of the situation by selecting a laser from the same manufacturer from the list provided by the system. In this case it is the HP LaserJet 3055 PCL5. In the next window, give a name to the equipment to be installed, then also click on “Next”.
Now you need to specify the access parameters for the device. Click “No sharing...” if you do not intend to connect the machine to the network, or “Allow sharing...” to be able to print from other PCs. After clicking on the “Next” button, the installation of the peripherals is completed.
Connecting a network device to a MacBook
Printing equipment can also be connected to the MacBook as networked. This requires knowing what IP address is assigned to it on your network. Go to the printer settings and select the “Print network settings” option, where the IP will be registered.
The procedure for connecting network equipment is as follows.
- Perform the initial steps as described above, and after clicking on the “+” button in the window that opens, click on the “IP” tab. In the window that opens, in the “Address” line, you need to enter the IP address of the device you need.
- The “Protocol” and “Queue” fields can be left blank.
- Next, you will need to select the desired software according to the same principles discussed earlier and click on “Add”. In a moment, your printing equipment will be added to your MacBook.
Setting up an ink jet (laser) for printing
To configure the device, you need to go to “Devices and Printers”, right-click on the desired equipment and select “Printer Properties”. To check the functionality of the machine, click on “Test Print”.
By clicking the “Print Settings” button, you can select the paper size and determine the page orientation, as well as the print quality.
Connect your printing device to your MacBook via Wi-Fi or Bluetooth
To connect the device to a MacBook via Wi-Fi, after logging into “Printers and Scanners”, click on “+” to add equipment. Select the equipment you need from the list. It is important that its type is “Multifunctional Bonjour”.
After selecting a device, if it supports Airprint technology, in the “Use” line, select “AirPrint” and click “Add”. After this, the search will begin and pairing will occur between the computer and the device you have chosen. It is also recommended to update the software from the App store. To connect the device via Bluetooth, click on its icon at the top of the screen and turn on the receiver “Turn Bluetooth On”.
Make sure the printing machine is turned on in Bluetooth mode. In the window that opens, after searching for Bluetooth devices, those found will be displayed. Select the one you need and pair by clicking “Create pair”. When the connection request appears, click “Accept”.
We connect the laser printer to the PC.
Let's consider the algorithm for connecting a laser printer or MFP - Multifunctional Device, when connecting it yourself at home. If you still doubt your abilities, it is better to contact a specialist or the seller at the place of purchase. Below we suggest that you familiarize yourself with the approximate sequence of actions and some precautions:
- Unpack the device. Remove all securing adhesive tapes on and inside the case. Take out the foam block inside the printer, find the cartridge behind it, take it out. Check to see if there are any tapes on it, remove the blocking tape by pulling the plastic ring on the side (usually orange. Also, depending on the model, the cartridge chip may be protected for transportation (usually orange).
- Carefully place the cartridge in place and close the lid.
- Also, depending on the device model, attach the paper output tray (plastic cover). From adjust the Paper Feed Tray to the width and length of the sheet.
- Release the cords: power and USB cable (information cable for communication with PC)
- Connect the power cord (you can replace the cord and connect power from the UPS, but consider the power of the uninterruptible power supply)
- Connect the USB cable with the rounded end into the printer and the flat end into a free connector in the system unit of the PC or laptop.
- Turn on your computer (if it is turned off). Place the laser discs in the optical drive (the discs are included with the printer).
- Install drivers and applications by default (Normal or Quick Install).
- When finished, restart your PC if necessary!
- The device can be used!
Note! If the document does not print, check whether this printer is the default in your Windows OS. Follow the path Start - Control Panel - Printers and Faxes (or Devices and Printers for Windows 7) / Make sure that the printer of your model is checked or right-click on the printer image and click “use as default”.
Precautionary measures!
- Do not touch the contacts;
- Do not touch the rollers (rubber, plastic and metal);
- When loading paper, check for foreign objects in the sheets (paper clips, pins, rulers);
- When scanning a document (if you have an MFP), check the document for the presence of staples and remove the staples (Do not subject the scanner glass to mechanical impact).
Adding a printer to Windows
First of all, you should carry out the connection process. As you know, this is done quite easily. You need to prepare the cables, then connect everything you need, start the devices and wait until the new peripherals are identified. You will find a detailed guide on this topic in our other material at the link below.
Connecting via a Wi-Fi router is a little more complicated, so we recommend paying attention to the instructions in the material at the following link. Thanks to them, you can do everything right.
Now let's move on to look at the available methods for adding printed peripherals.
Method 1: Installing drivers
The first thing you need to do is find and install drivers. Most likely, after their successful installation, you will not have to do anything else, since the operating system will carry out the remaining processes automatically. There are five different options for finding and downloading software. You can familiarize yourself with all of them in the article below.
If you need to install a new driver version because the previous one is not functioning correctly, you must first get rid of the old files. Therefore, do this first, and then move on to working with the new version of the software.
Method 2: Built-in Windows tool
The Windows operating system has several built-in tools that allow you to work with printing equipment. The process of installing a printer using the standard feature was discussed in the article on installing drivers, the link to which is provided in the first method. However, sometimes this function does not work and the printer does not install. Then you need to use the “Add Device” tool. Through the “Control Panel”, go to the “Devices and Printers” section, click on the appropriate button there and follow the instructions displayed on the screen.
Method 3: Add network printers
There are users who are members of a home or corporate workgroup to which several computers are connected. They can not only interact with each other, but also remotely control a peripheral device, in our case it is a printer. To add such equipment to the list, you will need to enable sharing. Read about how to do this in the following material.
If you encounter difficulties or problems with this process, please use the help guide below.
Now you can easily find and add the required device on your computer. Let's look at this procedure using Microsoft Word as an example:
Click on the "Find Printer" button.
Specify its name, location, and where to look. Once the scan is complete, simply select the appropriate option and it will be added to the list.
Sometimes a directory search is interrupted by an Active Directory unavailable alert. The error that has arisen is solved using several methods, each of which will be useful in certain situations. All of them are discussed in a separate article on our website.
Opening the Printer Settings Window
Open the HP print driver window in standard Windows applications and learn how to navigate through the various tabs and menus.
- Open a document or photo on your computer, click File or the menu icon, and then click Print. The Print or Print Images window or pane opens with general settings for your print job, including a menu for selecting the printer to print to.
- Open Document Properties or Printing Preferences in the main window or print panel to access HP print driver settings. The name of the button or link varies depending on the application you are printing from.
- Microsoft Word: Click Printer Properties
- Paint and WordPad: Click Settings
- Windows Photo Viewers: Click Options... in the lower right corner of the screen, then click Printer Properties... in the Printing Preferences window
- Adobe PDF Reader: Click Properties
- To view the various settings, click the tabs along the top of the window. To access additional settings, click the Advanced button, which is usually located on the Layout tab. Fig. : Example of the printer “Document Properties” window
- If the Print Shortcut tab is available, click it to use shortcuts that are already configured for common types of print jobs with all the settings you need. You can also create your own shortcuts for subsequent print jobs.
Settings for color and black and white printing
The HP driver can be used to control how the printer perceives colors and uses ink to print. For best results, edit the photo or document in the application where it was created before printing to improve colors, brightness, contrast, and any other appearance settings.
| Settings and options | Countries/Regions |
Choice of color or black and white printing:
| Select Color or Black & White from the Paper/Quality tab. On the Color or Features tab, or under Advanced Options, click the menu button next to Grayscale Printing and select Off. for color printing, High-quality grayscale printing, or Black ink only Under Printer Features on the Advanced tab |
Color management options: Determine the range of colors to print based on industry color standards and the application you are printing from. The print driver converts the colors from the current color settings to the selected option.
| The Color Management or Color Space menu on the Color tab. The Image Color Management menu on the Advanced tab. |
| Advanced color settings: Adjust saturation, brightness and hue, or change the levels of individual colors. | Color Attributes or Advanced Color Settings or Advanced Color Options sliders on the Color tab |
Settings for paper type, size, and input tray
Settings for paper type, paper size, and tray allow the printer to properly handle and scale paper print jobs. The paper type and size are included in some Printing Shortcuts when available.
Note: When loading paper in the input tray, wait until you are prompted to confirm the paper type and size you loaded if your printer has a text or touchscreen control panel.
| Parameter | Countries/Regions |
| Paper Type: Set the type of paper you are using, such as HP photo paper, plain paper, and specialty media, to ensure the printer handles and prints the paper properly. Select Automatic to let the printer automatically select the paper type if available. | Type, Type Set, Paper Type, or Media on the Paper/Quality or Features tab |
| Paper size: Select the size of paper loaded in the printer, such as 4 x 6, legal, or 8.5 x 11 plain paper. Check the paper sizes supported by the printer. Some newer printers support additional paper options. For more information, go to Creating custom paper sizes. | Size menu, Set Size or Paper Size under Advanced Options on the Paper/Quality or Features tab |
| Paper Tray or Source: Select the tray you loaded paper in if your printer has multiple trays. If the Automatically select option is available, select it to have paper come from the main tray. If the main tray is empty, paper will come from another full tray. | Source menu, Source Selected or Paper Source on the Paper/Quality or Features tab |
Computer settings
Regardless of which of the methods described above you choose, the settings on the computer are performed the same in all cases.
You can configure it through the “Control Panel” or through “Printers and Scanners”. The setup is similar.
“Printers and Scanners” appeared on the latest versions of Windows. This application is suitable for setting up a network printer on Windows 10.
We will configure it through the “Control Panel”, which is available on all versions of Windows. In particular, it is suitable for setting up a network printer on Windows 7.
Search for “Control Panel” in your computer search. In the Control Panel we find the “Devices and Printers” section. Click on the “Add a printer” item.
The system will try to find the device connected to the computer, but, of course, it will not succeed. Therefore, we will use the item “The required printer is not in the list” at the bottom of the window.
On the next page, select the option to add by TCP/IP address or host name. Click “Next”.
In the next window, in the “Device Type” drop-down list, select “TCP/IP Device”, and below in the “IP Address” and “Port Name” fields enter the address that we obtain as follows :
- When the printing device is connected via USB to the router, enter the IP address of your router, which you enter in the browser to enter the web interface. Typically this is 192.168.0.1 or 192.168.1.1. It is indicated on the label at the bottom of the device.
- When connecting via a LAN port with an address specified through the menu. In this case, enter this address.
- If the printing device is connected via LAN and receives an IP address from a DHCP server, look at what address was received on the DHCP server.
It is better to uncheck the checkbox for asking and selecting a driver automatically.
In the next window, check the “Special” box and click the “Options” button next to it.
In the settings window that opens, select the LPR protocol, and in the “Queue name” field - in our example we wrote “naseti”, in fact, any name can be written. Click OK and return to the previous page.
Now you can click “Next” and proceed to the actual installation of the printer. The driver can be selected from the list or installed from disk.
You can give the printer a new name, or you can leave the default one.
We refuse the offer to allow shared access to the printer and click “Next” again.
A message should appear here stating that everything went well and the printer is ready for use. To verify this, print a test page.
Setting up a print server on the router
If you have any difficulties, you can use the utility to configure the print server on the router. You can download it from the manufacturer’s official website by selecting your router model in the “Downloads” section.
To configure the print server on TP-link routers, use the proprietary TP-Link UDS Printer Controller utility . After you have downloaded and installed the program on your computer, run it and it will automatically find all printers connected to the router. Select the one you want to use to connect automatically.
The utility works with Windows and Mac OS.
For D-Link routers, use the proprietary utility SIUtility . If you have a router from another manufacturer, look for compatible software on the official website.
In most cases, a printer is a universal device and offers its user a lot of additional functions. Accordingly, such equipment has the ability to connect to a PC using different methods :
- Wired connection . This method is carried out by connecting two devices using a USB cable. To do this, connect the supplied wire with a standard output to the USB connector of the computer case, and the other to the corresponding socket of the printer.
- Wireless connection . Bluetooth and Wi-Fi modules may be involved here. Of course, this method is available for devices equipped with similar functionality.
- Opening the "Sharing" option. This method is useful if you need to print from an additional PC, and the printing device is programmed for a desktop computer.
- MFPs are connected to a computer in the same way as single devices
- Connect via built-in features . For new home PC models, the easiest way to connect a printer is assumed. To do this, you only need to turn on both devices and connect them with a cable, after which an “installation wizard” will appear on the monitor, which will independently recognize the printer and install the necessary software.
- Using drivers . You can find them on the disk that comes with your printing machine, or on the website of your printer manufacturer. But for this you need to accurately indicate the model of the device.
NOTE!
The methods for connecting your computer and printer to each other may vary depending on the type of operating system installed. Only the most important stages differ.
FAQ
Review this list of frequently asked questions about setting up and using a USB printer and installing print drivers and Windows software.
What should I do if the printer is not detected or was not connected to the installation via USB?
Below are tips and instructions for troubleshooting and resolving USB connection issues.
- Restart the printer and computer. Restarting your computer and printer may clear any possible errors.
- Reconnect the cable. Disconnect and reconnect the USB cable between the printer and computer.
- Connect the cable to another USB port. Connect the cable to another USB port on your computer.
- Disconnect the cable from the USB hub or dock. If you are using a USB hub or workstation, try connecting the cable directly to your computer.
- Try connecting a different USB cable. Please use a different USB cable. HP devices are connected using USB cables no longer than 3 m.
- Disconnect other USB devices. If you have multiple devices connected to your computer via USB, such as another printer, the voltage supplied to the USB ports may not be sufficient to detect all devices. Disconnect any other USB devices that are not in use.
Note: Make sure the printer is connected to a USB 2.0 port on your computer.
What should I do if the USB cable is connected without installing the HP driver?
When you connect a USB printer cable to your computer, instead of setting up the connection using the HP driver, in most cases Windows automatically detects the printer and installs the built-in driver to provide basic functionality. A "Installing device driver software" notification may appear. If printing works, the driver was installed successfully. If your print job fails, see the "Installing and using the built-in Windows print driver" section for more information about installing and using this driver, as well as information about problems during setup.