Users of personal computers, laptops and netbooks are often faced with the need to connect additional external devices to their computer. One such device is an external hard drive.
The need to connect a disk may be associated with transferring a significant number of files to a laptop, exchanging information with other devices, or organizing external data storage. Sometimes a user simply has an old hard drive that they intend to continue using.
How to connect a hard drive from a computer to a laptop
Scheme for disconnecting the hard drive from the PC
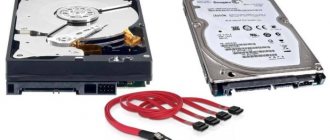
Laptops usually use 2.5-inch hard drives because... they are smaller and consume less power than 3.5-inch drives found in desktop PCs. However, a 3.5-inch drive removed from an old PC can be successfully used as an external drive.
Step 1. Turn off the computer and disconnect it from the 220 Volt power supply so as not to accidentally turn on the PC when removing the hard drive.
Turn off the computer and disconnect it from the 220 Volt power supply
Step 2. Open the computer case, most often by removing the right side panel (viewed from the side of the PC connectors) after unscrewing the mounting screws or pressing a button and removing the panel along the case to the back and to the side.
Unscrew the fixing screws of the side cover
We move the panel back and to the side, take it out
Step 3. Find the hard drive inside the PC case. The hard drive is a rectangular metal box the size of a small book and is usually located in a special compartment of the PC case.
Finding the hard drive inside the computer case
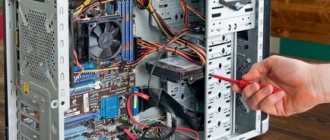
Step 4. The hard drive is usually connected to the PC with two cables. Carefully inspect the cables and carefully pull them out of the connectors.
We study the location and connection of cables to the drive and carefully pull them out of the connectors
Important! Dismantling actions are carried out with some, but not extremely significant, effort. Before removal, it is necessary to carefully inspect the part and make an appropriate decision on the method of its dismantling.
Step 5. Consider the method of attaching the hard drive, and, having chosen the appropriate method, remove it. The disk can be secured with screws or placed in the case on special “slides” with latches on the sides, sliding out through the removed front panel of the case.
We consider the method of attaching the hard drive, select the appropriate method for removing it
Unscrew the screws that secure the disk to the system unit
Carefully remove the hard drive
eSata adapter
Another convenient way to quickly connect drives and various drives, but for some reason not widely used. To do this, you need to install a bracket with eSATAp connectors on the front or rear panel of the computer and connect the appropriate SATA cables and power (Fig. on the left). The drive or drive is connected using a special eSATAp cable (picture on the right)
Pay attention specifically to the eSATAp option, which allows you to connect 3.5-inch drives and drives that require 12V power. The main advantage of this method is the complete absence of delays, since third-party controllers are not used during operation
Connecting an external drive to a laptop
To connect an external hard drive, the first thing you need to do is determine its size.
Step 1: If you don't know the size of your drive, you can measure its width. Hard drives are rectangular in shape, and its width determines its size (form factor) in the name. The width of a 3.5-inch drive is 10.2 cm, and the width of a 2.5-inch drive is 7 cm.
We measure the width of the hard drive, the width of a 2.5-inch drive is 7 cm, a 3.5-inch drive is 10.2 cm
Step 2. Next, you need to determine the type of connection of the hard drive in order to select a case compatible with it, which serves as an “adapter” for connecting the drive to the laptop. Older computers used hard drives with an IDE connection; today, drives with a SATA connection are used.
Consider the type of HDD contacts. The IDE connector consists of two rows of metal pins for data transfer, as well as a separate hard drive power connector. The SATA connector includes two small pads with flat contacts for data transfer and power supply to the drive.
Determine the connection type of your hard drive in order to select a case compatible with it
Step 3. Purchase a case that matches the size and type of HDD connection, as well as the type of connection to the laptop. For example, purchase a 2.5-inch case with a SATA connection for a 2.5-inch SATA drive.
We purchase a case that matches the size and type of connection of our hard drive
Most hard drive enclosures have a computer connection type with a USB 2.0 interface, as well as FireWire, since they are the most popular today. Some universal enclosures have a combination of both interface options.
Most USB 2.0 enclosures are compatible with any USB port on a laptop or netbook. However, USB 3.0 enclosures provide better performance when connected to a USB 3.0 port.
Reference! All personal computers sold today are equipped with USB 3.0 ports, so you can purchase a hard drive enclosure with a USB 3.0 interface, making sure that this type of connector is available on your laptop.
It's also important to consider that 2.5-inch cases typically draw power from the PC's USB plug-in port and do not have their own power adapter, making them completely portable.
2.5-inch cases are completely portable, as they do not have their own power adapter and are powered by a plug-in USB connector on the PC
That said, 3.5-inch hard drives require more power, so their cases usually come with an AC power adapter, which means they won't work in areas where there isn't a power outlet.
3.5" HDDs come with an AC adapter as they require more power
Step 4: Installing the hard drive into the external enclosure is very easy. Usually the most that is required in this case is a screwdriver. Most often, you need to remove the top cover of the case, position the hard drive being inserted into it parallel to its base, and carefully slide the drive onto the contact pad to connect it. Close the hard drive housing cover (see photo).
The process of installing a hard drive in a suitable external enclosure
Reference! To connect the hard drive to the enclosure, please refer to the instructions supplied with the HDD enclosure.
In some cases, on older 3.5-inch drives, you may need to move or remove the jumper that sets the hard drive as a Master or Slave device in accordance with the enclosure instructions.
We rearrange the jumper that sets the hard drive as a master (Master) or a slave (Slave), according to the instructions of the case
It is also possible to connect 3.5 and 2.5-inch hard drives to a special docking station. In this case, you need to carefully insert the disk into a suitable size connector, pressing slightly on it from above in order to securely connect the contacts of the disk to the station.
Connected 3.5 and 2.5-inch hard drives to a special docking station
Step 5. After connecting the hard drive to the case, you need to connect the case to the laptop connector using the special cable included in the kit.
For this:
- insert one cable connector into the socket on the hard drive housing;
Insert one cable connector into the socket on the hard drive case - and insert the second connector of the cable into the USB connector on the laptop.
We insert the second connector of the cable into the USB connector on the laptop
On a note! To supply enhanced power to a 2.5-inch hard drive, it is also possible to connect a second USB connector located on the cable included with the case.
Option for connecting a second USB connector located on the cable included with the case
In addition to special cases for connecting a hard drive, an open option for connecting the HDD through a special adapter that fits onto its connector is also possible.
How to place a small mobile HDD in a system unit
Another problem that often puzzles users is how to place the HDD from a laptop inside a desktop computer. Here, too, several options are allowed:
Installation in a 2.5" basket. Many computer cases of the latest generation have SSD cages where you can insert a 2.5-inch HDD from a laptop.
Using a 3.5”-2.5” adapter The mobile drive is placed inside the adapter, fixed, then inserted all together into a cage for a standard 3.5” hard drive and screwed in place. There are adapters for more compact media – 1.8”.
The location of the laptop disk at the bottom of the system unit. It is advisable to place a mouse pad or a layer of rubber underneath the HDD to reduce vibration. This method is only suitable for short-term connection; you should not work this way constantly.
And of course, before installing the mobile HDD inside the system unit, do not forget to turn off the power to the computer. When connecting via external ports (USB, eSATA), this is not necessary.
Connecting an “old” drive in Windows
If the hard drive has already been used in Windows before connecting it, then it has already been formatted. In this case, when connected, it will automatically be assigned a letter in the system, and it will appear in Windows Explorer, ready for use.
When connected, the old formatted hard drive will automatically appear in Windows Explorer with an assigned letter and ready for use
If the disk does not appear in the system, you may need to install a driver for the hard disk enclosure.
Step 1. Press the “Win + R” keys on the keyboard. In the “Run” window that opens, type “devmgmt.msc” and click “OK”.
Press the “Win+R” keys simultaneously, enter the command “devmgmt.msc” in the “Open” field, click “OK”
Step 2: Device Manager will launch. View the dispatcher for the presence of devices with exclamation marks. If there is such a device, right-click on it and select “Update drivers” from the menu with the left button.
Right-click on the device with the yellow exclamation mark and left-click on “Update drivers”
Step 3. In the window that opens, click on “Automatically search for updated drivers.”
Click on “Automatically search for updated drivers”
After the system finds the required driver, the exclamation mark from the device in the “Dispatcher” will disappear. You may need to restart your PC.
If the hard drive does not appear in the system, and a CD with drivers is included with the HDD enclosure, then you need to:
Step 1: Insert this disc into your laptop's optical drive by pressing the button to open it and snapping it back in after inserting the CD.
We insert the driver disk into the laptop's optical drive, opening it by pressing the button and snapping it back after installing the CD
Step 2. On the desktop, double-click on the “This PC” icon with the left mouse button.
Double-click on the “This PC” icon with the left mouse button
Step 3. A list of Windows OS drives and devices will open. Double-click to open the CD drive.
Double-click to open the CD drive
Step 4. Find the “Run” or “Setup” file to be launched in the folders by double-clicking on it with the left mouse button.
Find the file “Setup.exe” or “Run”, double-click on it with the left mouse button
Step 5. Install the required software in accordance with the suggested procedure. The HDD will appear in the system.
Left-click on the “Virtual HDD” icon and follow the installer’s instructions
How to place a small mobile HDD in a system unit
Another problem that often puzzles users is how to place the HDD from a laptop inside a desktop computer. Here, too, several options are allowed:
Installation in a 2.5" basket. Many computer cases of the latest generation have SSD cages where you can insert a 2.5-inch HDD from a laptop.
Using a 3.5”-2.5” adapter The mobile drive is placed inside the adapter, fixed, then inserted all together into a cage for a standard 3.5” hard drive and screwed in place. There are adapters for more compact media – 1.8”.
The location of the laptop disk at the bottom of the system unit. It is advisable to place a mouse pad or a layer of rubber underneath the HDD to reduce vibration. This method is only suitable for short-term connection; you should not work this way constantly.
And of course, before installing the mobile HDD inside the system unit, do not forget to turn off the power to the computer. When connecting via external ports (USB, eSATA), this is not necessary.
Connecting a new drive to the OS
If the connected hard drive has not yet been used in Windows, it will not appear in Explorer because it has not yet been initialized and formatted.
Step 1. Press the “Win+R” key combination on your keyboard. The Run window will open. Type “diskmgmt.msc” in the line and click “OK”.
Type “diskmgmt.msc” in the line and click “OK”
Step 2: The Windows Disk Management utility will launch. Find the disk labeled “Not initialized” in the left column and right-click on it, selecting “Initialize disk” in the drop-down menu with the left button.
Right-click on the disk that says “Not initialized” and select “Initialize disk” from the menu that opens with the left button.
Step 3. Check the box for the HDD you want to initialize. Check “MBR” if the HDD has a capacity of less than 2 TB, and “GPT” if more, and click “OK”.
Check the box for “Disk 1”, check the box for “MBR”, click “OK”
Step 4: Once the disk is initialized, it will be placed in the Unallocated state. Right-click on the unallocated HDD space and left-click on “Create simple volume”.
Right-click on the unallocated space of the HDD, left-click on “Create a simple volume”
Step 5. In the wizard that appears, click “Next”.
Click “Next”
Step 6. Leave the default settings and click “Next”.
We don’t change anything, click “Next”
Step 7. Select in the drop-down list the letter by which the drive will be identified in the system, click “Next”.
Select a letter from the drop-down list and click “Next”
Step 8. Select the file system type (usually NTFS) and volume label (any HDD name in the system), check the “Quick format” box and click “Next”.
Select the file system, name the volume label, check the “Quick Format” option, click “Next”
Step 9. Check the entered information and click “Finish”.
Check the information and click “Finish”
The disk will be formatted and ready to use.
As soon as the connected external drive is working, you can exchange any files with it.
Find out detailed information on how to install a hard drive instead of a disk drive in a laptop in our new article.
As internal storage
Let's start with the most difficult thing - connecting the hard drive as a hard drive, that is, as a replacement for an existing one.
In this case, you need to do the following:
- Turn off the laptop. All operations are performed exclusively with the power turned off. Otherwise, you can simply “kill” your device and nothing can bring it back to life. Of course, this doesn’t happen often, but it does happen.
- Remove the battery. Most often, this is done as shown in Figure 1 - first you need to press the fastening locks (just move them to the side), and then remove the battery from the laptop case.
No. 1. Removing the laptop battery
At the bottom of the laptop panel you need to find a cover measuring approximately 13x7 cm (it could be a little larger or smaller, but in any case it will be a rectangle). This cover must be removed by unscrewing the screws. This is done using a regular shaped screwdriver as shown in Figure No. 2.
No. 2. The process of unscrewing the screws securing the hard drive compartment cover
No. 3. Drives inside the laptop
Accordingly, it needs to be removed. The hard drives are always in a small mount, which is also held on by small screws. Accordingly, you need to unscrew them with the same screwdriver and remove the hard drive from the mount with your hands. First, the mount itself is removed, and then the hard drive itself is removed from it. Figure No. 2 shows the discs in the mounts. But we need to take them down. You can understand that the mount has been removed by one simple sign - you will see the board itself, that is, its physical appearance, without any insulation or additional coatings. Its appearance is shown in Figure No. 4.
No. 4. Hard drive board
In some cases, the hard drive is in a box that insulates it on all sides. Then it also needs to be disassembled. This is not difficult to do, because it is attached to the hard drive on all sides with screws.
No. 5. Removing the drive box
After the box or mount is removed, you need to install a new hard drive there. It is worth noting here that there are two types of hard drives - SATA and IDE. The appearance of each is shown in Figure 6.
No. 6. Hard drives of two types - SATA and IDE
As you can see, they have completely different mounts. It's good if you are replacing an old hard drive with a new one of the same type. Then you just need to paste everything as it was. The vast majority of laptops use SATA. Otherwise, you will have to buy an adapter from SATA to IDE or vice versa. They look something like what is shown in Figure 7.
No. 7. Adapter from SATA to IDE or vice versa
But it is highly not recommended to use such adapters in laptops, because there is simply nowhere to insert them. There are short adapters, which are a regular board with a SATA contact on one side and an IDE contact on the other. The appearance of one of them is shown in Figure No. 8. These are used in laptops, but in most cases it is recommended to simply take the type of hard drive that is already in the laptop.
No. 8. Adapter from SATA to IDE or vice versa for laptops
That's all! Now the new railway is in place. If your computer has a free slot for a second hard drive, you can install it in the appropriate place in exactly the same way.
What may be difficult?
The main difficulties during installation may arise with the fastenings of an existing hard drive. The fact is that different companies make different mounts or even full-fledged boxes, and often users simply do not know how to remove them and what to do with them next - how to remove the hard drive itself from the computer. For example, some Toshiba models have a small, one might say “auxiliary” compartment that needs to be removed before removing the main cover. This process is shown in Figure 9.
No. 9. Removing the "auxiliary" compartment to remove the cover
After this, you will also need to remove the mount on the disk itself. This mount is shown in Figure 10.
No. 10. Removing the fastening from the railway
As for the above adapter, it is usually called a connector in the literature. The process of removing it is shown schematically in Figure 11.
No. 11. Removing an adapter from SATA to IDE or vice versa
Some models by default have such a simple element in their design. And you don’t always need to remove it. There shouldn't be any problems with the rest. It is worth saying that replacing a hard drive on a regular personal computer is much more difficult, because there the corresponding wires and buses are connected to the IDE and SATA interfaces. Often people confuse some of these and then problems arise. On laptops everything is much simpler. Although, of course, everything also depends on the computer.
