Windows
Author Elena Pavlova
Date
Oct 11, 2016
2,317
Share
Many users have encountered a problem when the computer does not detect removable media, such as flash drives and cameras. Let's find out why the computer doesn't see the camera.
- LiveJournal
- Blogger
If the PC does not detect the camera, check if the USB cable works
- Connection interfaces
- Camera power
- Enabling/disabling the device
- Can't see the camera due to drivers
- Software problems
- Can't see the camera due to viruses
Connection interfaces
The first thing you need to do if a digital device connected via USB is not detected is to check whether the port itself and the cable connecting the camera to the computer are working.
- To test the port, you can connect a USB flash drive to it and see if it works.
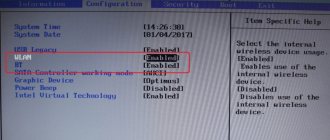
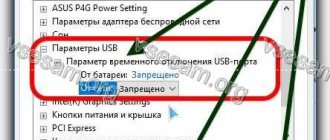
If the USB ports on your computer stop working, restart it. Try updating the USB controller drivers through Device Manager, and also check if the ports are disabled in the BIOS configuration settings. Keep in mind that not all PCs have front USB ports connected to the motherboard, so use the interfaces located on the rear panel of the case.
WATCH THE VIDEO
- Checking the cable is carried out in the same way - you need to try connecting a phone or printer with it.
Some companies produce types of USB cables that are suitable only for their products. Try to use the original cable from the camera to connect to the computer.
- LiveJournal
- Blogger
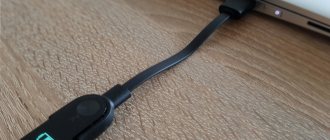
Fig.1 USB cable
System problems
In some cases, antivirus programs may regard your camera as a potential threat, and therefore block its operation. To resolve this problem, you need to use a certain algorithm:
- Go to Windows Firewall through “Control Panel” and “Security System”.
- Use the item about enabling and disabling the firewall and check the “Disable” option opposite.
- Use the "Ok" button below.
Next, you will need to restart the computer for further correct operation of the camera on the computer.
We recommend that you familiarize yourself with the catalog of gaming laptops in the Gaming Laptop online store.
Camera power
Before you connect the camera to your computer, the first one needs to be charged. When purchasing a new device, be aware that it is not always charged. Some models (Canon) have indicators in the form of diodes. If after connecting to the PC the red light is on, you will have to wait until the device charges. You can charge the camera without a charger using a USB cable: connect the digital media to a working USB socket and wait a little.
Enabling/disabling the device
If you connect a video camera to a laptop while it is turned off, nothing will happen, except perhaps charging it. Before connecting your digital photo or video camera to your laptop or PC, turn it on.
- LiveJournal
- Blogger
Before connecting a digital photo or video camera to a laptop or PC, turn it on.
When making the connection for the first time, Windows will automatically install the drivers and notify you of the completion of the process when the equipment is ready for use.
Causes of malfunction and solutions
Defective USB cable
Any camera connects to a computer via a USB cable. There are models that offer wireless connectivity, but they are very few. Accordingly, the main requirement will be the serviceability of the cable and socket of the computer or laptop. Therefore, if nothing happens when you connect the camera to the computer, you should first check that the USB is working properly. How?
- First, try connecting to a different USB port on your computer. Usually there are always enough of them, so if there is a problem with one, you can try with another.
- If none of the connectors respond, try using a different cable. However, if your camera has a non-standard connection format instead of microUSB, this may be a problem.
- Take out the memory card and insert it into a card reader (external or built into a laptop or computer system unit) or into any other device that supports working with an SD drive - a smartphone, tablet, TV. If in this case nothing works out, then the conclusion itself is that there is a hardware failure either in the camera socket or, in general, in the memory card.
Check if the USB cable on the device is working properly
Incompatible data transfer mode
Many modern devices have MTP or PTP data transfer format enabled by default. In this case, the computer recognizes it as an external device, and not a regular drive. On the one hand, this is convenient, since in MTP mode the internal memory also becomes available for viewing, and in PTP mode only folders with photos are displayed. But on the other hand, the problem is that if the computer is old and has an old version of the operating system installed, this mode may not be recognized. In this case, in the camera settings, set the connection mode to “External storage”, if it has such an option.
The problem may lie in the version of the operating system on the computer.
The camera is turned off
Very often, users forget that after connecting the camera to the computer, they need to turn it on, otherwise Windows will not be able to recognize it. It turns out that you just plug the wire into the connector and that’s it. Therefore, check whether your camera is turned off at the moment when you want to view photos stored on its memory card through a computer. If its battery is discharged, then you need to either charge it if the battery is lithium-ion, or replace the batteries if you use regular AA batteries or rechargeable batteries. And also do not forget to monitor the charge status, since, in addition to the problem described, you will not be able to use the camera for its intended purpose if the battery is discharged. Most cameras show the charge status on the screen. And by the way, for some models, manufacturers offer docking stations that allow you to connect the camera to a PC and charge it at the same time.
After connecting to the device, the camera should be turned on
Missing or incorrect driver operation
In most cases, no additional driver or software installation is required. The camera is often recognized as a regular flash drive or an external device when using MTP mode. The Windows operating system automatically installs the necessary software for the correct operation of external equipment.
If for some reason the camera does not connect and is not recognized by the system and you suspect that the drivers were not installed automatically, check how it is detected in Device Manager. Ideally, devices with a yellow exclamation mark, that is, unidentified, should not be displayed. The camera should appear either as a portable device or as a regular memory card.
If the system does not recognize your device, the best solution is to download the software from the manufacturer’s official website. On the support page, you will need to select the device model or series, operating system version and download the installation file from the options offered. After installation, everything should work as expected.
Check the drivers and, if necessary, download the necessary files
System infection by virus
This is also a very popular reason why the computer does not see the camera. It looks like this: when viewing the image on the device screen, everything is displayed perfectly, but as soon as you connect it via USB to the computer or insert a memory card through a card reader, nothing is visible. There are some viruses that make all files stored on external drives hidden, one of them is the so-called autorun virus. What can be done in this case?
- Use a third-party file manager. The most famous of them is Total Commander.
- In Windows Explorer settings, enable the display of hidden files. How to do this on different versions of the operating system?
- Windows 7: Start - Control Panel - Appearance and Personalization - Folder Options - View - Advanced Options - Show hidden files, folders and drives - OK.
- Windows 8–8.1: Win + C to bring up the sidebar - Search - enter "folder" - Folder Options - View - Advanced options - Show hidden files, folders and drives - OK.
- Windows 10: Explorer - View (in the top menu) - check the "Hidden items" box.
- Scan the memory card with an antivirus or any free scanner. Do not worry about the safety of the photo, because the files themselves are not damaged, but are only hidden, which is why they are not displayed. Just in case, scan the entire system, although you can only select a card.
Restoring compatibility
A fairly common practice is an outdated version of the driver for the video card itself. Every year new versions of operating systems are released, resulting in incompatibility with the updated system. This problem is quite easy to solve; just follow a simple algorithm:
- Left-click on the Start menu and select “Run programs created for previous versions of Windows” in the search bar. You can start entering only part of this request, the system will give a hint and find the desired application. Now it needs to be opened.
- If you click on the “Advanced” link, you are given the choice to log in with administrator rights. This option is the most preferable.
- Click "Run as administrator".
- You must click “Next” and wait for the compatibility troubleshooting process to complete. This procedure can take a long time.
Advice! To speed up the procedure, close all applications and programs so as not to load your PC.
You don’t have to resort to the above methods. Before starting any actions, the user should inspect the USB port for damage. It is likely that the issue is a technical failure, and not an erroneous operation of the system.
Faulty USB port
Connect the camera to the PC via the front connectors. Nothing works? Connect through the rear ports. If unsuccessful attempts, try connecting the USB flash drive. Is there no feedback? The problem is the cord is faulty, replace it. Everything worked, it was a faulty USB port(s).
Modern cameras have a USB connection type called MTP. The camera cannot be connected to a computer with an outdated operating system if MTP is enabled in the camera.
It is recommended to connect cameras with a native USB cable, directly to the USB port of the computer, the cord is no more than a meter long.
Camera is disabled
The computer does not see the camera if it is turned off after connecting to the computer. The PC will not recognize the USB cable connection as working.
Faulty USB port
You need to connect the device to the computer through the front connectors. Nothing succeeded? Try using the rear ports. If attempts are unsuccessful, then use a flash drive. If there is no feedback here, then the problem is in the cord. It should be replaced. If everything works, then the problem is in faulty USB ports.
In modern devices you can see a type of USB connection called MTP. If the PC has an old operating system, but the device has MTP, then this is the problem. We advise you to connect your cameras using native USB cables, directly to the USB port of your PC, the cord length is no more than a meter.
How to enable mass storage mode
You can configure the USB connection type in your camera. Find the Menu , look for the Settings or Settings menu item. The parameter we need will be called either USB connection settings , or USB connection selection , or USB Connect Setting, or USB Mode. And the connection type itself can be called either Mass Storage or MSDC .
Below we will describe the procedure for setting up a USB connection using the SONY DSC-HX20 camera as an example. So,
Step 1. Press the Menu to display the menu on the camera screen (see figure below).
Step 2. Find the system settings section with the corresponding icon:
Step 3. Go to the Basic settings :
Step 4. Find the Settings parameter. USB connected :
Step 5. Press the center of the joystick to change the settings of this parameter and select Mass Storage :
Ready :
Turn off the camera and try to reconnect it to the computer.
What to do first?
First, you need to make sure your webcam is working properly. The best option is to connect it to another computer. If he does not react in any way to the new device, the latter is most likely not working. Secondly, you need to make sure that there are no problems with the computer itself, specifically with the USB connectors. To do this, connect any other gadget to the connector selected for connecting the webcam, or connect the webcam to another connector. Thirdly, make sure there are no factors that prevent the webcam from working properly. Remember: a webcam can only work fully in one application. If you enable 2 or more programs that use the webcam's resources, it will either not work as expected or will not turn on at all.
Note!
If the webcam does not work in a particular application, but in other programs it copes with its main task normally, the problem lies directly in the problematic application. Go to the program settings and see if the image transfer settings are set correctly.
