11/29/2018 Category: System protection Author: alexeish4tohin
Typically, the standard built-in virus protection of a computer running Windows 10 is deactivated after system updates or as a result of inept or careless user actions. In most cases, you can restart Defender without being an IT specialist; you just need to carefully follow the instructions for turning it on.
- How to enable Windows Defender in different ways
Enabling protection via Start - Launching Windows Security using Registry Editor
- Activation via Local Group Policy Editor
- Using Win Updates Disabler
- Video: setting up built-in antivirus
How Windows Defender can be useful
The convenience of the PC user and the security of his files depend on the protection of the operating system. Among the many solutions designed to protect your computer from viruses, Windows Defender stands out, present in the Top Ten by default. Windows Defender contains all the tools a modern, effective antivirus application needs:
- real-time file protection,
- search and removal of malicious code,
- completing tasks according to schedule and much more.
Malicious programs can be installed on a computer without the user’s knowledge via the Internet and activated each time they connect to the network. Viruses can often enter the system through the installation of third-party programs, including from external media. Particularly malicious processes consume system resources, delete folders and files, and eat up Internet traffic.
Windows Defender can fight threats in two ways:
- protecting the system in real time, warning about Trojans, rootkits, worms, etc. when the latter attempts to install, start, or change system settings;
- scanning the PC for the presence of malicious code, including on a schedule, and automatically disinfects and deletes virus files, notifying the user about the operations performed.
If threats are detected, the Security Center will prompt you to run recommended actions.
Meanwhile, in new versions of Ten, Windows Security has appeared instead of Defender, but this does not mean that Defender has been excluded from the system. On the contrary, many of the functions and capabilities of the latest antivirus environment are tightly tied to it. Simply put, Defender remains the security core, and Windows Security is the software platform built on top of it. In any case, you can always return to the old interface, but not all of the protection options offered by Microsoft will be available here:
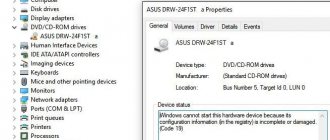
- To launch the old shell, open This PC, then the Program Files folder, and then Windows Defender. Run the MSASGui.exe executable file.
Microsoft changes Windows security features with every update - In the Defender window, you can enable/disable real-time protection, assign virus and spyware definitions, enable scanning, and perform other tasks.
In new versions of Windows, Defender is the core of the security system
Nevertheless, based on the fact that Windows Defender itself does not currently have maximum functionality, then its add-on will be considered first, namely the more global Security tool.
The main reasons why Windows 10 Defender can't start
As you know, Windows Defender is a built-in antivirus software in Windows 10 that does a very good job of handling most tasks. However, the Defender exhibits some glitches at launch. Below I will list the most common complaints about Windows 10 Defender not turning on:
- Windows Defender window won't open
- Windows Defender is disabled by group policy
- Windows Defender crashes on startup with an error
- Windows Defender does not turn on after uninstalling Avast, Bitdefender, McAfee, AVG antivirus programs
- Windows Defender conflicts with Windows 10 anti-spyware utility Spybot
- Windows Defender won't open, won't start, won't work, won't start
Now we can look at the most significant Windows 10 Defender startup errors
How to enable Windows Defender in different ways
Windows Defender can be activated in several different ways.
Enabling protection via Start
In any case, Windows will not ignore disabled virus protection. The system will persistently notify you about this through notifications. Additionally, the Security icons in the Start menu and system tray will contain a red symbol. A yellow label with an exclamation mark will also indicate the presence of problems.
The simplest and most obvious solution is to try to restart the protection through the standard graphical interface - “Windows Security”. This can be done through the Start menu:
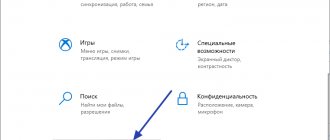
- Launch Windows Security by simply clicking on the shield icon, or by activating Settings (the gear icon).
The Windows Security icon in Start may not appear, depending on how Windows is configured - In the Settings window, select Update & Security.
“Update” and “Security” are in one tab - “Protecting against viruses and threats” requires action. You need to open the “Windows Security” service by clicking on the field of the same name.
In the Windows Security window, you can view information about your system's security and health - By the way, you can get to the protection settings in a shorter way by typing “Windows Security” in the search and pressing Enter.
Windows Security is a trusted Microsoft Store app - Activate the "Enable" button. You may have to click two or three times, starting all disabled antivirus services, until the green symbol appears instead of the cross icon.
In the "At a Glance" window, you can not only get information about the protection of the system, but also perform all security-related actions - Now, if you see a picture like this, you can close the Security Center.
Checkmarks on all items mean that your computer is completely protected
Usually, after completing this setup, the protection works flawlessly again, but not always. If security tools don't want to activate, the service is most likely disabled at the system level or is being administratively managed. This may also be indicated by the appearance of an error message when trying to restart the antivirus application. And if this is your case, try the following methods.
Launching Windows Security using Registry Editor
The easiest way to get to the Registry Editor is to use standard Windows 10 software tools:
- Right-click on the Start icon. In the window that opens, type Regedit and click OK.
In the Run window, you can also enter the path to the application, document or folder that you want to open - In the editor that opens, find the Policy Manager folder by following the path HKEY_LOCAL_MACHINE\SOFTWARE\Policies\Microsoft\Windows Defender. Open it. Double-click on the DisableAntiSpyware option. In the “Value” field, enter “0”. Click "OK"
Working with the editor requires care; even a small mistake when editing the registry can lead to system crash - Here, pay attention to the Real-Time Protection folder by opening it. If the values in parentheses (at the end of each line) are non-zero, change them to “0” in the same way as you did in step 2.
If you are not sure that you are doing everything correctly, it is better not to touch the system settings at all
When all operations are complete, close the windows and restart your computer. If Windows protection is not turned on, proceed to the next step.
Do not forget that by manipulating the registry, you risk damaging system files.
Activation via Local Group Policy Editor
System management through the local group policy editor is provided only in the corporate version of Ten and in Windows 10 Pro. To activate Windows Security using the gpedit.msc administrator tool, follow these steps:
- Using the Run utility, launch the Local Group Policy Editor. To do this, type Gpedit.msc and press Enter.
The Local Group Policy Editor is a very useful tool for making various system settings - In the left field of the console, find and open the Antivirus program folder. It is located in the path “Computer Configuration” / “Administrative Templates” / “Windows Components”. Click "Turn off your antivirus program."
You can customize the console to your liking through the “View” menu - In the window that opens, set it to “Disabled” by launching the Endpoint Protection tool. Next, click “Apply” and “OK”.
When this option is enabled, Endpoint Protection is disabled; if it is set to “Disabled,” the tool works by default
Close all programs and windows and restart your PC. If the protection is still disabled, try launching it using third-party software.
Using Win Updates Disabler
The third-party utility Win Updates Disabler allows you to enable or disable Windows 10 protection components with just a couple of clicks of the computer mouse. The program can be downloaded from site2unblock.com:
- Install and run the Win Updates Disabler utility. On the “Enable” tab, check all the boxes and click “Apply Now”. Restart your computer.
Win Updates Disabler is free - Sometimes when using this program, low-level protection is enabled, but you cannot launch the Security GUI. To fix the bug, open the registry editor and follow the path HKEY_LOCAL_MACHINE\SYSTEM\CurrentControlSet\Services\SecurityHealthService. In the last folder, find the Start variable, click on the line with the mouse and change the value to two in the window that opens.
Do not change values other than those indicated in the instructions, as you may damage the system
You can now exit the application and restart your computer. The Windows Security service should become active again.
Using a third party application Win Updates Disabler
Win Updates Disabler is a lightweight utility that allows you to change the configuration of system components. To use, you need to download the application from the official resource and follow the instructions:
- Launch and go to the “Enable” section.
- Check the box next to “Turn on Windows Defender.”
- Click the Apply Now button.
The built-in antivirus will begin to function after rebooting the PC.
Windows Defender is a necessary system component that reduces the likelihood of malicious code infiltrating. To enable it, it is recommended to use the above methods one by one, each time restarting the computer and checking the operation of the antivirus. As a last resort, you should reinstall Windows 10.
How to properly configure Windows Security
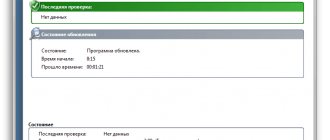
Using Windows 10 system protection requires constantly updating antivirus signatures (definitions). By default, the “ten” performs these actions automatically (just as it scans the PC for potential threats on a schedule, updates the antivirus itself, and carries out other security-related actions), so the user does not need to do anything. However, if you prefer, you can update the definitions manually by clicking the Check for Updates button in the Virus & Threat Protection Updates area of the Windows Security home window.
In the “Scan Settings” you can view the results of anti-virus scans of your PC; the “Threat Log” displays detected Trojans and rootkits
Here you can:
- run a computer scan for viruses (the “Quick scan” button);
- change antivirus settings (“Manage settings”);
- manage ransomware protection;
- contact “Technical Support” if you have any questions;
- Explore and configure other settings and services related to computer security.
In the Virus and Threat Protection Settings window, you can enable or disable:
- real-time protection,
- cloud protection,
- automatic sending of samples of suspicious files,
- adding or removing exceptions.
Do not change the default security settings, this way you will avoid many problems with the security of your PC.
However, touching the default “Security” settings is unnecessary, especially if you do not understand what disabling or changing a particular function may lead to, strongly not recommended.
Video: setting up built-in antivirus
How to add exceptions
For various reasons, it is sometimes necessary for the antivirus not to scan a particular file for threats. You can disable scanning of an object by adding it to exceptions:
- To do this, open Windows Security. Click Add or Remove Exceptions.
Before you start configuring exceptions, pay attention to the warning in the appropriate tab - Click on the plus sign and from the drop-down list select the type of object that you want to include in exceptions.
Add a file, folder, file type or process to exceptions - In the Explorer window that appears, select the object you are looking for by clicking “Open”.
If you have any questions, you can always contact Microsoft technical support
Perform the above steps only if you are confident that the object being excluded is safe. Removing a file, folder or process from exceptions is done on the same settings page by highlighting it and clicking the “Delete” button.
Solution 1: SFC
An SFC scan checks your entire computer for missing/damaged drivers and registry files. After checking, Windows will automatically suggest replacing them. At this stage we will initiate an SFC scan.
- Press the Windows button + X at the same time.
- Select "Command Prompt (Admin)" or "Powershell (Admin)" from the list.
Note. If you're using the Creators update version of Windows 10, you'll see a Powershell option instead of a command line option.
- Inside PowerShell, type "sfc /scannow" and press Enter.
- Wait until the scanning process is completed.
- Restart your computer and check if the problem persists.
Test virus
Another way to find out which antivirus we have installed, and if it works well, is through test viruses . These are small, harmless files that are present in all databases and serve to run the antivirus to check whether it really protects us.
Eikar, for example, is one of these test viruses. From the following link we can download these harmless files to check if our security program is active and working. In this case, we will be able to see a window like the following in case of using Windows Defender.
If we have another antivirus, instead of the previous message we will see a corresponding notification. And from this notification we can find out which antivirus we have installed.
Once our PC's security software has been identified, we now just need to find it to open its main window. Or, if we prefer, remove it.
What it is?
Reference. Windows Defender is software developed by Microsoft in 2005 and built into all versions of Windows starting with Windows XP.
Its purpose is to protect the operating system from malicious spyware. This type of malware sneaks onto a computer in order to copy the user’s personal information and send it to third parties.
Windows Defender should monitor the activity of such programs and quarantine them, but this can often only be a nuisance for an experienced user.
On the other hand, for inexperienced users, Windows Defender can be a good safety net when surfing the Internet.
What to do if the software product is not updated?
Windows Defender update problems can occur for a variety of reasons. Unfortunately, they are often very individual and can only be solved by professionals, but there are several universal solutions.
- First of all, Windows Defender may conflict with other antiviruses. Try disabling them, or ideally removing them.
- Another reason could be an error in writing some files. To correct the error, you should delete the C:\$WINDOWS.~BT folder, as well as clear the contents of the C:\Windows\SoftwareDistribution\ folder, and then try the update again.
- If none of the methods helps, you should refer to the chapter “How to install Windows Defender?”. When installed over an existing program, it will automatically update to the latest version.