If a user has a problem when Windows 7 does not start on a computer or laptop, then this article will help solve this difficult problem. Starting Windows 7 is sometimes impossible due to errors occurring in the system after hardware problems, incorrectly installed software, malicious utilities, etc.
But the most common reason why Windows 7 sometimes won’t load lies in the operating system itself.
Solution
In the case when all the initial stages of launching Windows 7 on a PC or laptop are performed normally, but Windows 7 still does not start completely, this usually confuses novice users. Although, given detailed instructions, the question is: “What to do?” will not appear even for beginners. If the cause of the problem is a hardware failure, then this will be indicated by the signal from the speaker of the laptop or desktop computer during the POST test. If this is the case, then the OS will not start.
But if the problem is of a software nature and the process stops at the stage of loading Windows 7, then it means that the user has encountered the most common problem, which can be solved using the algorithm of typical actions.
Types of problems when loading Windows:
- The computer freezes or restarts while Windows is loading. Most often when a checkbox appears.
- Windows 10 checkbox
- Windows 7 download checkbox
- Keyboard connection error during POST
CMOS checksum ERROR- Boot device not found error
RAM errors during POST
Blue screen when loading Windows BSOD
Instructions for action
You must use an OS recovery tool. During the PC startup process, if Windows 7 does not start, the system often recommends that the owner of the computer or laptop select boot options. If for some reason such an offer has not been received, then the user can independently open this menu by clicking on the “F8” button. Then proceed to restore the normal loading of the Seven.
Next you need to complete the following steps:
- Place the pointer on the line “Troubleshoot computer problems” and press “Enter”;
- Then type the login and administrator code of your computer or laptop;
- In the menu that appears, click on “Startup Repair”;
- After this, consistently follow the instructions offered by the system;
- After the recovery procedure is completed, the OS will boot in normal mode.
Other types of problems when loading the Windows operating system
In this section, we will talk about the most typical, but less common problems that cause Windows to not boot. Let us briefly present them in a table with a description and method of solving the problem.
| Description of the problem | Symptoms | Solution |
| A disk or flash drive is inserted while Windows is loading | The operating system does not boot. A black screen appears. | While the operating system is loading, remove the disk and flash drive from the computer. You can paste them in when Windows has fully started and your Desktop appears. |
| The computer is dirty | Anything that prevents Windows from loading | Clean your computer ( show hint / open full article) |
| Virus infection | Anything that prevents Windows from loading | Clean your computer for viruses ( show hint / open full article) |
| Incorrect SATA operating mode selected in BIOS | The operating system constantly reboots without loading completely | Reset BIOS to factory settings. Check the SATA operating mode ( show hint / open full article). |
What to do if the above instructions did not solve the problem?
To fix the problem when Windows 7 does not start, you need to use a CD with the OS:
- Insert the installation disk into the PC drive;
- Start the system from the disk (in the BIOS the appropriate order for booting the system from media must be set);
- In the window that appears, click on “Apply recovery functions that resolve OS boot problems” and click on “Next”;
- Then in the “OS Recovery Options” menu, click on “Startup Repair”;
- Wait until the system analysis is completed and the causes of failures are eliminated;
- Reboot the PC;
- In the BIOS, set the system to start from the hard drive ( when exiting the BIOS, be sure to save the adjustments made );
- Restart the computer again;
- Ready! Windows 7 will now boot normally.
After turning on the computer, a black screen appears with an error
In this case, the operating system does not load at all, but instead you see a black screen with the following messages, this may indicate:
- About problems with the boot device. When your computer cannot determine from which device it needs to load the operating system ( show hint
/ open full article); - About Windows bootloader error ( show hint
/ open full article);
Windows 7 boot loader error
Windows 10 bootloader error
/ open full article);
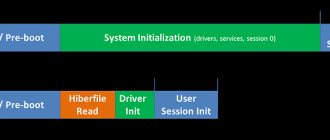
Booting the computer POST
/ open full article).
Using the command line
If for some reason it was not possible to restore Windows using the installation disk, then there is another way to do this through the command line.
First, you need to take the steps indicated in the paragraph about restoring normal loading of the “Seven”. The only changes are that simply in the “System Recovery Options” menu you now need to specify the “Command Line” section.
Then take the following steps sequentially:
- In the command line field, type “bootrec.exe /FixMbr;
- Then click on “Enter”;
- After that, enter “bootrec.exe /FixBoot”;
- Click the “Enter” button again;
- Reboot the PC.
How to run the troubleshooter
There are two ways to launch the troubleshooter in Windows 10: through the Options window, which many call Windows Settings, and through the Control Panel. In fact, these are two different utilities that are located in different places, but they work the same way.
Via the Options window (automatic troubleshooting)
Automatic troubleshooting is a utility that offers solutions to only the most obvious problems with Windows 10:
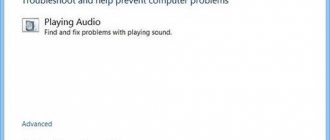
- problems with sound recording and playback;
- video problems;
- problems recognizing the keyboard, printer and other connected devices;
- problems with Wi-Fi, Bluetooth and Ethernet;
- appearance of a blue screen;
- rapid battery drain;
- problems with the store and receiving updates;
- Windows Explorer and internal search errors;
- compatibility problems.
This utility is located closer to the user interface to make it easier to find, and has the most simplified functionality.
- Click the “Start” button and click on the gear next to the computer shutdown button.
Click the "Start" button and click on the gear next to the computer shutdown button - The Options window will open.
Click on "Update and Security". Click on "Update & Security" - Now on the left side of the window, click on “Troubleshooting”.
On the left side of the window, click on “Troubleshooting” - Look through the entire list and select the problem you are experiencing.
After this, the “Run the troubleshooter” button will appear. Click on it. Select the problem you are having and click the "Run the troubleshooter" button - The search for possible problems will begin immediately.
This usually takes no more than three minutes. Typically, troubleshooting takes no more than three minutes - During the search process, the system can ask you questions and offer solutions to the problem.
During the search process, the system can ask you questions and offer solutions to the problem. - If all else fails, you'll be prompted to submit a review.
This will provide developers with information about the error, but will not help you specifically. If all else fails, you'll see a prompt to submit feedback.
Via Control Panel (Troubleshooting Wizard)
The Troubleshooter has been present in Windows 10 since XP. It is on its basis that the automatic troubleshooting tool, which is described above, was created. It can solve a much larger number of problems compared to its simplified version. Finding a troubleshooting wizard will be more difficult, since the path to this utility is carefully hidden by the developers.
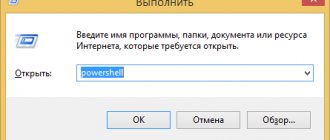
- First, you need to open the control panel.
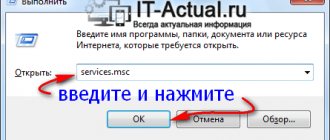
To do this, press the Win+R keys simultaneously to launch the Run utility. Type control and click OK. Press the Win+R keys simultaneously, enter control and click OK - As already mentioned, the troubleshooting wizard is hidden from users: on most versions of Windows 10 it cannot be found in the categories.
In the upper right corner of the window, select the Small Icons view option. Select the Small Icons view option - After this, the displayed list will change.
Find the Troubleshooting group here and click on it. Find the Troubleshooting group here and click on it - There will be few options in the menu that opens.
Immediately click on the inscription “View all categories” on the left side of the window. Click on “View all categories” on the left side of the window - A complete list of problems that can be solved internally in Windows 10 will open. Just double-click with the left mouse button on the problem you are experiencing.
Double-click the left mouse button on the problem you are having - In the window that opens, click on “Advanced” and check the “Automatically apply fixes” checkbox.
After that, click "Next". Further actions will be the same as for automatic troubleshooting. Click on “Advanced”, check the “Automatically apply fixes” checkbox and click “Next”
Why are preventive measures important?
Windows 7 has a special system that can make special reference points, with the help of which, if necessary, it is restored. By using this protection function, even a novice user can always easily return the OS to a working state.
For example, in case of failures due to incorrect installation of applications, drivers and other utilities such as codecs, or when errors occur due to adjustments being made to the registry.
Therefore, it is strongly recommended not to neglect this function of creating restore points, which is important for the health of the system.
It is necessary that it be possible to allocate a fixed amount of memory on the hard drive specifically for such protection of the operating system. In Windows 7, it is possible to independently configure protection for files along with system data, or you can do this separately.
Why is the download not happening?
What are the differences between 3G and 4G networks: features, advantages and disadvantages
Users wonder why files are not downloaded from the Internet. In most cases, downloading is blocked by the browser. Specialists perform a reboot, updating the program. You need to check the settings and, if necessary, clear your download history and cache.
Important ! Files may not load because third-party utilities are interfering. The download manager simply cannot start, communication is blocked.
Check antivirus
Antivirus programs sometimes get a little overzealous and block downloads that are otherwise quite normal, but disable some advanced protocols. To work around this issue, you can either disable your antivirus suite completely, usually via the system tray icon, or simply disable these advanced features.
The second approach is probably the safest, so it's best to try it first. However, since all antivirus programs are different, you will have to navigate them yourself. In most antivirus programs, you'll need to find the settings screen and then go to a menu that's probably called something like advanced.
This is what it looks like in ESET antivirus.
There you will need to find an option called HTTPS scanning or encrypted connection scanning. If it is installed, uncheck it and try downloading again. Whether it works or not, be sure to check it again after you're done to stay safe.
Crashes when starting installed programs
Sometimes the problem may not be in the system, but in the installed program. For example, it is very common for Windows 10 to load endlessly with NFS Underground 2. In other words, the crash is caused by the installed game itself. Apparently, this only happens because the installed version is not the official one, but a pirated one. To fix the problem, you need to download the official release or at least replace the game start executable file speed.exe with the original one. Also, some experts recommend launching the game in compatibility mode with versions of Windows lower than the tenth (if possible, even XP, and if this option is not available, then using a previous modification of the system).
Checking browser add-ons installed
If clearing the cache did not help, and the page in the browser still does not open completely, then I recommend checking the installed add-ons and temporarily disabling them (if any).
You can also do this in the browser settings, somewhere in the “Extensions”, “Add-ons” section. For example, in the Opera browser:
Disable all installed extensions for a while.
If you don’t know where these settings are located in your browser, then look at this article. In it I showed how to manage extensions in popular browsers.
Also look at what programs you have installed and running on your computer. Maybe you'll find something suspicious.
Clearing the browser cache
This is one of the first solutions to try when you encounter this type of problem. I am planning a separate article on this topic, but here I will briefly show how to clear the cache in the most popular browsers.
- Opera. Open “Menu” – “Other tools” – “Clear browsing history” (or Ctrl + Shift + Del). Leave only the “Cached images and files” item selected.
And click “Clear browsing history”. Read more about this in the article: how to clear history, cache, cookies in the Opera browser. - Chrome. “Menu” – “Additional tools” – “Deleting data about viewed pages.” Next, select “Images and other files...” and clear it.
After this, you can restart Chrome. - Firefox. “Menu” – “Settings” – “Privacy” tab. Select "delete your recent history."
- Yandex browser. To avoid navigating through the menu, you can press the key combination Ctrl + Shift + Del.
Next, select “Files saved in cache” and clear them.
If you have some other browser, then I think that you can easily find the cache clearing function in the settings. Or ask in the comments.
Bootloader recovery and update management
If the bootloader is damaged, which is most often observed, none of the above results will give. Therefore, it is strongly recommended to boot from removable media with the distribution kit or using a LiveCD, call the command line, and then use the Bootrec.exe tool, adding the “/FixMbr” attribute, separated by a space, and then “/FixBoot” (without quotes).
If the problem is not resolved upon restart, you will have to completely rewrite the bootloader by adding the “/RebuildBCD” attribute to the main command separated by a space, and then reboot the system again in normal or safe mode.
Since it is very common to experience endless downloads after updating Windows 10, the smartest solution would be to remove them. To do this, if possible, it is better to use Safe Mode, go to the programs and components section in the Control Panel, and then remove the latest installed packages one by one from the installed updates section.
Note: You don't need to delete everything. It is enough to uninstall the packages one by one, checking the functionality of the system after a restart, and when a faulty update is found, when searching for updates manually again, it will need to be removed from the installation list. You can also use a utility from Microsoft called Show or hide updates for such purposes.
But it also happens that the system seems to be working, but updates are not installed. Endless downloads of Windows 10 updates are almost always associated with problems with the Update Center itself. First, look at the startup type of this service in the corresponding section (services.msc).
The Update Center, Delivery Optimization, Windows Modules Installer, and Windows Installer services must be active. If a component is not active, launch it in the parameters editing window, and in the start type set the value to automatic launch.
You can also use the command line running as an administrator to fix problems and restart the update service. First, the commands “net stop wuauserv” and “sc config wuauserv start= disabled” are executed, followed by a full reboot, and after that activation is performed with the commands “net start wuauserv” and “sc config wuauserv start= auto”. If this approach does not work, try looking for an automatic solution in the Troubleshooting Center by calling it from the Control Panel.
Reasons for the error
It is not always possible to immediately understand what caused the failure, but from the code you can approximately determine what could have been the source of the problem, and the message often indicates the probable cause of the malfunction, and this significantly narrows the circle of “suspects.” Thus, error 0xc0000185 in Windows 10 or other versions occurs due to the inability of the system to obtain information from the hard drive necessary for startup. This may be due to incorrect system settings, irregular registry entries, damaged bootloader data, or incorrectly connected equipment. Correcting the error code 0xc0000185 directly depends on eliminating the provoking factor. If a regular reboot does not help get rid of the failure or is only a temporary solution, then you need to take more drastic measures to restore normal functioning of the device.