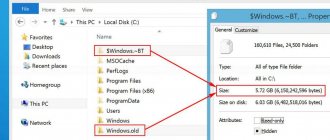
This instruction tells you how to disable automatic updating of device drivers in Windows 10 in three ways - a simple setting in system properties, using the registry editor, and also using the local group policy editor (the latter option is only for Windows 10 Pro and Enterprise). You will also find a video tutorial at the end. According to observations, many problems with the operation of Windows 10, especially on laptops, are currently associated precisely with the fact that the OS automatically loads the “best” driver, which in its opinion can ultimately lead to unpleasant consequences, such as a black screen , incorrect operation of sleep and hibernation mode and the like.
Disable automatic driver updates in Windows 10 using a utility from Microsoft
After the initial publication of this article, Microsoft released its own Show or Hide Updates utility, which allows you to disable driver updates for specific devices in Windows 10, i.e. only those for which updated drivers cause problems.
After launching the utility, click “Next”, wait until the necessary information is collected, and then click on the “Hide Updates” item.
In the list of devices and drivers for which you can disable updates that appears (not all appear, but only those for which, as far as I understand, problems and errors are possible during automatic updating), select those for which you would like to do this and click Next .
Upon completion of the utility, the selected drivers will not be updated automatically by the system. Address for downloading Microsoft Show or Hide Updates: support.microsoft.com/ru-ru/kb/3073930
Using the wushowhide.diagcab utility
This method is used if you need to disable a specific system driver. The wushowhide.diagcab utility helps you hide certain updates or software for your computer. For example, if a user needed to disable an outdated video card driver, he can use this tool.
To use the tool, you will need to download it from the official source and do the following:
- Launch the software.
- Select "Hide Updates".
- Select the software you want to turn off from the list.
- Click “Next”.
After saving the changes, the OS will stop automatically updating drivers.
Drivers are of particular importance in system performance and stability. But the latest software versions may disrupt the operation of the OS. You can deactivate auto-update of drivers in Windows 10 using one of the proposed methods. Disabling the option will help avoid a number of problems and system failures. If none of the options help, you need to try scanning your system for viruses. In extreme cases, you will need to reinstall the operating system.
Disable automatic installation of device drivers in gpedit and Windows 10 Registry Editor
You can disable automatic installation of drivers for individual devices in Windows 10 manually - using the Local Group Policy Editor (for Professional and Enterprise editions) or using the Registry Editor. This section shows the prohibition for a specific device by hardware ID.
To do this using the Local Group Policy Editor, you will need the following simple steps:
- How to disable Windows 10 update - change Update settings
- Go to the device manager (right-click menu on the “Start” button), open the properties of the device for which driver updates should be prohibited, on the “Information” tab, open the “Hardware ID” item. These values will be useful to us, they can be copied entirely and pasted into a text file (this will make it more convenient to work with them later), or you can simply leave the window open.
- Press Win+R keys and enter gpedit.msc
- In the Local Group Policy Editor, go to “Computer Configuration” - “Administrative Templates” - “System” - “Device Installation” - “Device Installation Restrictions”.
- Double-click on “Prevent installation of devices with specified device codes.”
- Set it to Enabled and then click Show.
- In the window that opens, enter the equipment IDs that you defined in the first step and apply the settings.
After these steps, the installation of new drivers for the selected device will be prohibited, either automatically by Windows 10 itself or manually by the user, until the changes are canceled in the local group policy editor.
If gpedit is not available in your edition of Windows 10, you can do the same using the Registry Editor. To begin, follow the first step from the previous method (find out and copy all equipment IDs).
Go to the registry editor (Win+R, enter regedit) and go to the HKEY_LOCAL_MACHINE SOFTWARE Policies Microsoft Windows DeviceInstall Restrictions DenyDeviceIDs section (if there is no such section, create it).
After this, create string values, the name of which is numbers in order, starting from 1, and the value is the ID of the equipment for which you want to prohibit driver updates (see screenshot).
Questions and answers
Passwords saved in the browser are protected by the operating system, the password of the current user.
Most modern smartphones save photos to a memory card rather than to the device's internal memory. To restore, remove the card from your phone, connect it to your computer and run the analysis.
The program can also recover data from the internal memory of some phones. Connect your phone to your computer and start the analysis. The program will display the photos found for recovery.
The utility is designed to recover data from deleted partitions and re-partitioned disks. Follow these steps:
The ransomware virus deletes documents and creates a new encrypted copy of them. Our program allows you to recover deleted documents and gain access to the original files.
This depends on the payment method you use. If you pay online using your credit card or PayPal, you will receive a registration key immediately after payment.
For successful recovery, you must stop using the device until the necessary files are completely returned.
Disabling automatic driver downloads in system settings
The first way to disable driver updates is to use the Windows 10 device installation settings settings. There are two ways to get into these settings (both options require you to be an administrator on the computer).
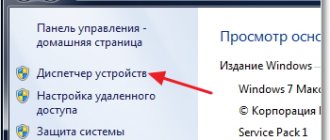
- Right-click on “Start”, select the “System” context menu item, then in the “Computer name, domain name and workgroup settings” section, click “Change settings”. On the Hardware tab, click Device Installation Options.
- By right-clicking on Start, go to “Control Panel” - “Devices and Printers” and right-click on your computer in the list of devices. Select Device Installation Options.
In the installation options, you will see a single request: “Automatically download manufacturer apps and custom icons available for your devices?”
- How to permanently disable forced updates in Windows 10p
Select "No" and save the settings. In the future, you will not receive new drivers automatically from Windows 10 Update.
Shutdown process
sysdm.cpl
The system properties window will appear in front of us. Here we switch to the “Equipment” . Next we need to click “Device installation options” .
In the new window, check the “No” . And click the “Save” .
Using Registry Editor
The same can be done using the Windows 10 Registry Editor. To launch it, press the Windows + R keys on your computer keyboard and enter regedit in the Run window, then click OK.
In the registry editor, go to the HKEY_LOCAL_MACHINE Software Microsoft Windows CurrentVersion DriverSearching section (if the DriverSearching section is not in the specified location, then right-click on the CurrentVersion section and select New - Key, then specify its name).
In the DriverSearching section, change (on the right side of the Registry Editor) the value of the SearchOrderConfig variable to 0 (zero) by double-clicking on it and entering the new value. If such a variable is missing, then in the right part of the registry editor, right-click - New - 32-bit DWORD Value. Name it SearchOrderConfig and then set the value to zero.
After this, close the Registry Editor and restart your computer. If in the future you need to re-enable automatic driver updates, change the value of the same variable to 1.
Method number 1. Special utility for Windows 10
Microsoft has developed its own Show or Hide Updates program, the functionality of which is the ability to enable or disable automatic updates of certain operating system components, including drivers. To take advantage of this opportunity, do everything as in the instructions:
- Download the utility. You can do this using the link: support.microsoft.com/ru-ru/kb/3073930. Scroll down the page, find the link in the text “Download the troubleshooter package...” and click on it.
We follow the link, find in the text the link “Download the troubleshooter package - Run the utility, then click “Next”. After this, the program initiates the collection of all necessary information from your computer. This may take about a minute. Click “Next”
- When the utility receives the information, the following window will appear. Select “Hide Updates” in it.
Select “Hide Updates” in it - After this, a list of drivers will appear. Mark those lines with drivers whose automatic updating should be disabled. Once done, click Next.
We mark the lines with drivers whose automatic updating we want to disable, click “Next”
On a note! To reactivate automatic updates, run the program again and select the “Show hidden updates” function, then uncheck the boxes.
Method 1. How to disable automatic installation of Windows 10 drivers
- Right-click on the This PC and select Properties .
- Go to the Advanced system settings and in the window that opens, click on the Hardware tab.
- Go to Device installation options and select No in the new window (the device may not work correctly).
This means that Windows 10 will not automatically download manufacturer apps and custom icons available for your devices. This method is simple and fast. But I also recommend using one more of the following methods with it.
How to disable driver search in Windows Update 7
In recent days I have been experimenting a lot with finding and installing 64-bit drivers in Windows 7 x64 for old printers and plotters. We managed to find many drivers and now the devices perform their function perfectly with 32-bit and 64-bit Windows 7 systems. During the testing process, very often it was necessary to install different drivers; if the drivers were not in the local storage, then Windows began searching for them on the web -Windows Update website on the Internet. And because there is no Internet access from these computers, the process was delayed for 5-10 minutes and the result was obviously negative.
In order not to waste a lot of time on useless waiting, it was necessary to disable the search for drivers in Windows Update 7 , and I will tell you how to do this below...
Open System Properties ( Control Panel –> System and Security –> System –> Advanced system settings ), open the Hardware and click the Device installation options
Device installation options window will open , with the default option selected - Yes, do this automatically (recommended) . We need to disable it by setting the parameters as in the screenshot and click the Save .
Now, when installing drivers, if it is not in the driver store, Windows will not waste our time, but will immediately offer to specify the driver manually.
Method 2: How to disable automatic driver installation using Group Policy Editor
- Open the Group Policy Editor by pressing Win+R and executing the command gpedit.msc.
- Let's follow the path: Computer configuration => Administrative templates => System => Device installation => Restrictions on device installation.
- In the same section, we find the policy Prohibit installation of devices not described by other policy settings and change its value to Enabled .
Method number 2. Policy Editor
Windows OS has a useful built-in utility - “Local Group Policy Editor”. It is a list of settings for regulating user access to programs, activating certain functions, and so on. You can also use it to disable automatic driver updates. To do this, follow the instructions below:
- First of all, you need to find out the special device identifier. To do this, go to Device Manager. To do this, press the Win+R key combination, then type the command “devmgmt.msc” and click OK. Type the command “devmgmt.msc” and click “OK”
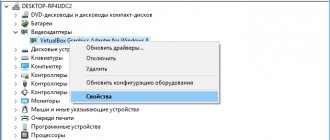
- Find in the list the device for which you plan to disable driver updates, right-click on it and click “Properties”.
Right-click on the device and click “Properties” - Then activate the “Details” tab and set the “Hardware ID” property. This is the very identifier you need. Copy it by first selecting it with the right mouse click.
Go to the “Details” tab, select the “Equipment ID” property, copy the identifier - Now go to the policy editor. To do this, click on the “Win + R” button combination and type the command “gpedit.msc”, confirm by clicking “OK”.
Enter the command “gpedit.msc”, confirm by clicking “OK” - Next, you need to open the “Device Installation Restrictions” folder. The address of this folder is shown in the screenshot below. In this folder, double-click on the option that is responsible for prohibiting the installation of devices with the specified identifier.
Open the folders along the specified path to the “Device installation restrictions” folder
Double-click on the option “Prohibit the installation of devices with the specified device codes” - Activate the “Enabled” option, then click on the “Show…” button.
Activate the “Enabled” option, then click on the “Show…” button - In the input field of the new window, enter the equipment ID. Since you previously copied it to the clipboard, you just need to press “Ctrl+V”. After that, click "OK" to confirm the changes. In the “Value” field, enter the equipment ID, or press the “Ctrl+V” keys, then “OK”
Additional method
There is another way to disable automatic driver updates using the gpedit utility. To use it, do everything as indicated in the instructions:
- Run the gpedit utility (how to do this was described above). Enter the command “gpedit.msc”, confirm by clicking “OK”
- Open the Driver Installation folder. To find this folder, first open the Computer Configuration folder, then Administrative Templates, and then System. Open the “Computer Configuration” folder, then “Administrative Templates”, then “System” Open the “Driver Installation” folder
- Double-click to select the option that disables the Update Center.
Double-click to open the option “Disable the request to use the Update Center” - Then enable this option by setting its settings menu to “Enabled”. To confirm the changes, click on “Apply” and then on “OK”.
Set the settings menu to “Enabled”, click “Apply”, then “OK”
After these procedures have been completed, the system will not automatically search for and install drivers.
On a note! The additional method differs from the original one in that it disables driver updates for all devices at once, and not for the one whose identifier you specified. If, for example, you need to disable driver updates only for a video card, then it is better to use the first method.
Method 3: How to disable automatic driver installation using Registry Editor
- Open the registry editor by pressing Win+R and running the regedit command.
- Let's follow the path: HKEY_LOCAL_MACHINE Software Microsoft Windows CurrentVersion DriverSearching.
- Find the SearchOrderConfig and change its value to .
If such a section or parameter does not exist, then simply create it. Well, of course, to return everything back, just change the value back to 1, which should be the default.
Method number 3. Through “System Settings”
Important! To use this method, you must have Administrator access.
- Right-click on the Windows logo icon.
Right-click on the Windows logo icon - Left-click on the “System” line. Left-click on the line “System”
- In the “Computer name, domain name...” block, click the “Change settings” link. In the “Computer name, domain name...” block, click on the “Change settings” link
- Left-click to activate the “Hardware” tab. Left-click to activate the “Hardware” tab
- Click on the “Device installation parameters” block.
Click on the “Device installation options” button - Oh, click Save.
Oh, click “Save”
So, now you know how to deactivate the automatic search and installation of drivers for Windows 10. In some cases, this can save you from unpleasant situations (as, for example, in the case with the video card mentioned at the beginning of the article), and will also save your traffic. If none of the described methods helped you, then you should scan your computer for viruses, and even if this does not help, then reinstall the system.
Method 4. How to disable driver installation in Windows 10 using a utility from Microsoft
Since many Windows 10 users have been thinking about this since the transition to the new operating system, Microsoft released the Show or Hide Updates utility. In essence, this is the troubleshooter that we are used to seeing in Windows. It searches for all drivers with which you may have problems and gives you the opportunity to disable driver updates, you can disable them one by one.
You can download it from the Microsoft website using this link.
- the Show or Hide Updates utility itself .
- Launch it and click Next and then the Hide Updates button.
- In the window that opens, there will be a list of problematic drivers, the updating of which you can actually prohibit here; to do this, you should mark them and click Next .
In this article, we looked at ways to disable automatic driver installation in Windows 10. In principle, I think this innovation is interesting. Since in most versions Windows 10 downloads good drivers, but if you have problems with drivers then this article will be interesting for you. Don't forget to subscribe to updates and share the article on social networks.
—>
You might be interested in: How to prevent driver updates for a selected device in Windows 10.
Often, for a number of reasons, you need to use an older version of the driver, but after installing system updates, you again and again end up with a version of the driver that you do not need, which, since you are reading this, is probably causing problems. Windows 10 has a special setting that you can use to change this behavior. Often the OEM driver is better, as opposed to drivers installed by Windows Update, which can create a problem. To continue, you must be logged in with an administrator account.
Windows 10 automatically installs drivers for your gadgets, video cards and other equipment. If you want the operating system not to automatically install device drivers, disable this function. Below are five working methods. In addition to Settings , let's look at how to use: Group Policies for Windows 10 Pro and Registry Editor for the Home version. (The registry method works in any version of Windows).
In Windows 10, you can turn off automatic driver updates. This is a useful feature, but a large number of users are not happy with the new versions of drivers installed using Windows 10 Update.
Note: We must warn you that if you prevent Windows 10 from installing drivers, you will need to check and install new drivers manually for all your hardware devices. You may want to prevent automatic driver updates for your video card, but this will also affect other drivers, such as the audio driver.
Method 1: Disable driver updates in Windows 10 using Device Setup Options.
- Open File Explorer, paste into the address bar and press Enter.
Control PanelHardware and SoundDevices and Printers
This will open the Devices and Printers section of Control Panel.
- Expand the "Devices" . Here you will see a list of all the devices (see picture above) connected to your system and your own system will appear as a device. It will have the same name as your computer and will be represented by a PC icon.
- Right-click on it and select “Device installation options” .
A dialog box will open asking if you want to automatically download manufacturer apps and custom icons available for your devices . It doesn't say anything about drivers, but this setting is what you need to disable automatic driver loading.
- Select the None and click the Save Changes . You will need administrator rights to save changes.
- Restart your computer.
Method 2: Disable automatic device driver installation using the registry.
- Open the Registry Editor application .
- Go to the next registry key.
HKEY_LOCAL_MACHINESOFTWAREMicrosoftWindowsCurrentVersionDevice Metadata
- On the right, change or create a new 32-bit DWORD value named PreventDeviceMetadataFromNetwork .
Note: Even if you are using 64-bit Windows, you must still create a 32-bit DWORD value.
- PreventDeviceMetadataFromNetwork value to 1 , this will disable the automatic driver update feature. A value equal to allows the system to load drivers automatically (this is the default value).
- Restart your computer.
Method 3: Disable automatic driver downloads in Windows 10 using Group Policy Editor.
- Open the Local Group Policy Editor ( see how ).
- In the Group Policy Editor, go to the following path:
Computer Configuration / Administrative Templates → Windows Components → Windows Update
- Find and open the option - Don't include drivers in Windows updates
- The Default Policies option is not set, it must be Enabled , now Windows 10 will not automatically install drivers using Update Center.
- Reboot your system.
After the reboot, the Drivers will be excluded from the update search list.
If you want to enable driver updates again, you can easily do so by returning the settings to default.
Method 4 - Disable automatic driver updates using group policies.
- Open the Local Group Policy Editor by pressing the Win + R key combination , type gpedit.msc and click OK.
- In the Group Policy Editor, go to: Computer Configuration → Administrative Templates → System → Device Installation → Device Installation Restrictions → Prohibit the installation of devices not described by other policy settings.
- If this option is Off , then Windows will automatically install the driver for any device.
4. Enable this option and click the Apply .
- Now restart Windows 10; the system will not be able to update drivers on its own.
To set the default option, you must set the option to Not Configured or Disabled.
Alternatives from third-party software
What's next? Well, we removed the problematic device driver, downloaded a normal driver from the official website of this device, and installed it. What about updating drivers for other devices? Updates to drivers for other devices can be useful and sometimes even necessary. Searching all the time on the official websites of computer components and looking for new driver versions there is a waste of time.
It is better to use third-party programs to automate driver updates. There are many programs of this type on the Windows software market; they usually work on the principle of scanning for driver updates, informing about the availability of such updates, but we start the update process ourselves manually. And before such a launch, we will be able to create a Windows restore point each time. If we have problems after installing the drivers, we will roll back the system to the created point.
The mentioned Snappy Driver Installer is one of the best solutions to the issue of installing and updating drivers in principle. Completely free, portable, not stuffed with unnecessary commercial functionality, and not interfering with Windows startup, this program will help us solve our problem as simply and conveniently as possible. We can resort to its help, say, once a month, and our drivers will always be up to date.
Click on the update block.
Select “Only for this PC” . Click “Apply” , then “Ok” .
We are waiting for a list of drivers to update. We mark all of them or check the boxes of only individual devices. Click the “Install” .
Snappy Driver Installer is good for situations where computer device manufacturers are guilty of releasing problematic drivers.
In the left panel of the program window, we can filter the driver database and exclude from it the preset search for new versions by checking the search for current versions checkbox.
Another convenience of Snappy Driver Installer is the option to create a Windows restore point implemented directly in the interface. We tick this option, and the program itself will create rollback points every time before updating drivers.
What are the ways to prevent Windows 10 from updating drivers?
Method #1: Using the Group Policy Editor
This method (in my humble opinion) is one of the most effective. First you need to open the Group Policy Editor. For this:
- press the combination Win+R;
- In the Run window that appears, enter the command gpedit.msc and click OK.
gpedit.msc - launch the Group Policy Editor
Note: Group Policy Editor is not available in Home and Starter editions of Windows! If, when you try to launch it, an error occurs, then you have 2 choices: either update your OS to the Pro edition, or use other methods.
By the way, working in this editor is no different from Explorer.
In general, you need to open the tab:
Computer Configuration -> Administrative Templates -> System -> Device Installation -> Device Installation Restrictions
Next, expand the option “Prohibit the installation of devices not described by other policy settings,” enable it and save the settings.
Deny installation of devices not described by other policy settings / clickable
Note: When this policy setting is enabled, Windows cannot install or update drivers for devices that are not specified in the Allow installation of devices that match these device IDs policy settings.
After which it is recommended to open another tab:
Computer Configuration -> Administrative Templates -> Windows Components -> Windows Update
In this tab there is an option “Do not include drivers in Windows updates” - you need to open it.
Don't include drivers in Windows updates
Next, also move the slider to “on” mode, as with the previous parameter, and click on OK (example in the screenshot below).
Well, one last thing: in the same tab, find the “Setting automatic updates” option and open it.
Setting up automatic updates / group policy editor
Set the slider to "Enabled" mode and set the setting to "Allow local administrator to select options". Then save the settings and restart your computer.
Configure Automatic Updates - Allow local administrator to select options
Now Windows will not automatically download and install drivers along with updates (well, we have limited the downloading of the updates themselves.).
It seems like the task is completed