Realtek HD Audio Driver is probably the most popular audio driver for managing audio settings in Windows. Realtek HD Manager for Windows 10 is installed with the standard set of Realtek Audio drivers.
OFTOP. Realtek HD Audio Manager indicates that you have a built-in (integrated) sound card. Previously, they were always purchased separately; at the moment, built-in solutions from Realtek completely cover the needs of the average user.
Built-in solutions have been developing quite actively lately, and a standard driver downloaded from the Internet may simply not be enough. The fact is that many manufacturers adapt it to their devices, and you can’t do it without the Realtek HD manager.
Diagnosis of the problem
If you are not sure about the cause of the problem, you can find out by doing the following:
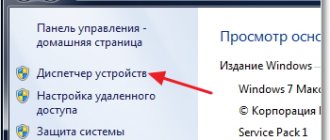
Right-click the Windows logo and select Device Manager . OR press Windows + R on your keyboard, type “ devmgmt.msc ” and press Enter. Expand the " Sound, Game and Video Devices " tab.
Right click on Start - Device Manager - Sound, Game and Video Devices
Search for Realtek High Definition Audio . If it is marked with a yellow exclamation mark, it means that the Realtek driver is the culprit of all the problems in the system.
Faulty Realtek driver
Restart audio services on your computer
Audio services can sometimes accidentally disconnect themselves. Troubleshooting video and audio playback on PC in this case is an easy task and the user can fix the problem on his own. Procedure:
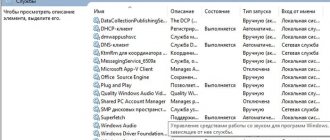
- In the taskbar search box, type “Services” and press “Enter.”
- Scroll down to Windows Audio.
- If the service is stopped for any reason, system audio will not work properly.
- Start the service. Check the service startup type. Audio services should be set to Automatic by default. If it is something else - manual or disabled mode, change it to automatic.
- Restart your PC by clicking on “Start”.
Update using driver installation programs [method 1]
The manual methods described below are quite tedious. It takes a lot of clicking, searching and installing. Even advanced users can get tired of this. A much simpler solution is to use driver update programs.
For example, the free SlimDrivers program can scan your computer in a few seconds and detect all problematic drivers. It then presents new ones for you to download and install automatically. Let's start updating:
Download and install SlimDrivers. Launch it and click the “ Start Scan ” button.
The program will scan your computer and instantly display the drivers that need to be updated. In this case, the outdated driver is High Definition Audio Device.
Finding an outdated audio driver in SlimDrivers
Click " Download Update " in the line for this driver. A warning will appear showing what steps the automatic driver update will consist of. Click " OK ".
The installation process consists of: creating a backup copy of all drivers, creating a Windows restore point, downloading the driver installer, installation. SlimDrivers will do all these actions automatically.
Other programs for updating Windows drivers:
- DriverMax (free, in Russian);
- Driver Booster Free (free, in Russian);
- DriverPack Solution (free, in Russian);
- Avast Driver Updater (paid).
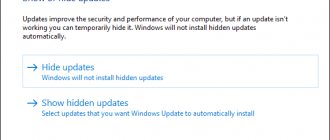
Using the troubleshooting tool
Before you reinstall your audio driver, you can use the built-in audio troubleshooting tool to let Windows identify and fix problems. If a Russian user has previously used Microsoft's built-in troubleshooting tools, then he knows that this method is not always effective. It is more reliable to perform diagnostics, on the basis of which you can solve problems in Windows. Procedure:
- Go to Control Panel > Troubleshooting > Troubleshoot audio problems and follow the instructions.
- If the sound still does not work, you need to make sure that the USB device drivers are updated and there are no yellow warning icons in the USB Device Manager.
- Standard mini-jack jacks on speakers or headphones may not work due to bad sockets on the sound card (or external card), you will need to change either the motherboard or the external sound card to replace the hardware.
Using Windows Update to update audio drivers - [method 2]
Before we delve into more complex methods, let's try the easiest way - Windows Update. The update center offers many official and certified drivers. While these are usually not the latest drivers, they are generally stable and should work well with your computer's sound card.
In Windows 10, you can find audio drivers through the built-in Windows Update utility. Here's how to check for drivers using Windows Update:
Click the Start in the lower left corner and select Settings .
Start Menu - Settings
Next, click " Update & Security ". You can check for updates here.
Windows Settings - Update & Security
Click on the “ Check for updates ” button. If any sound drivers are found, they will be installed automatically.
The Three Easiest Ways to Restart the Windows Audio Service
There are several ways in which you can restart the service, let's look at each:
— Restart through the Windows service window (helps to quickly restart the Windows Audio service, as well as disable it completely or run it in automatic mode)
- Restart via the command line (a fairly quick way to solve the problem with a few entries in the command line)
— Restart through the task manager (a convenient way to solve the problem for beginners and other PC users) To solve the problem through the Windows service window, you must follow the instructions sequentially.
How to update sound drivers on Windows 10 through Device Manager [method 3]
If Windows Update found the files to update and you can now hear music, you're done. But if you still don't hear any sound, it's likely that Windows Update couldn't find the correct driver.
In such conditions, you will need to find and install them manually. This means that you will have to hunt for sound drivers. Below we will show you how to do this on Windows 10 using Device Manager:
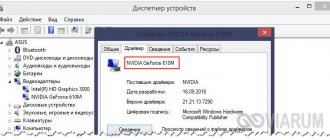
Right-click on the Start and select Device Manager .
Start - Device Manager
In the window that appears, find the item “ Sound, game and video devices ” and click on it twice (or click on the arrow > ). Windows will show you the hardware associated with your computer's audio chip. Here it's Realtek(R) Audio. Double click on it and switch to the Driver . From here, click on " Update ".
Sound, game and video devices – Realtek(R) Audio – Driver – Update driver
Select " Search for drivers automatically ".
Update drivers – Automatically search for drivers
If the search is unsuccessful, return to Update Driver and select “ Browse this computer for driver software .”
Now, before installing the driver, you need to download it. Go to section "". A section of this article explains how to get these drivers for free.
The driver you download may come with an installer. If not, go to your Downloads directory and extract the driver file (it almost certainly ends in .inf).
Update Drivers dialog box, click Select a driver from the list of available drivers on your computer .
Search for drivers on this computer – Select a driver from the list of available drivers on your computer
Click " Have Disk " and then " Browse ". Navigate to the folder containing the driver you just downloaded. These files contain all the information needed to update drivers.
Install from Disk - Overview
Click " Next " to install the driver. Ready.
How to install audio drivers
If the sound does not work after installing Windows 7, the user may think that the audio driver is “faulty”. In fact, this is not true. Often this is simply an incompatibility between the processes of uninstalling the old audio driver and installing the new one. This is about the same as upgrading the system. Sometimes upgrading from Windows Vista to Windows 7 doesn't work. To do this, you need to completely erase Vista from the system and install Windows 7. Procedure:
- First remove old audio drivers.
- From the Windows Start menu, go to the Control Panel -> System - Hardware tab (steps may vary depending on the version of Windows).
- Click "Device Manager".
- Scroll down to the Sound, Video and Game Controllers category.
Select the audio device based on the audio device chipset manufacturer (such as intel, Realtek, C-Media, Creative, Turtle Beach, Yamaha, etc.).
Where to download sound drivers
If Windows can't find the audio drivers, you'll have to search for them yourself. There are several ways to get the latest audio drivers:
On the audio chip manufacturer's website
To find out who made the audio chip in your computer, use the Device Manager method described above (method 3).
Among the most common manufacturers are Realtek, Intel, AMD (High Definition Audio), NVIDIA (High Definition Audio), VIA - although, of course, there are many of them. Every manufacturer will at least provide basic drivers that work with their audio hardware.
Attention! The audio chip is often part of the video card. As a result, as strange as it may sound, you may need to download new graphics drivers in order to get audio drivers. This is a good thing because it means you'll be updating two components at once.
Once you have identified the manufacturer, visit their website where you can find and download the driver. You may have to search their support pages.
Let's say you have a Realtek driver. Visit the drivers section and select Realtek High Definition Audio Drivers to match your Windows. For example, you have Windows 10 (64-bit), click on the download icon:
Download Realtek High Definition Audio from the official website
On the page that opens, click on the checkbox and click on “ Download this file ”. Next, enter the captcha, and the driver download begins.
Front panel connector management
Fixing this method is very system specific, but it works in some cases. Users fix the persistent RealTek audio issue by disabling front jack detection from the RealTek HD Audio Manager itself. Next, it is recommended to install Windows 10 Audio Enhancements. These are built-in packages from Microsoft and third parties designed to ensure flawless performance of your audio equipment. In cases where the system does not accept these improvements and they simply need to be disabled, the order of disabling is:
- In the taskbar, type “Sound” and click “Sound Control Panel.”
- In the new window that opens, click on the default device and select “Properties”.
- Go to the "Enhancements" tab and check the "Disable all enhancements" and "Apply" checkbox.
- If the problem is with multiple devices, repeat the process for each one individually.
Driver search by ID
We have already discussed how to reinstall sound drivers using standard Windows utilities and programs. Now let's talk about how to find the required driver on the Internet by ID.
- In Device Manager, go to the properties of the required driver.
- Go to the Details tab.
- In the drop-down list, click on “ID Codes”
- Copy any line from the list.
- Go to the DevID website.
- Paste the copied code into the search bar.
Now all that remains is to download and install the driver.